2022 HYUNDAI KONA door lock
[x] Cancel search: door lockPage 175 of 579
05
5-41
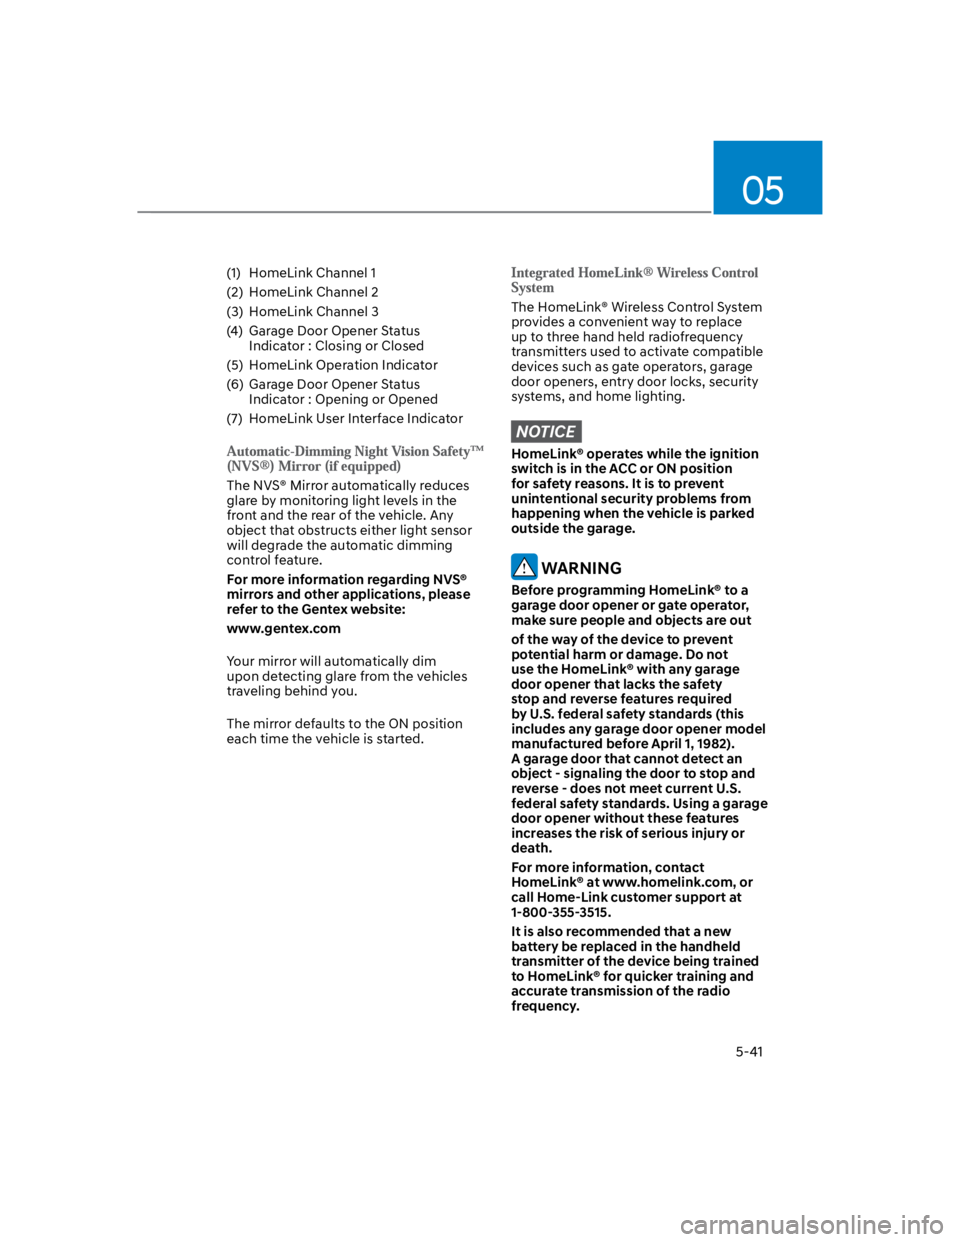
(1) HomeLink Channel 1
(2) HomeLink Channel 2
(3) HomeLink Channel 3
(4) Garage Door Opener Status
Indicator : Closing or Closed
(5) HomeLink Operation Indicator
(6) Garage Door Opener Status
Indicator : Opening or Opened
(7) HomeLink User Interface Indicator
The NVS® Mirror automatically reduces
glare by monitoring light levels in the
front and the rear of the vehicle. Any
object that obstructs either light sensor
will degrade the automatic dimming
control feature.
For more information regarding NVS®
mirrors and other applications, please
refer to the Gentex website:
www.gentex.com
Your mirror will automatically dim
upon detecting glare from the vehicles
traveling behind you.
The mirror defaults to the ON position
each time the vehicle is started.
The HomeLink® Wireless Control System
provides a convenient way to replace
up to three hand held radiofrequency
transmitters used to activate compatible
devices such as gate operators, garage
door openers, entry door locks, security
systems, and home lighting.
NOTICE
HomeLink® operates while the ignition
switch is in the ACC or ON position
for safety reasons. It is to prevent
unintentional security problems from
happening when the vehicle is parked
outside the garage.
WARNING
Before programming HomeLink® to a
garage door opener or gate operator,
make sure people and objects are out
of the way of the device to prevent
potential harm or damage. Do not
use the HomeLink® with any garage
door opener that lacks the safety
stop and reverse features required
by U.S. federal safety standards (this
includes any garage door opener model
manufactured before April 1, 1982).
A garage door that cannot detect an
object - signaling the door to stop and
reverse - does not meet current U.S.
federal safety standards. Using a garage
door opener without these features
increases the risk of serious injury or
death.
For more information, contact
HomeLink® at www.homelink.com, or
call Home-Link customer support at
1-800-355-3515.
It is also recommended that a new
battery be replaced in the handheld
transmitter of the device being trained
to HomeLink® for quicker training and
accurate transmission of the radio
frequency.
Page 187 of 579
05
5-53
OOS050134N
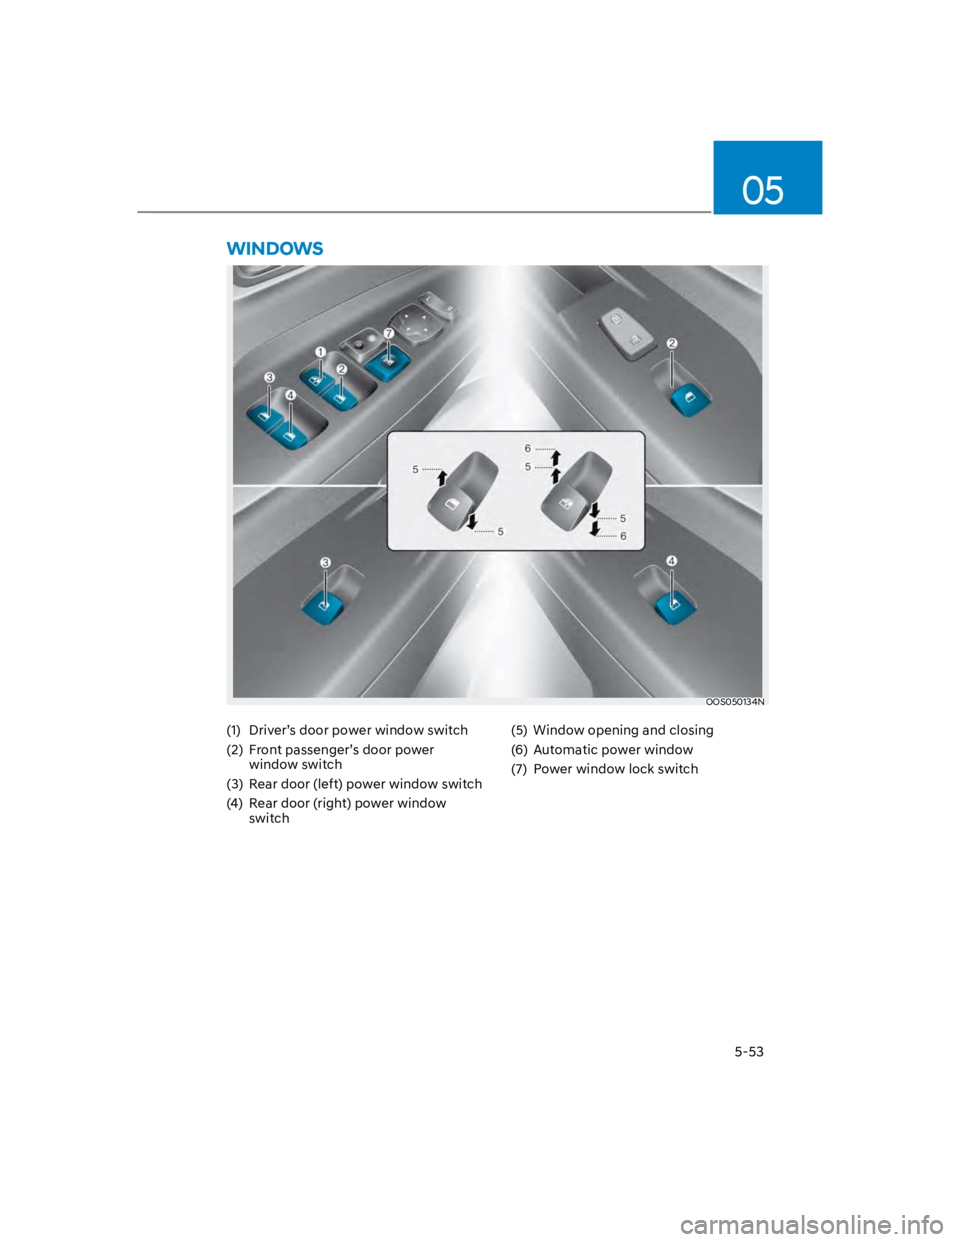
WINDOWS
(1) Driver’s door power window switch
(2) Front passenger’s door power
window switch
(3) Rear door (left) power window switch
(4) Rear door (right) power window
switch
(5) Window opening and closing
(6) Automatic power window
(7) Power window lock switch
Page 188 of 579
Convenient features
5-54
Power Windows
The ignition switch must be in the
ON position to be able to raise or
lower the windows. Each door has a
Power Window switch to control that
door’s window. The driver has a Power
Window Lock switch which can block
the operation of passenger windows.
The power windows will operate for
approximately 30 seconds after the
ignition switch is placed in the ACC or
LOCK/OFF position. However, if the front
doors are opened, the Power Windows
will not operate even within the 30
second period.
WARNING
To avoid serious injury or death, do not
extend your head, arms or body outside
the windows while driving.
Information
Window opening and closing
OOS047018
To open:
Press the window switch down to the
first detent position (5). Release the
switch when you want the window to
stop.
To close:
Pull the window switch up to the first
detent position (5). Release the window
switch when you want the window to
stop.
Auto down window (if equipped)
Pressing the power window switch
down momentarily to the second
detent position (6) completely lowers
the window even when the switch is
released. To stop the window at the
desired position while the window is in
operation, pull up or press down and
release the switch.
Page 190 of 579
Convenient features
5-56
WARNING
Make sure body parts or other objects
are safely out of the way before closing
the windows to avoid injuries or vehicle
damage.
Objects less than 0.16 in (4 mm) in
diameter caught between the window
glass and the upper window channel
may not be detected by the automatic
reverse window and the window will
not stop and reverse direction.
Power window lock button
OOS047019
The driver can disable the power window
switches on the rear passenger doors by
pressing the power window lock button.
When the power window lock button is
pressed:
The driver’s master control can
operate all the power windows.
The front passenger’s control can
operate the front passenger’s power
window.
The rear passenger’s control cannot
operate the rear passengers’ power
window.
WARNING
Do not allow children to play with the
power windows. Keep the driver’s
door power window lock button in the
LOCK position. Serious injury or death
can result from unintentional window
operation by a child.
NOTICE
To prevent possible damage to the
power window system, do not open
or close two windows or more at the
same time. This will also ensure the
longevity of the fuse.
Never try to operate the main
switch on the driver’s door and the
individual door window switch in
opposite directions at the same time.
If this is done, the window will stop
and cannot be opened or closed.
Page 191 of 579
05
5-57
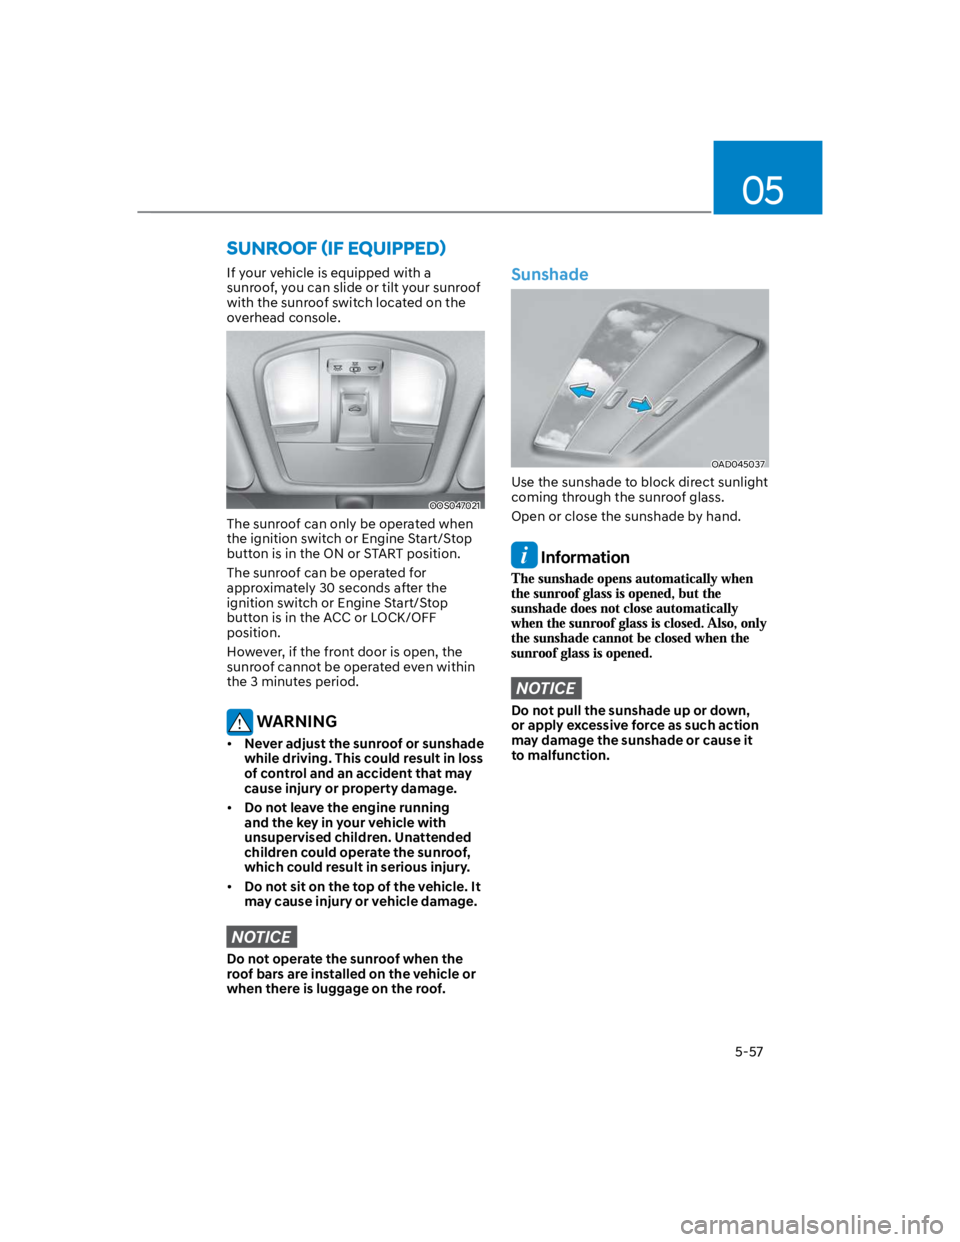
If your vehicle is equipped with a
sunroof, you can slide or tilt your sunroof
with the sunroof switch located on the
overhead console.
OOS047021
The sunroof can only be operated when
the ignition switch or Engine Start/Stop
button is in the ON or START position.
The sunroof can be operated for
approximately 30 seconds after the
ignition switch or Engine Start/Stop
button is in the ACC or LOCK/OFF
position.
However, if the front door is open, the
sunroof cannot be operated even within
the 3 minutes period.
WARNING
Never adjust the sunroof or sunshade
while driving. This could result in loss
of control and an accident that may
cause injury or property damage.
Do not leave the engine running
and the key in your vehicle with
unsupervised children. Unattended
children could operate the sunroof,
which could result in serious injury.
Do not sit on the top of the vehicle. It
may cause injury or vehicle damage.
NOTICE
Do not operate the sunroof when the
roof bars are installed on the vehicle or
when there is luggage on the roof.
Sunshade
OAD045037
Use the sunshade to block direct sunlight
coming through the sunroof glass.
Open or close the sunshade by hand.
Information
NOTICE
Do not pull the sunshade up or down,
or apply excessive force as such action
may damage the sunshade or cause it
to malfunction.
Page 196 of 579
Convenient features
5-62
Closing the hood
1. Before closing the hood, check in and
around the engine compartment to
ensure the following:
- Any tools or other loose objects
are removed from the engine room
area or hood opening area
- All glove, rags, or other
combustible material is removed
from the engine compartment
- All filler caps are tightly and
correctly installed
2. Lower the hood halfway (lifted
approximately 12 in. (30 cm) from the
closed position) and push down to
securely lock in place. Then double
check to be sure the hood is secure.
If the hood can be raised slightly, it is
not securely locked. Open it again and
close it with more force.
WARNING
Before closing the hood, ensure
all obstructions are removed from
around the hood opening.
Always double check to be sure that
the hood is firmly latched before
driving away. Check there is no
hood open warning light or message
displayed on the instrument cluster.
Driving with the hood opened may
cause a total loss of visibility, which
might result in an accident.
Do not move the vehicle with the
hood in the raised position, as vision
is obstructed, which might result in
an accident, and the hood could fall
or be damaged.
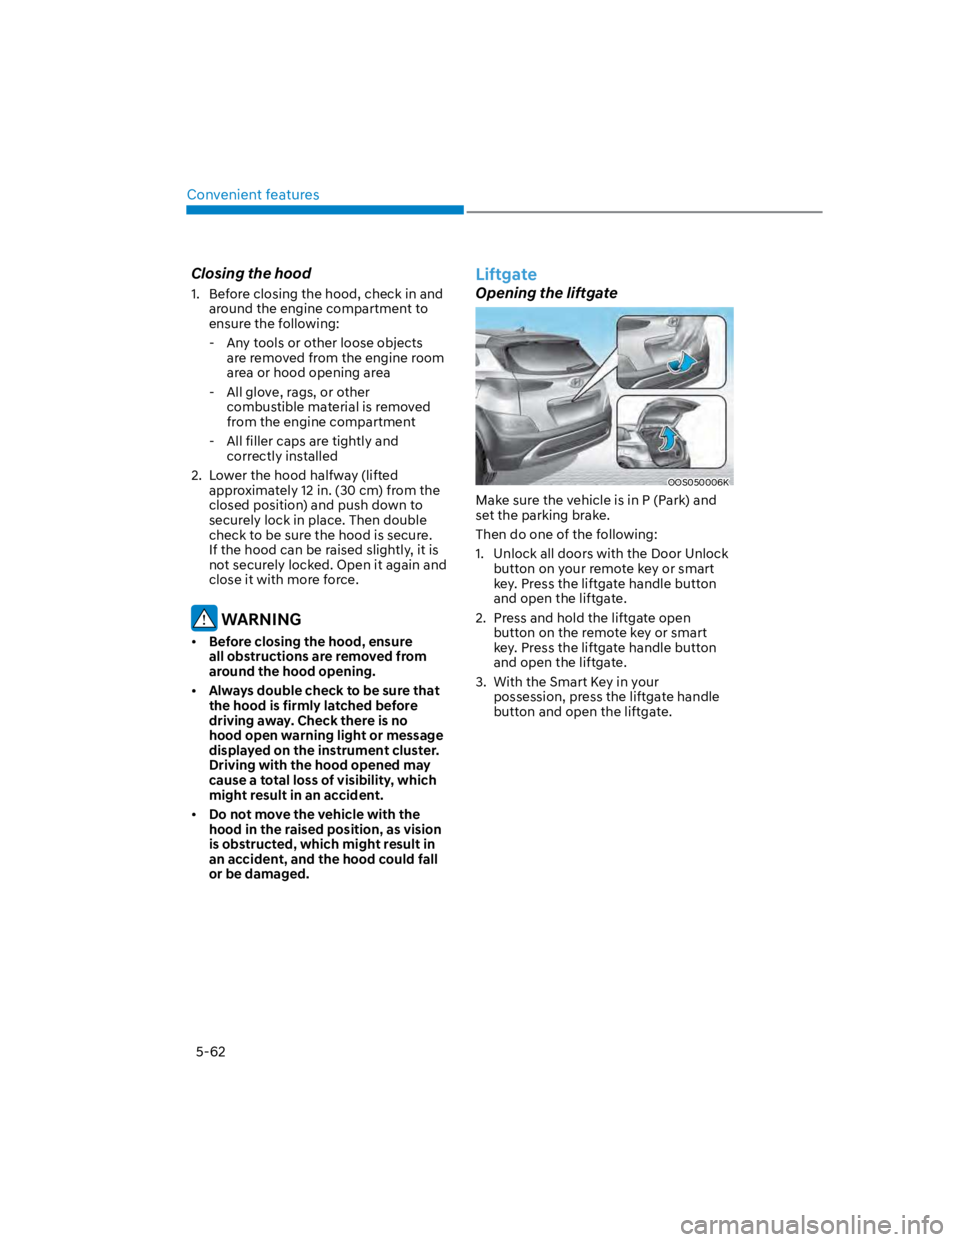
Liftgate
Opening the liftgate
OOS050006K
Make sure the vehicle is in P (Park) and
set the parking brake.
Then do one of the following:
1. Unlock all doors with the Door Unlock
button on your remote key or smart
key. Press the liftgate handle button
and open the liftgate.
2. Press and hold the liftgate open
button on the remote key or smart
key. Press the liftgate handle button
and open the liftgate.
3. With the Smart Key in your
possession, press the liftgate handle
button and open the liftgate.
Page 198 of 579
Convenient features
5-64
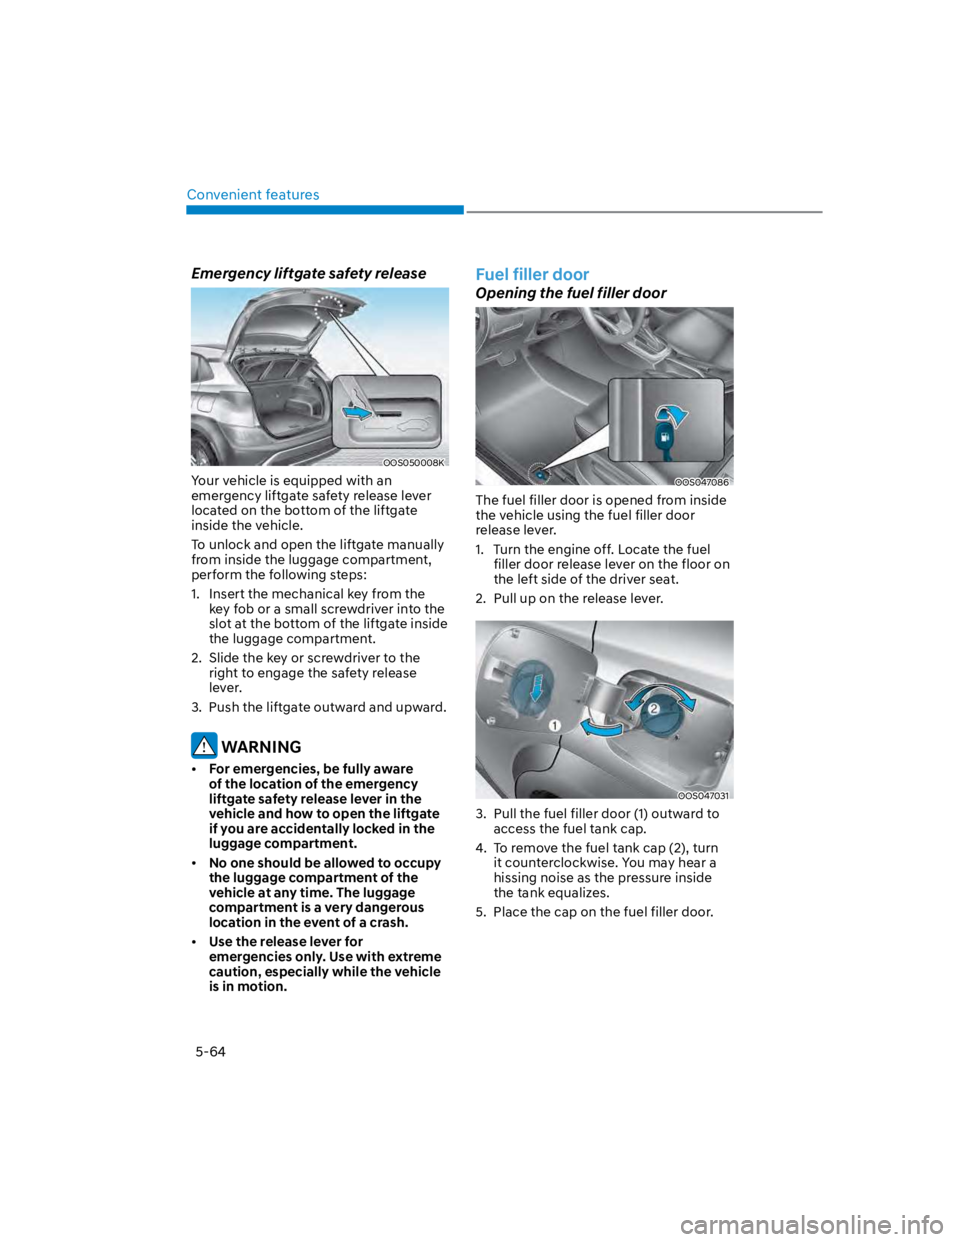
Emergency liftgate safety release
OOS050008K
Your vehicle is equipped with an
emergency liftgate safety release lever
located on the bottom of the liftgate
inside the vehicle.
To unlock and open the liftgate manually
from inside the luggage compartment,
perform the following steps:
1. Insert the mechanical key from the
key fob or a small screwdriver into the
slot at the bottom of the liftgate inside
the luggage compartment.
2. Slide the key or screwdriver to the
right to engage the safety release
lever.
3. Push the liftgate outward and upward.
WARNING
For emergencies, be fully aware
of the location of the emergency
liftgate safety release lever in the
vehicle and how to open the liftgate
if you are accidentally locked in the
luggage compartment.
No one should be allowed to occupy
the luggage compartment of the
vehicle at any time. The luggage
compartment is a very dangerous
location in the event of a crash.
Use the release lever for
emergencies only. Use with extreme
caution, especially while the vehicle
is in motion.
Fuel filler door
Opening the fuel filler door
OOS047086
The fuel filler door is opened from inside
the vehicle using the fuel filler door
release lever.
1. Turn the engine off. Locate the fuel
filler door release lever on the floor on
the left side of the driver seat.
2. Pull up on the release lever.
OOS047031
3. Pull the fuel filler door (1) outward to
access the fuel tank cap.
4. To remove the fuel tank cap (2), turn
it counterclockwise. You may hear a
hissing noise as the pressure inside
the tank equalizes.
5. Place the cap on the fuel filler door.
Page 199 of 579

05
5-65
Information
Closing the fuel filler door
1. To install the fuel tank cap, turn it
clockwise until it “clicks” one time.
2. Close the fuel filler door until it is
latched securely.
WARNING
Gasoline is highly flammable and
explosive. Failure to follow these
guidelines may result in SERIOUS
INJURY or DEATH:
Read and follow all warnings posted
at the gas station.
Before refueling, note the location
of the Emergency Fuel Shut-Off, if
available, at the gas station.
Before touching the fuel nozzle, you
should eliminate the potential build-
up of static electricity by touching
a metal part of the vehicle, a safe
distance away from the fuel filler
neck, nozzle, or other gas source,
with your bare hand.
Do not use cellular phones while
refueling. Electric current and/or
electronic interference from cellular
phones can potentially ignite fuel
vapors and cause a fire.
Do not get back into a vehicle
once you have begun refueling.
You can generate a buildup of
static electricity by touching,
rubbing or sliding against any item
or fabric capable of producing
static electricity. Static electricity
discharge can ignite fuel vapors
causing a fire. If you must re-enter
the vehicle, you should once again
eliminate potentially dangerous
static electricity discharge by
touching a metal part of the vehicle,
away from the fuel filler neck, nozzle
or other fuel source, with your bare
hand.
When using an approved portable
fuel container, be sure to place the
container on the ground prior to
refueling. Static electricity discharge
from the container can ignite fuel
vapors causing a fire.
Once refueling has begun, contact
between your bare hand and the
vehicle should be maintained until
the filling is complete.
Use only approved portable plastic
fuel containers designed to carry and
store fuel.
When refueling, always shift the
gear to the P (Park) position, set
the parking brake, and press the
Engine Start/Stop button to the
OFF position. Sparks produced by
electrical components related to the
engine can ignite fuel vapors causing
a fire.
Do not use matches or a lighter and
do not smoke or leave a lit cigarette
in your vehicle while at a gas station,
especially during refueling.