Page 125 of 579
Instrument cluster
4-32
OCN7040026L
This mode displays information related to
Tire Pressure.
For more details, refer to "Tire Pressure
Monitoring System (TPMS)" in chapter
8.
User settings mode
OOS040478N
In this mode, you can change the
settings of the instrument cluster, doors,
lamps, etc.
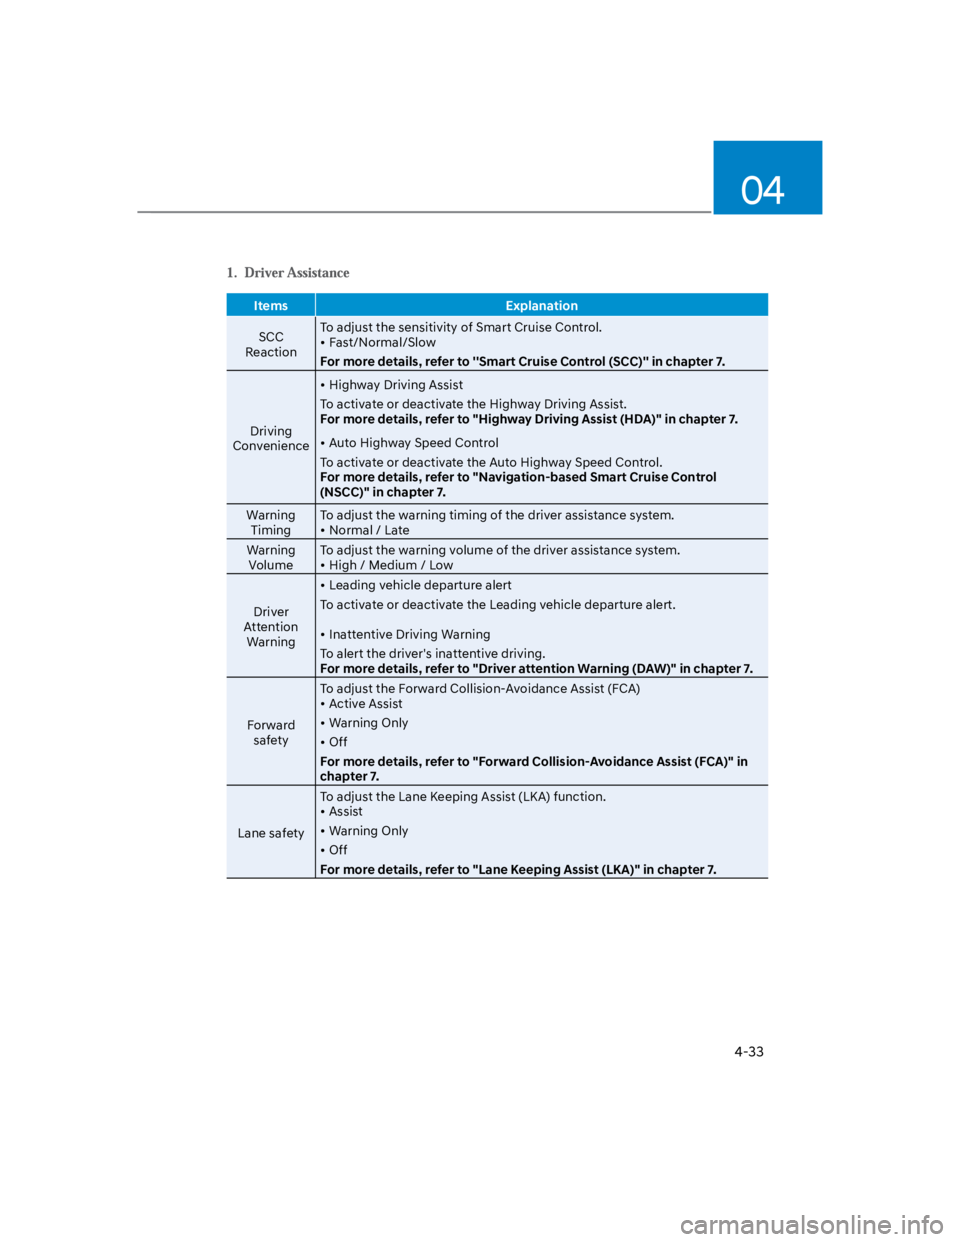
1. Driver Assistance
2. Cluster
3. Lights
4. Door
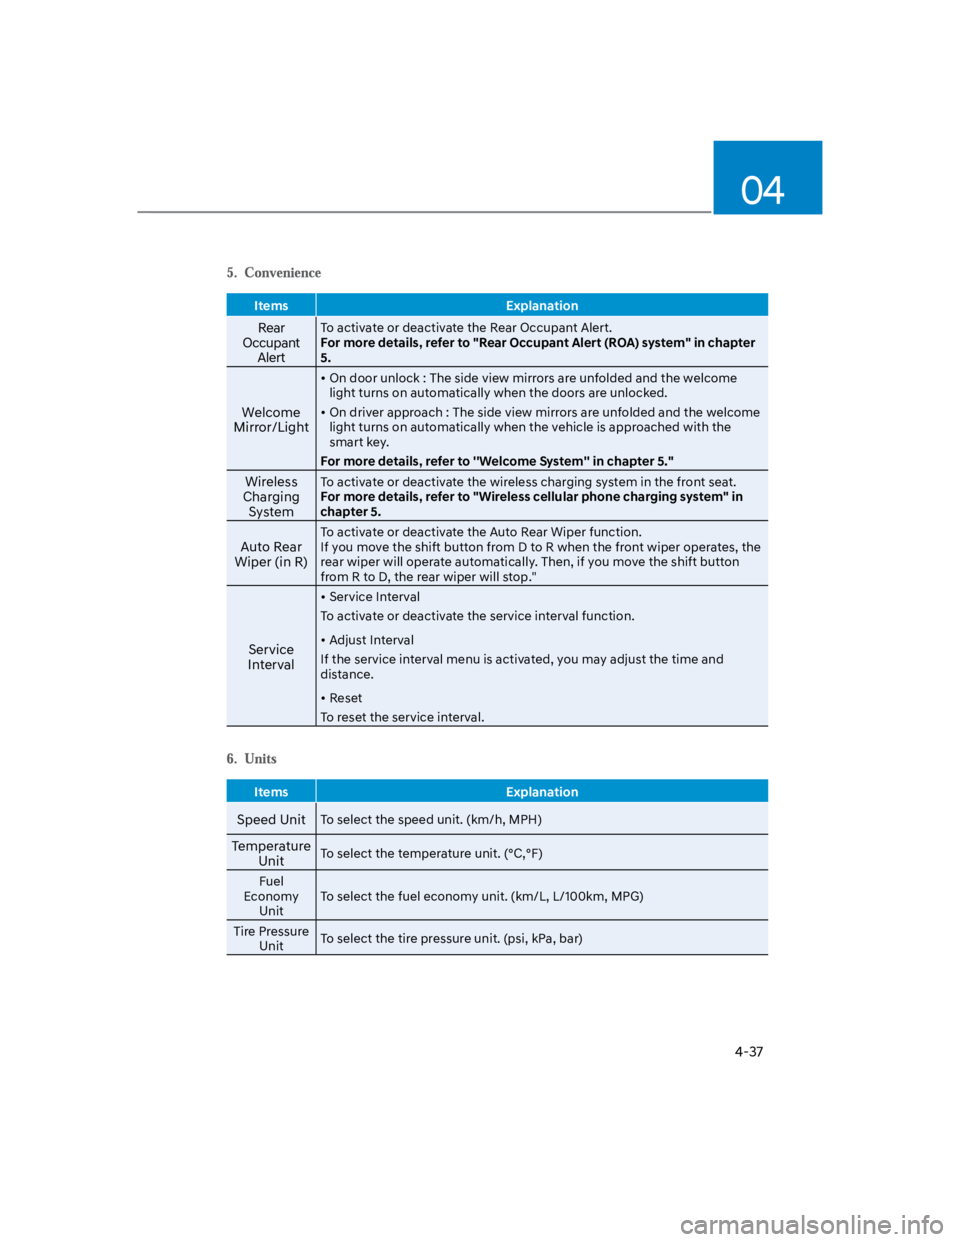
5. Convenience
6. Units
The information provided may differ
depending on which functions are
applicable to your vehicle.
This warning message illuminates if
you try to select an item from the User
Settings mode while driving.
Dual clutch transmission.
For your safety, change the User
Settings after parking the vehicle,
applying the parking brake and
selecting the shift button to P(Park).
This mode provides quick guides for the
systems in the User Settings mode.
Select an item, press and hold the OK
button.
For more details about each system,
refer to this Owner’s Manual.
Information
Page 126 of 579

04
4-33
Items Explanation
SCC
Reaction
To adjust the sensitivity of Smart Cruise Control.
Fast/Normal/Slow
For more details, refer to ''Smart Cruise Control (SCC)'' in chapter 7.
Driving
Convenience
Highway Driving Assist
To activate or deactivate the Highway Driving Assist.
For more details, refer to "Highway Driving Assist (HDA)" in chapter 7.
Auto Highway Speed Control
To activate or deactivate the Auto Highway Speed Control.
For more details, refer to "Navigation-based Smart Cruise Control
(NSCC)" in chapter 7.
Warning
Timing
To adjust the warning timing of the driver assistance system.
Normal / Late
Warning
Volume
To adjust the warning volume of the driver assistance system.
High / Medium / Low
Driver
Attention
Warning
Leading vehicle departure alert
To activate or deactivate the Leading vehicle departure alert.
Inattentive Driving Warning
To alert the driver's inattentive driving.
For more details, refer to "Driver attention Warning (DAW)" in chapter 7.
Forward
safety
To adjust the Forward Collision-Avoidance Assist (FCA)
Active Assist
Warning Only
Off
For more details, refer to "Forward Collision-Avoidance Assist (FCA)" in
chapter 7.
Lane safety
To adjust the Lane Keeping Assist (LKA) function.
Assist
Warning Only
Off
For more details, refer to "Lane Keeping Assist (LKA)" in chapter 7.
Page 127 of 579
Instrument cluster
4-34
Items Explanation
Blind-Spot
safety
Safe Exit Warning (SEW)
To activate or deactivate Safe Exit Warning
For more details, refer to "Safe Exit Warning (SEW)" in chapter 7.
Active Assist
Warning Only
Off
To activate or deactivate Blind-Spot Collision-Avoidance Assist
For more details, refer to “Blind-Spot Collision-Avoidance Assist (BCA)” in
chapter 7.
Parking
Safety
Parking Distance Warning Auto On
To activate or deactivate the Parking Distance Warning Auto On.
For more details, refer to the "Forward/Reverse Parking Distance
Warning (PDW)" in chapter 7.
Rear Cross-Traffic Safety
To activate or deactivate Rear Cross-Traffic Safety.
For more details, refer to "Rear Cross-Traffic Collision-Avoidance Assist
(RCCA)" in chapter 7.
Page 128 of 579

04
4-35
Items Explanation
Reset fuel
economy
(if equipped)
At vehicle start
After refueling
Manually
To reset the fuel economy displayed.
Wiper/Lights
Display
To activate or deactivate the Wiper/ Light mode.
When activated, the LCD display shows the selected Wiper/Light mode
whenever you changed the mode.
Traffic Signs To set the traffic signs displayed.
Icy Road
WarningTo activate or deactivate the icy road warning.
Cluster Voice
Guidance
Volume
To adjust the cluster voice guidance volume.
Level 0 ~ 3
Welcome
SoundTo activate or deactivate the welcome sound.
Theme
SelectionYou can select the theme of the cluster.
Items Explanation
IlluminationTo adjust the illumination level.
Level 1~20
One Touch
Turn Signal
Off : The one touch turn signal function will be deactivated.
3, 5, 7 Flashes : The turn signal indicator will blink 3, 5, or 7 times when
the turn signal lever is moved slightly.
For more details, refer to “Lighting” in chapter 5.
Headlight
Delay
To activate or deactivate the headlamp delay function.
For more details, refer to "Lighting" in chapter 5.
Footwell
LightTo activate or deactivate the Footwell Light function.
Travel ModeTo activate or deactivate the traffic change function.
For more details, refer to "Lighting" in chapter 5.
High Beam
Assist
To activate or deactivate High Beam Assist function.
For more details, refer to "High Beam Assist (HBA)" in chapter 5.
Page 130 of 579

04
4-37
Items Explanation
Rear
Occupant
Alert
To activate or deactivate the Rear Occupant Alert.
For more details, refer to "Rear Occupant Alert (ROA) system" in chapter
5.
Welcome
Mirror/Light
On door unlock : The side view mirrors are unfolded and the welcome
light turns on automatically when the doors are unlocked.
On driver approach : The side view mirrors are unfolded and the welcome
light turns on automatically when the vehicle is approached with the
smart key.
For more details, refer to ''Welcome System'' in chapter 5."
Wireless
Charging
System
To activate or deactivate the wireless charging system in the front seat.
For more details, refer to "Wireless cellular phone charging system" in
chapter 5.
Auto Rear
Wiper (in R)
To activate or deactivate the Auto Rear Wiper function.
If you move the shift button from D to R when the front wiper operates, the
rear wiper will operate automatically. Then, if you move the shift button
from R to D, the rear wiper will stop."
Service
Interval
Service Interval
To activate or deactivate the service interval function.
Adjust Interval
If the service interval menu is activated, you may adjust the time and
distance.
Reset
To reset the service interval.
Items Explanation
Speed UnitTo select the speed unit. (km/h, MPH)
Temperature
UnitTo select the temperature unit. (°C,°F)
Fuel
Economy
Unit
To select the fuel economy unit. (km/L, L/100km, MPG)
Tire Pressure
UnitTo select the tire pressure unit. (psi, kPa, bar)
Page 132 of 579
04
4-39
OTMA040004
Trip distance (1), average fuel economy
(2), and instant fuel economy (3) are
displayed.
The information is combined for each
ignition cycle. However, when the engine
has been OFF for 3 minutes or longer the
Drive Info screen will reset.
To reset manually, press the OK switch
on the steering wheel for more than 1
second when ‘Drive Info’ is displayed.
OTMA040009
Accumulated trip distance (1), average
fuel economy (2), and instant fuel
economy (3) are displayed.
The information is accumulated starting
from the last reset.
To reset manually, press the OK switch
on the steering wheel for more than
1 second when ‘Accumulated Info’ is
displayed.
OJX1069044
AUTO STOP display shows the elapsed
time of engine stop by Idle Stop and Go
system.
For more details, refer to “Idle Stop and
Go (ISG)” section in chapter 6.
OIK047151N
Digital speedometer display shows the
speed of the vehicle.
Page 134 of 579
04
4-41
OTMA040014
Trip distance (1), average fuel economy
(2), and total driving time (3) after the
vehicle has been refueled are displayed.
To reset manually, press the OK switch
on the steering wheel for more than
1 second when ‘Since Refueling’ is
displayed.
OTMA040016
Accumulated trip distance (1), average
fuel economy (2), and total driving time
(3) are displayed.
The information is accumulated starting
from the last reset.
To reset manually, press the OK switch
on the steering wheel for more than
1 second when ‘Accumulated Info’ is
displayed.
OJX1069044
AUTO STOP display shows the elapsed
time of engine stop by Idle Stop and Go
system.
For more details, refer to “Idle Stop and
Go (ISG)” section in chapter 6.
OTMA040018
Digital speedometer display shows the
speed of the vehicle.
Page 139 of 579

05
5-5
Panic button (if equipped)
Press and hold the Panic button (3) for
more than one second. The horn sounds
and hazard warning lights flash for about
30 seconds.
To cancel the panic mode, press any
button on the remote key.
Information
Start-up
For detailed information refer to “Key
Ignition Switch” in chapter 6.
NOTICE
To prevent damaging the remote key:
Keep the remote key away from
water or any liquid and fire. If
the inside of the remote key gets
damp (due to drinks or moisture),
or is heated, internal circuit may
malfunction, excluding the car from
the warranty.
Avoid dropping or throwing the
remote key.
Protect the remote key from extreme
temperatures.
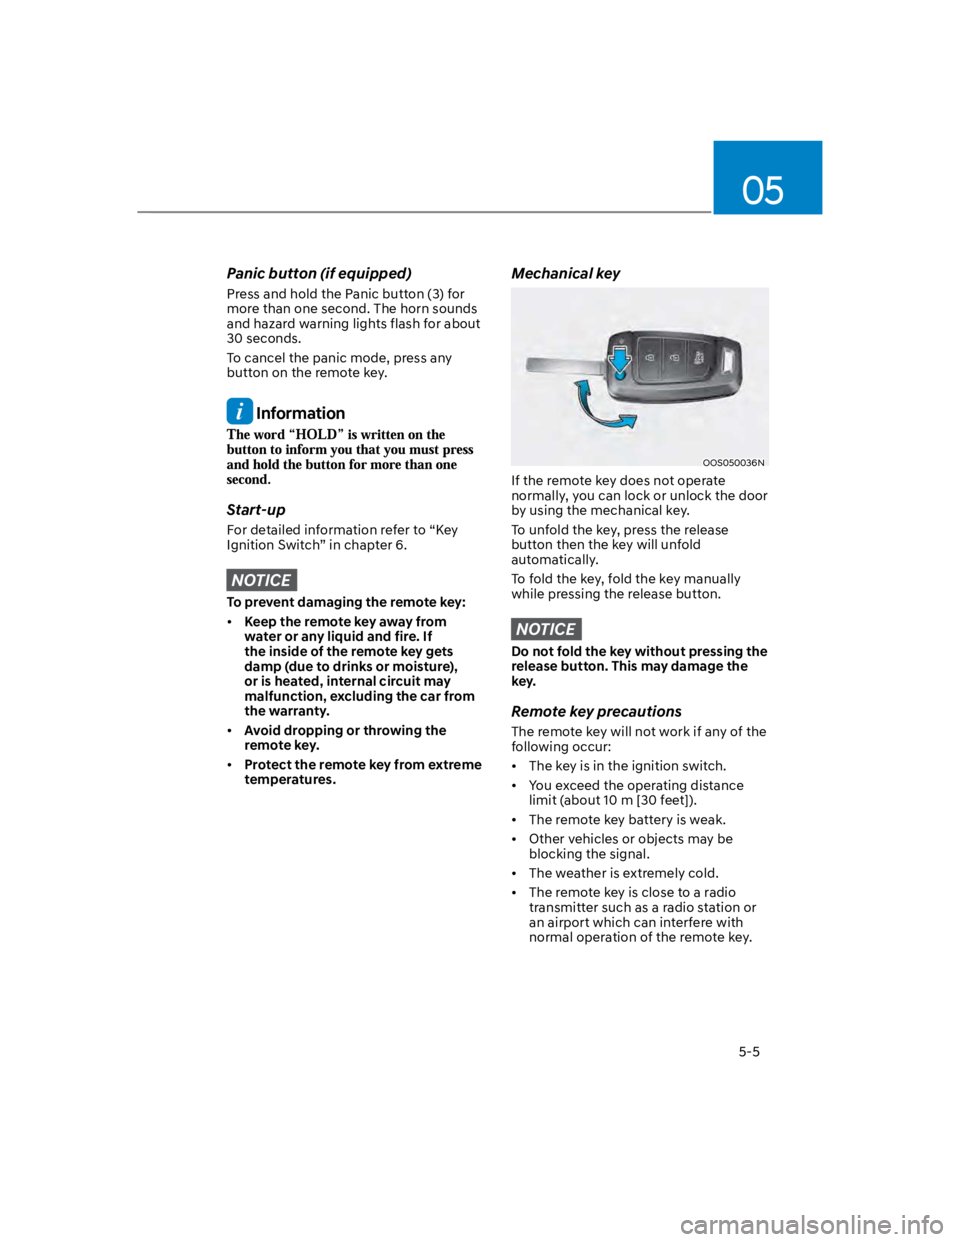
Mechanical key
OOS050036N
If the remote key does not operate
normally, you can lock or unlock the door
by using the mechanical key.
To unfold the key, press the release
button then the key will unfold
automatically.
To fold the key, fold the key manually
while pressing the release button.
NOTICE
Do not fold the key without pressing the
release button. This may damage the
key.
Remote key precautions
The remote key will not work if any of the
following occur:
The key is in the ignition switch.
You exceed the operating distance
limit (about 10 m [30 feet]).
The remote key battery is weak.
Other vehicles or objects may be
blocking the signal.
The weather is extremely cold.
The remote key is close to a radio
transmitter such as a radio station or
an airport which can interfere with
normal operation of the remote key.