2022 HYUNDAI KONA auto stop
[x] Cancel search: auto stopPage 175 of 579
05
5-41
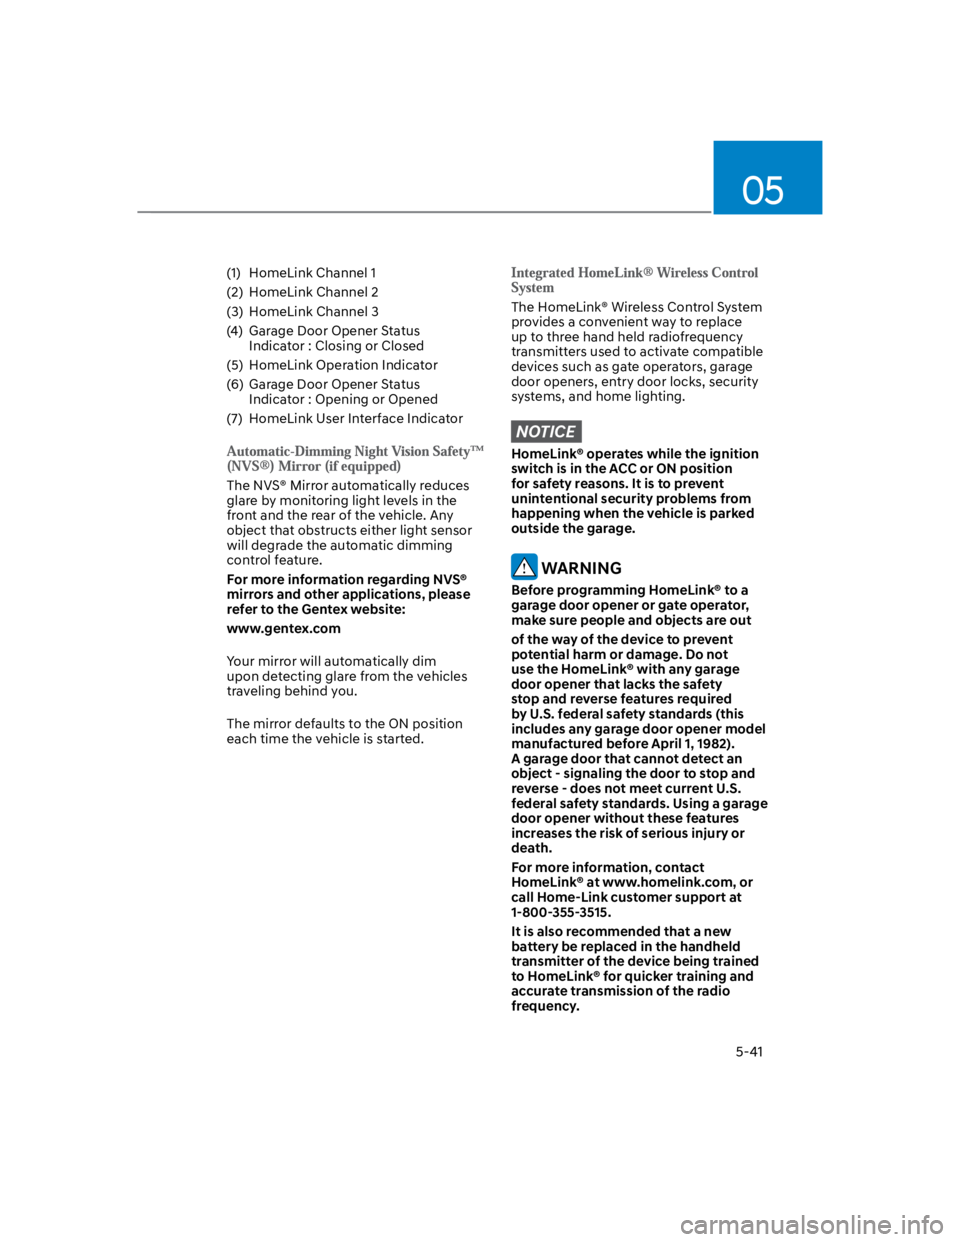
(1) HomeLink Channel 1
(2) HomeLink Channel 2
(3) HomeLink Channel 3
(4) Garage Door Opener Status
Indicator : Closing or Closed
(5) HomeLink Operation Indicator
(6) Garage Door Opener Status
Indicator : Opening or Opened
(7) HomeLink User Interface Indicator
The NVS® Mirror automatically reduces
glare by monitoring light levels in the
front and the rear of the vehicle. Any
object that obstructs either light sensor
will degrade the automatic dimming
control feature.
For more information regarding NVS®
mirrors and other applications, please
refer to the Gentex website:
www.gentex.com
Your mirror will automatically dim
upon detecting glare from the vehicles
traveling behind you.
The mirror defaults to the ON position
each time the vehicle is started.
The HomeLink® Wireless Control System
provides a convenient way to replace
up to three hand held radiofrequency
transmitters used to activate compatible
devices such as gate operators, garage
door openers, entry door locks, security
systems, and home lighting.
NOTICE
HomeLink® operates while the ignition
switch is in the ACC or ON position
for safety reasons. It is to prevent
unintentional security problems from
happening when the vehicle is parked
outside the garage.
WARNING
Before programming HomeLink® to a
garage door opener or gate operator,
make sure people and objects are out
of the way of the device to prevent
potential harm or damage. Do not
use the HomeLink® with any garage
door opener that lacks the safety
stop and reverse features required
by U.S. federal safety standards (this
includes any garage door opener model
manufactured before April 1, 1982).
A garage door that cannot detect an
object - signaling the door to stop and
reverse - does not meet current U.S.
federal safety standards. Using a garage
door opener without these features
increases the risk of serious injury or
death.
For more information, contact
HomeLink® at www.homelink.com, or
call Home-Link customer support at
1-800-355-3515.
It is also recommended that a new
battery be replaced in the handheld
transmitter of the device being trained
to HomeLink® for quicker training and
accurate transmission of the radio
frequency.
Page 188 of 579
Convenient features
5-54
Power Windows
The ignition switch must be in the
ON position to be able to raise or
lower the windows. Each door has a
Power Window switch to control that
door’s window. The driver has a Power
Window Lock switch which can block
the operation of passenger windows.
The power windows will operate for
approximately 30 seconds after the
ignition switch is placed in the ACC or
LOCK/OFF position. However, if the front
doors are opened, the Power Windows
will not operate even within the 30
second period.
WARNING
To avoid serious injury or death, do not
extend your head, arms or body outside
the windows while driving.
Information
Window opening and closing
OOS047018
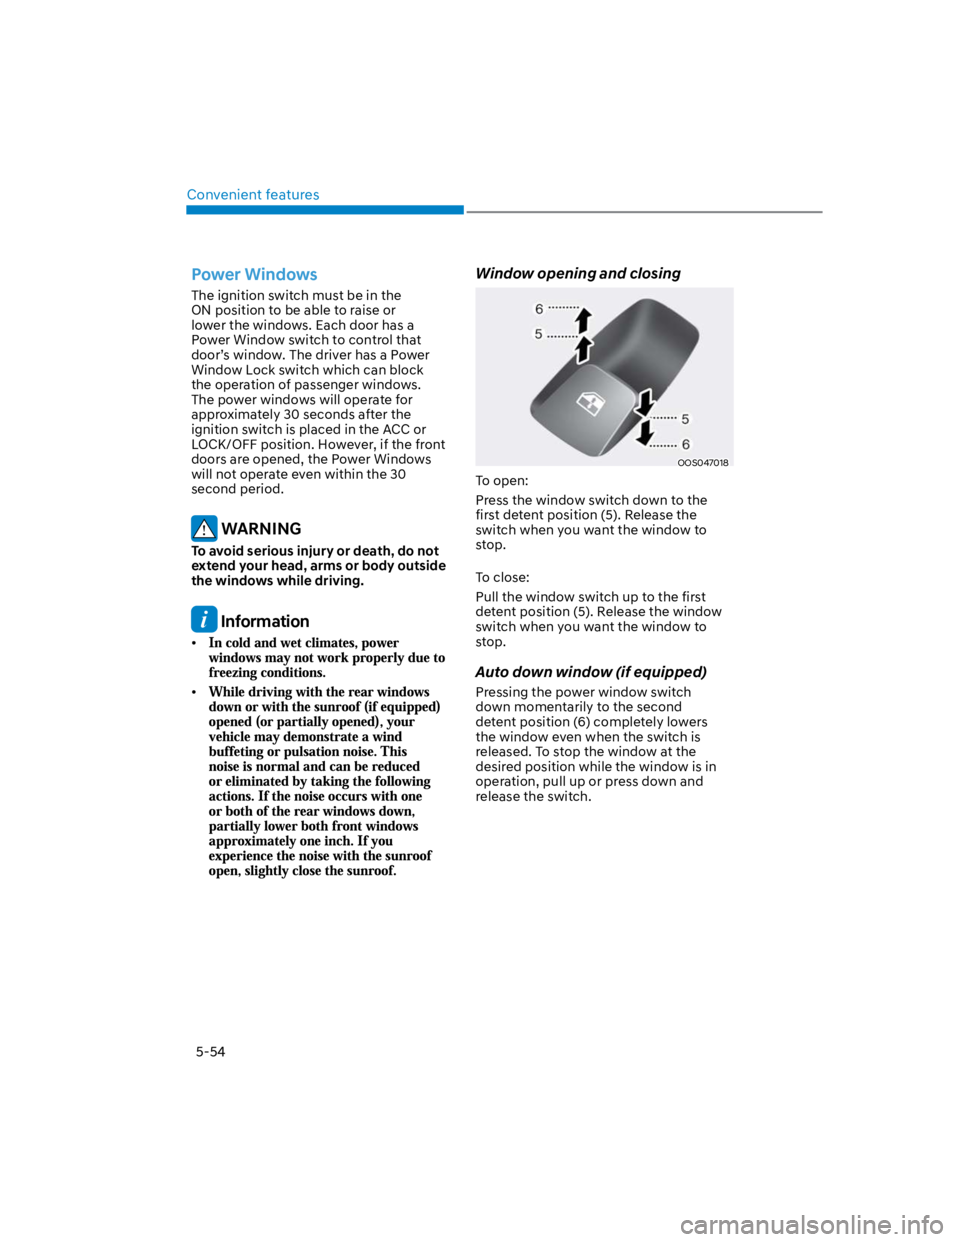
To open:
Press the window switch down to the
first detent position (5). Release the
switch when you want the window to
stop.
To close:
Pull the window switch up to the first
detent position (5). Release the window
switch when you want the window to
stop.
Auto down window (if equipped)
Pressing the power window switch
down momentarily to the second
detent position (6) completely lowers
the window even when the switch is
released. To stop the window at the
desired position while the window is in
operation, pull up or press down and
release the switch.
Page 189 of 579
05
5-55
Auto up/down window (if equipped)
Pressing or pulling up the power window
switch momentarily to the second
detent position (6) completely lowers or
lifts the window even when the switch
is released. To stop the window at the
desired position while the window is in
operation, pull up or press down and
release the switch.
Resetting the power windows
If the power windows do not operate
normally, the automatic power window
system must be reset as follows:
1. Press the ignition switch to the ON
position.
2. Close the window and continue
pulling up on the power window
switch for at least one second.
If the power windows do not operate
properly after resetting, have the system
checked by an authorized HYUNDAI
dealer.
Automatic reverse (if equipped)
OLF044032
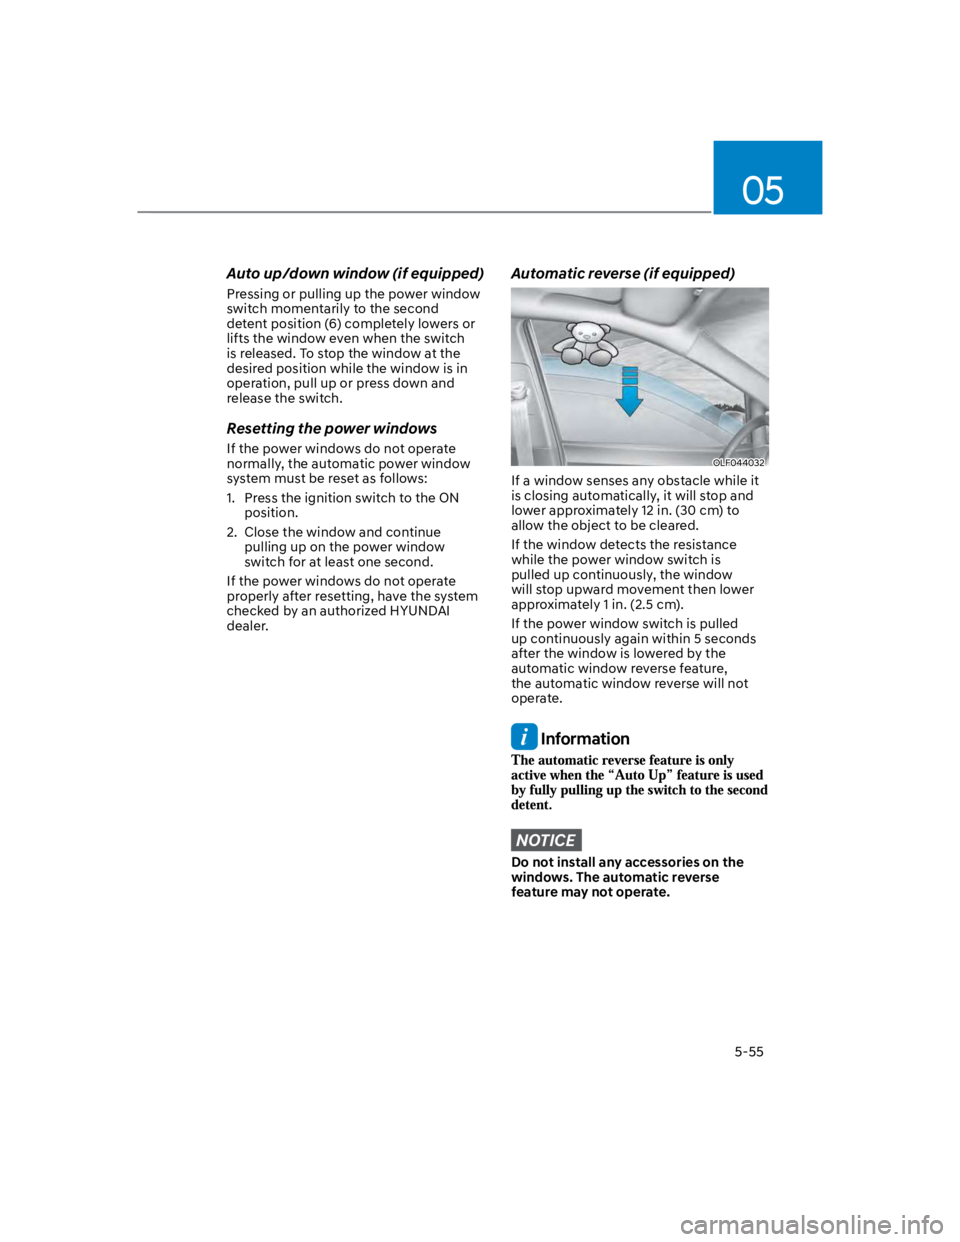
If a window senses any obstacle while it
is closing automatically, it will stop and
lower approximately 12 in. (30 cm) to
allow the object to be cleared.
If the window detects the resistance
while the power window switch is
pulled up continuously, the window
will stop upward movement then lower
approximately 1 in. (2.5 cm).
If the power window switch is pulled
up continuously again within 5 seconds
after the window is lowered by the
automatic window reverse feature,
the automatic window reverse will not
operate.
Information
NOTICE
Do not install any accessories on the
windows. The automatic reverse
feature may not operate.
Page 190 of 579
Convenient features
5-56
WARNING
Make sure body parts or other objects
are safely out of the way before closing
the windows to avoid injuries or vehicle
damage.
Objects less than 0.16 in (4 mm) in
diameter caught between the window
glass and the upper window channel
may not be detected by the automatic
reverse window and the window will
not stop and reverse direction.
Power window lock button
OOS047019
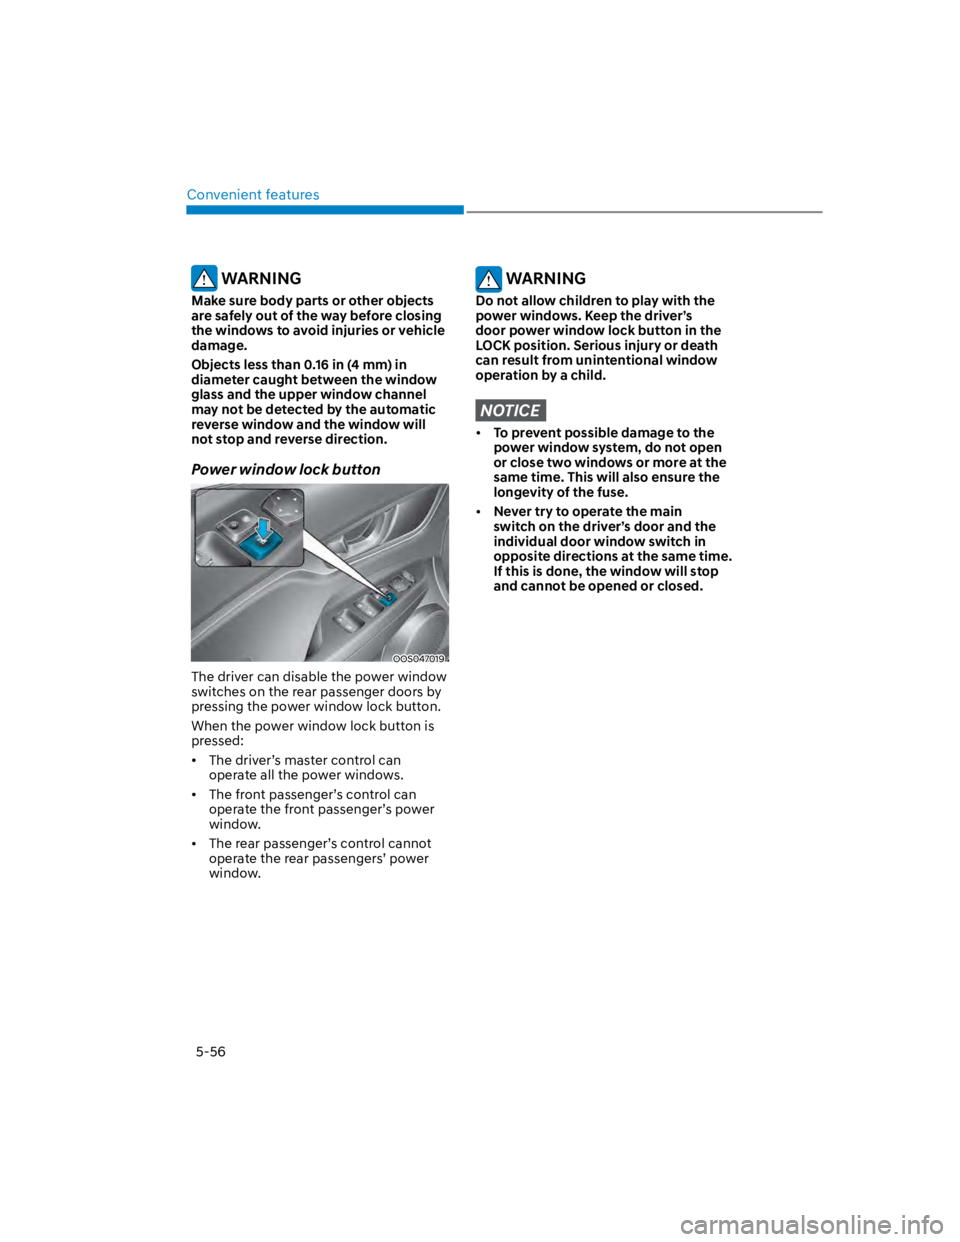
The driver can disable the power window
switches on the rear passenger doors by
pressing the power window lock button.
When the power window lock button is
pressed:
The driver’s master control can
operate all the power windows.
The front passenger’s control can
operate the front passenger’s power
window.
The rear passenger’s control cannot
operate the rear passengers’ power
window.
WARNING
Do not allow children to play with the
power windows. Keep the driver’s
door power window lock button in the
LOCK position. Serious injury or death
can result from unintentional window
operation by a child.
NOTICE
To prevent possible damage to the
power window system, do not open
or close two windows or more at the
same time. This will also ensure the
longevity of the fuse.
Never try to operate the main
switch on the driver’s door and the
individual door window switch in
opposite directions at the same time.
If this is done, the window will stop
and cannot be opened or closed.
Page 192 of 579
Convenient features
5-58
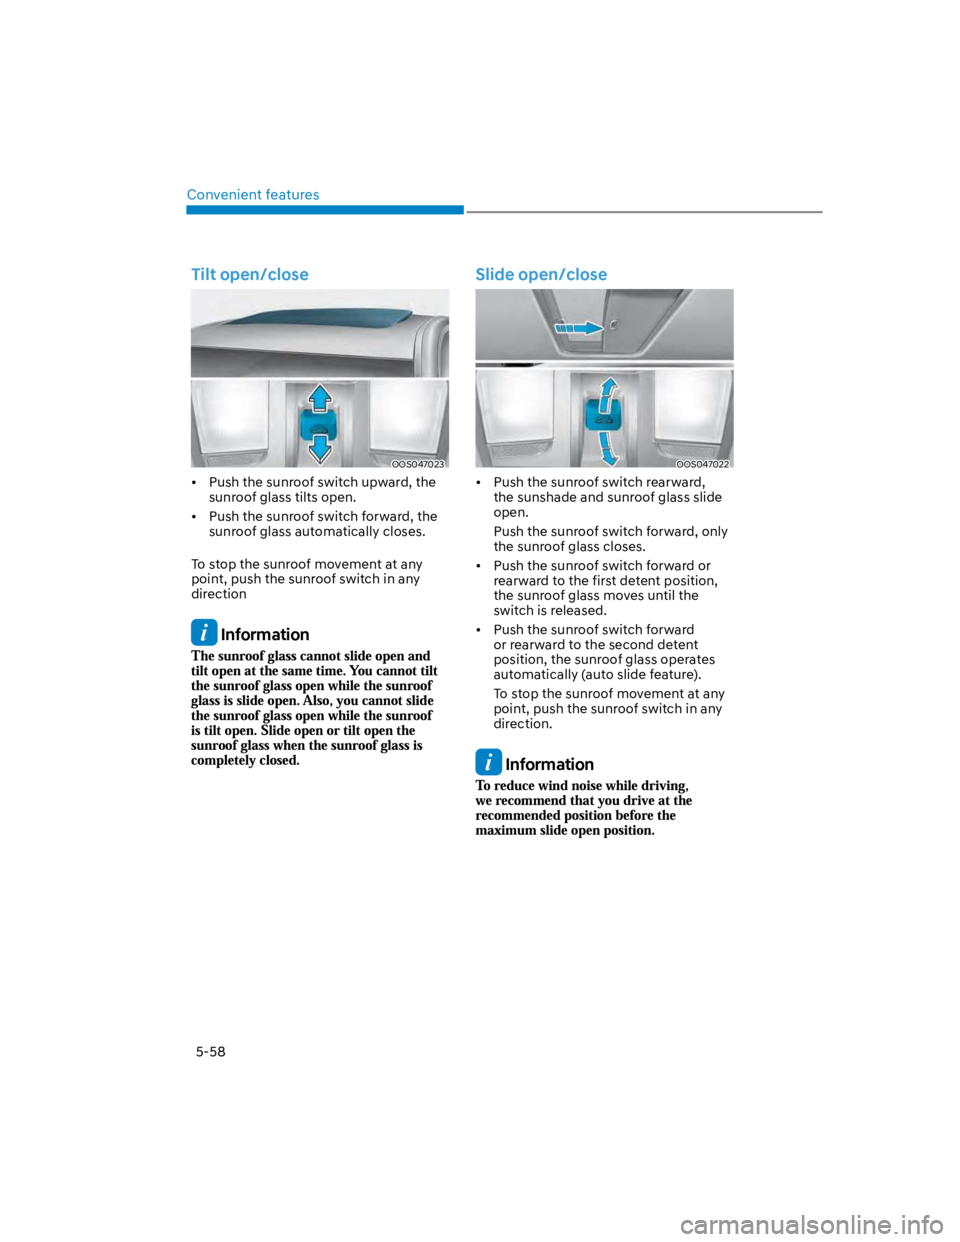
Tilt open/close
OOS047023
Push the sunroof switch upward, the
sunroof glass tilts open.
Push the sunroof switch forward, the
sunroof glass automatically closes.
To stop the sunroof movement at any
point, push the sunroof switch in any
direction
Information
Slide open/close
OOS047022
Push the sunroof switch rearward,
the sunshade and sunroof glass slide
open.
Push the sunroof switch forward, only
the sunroof glass closes.
Push the sunroof switch forward or
rearward to the first detent position,
the sunroof glass moves until the
switch is released.
Push the sunroof switch forward
or rearward to the second detent
position, the sunroof glass operates
automatically (auto slide feature).
To stop the sunroof movement at any
point, push the sunroof switch in any
direction.
Information
Page 193 of 579
05
5-59
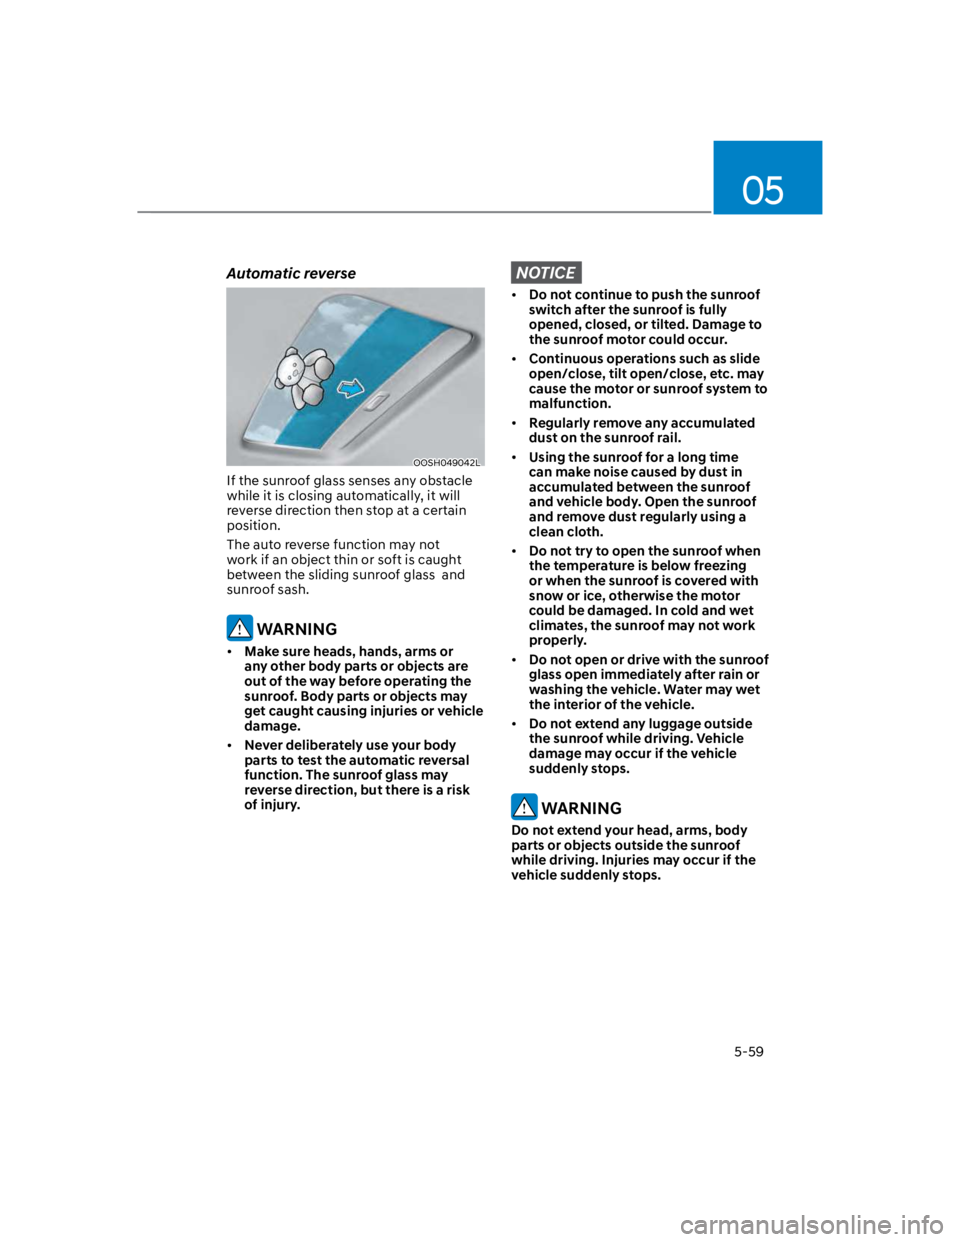
Automatic reverse
OOSH049042L
If the sunroof glass senses any obstacle
while it is closing automatically, it will
reverse direction then stop at a certain
position.
The auto reverse function may not
work if an object thin or soft is caught
between the sliding sunroof glass and
sunroof sash.
WARNING
Make sure heads, hands, arms or
any other body parts or objects are
out of the way before operating the
sunroof. Body parts or objects may
get caught causing injuries or vehicle
damage.
Never deliberately use your body
parts to test the automatic reversal
function. The sunroof glass may
reverse direction, but there is a risk
of injury.
NOTICE
Do not continue to push the sunroof
switch after the sunroof is fully
opened, closed, or tilted. Damage to
the sunroof motor could occur.
Continuous operations such as slide
open/close, tilt open/close, etc. may
cause the motor or sunroof system to
malfunction.
Regularly remove any accumulated
dust on the sunroof rail.
Using the sunroof for a long time
can make noise caused by dust in
accumulated between the sunroof
and vehicle body. Open the sunroof
and remove dust regularly using a
clean cloth.
Do not try to open the sunroof when
the temperature is below freezing
or when the sunroof is covered with
snow or ice, otherwise the motor
could be damaged. In cold and wet
climates, the sunroof may not work
properly.
Do not open or drive with the sunroof
glass open immediately after rain or
washing the vehicle. Water may wet
the interior of the vehicle.
Do not extend any luggage outside
the sunroof while driving. Vehicle
damage may occur if the vehicle
suddenly stops.
WARNING
Do not extend your head, arms, body
parts or objects outside the sunroof
while driving. Injuries may occur if the
vehicle suddenly stops.
Page 211 of 579
05
5-77
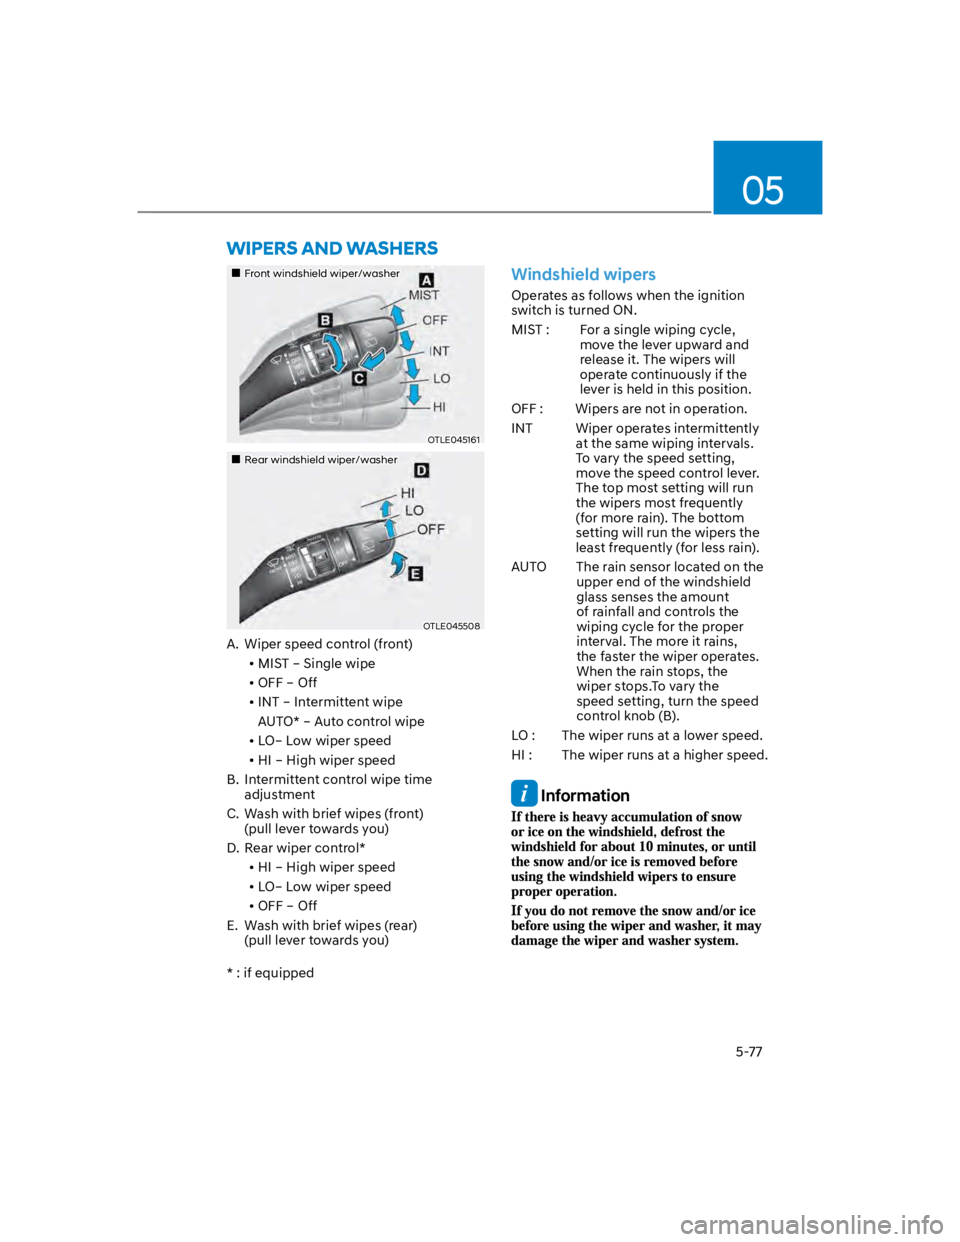
Front windshield wiper/washer
OTLE045161
Rear windshield wiper/washer
OTLE045508
A. Wiper speed control (front)
MIST – Single wipe
OFF – Off
INT – Intermittent wipe
AUTO* – Auto control wipe
LO– Low wiper speed
HI – High wiper speed
B. Intermittent control wipe time
adjustment
C. Wash with brief wipes (front)
(pull lever towards you)
D. Rear wiper control*
HI – High wiper speed
LO– Low wiper speed
OFF – Off
E. Wash with brief wipes (rear)
(pull lever towards you)
* : if equipped
Windshield wipers
Operates as follows when the ignition
switch is turned ON.
MIST : For a single wiping cycle,
move the lever upward and
release it. The wipers will
operate continuously if the
lever is held in this position.
OFF : Wipers are not in operation.
INT Wiper operates intermittently
at the same wiping intervals.
To vary the speed setting,
move the speed control lever.
The top most setting will run
the wipers most frequently
(for more rain). The bottom
setting will run the wipers the
least frequently (for less rain).
AUTO The rain sensor located on the
upper end of the windshield
glass senses the amount
of rainfall and controls the
wiping cycle for the proper
interval. The more it rains,
the faster the wiper operates.
When the rain stops, the
wiper stops.To vary the
speed setting, turn the speed
control knob (B).
LO : The wiper runs at a lower speed.
HI : The wiper runs at a higher speed.
Information
Page 212 of 579
Convenient features
5-78
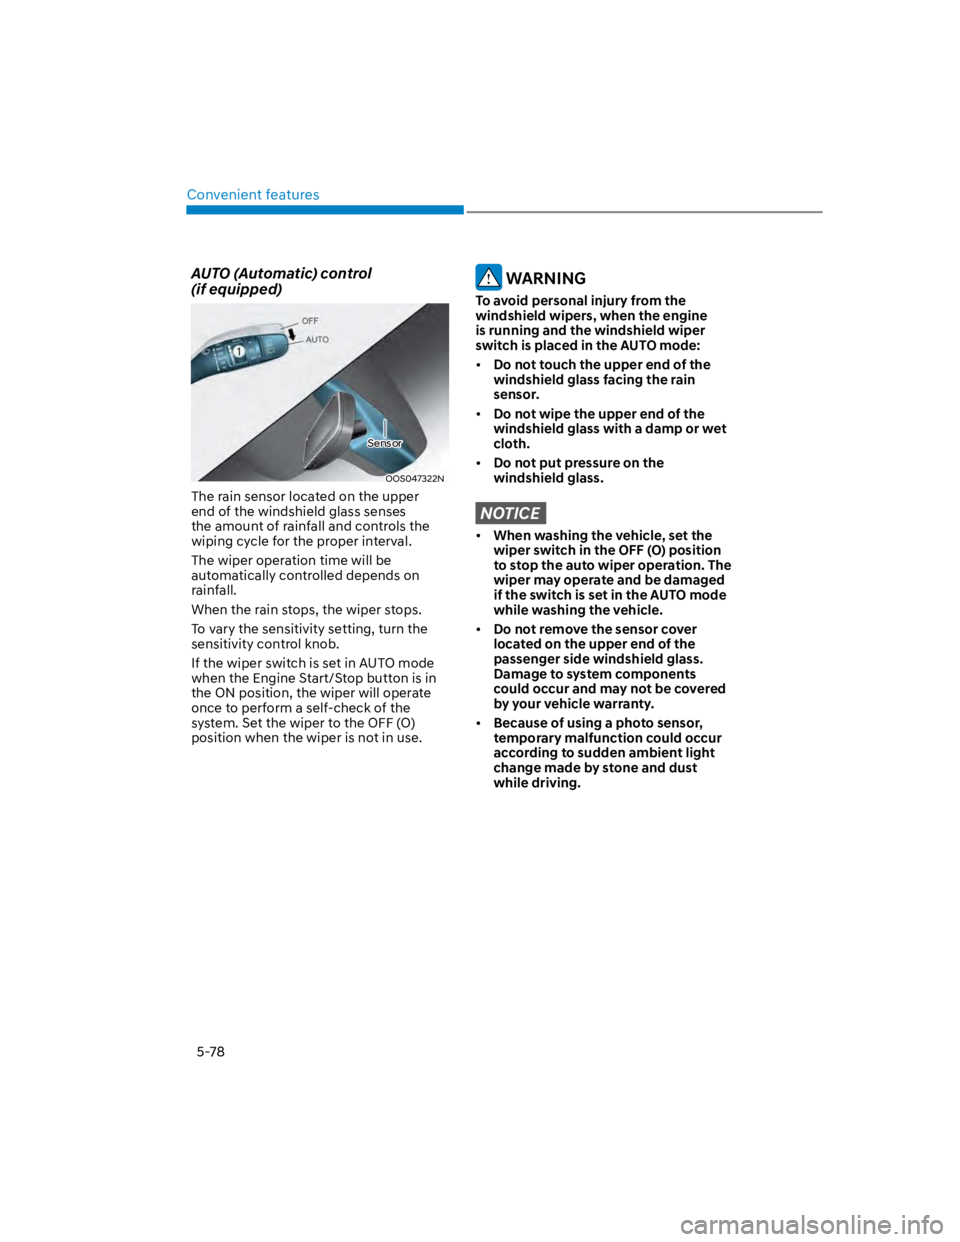
AUTO (Automatic) control
(if equipped)
OOS047322N
The rain sensor located on the upper
end of the windshield glass senses
the amount of rainfall and controls the
wiping cycle for the proper interval.
The wiper operation time will be
automatically controlled depends on
rainfall.
When the rain stops, the wiper stops.
To vary the sensitivity setting, turn the
sensitivity control knob.
If the wiper switch is set in AUTO mode
when the Engine Start/Stop button is in
the ON position, the wiper will operate
once to perform a self-check of the
system. Set the wiper to the OFF (O)
position when the wiper is not in use.
WARNING
To avoid personal injury from the
windshield wipers, when the engine
is running and the windshield wiper
switch is placed in the AUTO mode:
Do not touch the upper end of the
windshield glass facing the rain
sensor.
Do not wipe the upper end of the
windshield glass with a damp or wet
cloth.
Do not put pressure on the
windshield glass.
NOTICE
When washing the vehicle, set the
wiper switch in the OFF (O) position
to stop the auto wiper operation. The
wiper may operate and be damaged
if the switch is set in the AUTO mode
while washing the vehicle.
Do not remove the sensor cover
located on the upper end of the
passenger side windshield glass.
Damage to system components
could occur and may not be covered
by your vehicle warranty.
Because of using a photo sensor,
temporary malfunction could occur
according to sudden ambient light
change made by stone and dust
while driving.
Sensor