2022 HYUNDAI KONA auto stop
[x] Cancel search: auto stopPage 20 of 579
2-7
02
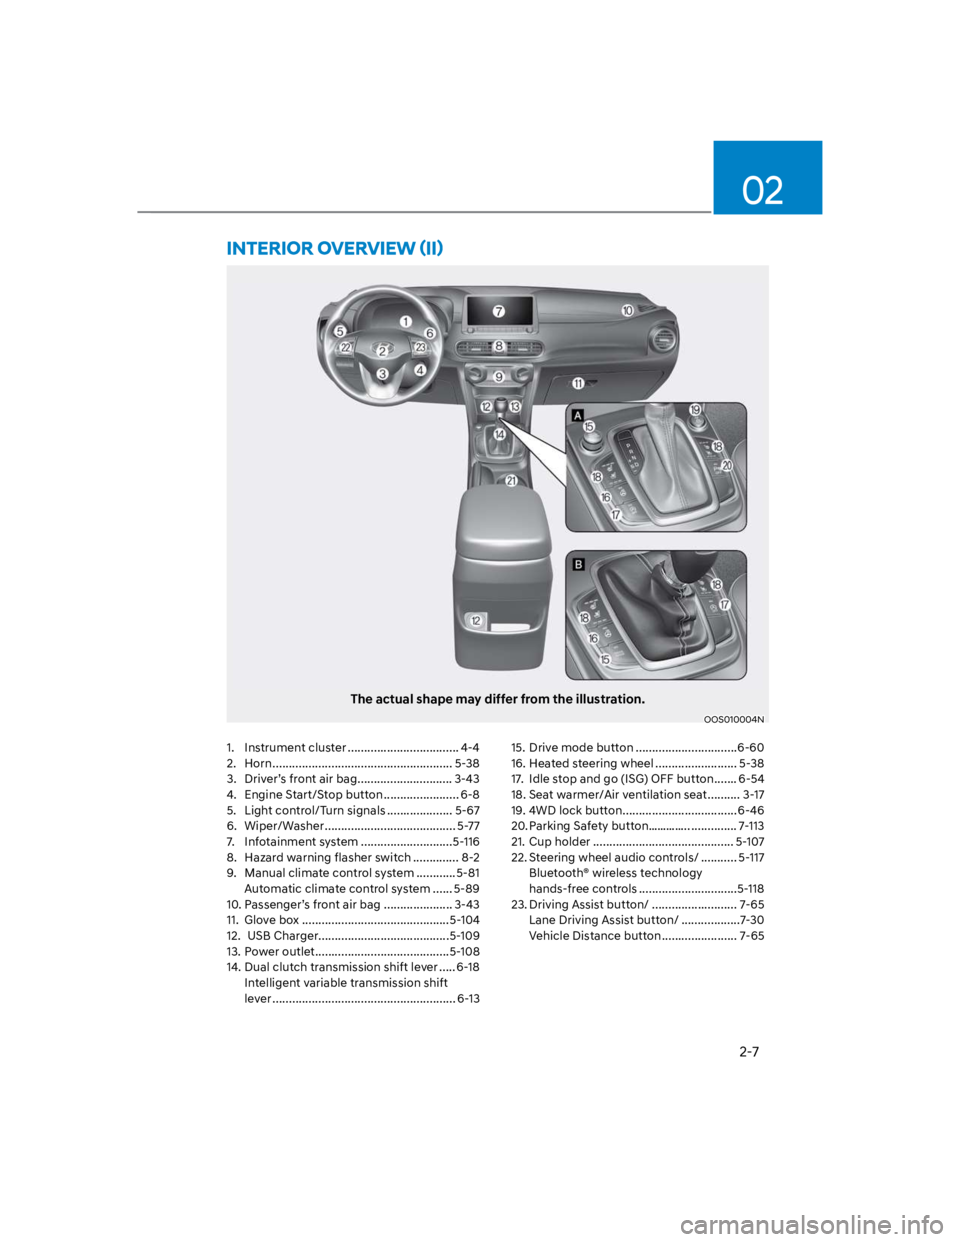
The actual shape may differ from the illustration.
OOS010004N
1. Instrument cluster .................................. 4-4
2. Horn ....................................................... 5-38
3. Driver’s front air bag ............................. 3-43
4. Engine Start/Stop button ....................... 6-8
5. Light control/Turn signals .................... 5-67
6. Wiper/Washer ........................................ 5-77
7. Infotainment system ............................5-116
8. Hazard warning flasher switch .............. 8-2
9. Manual climate control system ............5-81
Automatic climate control system ...... 5-89
10. Passenger’s front air bag ..................... 3-43
11. Glove box .............................................5-104
12. USB Charger........................................5-109
13. Power outlet .........................................5-108
14. Dual clutch transmission shift lever ..... 6-18
Intelligent variable transmission shift
lever ........................................................ 6-13
15. Drive mode button ...............................6-60
16. Heated steering wheel ......................... 5-38
17. Idle stop and go (ISG) OFF button ....... 6-54
18. Seat warmer/Air ventilation seat .......... 3-17
19. 4WD lock button ...................................6-46
20. Parking Safety button………….. .............. 7-113
21. Cup holder ........................................... 5-107
22. Steering wheel audio controls/ ........... 5-117
Bluetooth® wireless technology
hands-free controls ..............................5-118
23. Driving Assist button/ .......................... 7-65
Lane Driving Assist button/ ..................7-30
Vehicle Distance button ....................... 7-65
Page 54 of 579
03
3-23
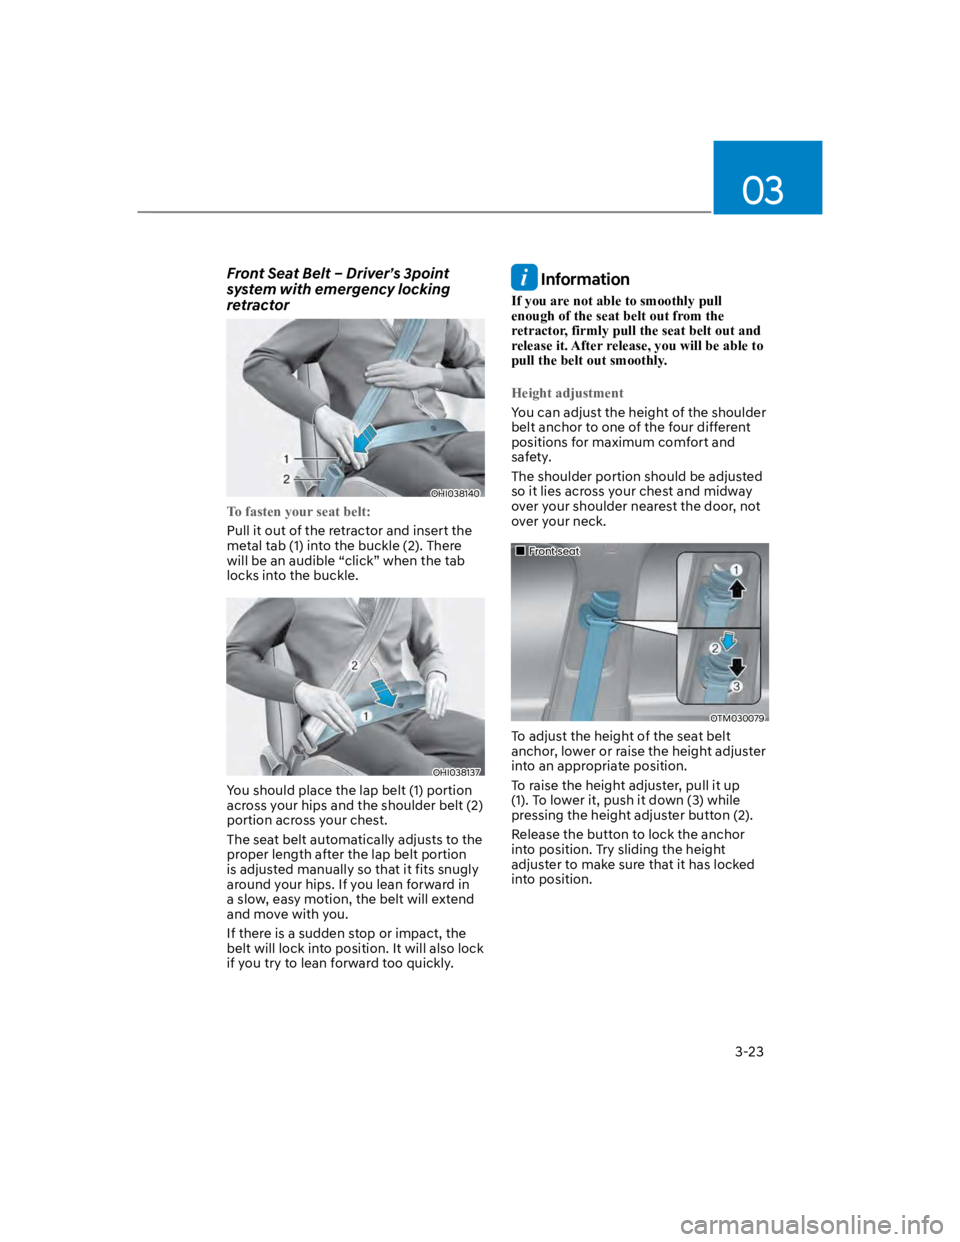
Front Seat Belt – Driver’s 3point
system with emergency locking
retractor
OHI038140
To fasten your seat belt:
Pull it out of the retractor and insert the
metal tab (1) into the buckle (2). There
will be an audible “click” when the tab
locks into the buckle.
OHI038137
You should place the lap belt (1) portion
across your hips and the shoulder belt (2)
portion across your chest.
The seat belt automatically adjusts to the
proper length after the lap belt portion
is adjusted manually so that it fits snugly
around your hips. If you lean forward in
a slow, easy motion, the belt will extend
and move with you.
If there is a sudden stop or impact, the
belt will lock into position. It will also lock
if you try to lean forward too quickly.
Information
If you are not able to smoothly pull
enough of the seat belt out from the
retractor, firmly pull the seat belt out and
release it. After release, you will be able to
pull the belt out smoothly.
Height adjustment
You can adjust the height of the shoulder
belt anchor to one of the four different
positions for maximum comfort and
safety.
The shoulder portion should be adjusted
so it lies across your chest and midway
over your shoulder nearest the door, not
over your neck.
Front seat
OTM030079
To adjust the height of the seat belt
anchor, lower or raise the height adjuster
into an appropriate position.
To raise the height adjuster, pull it up
(1). To lower it, push it down (3) while
pressing the height adjuster button (2).
Release the button to lock the anchor
into position. Try sliding the height
adjuster to make sure that it has locked
into position.
Page 55 of 579
Seats & Safety System
3-24
OHI038142
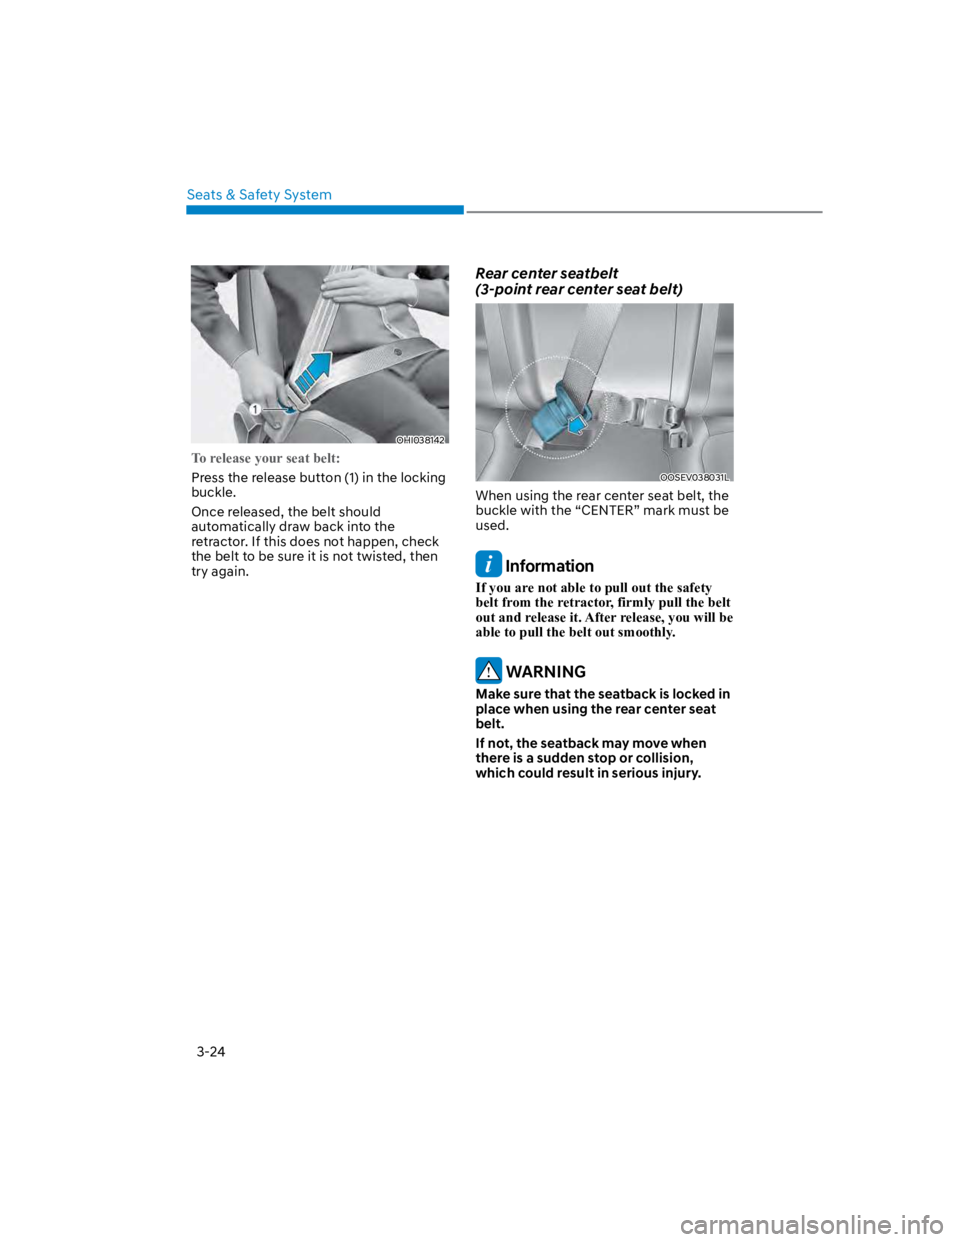
To release your seat belt:
Press the release button (1) in the locking
buckle.
Once released, the belt should
automatically draw back into the
retractor. If this does not happen, check
the belt to be sure it is not twisted, then
try again.
Rear center seatbelt
(3-point rear center seat belt)
OOSEV038031L
When using the rear center seat belt, the
buckle with the “CENTER” mark must be
used.
Information
If you are not able to pull out the safety
belt from the retractor, firmly pull the belt
out and release it. After release, you will be
able to pull the belt out smoothly.
WARNING
Make sure that the seatback is locked in
place when using the rear center seat
belt.
If not, the seatback may move when
there is a sudden stop or collision,
which could result in serious injury.
Page 71 of 579
Seats & Safety System
3-40
OHI038148
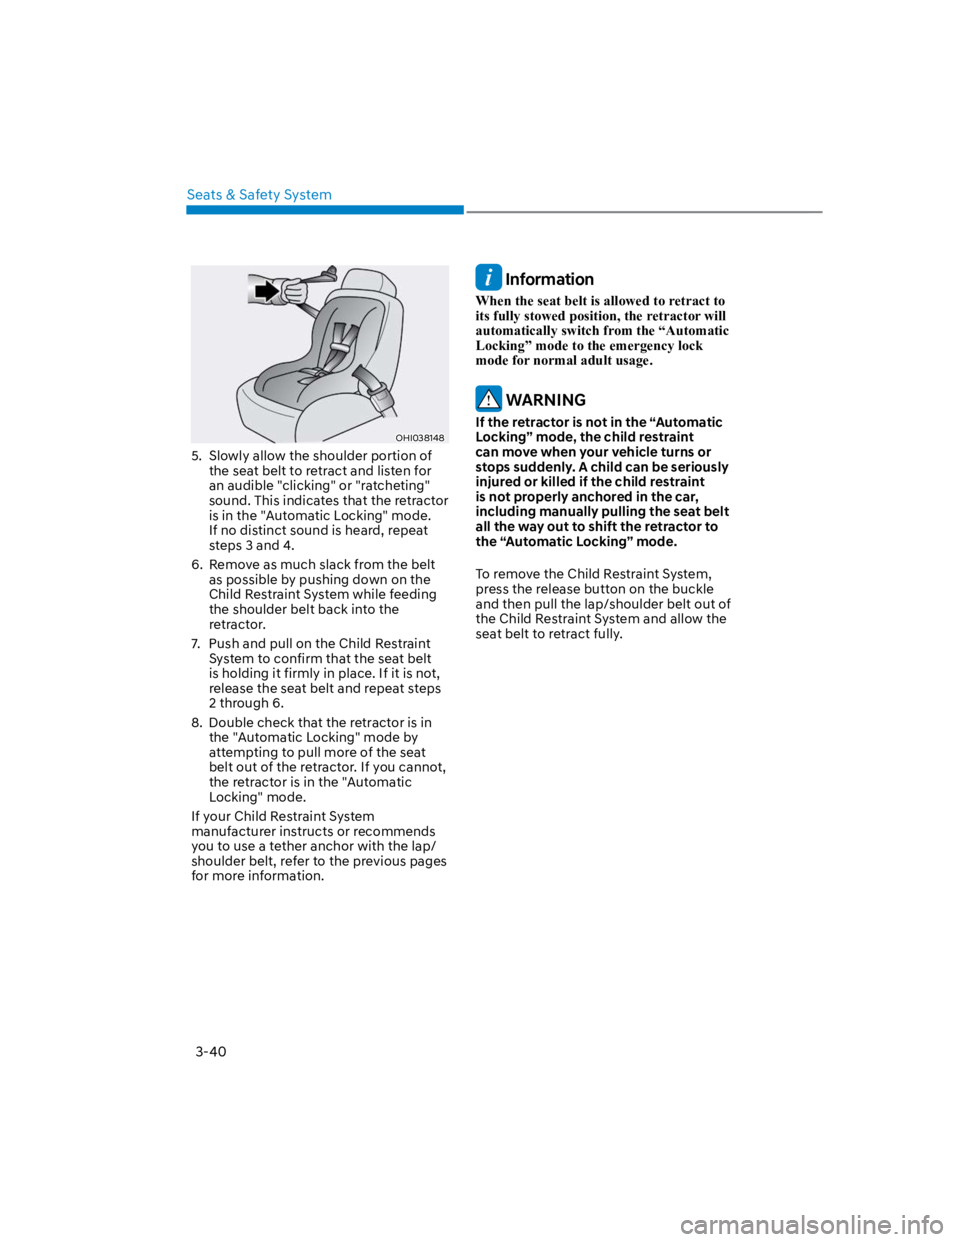
5. Slowly allow the shoulder portion of
the seat belt to retract and listen for
an audible "clicking" or "ratcheting"
sound. This indicates that the retractor
is in the "Automatic Locking" mode.
If no distinct sound is heard, repeat
steps 3 and 4.
6. Remove as much slack from the belt
as possible by pushing down on the
Child Restraint System while feeding
the shoulder belt back into the
retractor.
7. Push and pull on the Child Restraint
System to confirm that the seat belt
is holding it firmly in place. If it is not,
release the seat belt and repeat steps
2 through 6.
8. Double check that the retractor is in
the "Automatic Locking" mode by
attempting to pull more of the seat
belt out of the retractor. If you cannot,
the retractor is in the "Automatic
Locking" mode.
If your Child Restraint System
manufacturer instructs or recommends
you to use a tether anchor with the lap/
shoulder belt, refer to the previous pages
for more information.
Information
When the seat belt is allowed to retract to
its fully stowed position, the retractor will
automatically switch from the “Automatic
Locking” mode to the emergency lock
mode for normal adult usage.
WARNING
If the retractor is not in the “Automatic
Locking” mode, the child restraint
can move when your vehicle turns or
stops suddenly. A child can be seriously
injured or killed if the child restraint
is not properly anchored in the car,
including manually pulling the seat belt
all the way out to shift the retractor to
the “Automatic Locking” mode.
To remove the Child Restraint System,
press the release button on the buckle
and then pull the lap/shoulder belt out of
the Child Restraint System and allow the
seat belt to retract fully.
Page 94 of 579
4
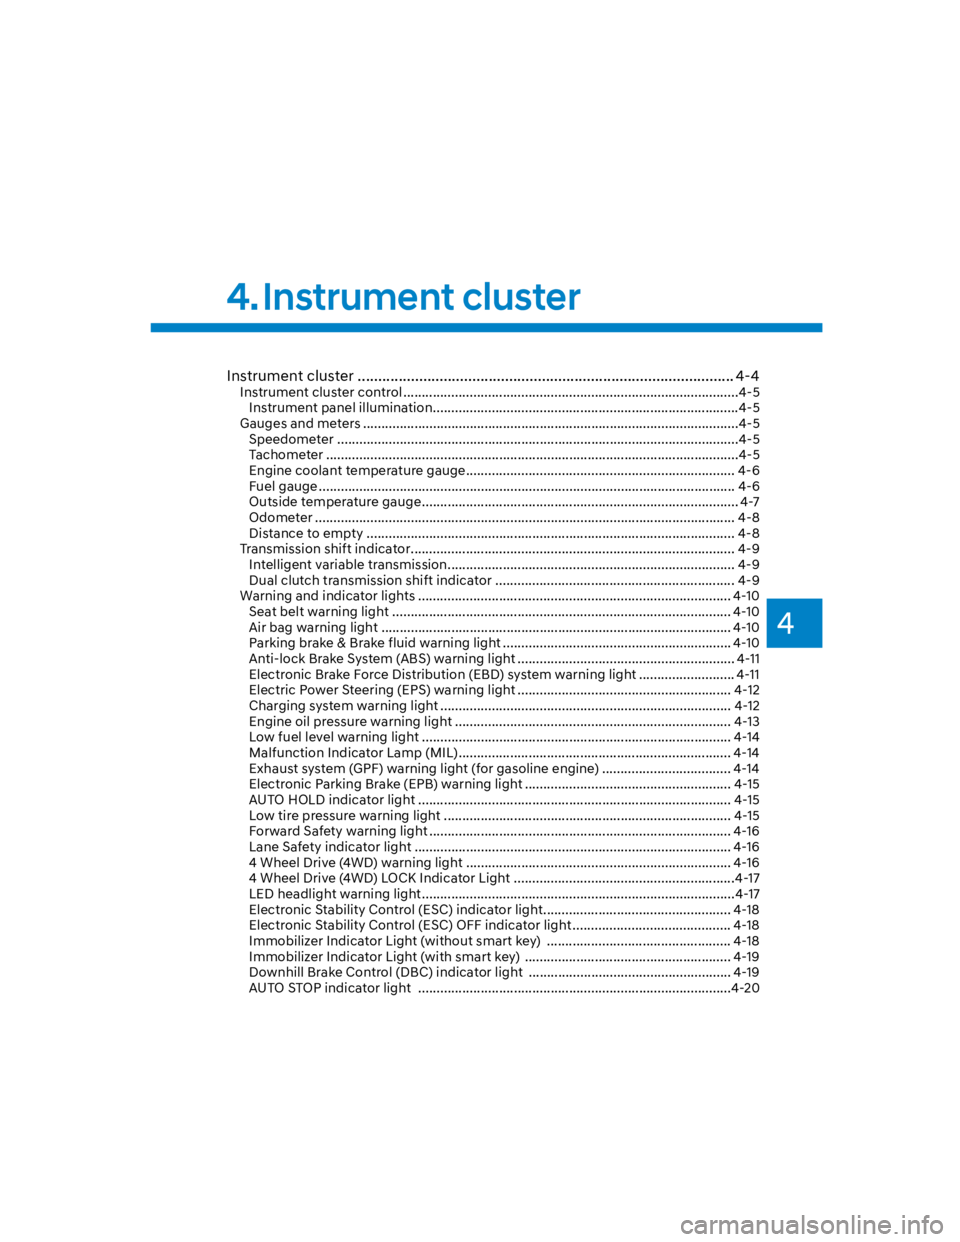
Instrument cluster ............................................................................................ 4-4
Instrument cluster control ...........................................................................................4-5
Instrument panel illumination ...................................................................................4-5
Gauges and meters ......................................................................................................4-5
Speedometer .............................................................................................................4-5
Tachometer ................................................................................................................4-5
Engine coolant temperature gauge ......................................................................... 4-6
Fuel gauge ................................................................................................................. 4-6
Outside temperature gauge ...................................................................................... 4-7
Odometer .................................................................................................................. 4-8
Distance to empty .................................................................................................... 4-8
Transmission shift indicator ........................................................................................ 4-9
Intelligent variable transmission .............................................................................. 4-9
Dual clutch transmission shift indicator ................................................................. 4-9
Warning and indicator lights ..................................................................................... 4-10
Seat belt warning light ............................................................................................ 4-10
Air bag warning light ............................................................................................... 4-10
Parking brake & Brake fluid warning light .............................................................. 4-10
Anti-lock Brake System (ABS) warning light ........................................................... 4-11
Electronic Brake Force Distribution (EBD) system warning light .......................... 4-11
Electric Power Steering (EPS) warning light .......................................................... 4-12
Charging system warning light ............................................................................... 4-12
Engine oil pressure warning light ........................................................................... 4-13
Low fuel level warning light .................................................................................... 4-14
Malfunction Indicator Lamp (MIL) .......................................................................... 4-14
Exhaust system (GPF) warning light (for gasoline engine) ................................... 4-14
Electronic Parking Brake (EPB) warning light ........................................................ 4-15
AUTO HOLD indicator light ..................................................................................... 4-15
Low tire pressure warning light .............................................................................. 4-15
Forward Safety warning light .................................................................................. 4-16
Lane Safety indicator light ...................................................................................... 4-16
4 Wheel Drive (4WD) warning light ........................................................................ 4-16
4 Wheel Drive (4WD) LOCK Indicator Light ............................................................4-17
LED headlight warning light .....................................................................................4-17
Electronic Stability Control (ESC) indicator light ................................................... 4-18
Electronic Stability Control (ESC) OFF indicator light ........................................... 4-18
Immobilizer Indicator Light (without smart key) .................................................. 4-18
Immobilizer Indicator Light (with smart key) ........................................................ 4-19
Downhill Brake Control (DBC) indicator light ....................................................... 4-19
AUTO STOP indicator light .....................................................................................4-20
4. Instrument cluster
Page 100 of 579
04
4-7
Information
WARNING
Running out of fuel can expose vehicle
occupants to danger.
You must stop and obtain additional
fuel as soon as possible after the
warning light comes on or when the
gauge indicator comes close to the “E
(Empty) or 0” level.
NOTICE
Avoid driving with an extremely low
fuel level. Running out of fuel could
cause the engine to misfire damaging
the catalytic converter.
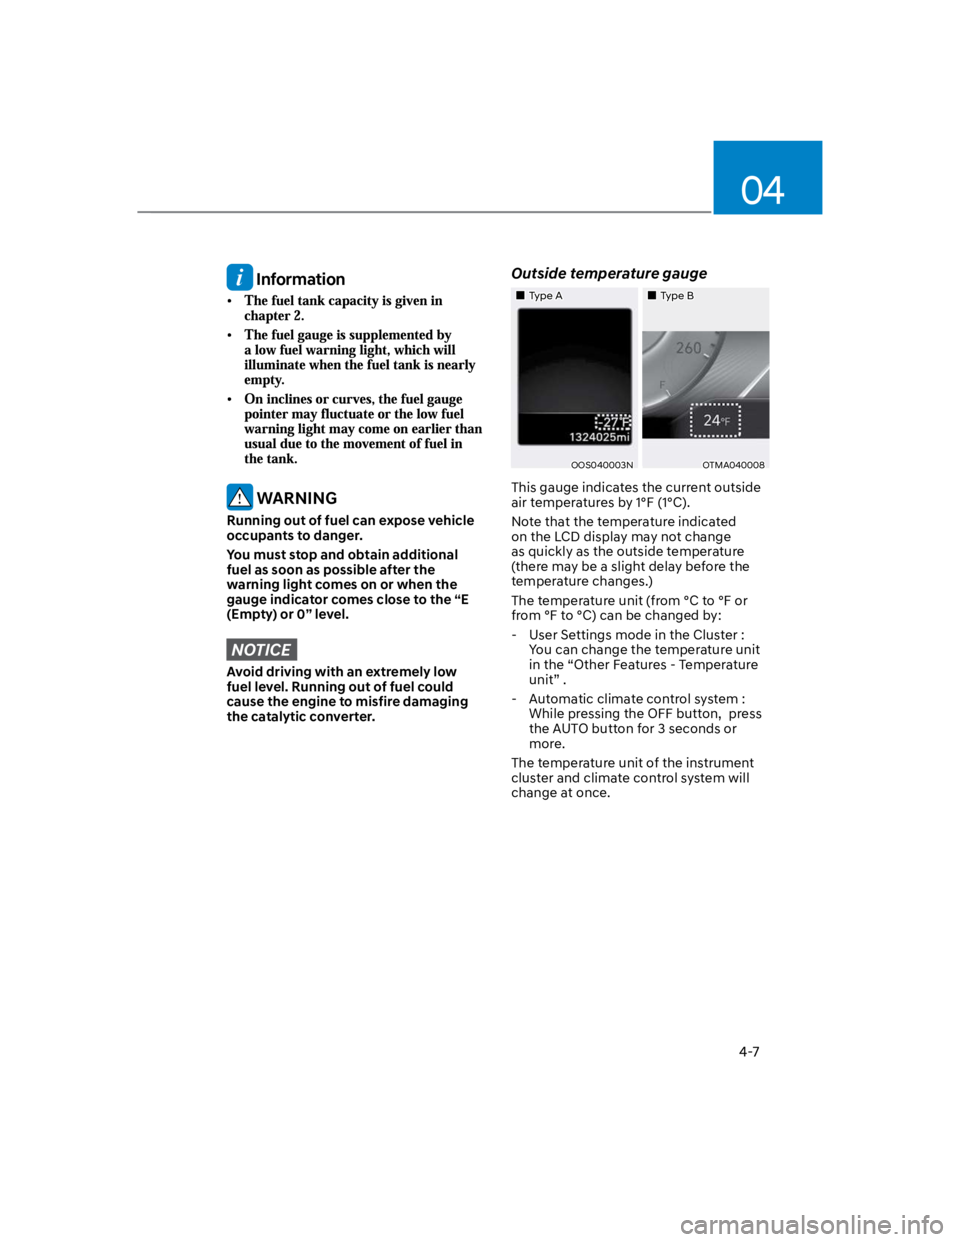
Outside temperature gauge
Type AType B
OOS040003NOTMA040008
This gauge indicates the current outside
air temperatures by 1°F (1°C).
Note that the temperature indicated
on the LCD display may not change
as quickly as the outside temperature
(there may be a slight delay before the
temperature changes.)
The temperature unit (from °C to °F or
from °F to °C) can be changed by:
- User Settings mode in the Cluster :
You can change the temperature unit
in the “Other Features - Temperature
unit” .
- Automatic climate control system :
While pressing the OFF button, press
the AUTO button for 3 seconds or
more.
The temperature unit of the instrument
cluster and climate control system will
change at once.
Page 108 of 579
04
4-15
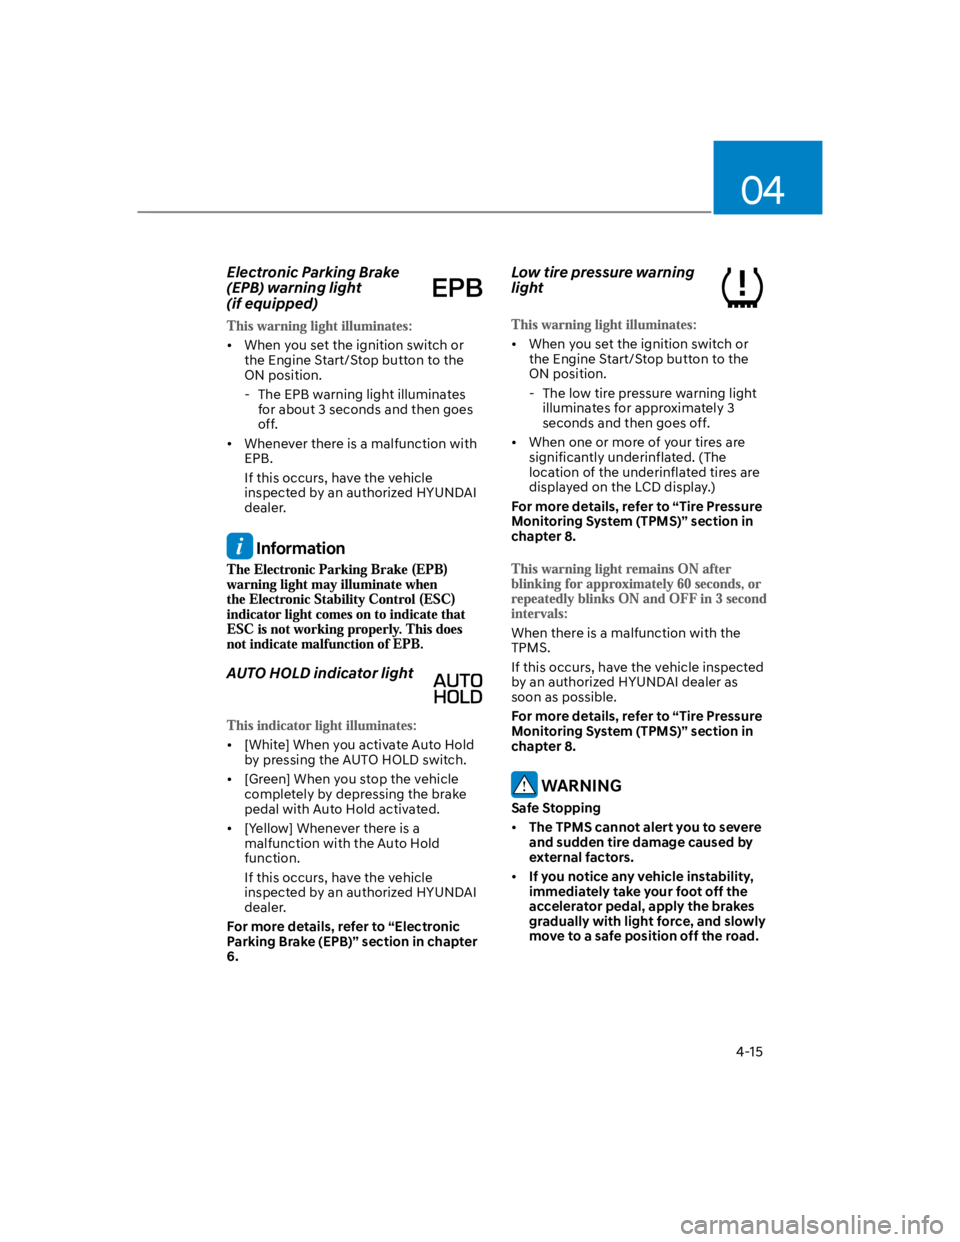
Electronic Parking Brake
(EPB) warning light
(if equipped)
When you set the ignition switch or
the Engine Start/Stop button to the
ON position.
- The EPB warning light illuminates
for about 3 seconds and then goes
off.
Whenever there is a malfunction with
EPB.
If this occurs, have the vehicle
inspected by an authorized HYUNDAI
dealer.
Information
AUTO HOLD indicator light
[White] When you activate Auto Hold
by pressing the AUTO HOLD switch.
[Green] When you stop the vehicle
completely by depressing the brake
pedal with Auto Hold activated.
[Yellow] Whenever there is a
malfunction with the Auto Hold
function.
If this occurs, have the vehicle
inspected by an authorized HYUNDAI
dealer.
For more details, refer to “Electronic
Parking Brake (EPB)” section in chapter
6.
Low tire pressure warning
light
When you set the ignition switch or
the Engine Start/Stop button to the
ON position.
- The low tire pressure warning light
illuminates for approximately 3
seconds and then goes off.
When one or more of your tires are
significantly underinflated. (The
location of the underinflated tires are
displayed on the LCD display.)
For more details, refer to “Tire Pressure
Monitoring System (TPMS)” section in
chapter 8.
When there is a malfunction with the
TPMS.
If this occurs, have the vehicle inspected
by an authorized HYUNDAI dealer as
soon as possible.
For more details, refer to “Tire Pressure
Monitoring System (TPMS)” section in
chapter 8.
WARNING
Safe Stopping
The TPMS cannot alert you to severe
and sudden tire damage caused by
external factors.
If you notice any vehicle instability,
immediately take your foot off the
accelerator pedal, apply the brakes
gradually with light force, and slowly
move to a safe position off the road.
Page 113 of 579

Instrument cluster
4-20
AUTO STOP indicator light
When the engine enters the Idle Stop
mode of ISG (Idle Stop and Go) system.
When the engine automatically starts,
the AUTO STOP indicator on the cluster
Illuminates to white.
For more details, refer to "ISG (Idle Stop
and Go) system" section in chapter 6.
Information
Turn signal indicator light
When you operate the turn signal
indicator stalk.
If any of the following occur, there may
be a malfunction with the turn signal
system.
- The turn signal indicator light
illuminates but does not blink
- The turn signal indicator light blinks
rapidly
- The turn signal indicator light does not
illuminate at all
If any of these conditions occur, have
the vehicle inspected by an authorized
HYUNDAI dealer.
High beam indicator light
When the headlamps are on and in
the high beam position
When the turn signal lever is pulled
into the Flash-to-Pass position.