2022 HYUNDAI KONA EV parking brake
[x] Cancel search: parking brakePage 20 of 548
01
1-15
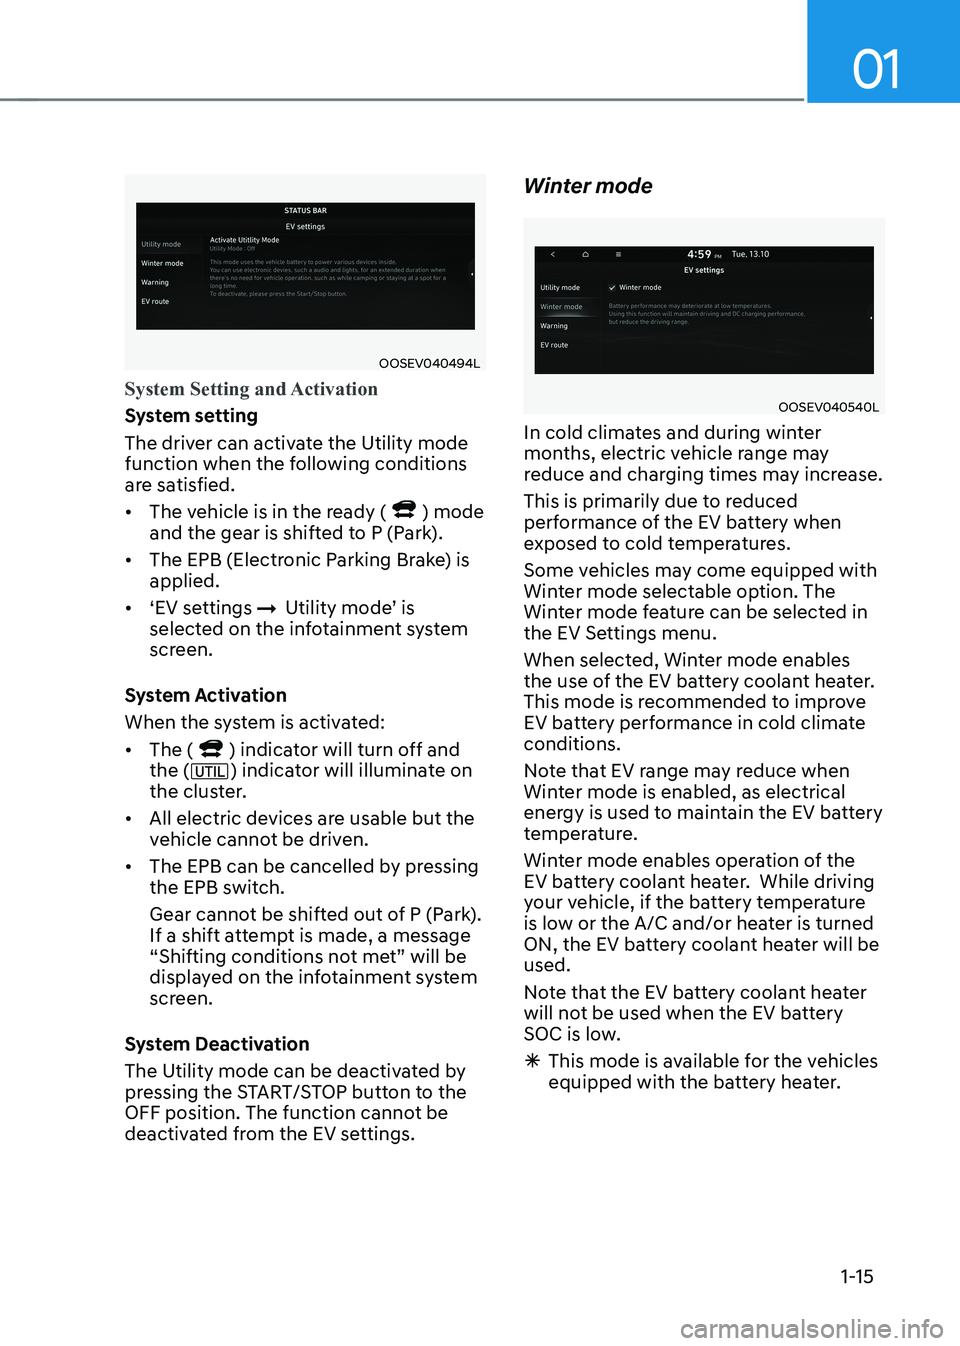
OOSEV040494L
System Setting and Activation
System setting
The driver can activate the Utility mode
function when the following conditions
are satisfied. • The vehicle is in the ready (
) mode
and the gear is shifted to P (Park).
• The EPB (Electronic Parking Brake) is applied.
• ‘EV settings
ÞUtility mode’ is
selected on the infotainment system
screen.
System Activation
When the system is activated:• The (
) indicator will turn off and
the () indicator will illuminate on
the cluster.
• All electric devices are usable but the
vehicle cannot be driven.
• The EPB can be cancelled by pressing
the EPB switch.
Gear cannot be shifted out of P (Park).
If a shift attempt is made, a message
“Shifting conditions not met” will be
displayed on the infotainment system
screen.
System Deactivation
The Utility mode can be deactivated by
pressing the START/STOP button to the
OFF position. The function cannot be
deactivated from the EV settings. Winter mode
OOSEV040540L
In cold climates and during winter
months, electric vehicle range may
reduce and charging times may increase.
This is primarily due to reduced
performance of the EV battery when
exposed to cold temperatures.
Some vehicles may come equipped with
Winter mode selectable option. The
Winter mode feature can be selected in
the EV Settings menu.
When selected, Winter mode enables
the use of the EV battery coolant heater.
This mode is recommended to improve
EV battery performance in cold climate conditions.
Note that EV range may reduce when
Winter mode is enabled, as electrical
energy is used to maintain the EV battery
temperature.
Winter mode enables operation of the
EV battery coolant heater. While driving
your vehicle, if the battery temperature
is low or the A/C and/or heater is turned
ON, the EV battery coolant heater will be used.
Note that the EV battery coolant heater
will not be used when the EV battery
SOC is low.
à This mode is available for the vehicles
equipped with the battery heater.
Page 29 of 548
Foreword / Electric Vehicle System Overview
1-24
AC Charge
„„AC Charger
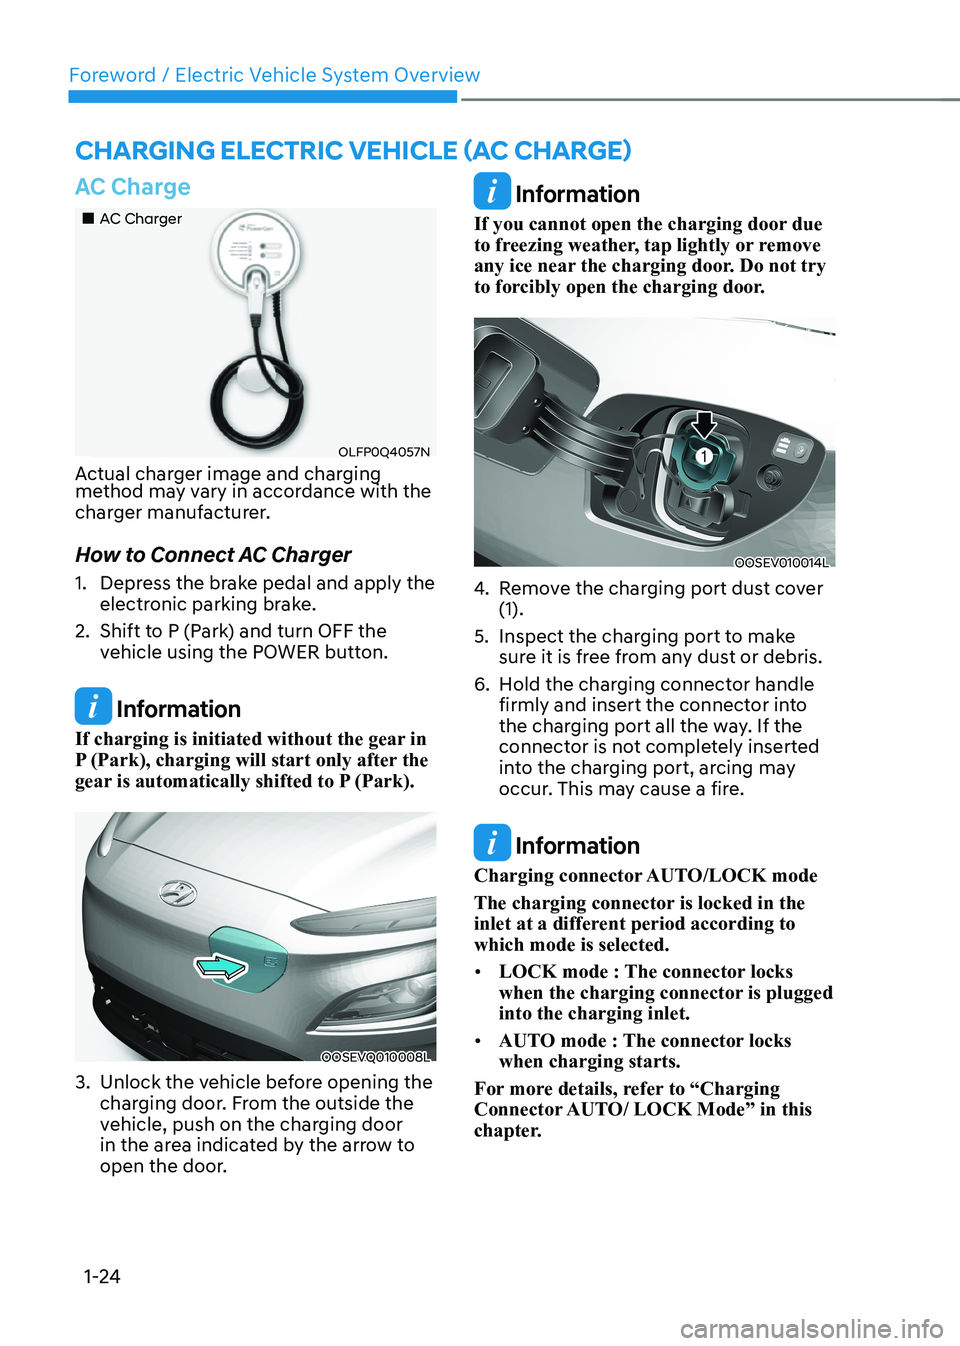
OLFP0Q4057N
Actual charger image and charging
method may vary in accordance with the
charger manufacturer.
How to Connect AC Charger
1. Depress the brake pedal and apply the electronic parking brake.
2. Shift to P (Park) and turn OFF the vehicle using the POWER button.
Information
If charging is initiated without the gear in
P (Park), charging will start only after the
gear is automatically shifted to P (Park).
OOSEVQ010008L
3. Unlock the vehicle before opening the charging door. From the outside the
vehicle, push on the charging door
in the area indicated by the arrow to
open the door.
Information
If you cannot open the charging door due
to freezing weather, tap lightly or remove
any ice near the charging door. Do not try
to forcibly open the charging door.
OOSEV010014L
4. Remove the charging port dust cover (1).
5. Inspect the charging port to make sure it is free from any dust or debris.
6. Hold the charging connector handle firmly and insert the connector into
the charging port all the way. If the
connector is not completely inserted
into the charging port, arcing may
occur. This may cause a fire.
Information
Charging connector AUTO/LOCK mode
The charging connector is locked in the
inlet at a different period according to which mode is selected. • LOCK mode : The connector locks
when the charging connector is plugged into the charging inlet.
• AUTO mode : The connector locks when charging starts.
For more details, refer to “Charging
Connector AUTO/ LOCK Mode” in this
chapter.
Charging ElECtriC VEhiClE (aC ChargE)
Page 34 of 548
01
1-29
How to Connect DC Charger
1. Depress the brake pedal and apply the
electronic parking brake.
2. Shift to P (Park) and turn OFF the vehicle using the POWER button.
Information
If charging is initiated without the gear in
P (Park), charging will start only after the
gear is automatically shifted to P (Park).
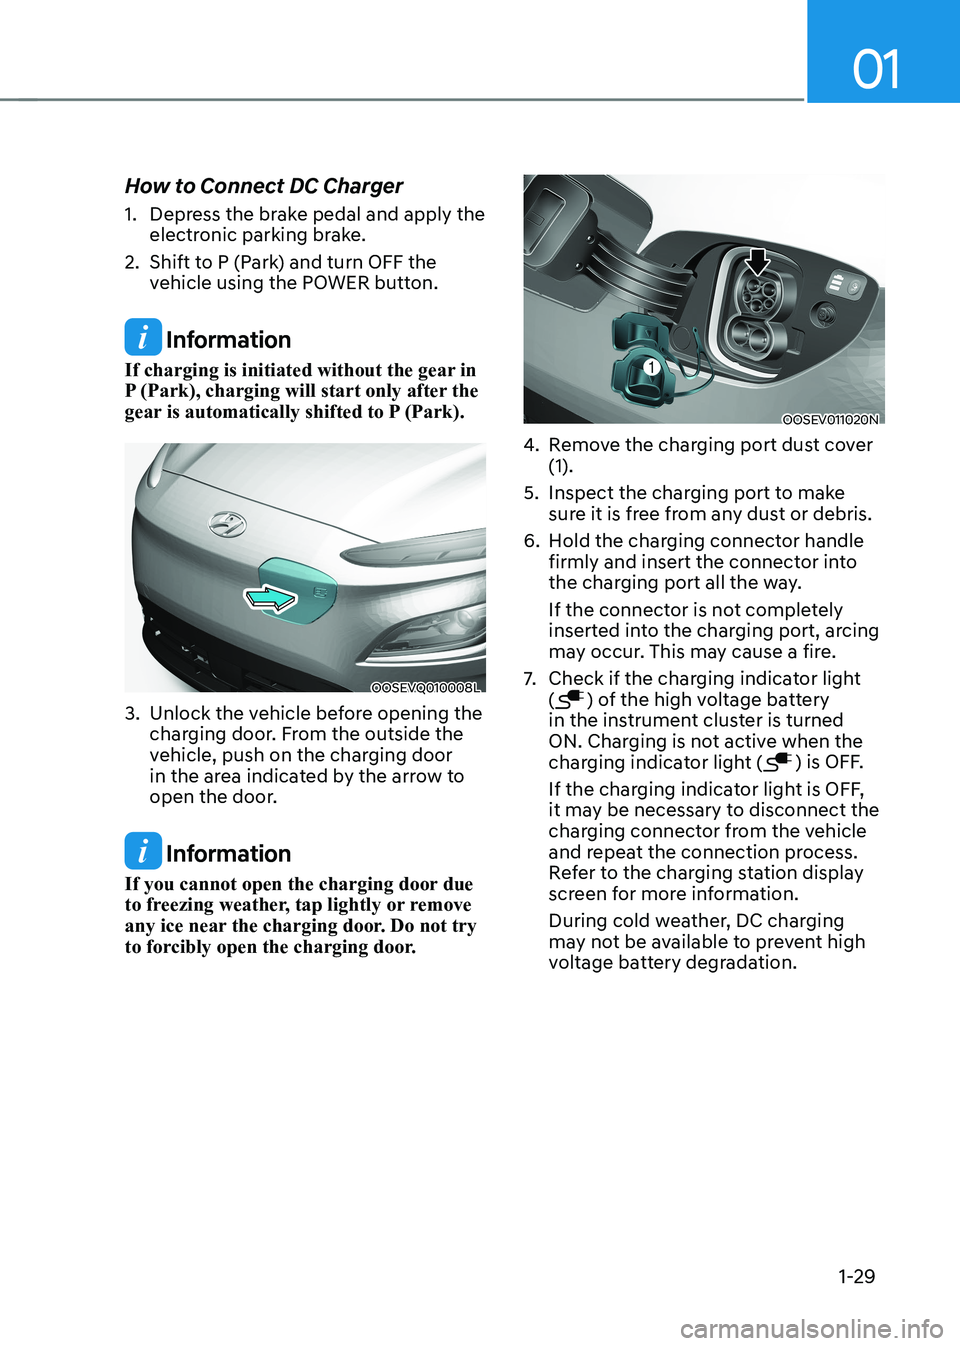
OOSEVQ010008L
3. Unlock the vehicle before opening the charging door. From the outside the
vehicle, push on the charging door
in the area indicated by the arrow to
open the door.
Information
If you cannot open the charging door due
to freezing weather, tap lightly or remove
any ice near the charging door. Do not try
to forcibly open the charging door.
OOSEV011020N
4. Remove the charging port dust cover (1).
5. Inspect the charging port to make sure it is free from any dust or debris.
6. Hold the charging connector handle firmly and insert the connector into
the charging port all the way.
If the connector is not completely
inserted into the charging port, arcing
may occur. This may cause a fire.
7. Check if the charging indicator light (
) of the high voltage battery
in the instrument cluster is turned
ON. Charging is not active when the
charging indicator light (
) is OFF.
If the charging indicator light is OFF,
it may be necessary to disconnect the
charging connector from the vehicle
and repeat the connection process.
Refer to the charging station display
screen for more information.
During cold weather, DC charging
may not be available to prevent high
voltage battery degradation.
Page 40 of 548
01
1-35
How to Connect Portable Charger
(ICCB: In-Cable Control Box)
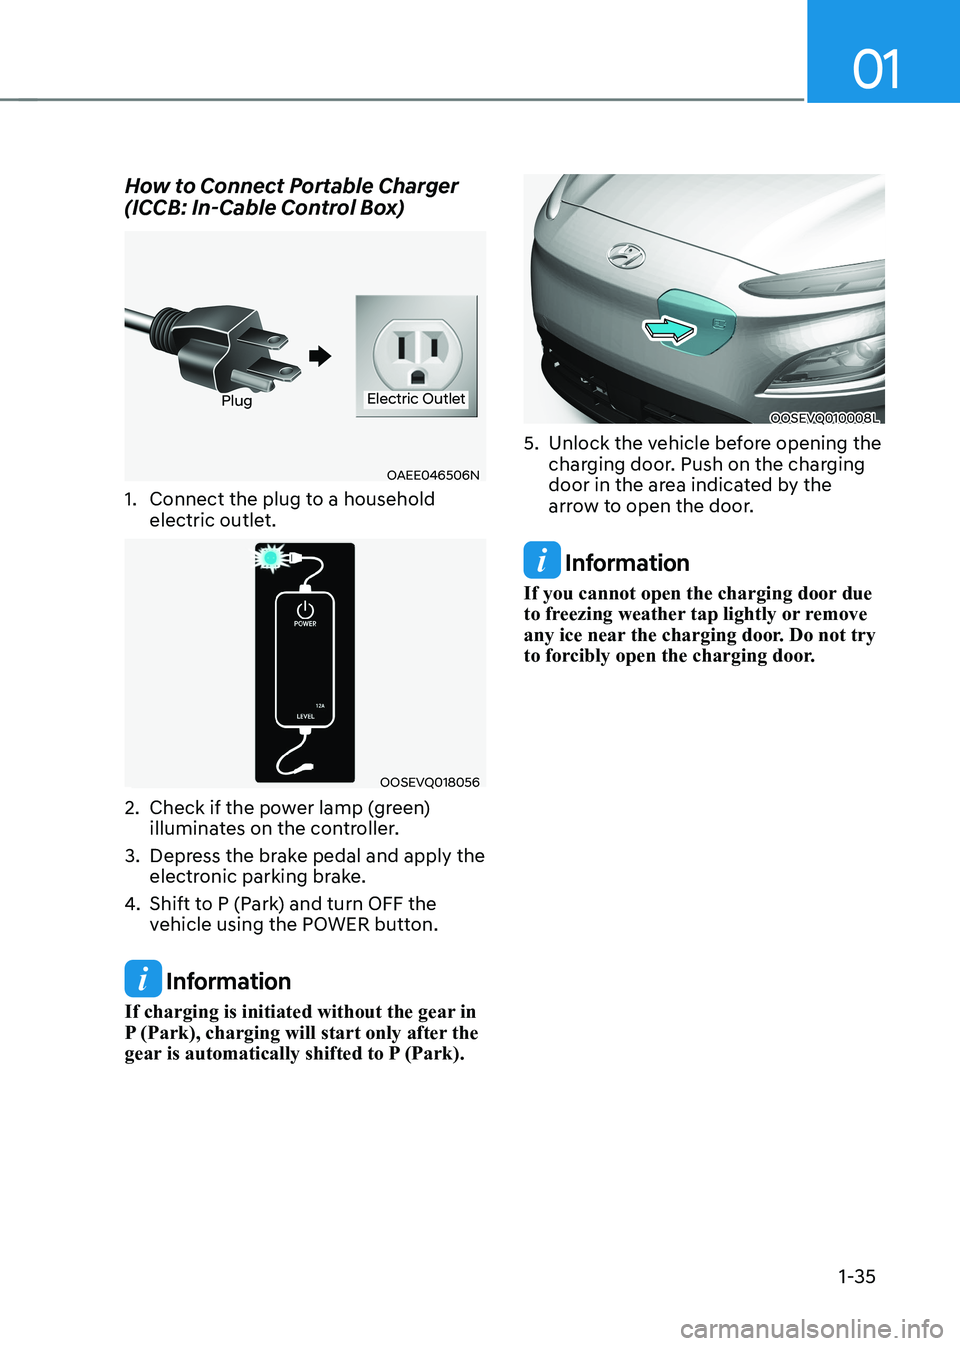
OAEE046506N
PlugElectric Outlet
1. Connect the plug to a household electric outlet.
OOSEVQ018056
2. Check if the power lamp (green) illuminates on the controller.
3. Depress the brake pedal and apply the electronic parking brake.
4. Shift to P (Park) and turn OFF the
vehicle using the POWER button.
Information
If charging is initiated without the gear in
P (Park), charging will start only after the
gear is automatically shifted to P (Park).
OOSEVQ010008L
5. Unlock the vehicle before opening the charging door. Push on the charging
door in the area indicated by the
arrow to open the door.
Information
If you cannot open the charging door due
to freezing weather tap lightly or remove
any ice near the charging door. Do not try
to forcibly open the charging door.
Page 50 of 548
01
1-45
driVing and operaTing inFormaTion
How to Start the Vehicle
1. Holding the smart key, sit in the driver’s seat.
2. Fasten the seat belt before starting the vehicle.
3. Make sure to engage the parking brake.
4. Turn OFF all electrical devices.
5. Make sure to depress and hold the brake pedal.
6. While depressing the brake pedal, shift to P (Park).
7. Depress and hold the brake pedal
while pressing the Start/Stop button.
8. When the “
” indicator is ON, you
can drive the vehicle. When the “
” indicator is OFF, you
cannot drive the vehicle. Start the
vehicle again.
9. Depress and hold the brake pedal and
shift to the desired position.
Information
While the charging cable is connected, the
gear cannot be shift from P (Park) to any
other gear for safety reasons.
10. Release the parking brake and slowly release the brake pedal. Check if the
vehicle slowly moves forward, then
depress the accelerator pedal.
How to Stop the Vehicle
1. Hold down the brake pedal while the
vehicle is parked.
2. While depressing the brake pedal, shift to P (Park).
3. While depressing the brake pedal, engage the parking brake.
4. While depressing the brake pedal,
press the Start/Stop button and turn
off the vehicle.
5. Check if the “
” indicator is turned
OFF on the instrument cluster. When the “
” indicator is ON and
the gear is in a position other than
P (Park), the driver can accidently
depress the accelerator pedal, causing
the vehicle to move unexpectedly.
Page 64 of 548
01
1-59
WARNING
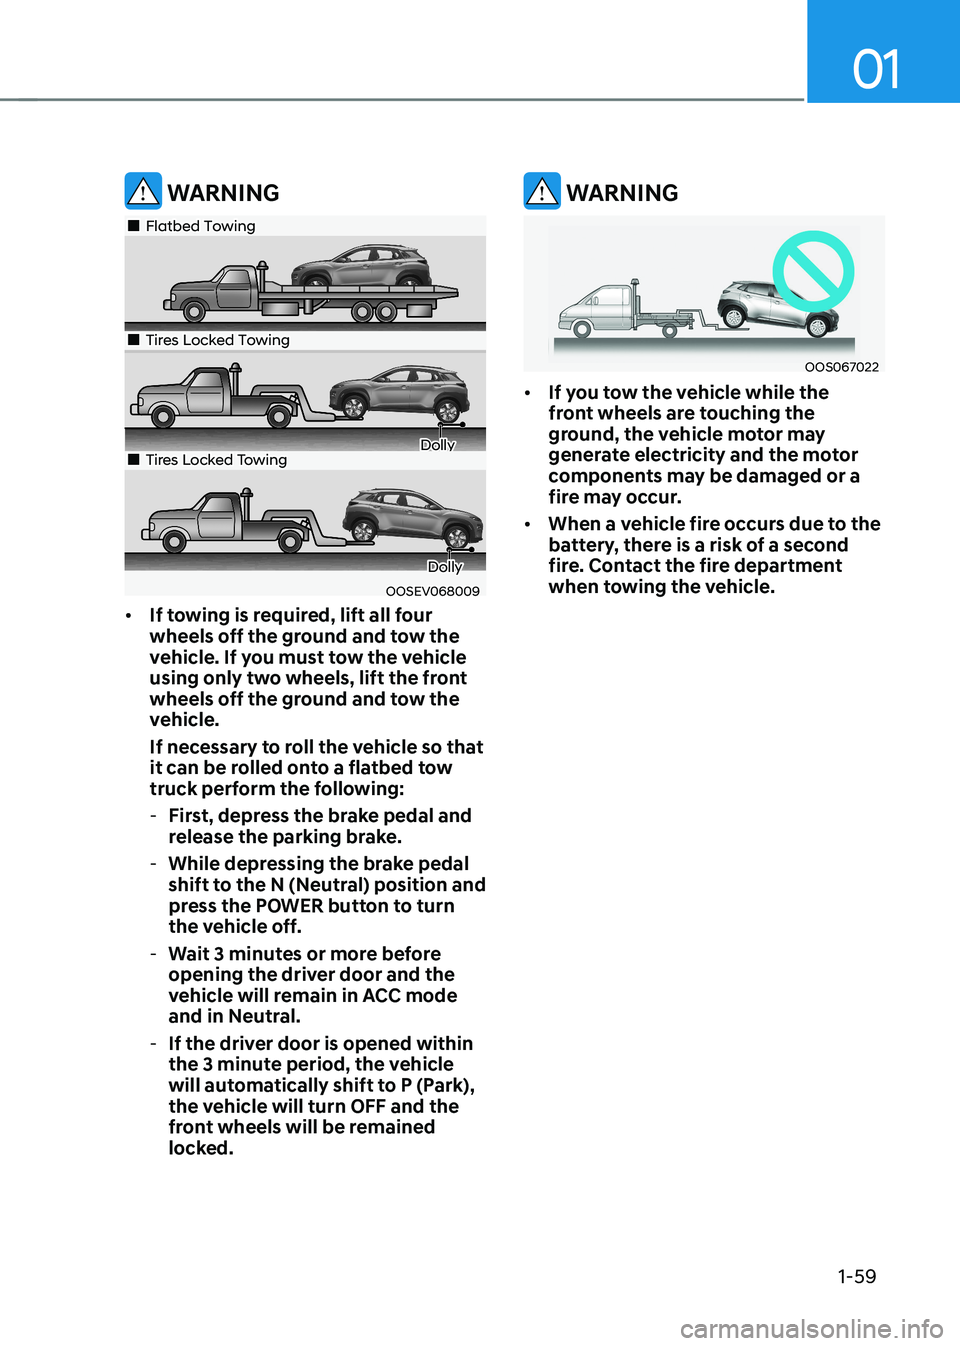
OOSEV068009
„„Flatbed Towing
„„Tires Locked Towing
Dolly„„Tires Locked Towing
Dolly
• If towing is required, lift all four
wheels off the ground and tow the
vehicle. If you must tow the vehicle
using only two wheels, lift the front
wheels off the ground and tow the
vehicle.
If necessary to roll the vehicle so that
it can be rolled onto a flatbed tow
truck perform the following:
- First, depress the brake pedal and
release the parking brake.
- While depressing the brake pedal
shift to the N (Neutral) position and
press the POWER button to turn
the vehicle off.
- Wait 3 minutes or more before
opening the driver door and the
vehicle will remain in ACC mode
and in Neutral.
- If the driver door is opened within
the 3 minute period, the vehicle
will automatically shift to P (Park),
the vehicle will turn OFF and the
front wheels will be remained
locked.
WARNING
OOS067022
• If you tow the vehicle while the
front wheels are touching the
ground, the vehicle motor may
generate electricity and the motor
components may be damaged or a
fire may occur.
• When a vehicle fire occurs due to the
battery, there is a risk of a second
fire. Contact the fire department
when towing the vehicle.
Page 70 of 548
2-5
02
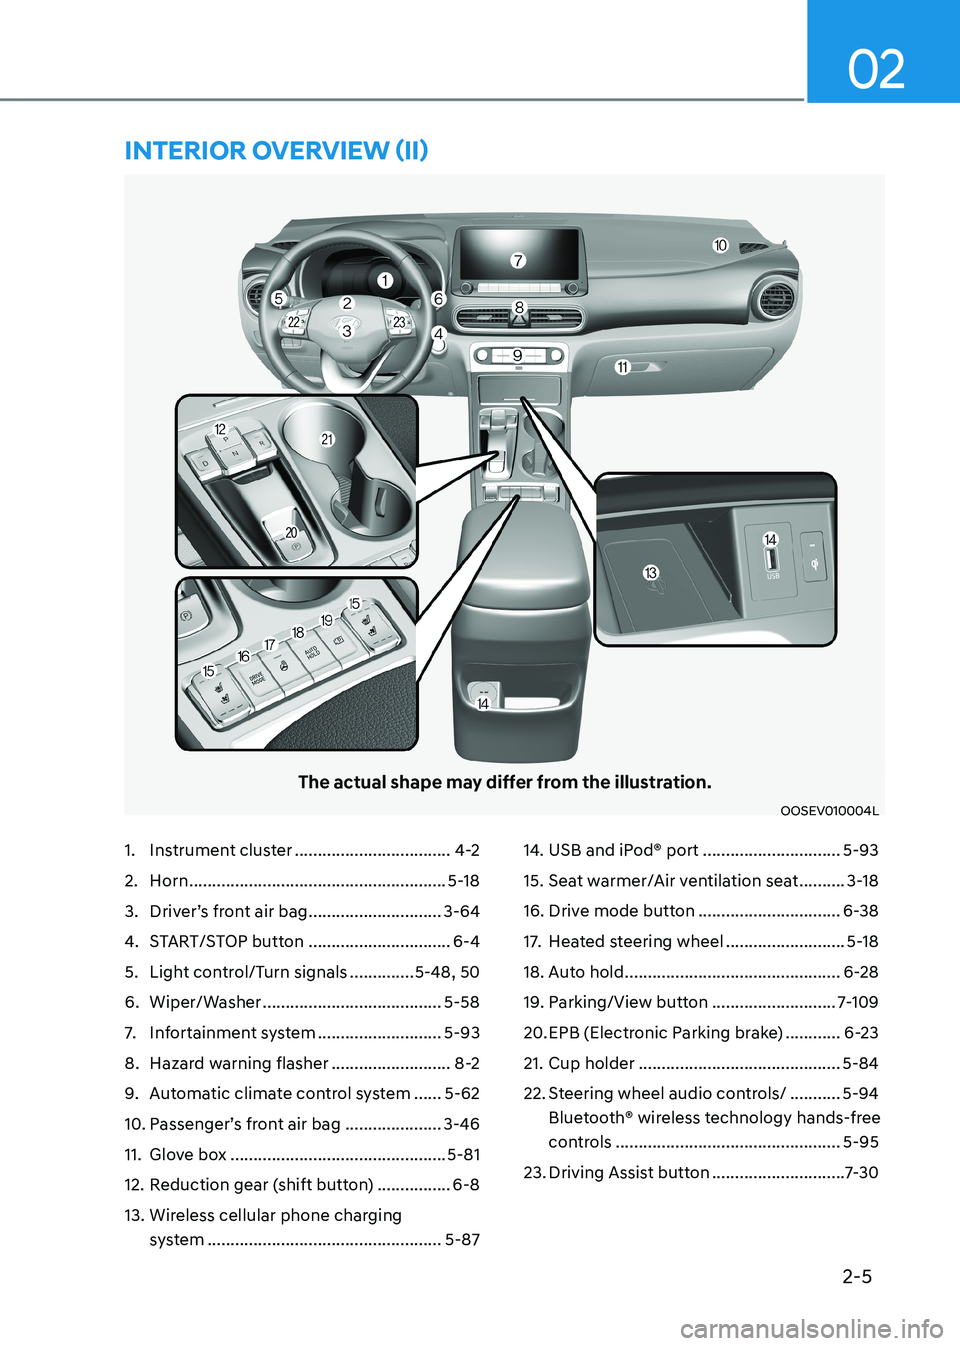
The actual shape may differ from the illustration.
OOSEV010004L
1. Instrument cluster ..................................4-2
2. Horn ........................................................ 5-18
3. Driver’s front air bag .............................3-64
4. START/STOP button ...............................6-4
5. Light control/Turn signals ..............5-48, 50
6. Wiper/Washer ....................................... 5-58
7. Infortainment system ...........................5-93
8. Hazard warning flasher ..........................8-2
9. Automatic climate control system ......5-62
10. Passenger’s front air bag ..................... 3-46
11. Glove box ............................................... 5-81
12. Reduction gear (shift button) ................6-8
13. Wireless cellular phone charging system ................................................... 5-8714. USB and iPod® port
..............................5-93
15. Seat warmer/Air ventilation seat ..........3-18
16. Drive mode button ...............................6-38
17. Heated steering wheel ..........................5-18
18. Auto hold ............................................... 6-28
19. Parking/View button ...........................7-109
20. EPB (Electronic Parking brake) ............6-23
21. Cup holder ............................................ 5-84
22. Steering wheel audio controls/ ...........5-94
Bluetooth® wireless technology hands-free
controls ................................................. 5-95
23. Driving Assist button .............................7-30
intErior ovErviEw (ii)
Page 91 of 548
Safety system
3-12
CAUTION
Damaging rear seat belt buckles
When you fold the rear seatback, insert
the buckle in the pocketbetween the
rear seatback and cushion. Doing so
can prevent the buckle from being
damaged by the rear seatback.
WARNING
Make sure the vehicle is off, the vehicle
is shifted to P (Park), and the parking
brake is securely applied whenever
loading or unloading cargo. Failure to
take these steps may allow the vehicle
to move if the shift lever is inadvertently
moved to another position.
CAUTION
• Be careful when loading cargo
through the rear passenger seats
to prevent damage to the vehicle
interior.
• When cargo is loaded through the
rear passenger seats, ensure the
cargo is properly secured to prevent
it from moving while driving.
• Unsecured cargo in the passenger
compartment can cause damage
to the vehicle or injury to it’s
occupants.
WARNING
Cargo should always be secured to
prevent it from being thrown about the
vehicle in a collision and causing injury
to the vehicle occupants. Do not place
objects in the rear seats, since they
cannot be properly secured and may hit
the front seat occupants in a collision. Armrest (if equipped)
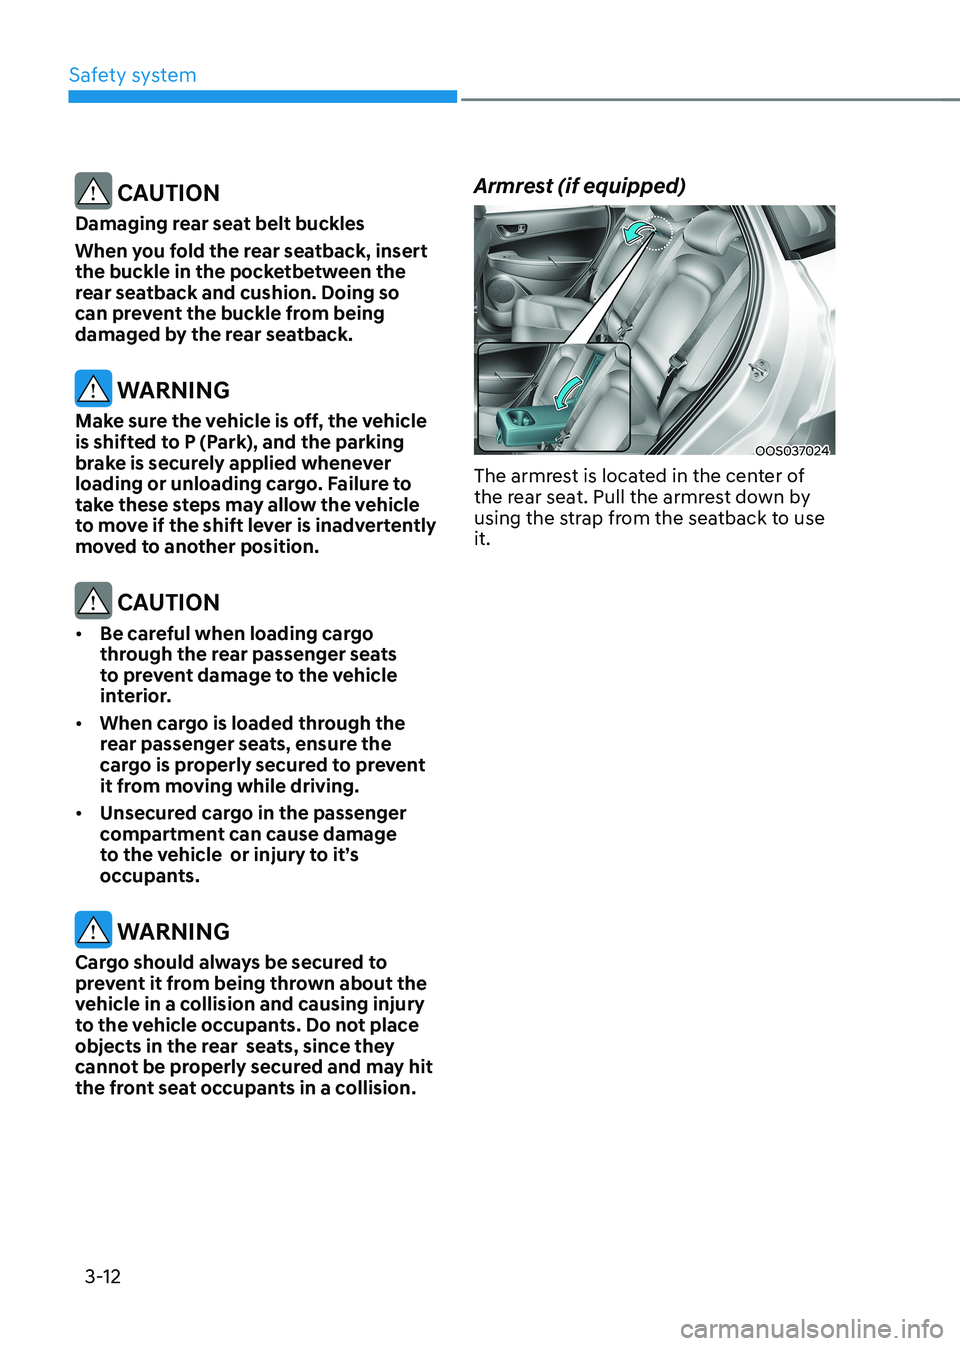
OOS037024
The armrest is located in the center of
the rear seat. Pull the armrest down by
using the strap from the seatback to use it.