2022 HYUNDAI KONA EV key
[x] Cancel search: keyPage 50 of 548
01
1-45
driVing and operaTing inFormaTion
How to Start the Vehicle
1. Holding the smart key, sit in the driver’s seat.
2. Fasten the seat belt before starting the vehicle.
3. Make sure to engage the parking brake.
4. Turn OFF all electrical devices.
5. Make sure to depress and hold the brake pedal.
6. While depressing the brake pedal, shift to P (Park).
7. Depress and hold the brake pedal
while pressing the Start/Stop button.
8. When the “
” indicator is ON, you
can drive the vehicle. When the “
” indicator is OFF, you
cannot drive the vehicle. Start the
vehicle again.
9. Depress and hold the brake pedal and
shift to the desired position.
Information
While the charging cable is connected, the
gear cannot be shift from P (Park) to any
other gear for safety reasons.
10. Release the parking brake and slowly release the brake pedal. Check if the
vehicle slowly moves forward, then
depress the accelerator pedal.
How to Stop the Vehicle
1. Hold down the brake pedal while the
vehicle is parked.
2. While depressing the brake pedal, shift to P (Park).
3. While depressing the brake pedal, engage the parking brake.
4. While depressing the brake pedal,
press the Start/Stop button and turn
off the vehicle.
5. Check if the “
” indicator is turned
OFF on the instrument cluster. When the “
” indicator is ON and
the gear is in a position other than
P (Park), the driver can accidently
depress the accelerator pedal, causing
the vehicle to move unexpectedly.
Page 157 of 548

Instrument cluster
4-14
Immobilizer Indicator Light
This indicator light illuminates for up to 30 seconds:
•
When the vehicle detects the smart
key in the vehicle with the START/
STOP button in the ACC or ON position.
- At this time, you can start the vehicle.
- The indicator light goes off after starting the vehicle.
This indicator light blinks for a few seconds:
• When the smart key is not in the
vehicle.
- At this time, you cannot start the vehicle.
This indicator light illuminates for 2 seconds and goes off:
• If the smart key is in the vehicle and
the START/STOP button is ON, but the
vehicle cannot detect the smart key.
In this case, we recommend that
you have the vehicle inspected by an
authorized HYUNDAI dealer.
This indicator light blinks:
• When the battery voltage of the smart
key is low.
- At this time, you cannot start the vehicle. However, you can start the
vehicle if you press the START/STOP
button with the smart key. (For
more details, refer to “Starting the
vehicle” in chapter 6).
• When there is a malfunction with the
immobilizer system.
In this case, we recommend that
you have the vehicle inspected by an
authorized HYUNDAI dealer. Turn Signal Indicator Light
This indicator light blinks:
•
When you operate the turn signals.
If any of the following occur, there may be a malfunction with the turn signal
system. - The turn signal indicator light illuminates but does not blink
- The turn signal indicator light blinks rapidly
- The turn signal indicator light does not illuminate at all
If any of these conditions occur, we
recommend that you have your vehicle
inspected by an authorized HYUNDAI
dealer.
Low Beam Indicator Light
This indicator light illuminates:
• When the headlamps are on.
High Beam Indicator Light
This indicator light illuminates:
• When the headlamps are on and in the high beam position.
• When the turn signal lever is pulled
into the Flash-to-Pass position.
Page 160 of 548
04
4-17
lcD DIsplay messages
Shift to P
This warning message is displayed if you
try to turn off the vehicle when the gear
is not in the P (Park) position.
At this time, the START/STOP button
changes to the ACC position (If you press
the START/STOP button once more, it will
turn to the ON position).
Low key battery
This warning message is displayed if the
battery of the smart key is discharged
while changing the START/STOP button
to the OFF position.
Press START/STOP button while turning wheel
This warning message is displayed if the
steering wheel does not unlock normally
when the START/STOP button is pressed.
You should press the START/STOP button
while turning the steering wheel right
and left.
Check steering wheel lock system
This warning message is displayed if the
steering wheel does not lock normally
while the START/STOP button changes to the OFF position.
Press brake pedal to start vehicle
This warning message is displayed if the
START/STOP button changes to the ACC
position twice by pressing the button
repeatedly without depressing the brake pedal.
You can start the vehicle by depressing
the brake pedal.Key not in vehicle
This warning message is displayed if the
smart key is not in the vehicle when you
press the START/STOP button.
When attempting to start the vehicle,
always have the smart key with you.
Key not detected
This warning message is displayed if the
smart key is not detected when you press
the START/STOP button.
Press START/STOP button again
This message is displayed if you were
unable to start the vehicle when the
START/STOP button was pressed.
If this occurs, attempt to start the vehicle
by pressing the START/STOP button again.
If the warning message appears each
time you press the START/STOP button,
we recommend you to have your vehicle
inspected by an authorized Hyundai
dealer.
Press START/STOP button with key
This warning message is displayed if you
press the START/STOP button while the
warning message "Key not detected" is
displayed.
At this time, the immobilizer indicator
light blinks.
Page 179 of 548
Instrument cluster
4-36
5. Lights
Items Explanation
IlluminationTo adjust the illumination level. •
Level 1~20
One Touch
Turn Signal •
Off : The one touch turn signal function will be deactivated.
• 3, 5, 7 Flashes : The turn signal indicator will blink 3, 5, or 7 times when
the turn signal lever is moved slightly.
For more details, refer to “Lighting” in chapter 5.
Headlight Delay To activate or deactivate the headlamp delay function.
For more details, refer to "Lighting" in chapter 5.
High Beam Assist To activate or deactivate High Beam Assist.
For more details, refer to "High Beam Assist (HBA)" in chapter 5.
6. Door
Items Explanation
Auto lock
•
Disable: The auto door lock operation will be canceled.
• Enable on speed: All doors will be automatically locked when the vehicle
speed exceeds 15 km/h (9.3 mph).
• Enable on shift: All doors will be automatically locked if the vehicle is
shifted from the P (Park) position to the R (Reverse), N (Neutral), or D
(Drive) position (Only when the vehicle is in the ready mode).
Auto unlock
• Disable: The auto door unlock operation will be canceled.
• Vehicle Off: All doors will be automatically unlocked when the START/
STOP button is set to the OFF position.
• On shift to P: All doors will be automatically unlocked if the gear is shifted
to the P (Park) position (Only when the vehicle is in the ready mode).
Two press unlock •
Off: The two press unlock function will be deactivated. Therefore, all
doors will unlock if the door unlock button is pressed.
• On: Only the driver's door will unlock if the door unlock button is pressed.
When the door unlock button is pressed again within 4 seconds, the
remaining doors will unlock.
Horn
feedback To activate or deactivate the horn feedback.
If the horn feedback is activated, after locking the door by pressing the lock
button on the smart key, and pressing it again within 4 seconds, the horn
feedback sound will operate once to indicate that all doors are locked (if
equipped with smart key).
Page 180 of 548
04
4-37
7. Convenience
Items Explanation
Rear
Occupant AlertTo activate or deactivate the Rear Occupant Alert.
For more details, refer to "Rear Occupant Alert (ROA) system" in chapter 5.
Welcome
Mirror/Light To activate or deactivate the welcome mirror/light function.
When activated, the outside rearview mirrors are unfolded if approached
with the smart key.
For more details, refer to ''Welcome System'' in chapter 5."
Wireless
Charging System To activate or deactivate the wireless charging system in the front seat.
For more details, refer to "Wireless cellular phone charging system" in
chapter 5.
Auto Rear
Wiper (in R) To activate or deactivate the rear wiper while the vehicle is in reverse with
the front wiper ON.
Service
Interval •
Service Interval
To activate or deactivate the service interval function. • Adjust Interval
If the service interval menu is activated, you may adjust the time and
distance. • Reset
To reset the service interval.
Page 183 of 548
Instrument cluster
4-40
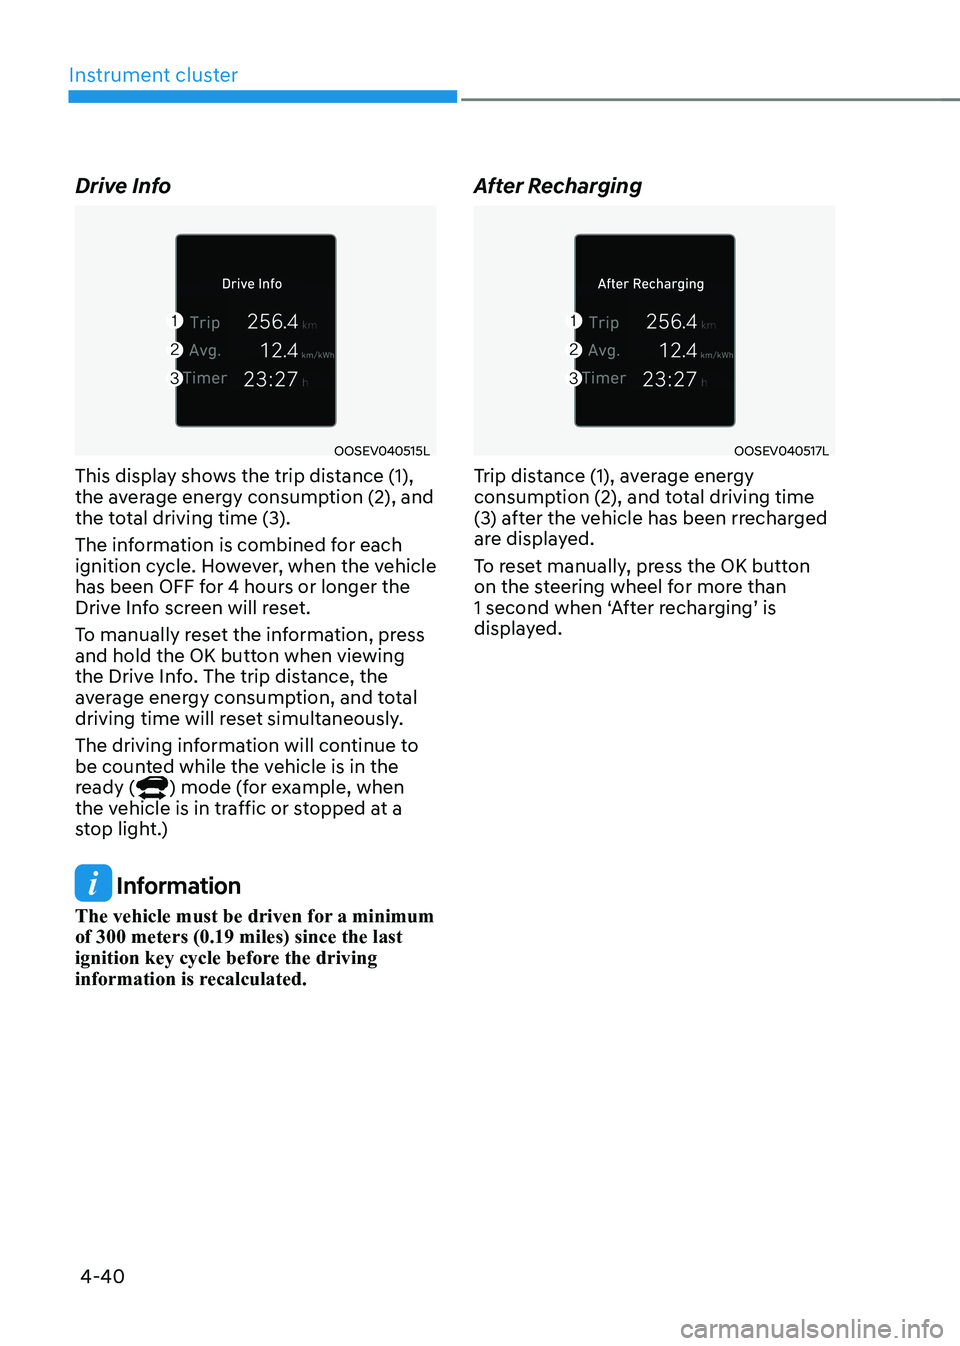
Drive Info
OOSEV040515L
This display shows the trip distance (1),
the average energy consumption (2), and
the total driving time (3).
The information is combined for each
ignition cycle. However, when the vehicle
has been OFF for 4 hours or longer the
Drive Info screen will reset.
To manually reset the information, press
and hold the OK button when viewing
the Drive Info. The trip distance, the
average energy consumption, and total
driving time will reset simultaneously.
The driving information will continue to
be counted while the vehicle is in the
ready (
) mode (for example, when
the vehicle is in traffic or stopped at a
stop light.)
Information
The vehicle must be driven for a minimum of 300 meters (0.19 miles) since the last
ignition key cycle before the driving
information is recalculated. After Recharging
OOSEV040517L
Trip distance (1), average energy
consumption (2), and total driving time
(3) after the vehicle has been rrecharged
are displayed.
To reset manually, press the OK button
on the steering wheel for more than
1 second when ‘After recharging’ is
displayed.
Page 184 of 548
04
4-41
Accumulated info
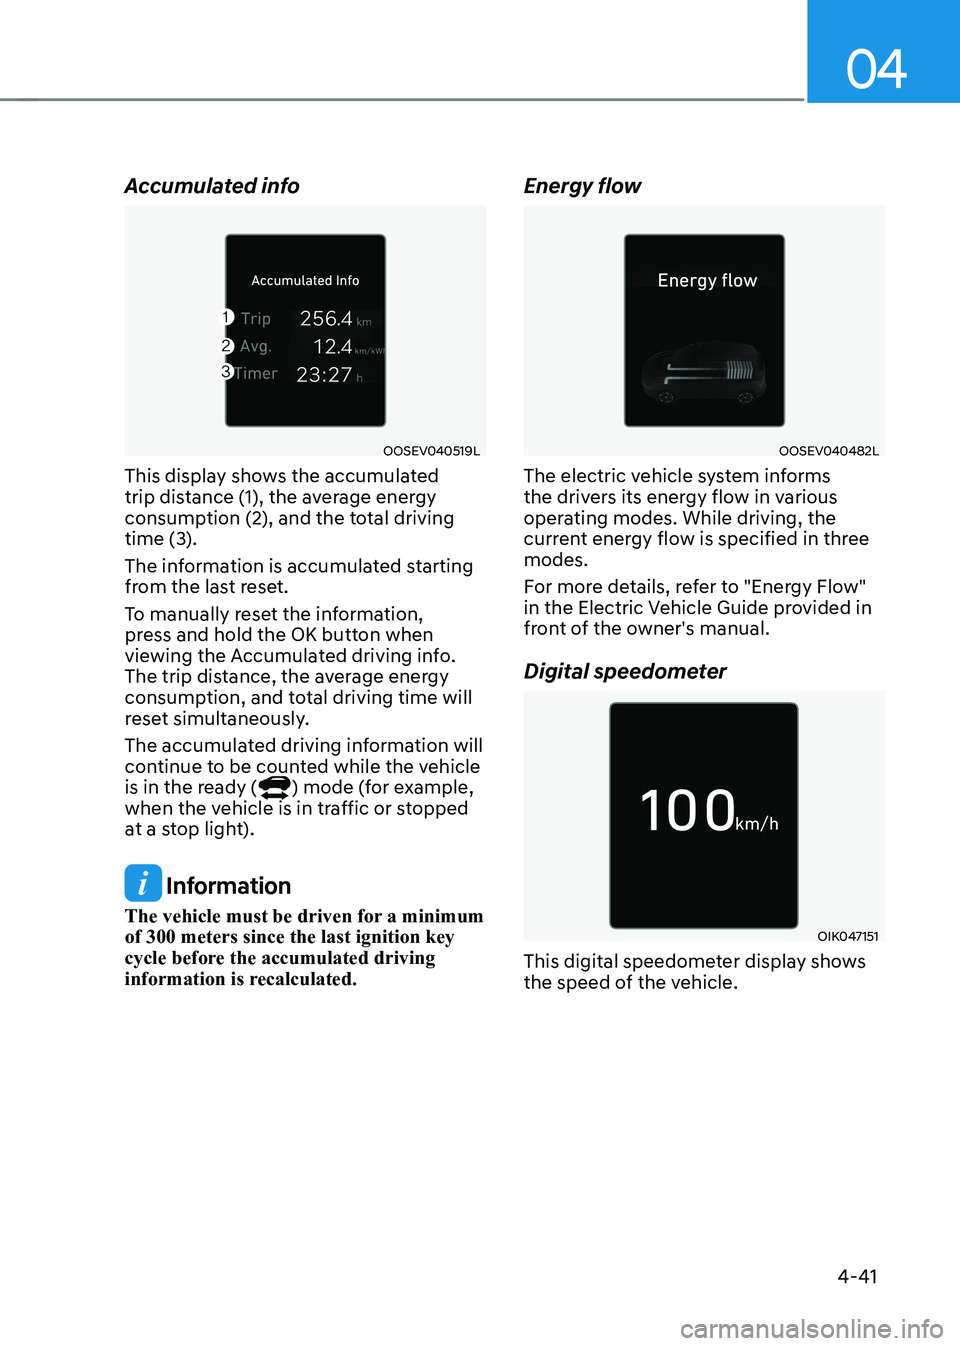
OOSEV040519L
This display shows the accumulated
trip distance (1), the average energy
consumption (2), and the total driving
time (3).
The information is accumulated starting
from the last reset.
To manually reset the information,
press and hold the OK button when
viewing the Accumulated driving info.
The trip distance, the average energy
consumption, and total driving time will
reset simultaneously.
The accumulated driving information will
continue to be counted while the vehicle
is in the ready (
) mode (for example,
when the vehicle is in traffic or stopped
at a stop light).
Information
The vehicle must be driven for a minimum of 300 meters since the last ignition key
cycle before the accumulated driving
information is recalculated. Energy flow
OOSEV040482L
The electric vehicle system informs
the drivers its energy flow in various
operating modes. While driving, the
current energy flow is specified in three modes.
For more details, refer to "Energy Flow"
in the Electric Vehicle Guide provided in
front of the owner's manual.
Digital speedometer
OIK047151
This digital speedometer display shows
the speed of the vehicle.
Page 185 of 548
5
Accessing your vehicle ..................................................................................... 5-4
Smart key .................................................................................................................... 5-4
Immobilizer system ...................................................................................................... 5-9
Door locks .................................................................................................................. 5-10
Operating door locks from outside the vehicle........................................................ 5-10
Operating door locks from inside the vehicle ...........................................................5-11
Auto door lock/unlock features..................................................................................5-13
Child-protector rear door locks ................................................................................. 5-14
Rear Occupant Alert (ROA) ....................................................................................... 5-14
Theft-alarm system .......................................................................................... 5-15
Steering wheel ................................................................................................. 5-16
Electric power steering (EPS) .................................................................................... 5-16
Tilt steering/Telescopic steering ................................................................................ 5-17
Heated steering wheel ............................................................................................... 5-18
Horn............................................................................................................................. 5-18
Mirrors .............................................................................................................. 5-19
Inside rearview mirror ................................................................................................ 5-19
Outside rearview mirror ............................................................................................. 5-30
Windows .......................................................................................................... 5-33
Power windows .......................................................................................................... 5-33
Sunroof ............................................................................................................. 5-37
Sunroof opening and closing .................................................................................... 5-38
Sliding the sunroof ..................................................................................................... 5-38
Tilting the sunroof ...................................................................................................... 5-39
Sunshade .................................................................................................................... 5-39
Resetting the sunroof ................................................................................................ 5-39
Sunroof open warning .............................................................................................. 5-40
Exterior features ............................................................................................... 5-41
Hood ............................................................................................................................ 5-41
Tailgate ........................................................................................................................ 5-43
Charging door ............................................................................................................. 5-45
Head Up Display (HUD) .................................................................................. 5-46
Precautions while using the head up display ..........................................................5-46
Head Up Display ON/OFF .......................................................................................... 5-47
Head Up Display Information .................................................................................... 5-47
Head Up Display Setting ............................................................................................ 5-47
5. Convenient features