Page 301 of 444

7-54
Driving your vehicle
Don’t let your parking brake freeze
Under some conditions your parking
brake can freeze in the engaged
position. This is most likely to happen
when there is an accumulation of snow
or ice around or near the rear brakes or
if the brakes are wet. If there is a risk
the parking brake may freeze, apply
it only temporarily while you put the
shift lever in N (for Automated Manual
Transmission) or in first or reverse gear
(for manual transmission) and block the
rear wheels so the vehicle cannot roll.
Then release the parking brake.
Don’t let ice and snow accumulate
underneath
Under some conditions, snow and ice
can build up under the fenders and
interfere with the steering. When driving
in severe winter conditions where this
may happen, you should periodically
check underneath the car to be sure the
movement of the front wheels and the
steering components is not obstructed.
Carry emergency equipment
Depending on the severity of the
weather, you should carry appropriate
emergency equipment. Some of the
items you may want to carry include tire
chains, tow straps or chains, flashlight,
emergency flares, sand, shovel, jumper
cables, window scraper, gloves, ground
cloth, coveralls, blanket, etc.
Don’t place foreign objects
or materials in the engine
compartment
Placement of foreign objects or
materials which prevent cooling of the
engine, in the engine compartment,
may cause a failure or combustion. The
manufacturer is not responsible for the
damage caused by such placement.
Page 354 of 444
10-15
10
MAINTENANCE
INTERVALS
MAINTENANCE ITEMNumber of months or driving distance, whichever comes first
Kmsx1,000
1.51020304050607080
Months
2 1224364860728496
Years
- 12345678
Power window / Sunroof operation (if equipped) I I IIIIIII
All seat belt operationIIIIIIIII
Road test - - - I - - - - INORMAL MAINTENANCE SCHEDULE - PETROL ENGINE (CONT.)I : Inspect and if necessary adjust,top-up, clean or replace
R : ReplaceC : Clean and Replace if necessary
Page 360 of 444
10-21
10
MAINTENANCE
INTERVALS
MAINTENANCE ITEMNumber of months or driving distance, whichever comes first
Kmsx1,000
1.51020304050607080
Months
2 1224364860728496
Years
- 12345678
Power window / Sunroof operation (if equipped) I I IIIIIII
All seat belt operation IIIIIIIII
Road test - - - I---- INORMAL MAINTENANCE SCHEDULE - DIESEL ENGINEI : Inspect and if necessary adjust,top-up, clean or replace
R : Replace
Page 384 of 444

10-45
10
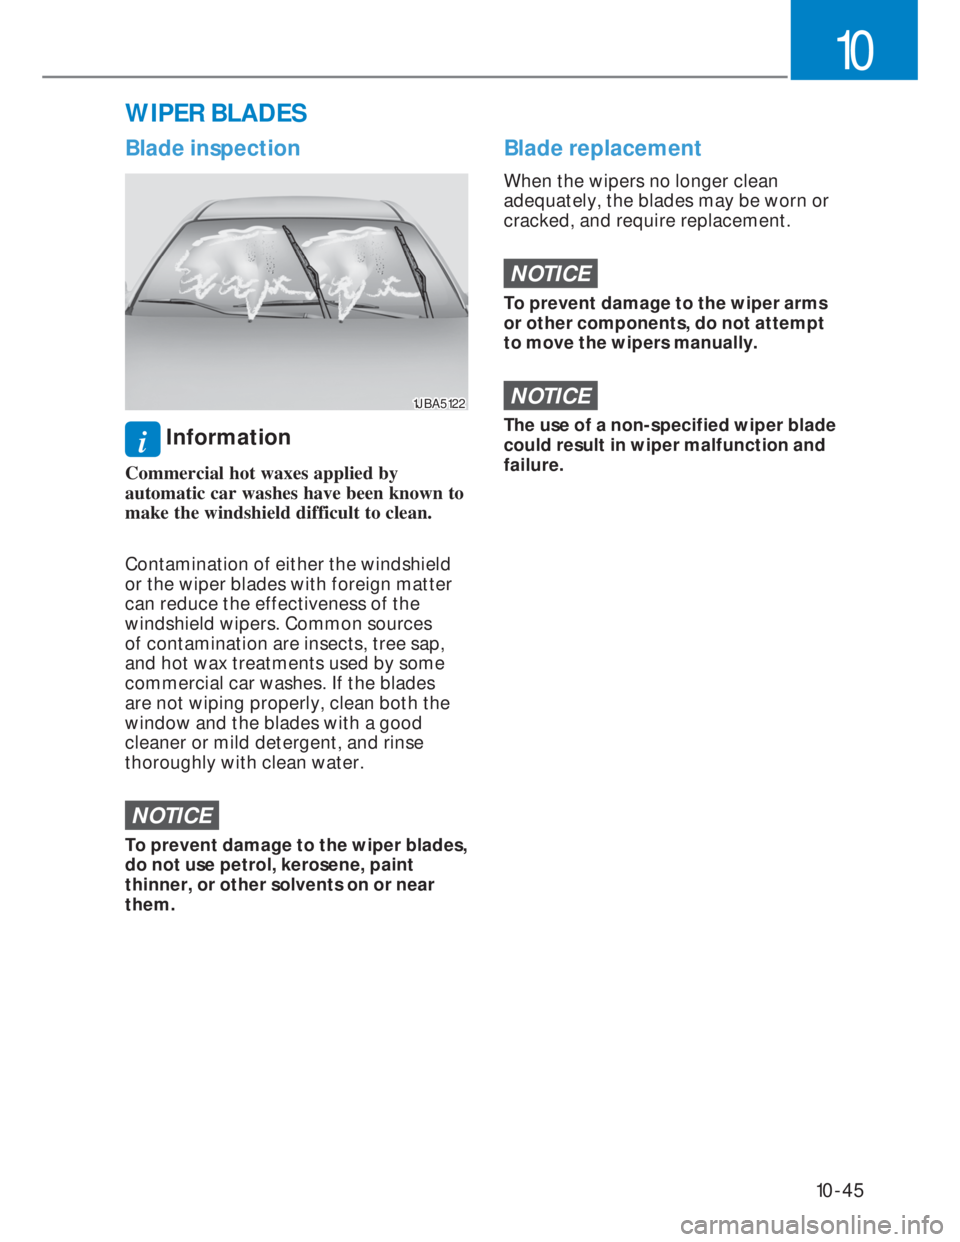
Blade inspection
1JBA51221JBA5122
i Information
Commercial hot waxes applied by
automatic car washes have been known to
make the windshield difficult to clean.
Contamination of either the windshield
or the wiper blades with foreign matter
can reduce the effectiveness of the
windshield wipers. Common sources
of contamination are insects, tree sap,
and hot wax treatments used by some
commercial car washes. If the blades
are not wiping properly, clean both the
window and the blades with a good
cleaner or mild detergent, and rinse
thoroughly with clean water.
NOTICE
To prevent damage to the wiper blades,
do not use petrol, kerosene, paint
thinner, or other solvents on or near
them.
Blade replacement
When the wipers no longer clean
adequately, the blades may be worn or
cracked, and require replacement.
NOTICE
To prevent damage to the wiper arms
or other components, do not attempt
to move the wipers manually.
NOTICE
The use of a non-specified wiper blade
could result in wiper malfunction and
failure.
WIPER BLADES
Page 386 of 444
10-47
10
Rear window wiper blade
(if equipped)
OLMB073023OLMB073023
1. Raise the wiper arm and rotate the
wiper blade assembly (1).
2. Pull out the wiper blade assembly.
OLMB073024OLMB073024
3. Install the new blade assembly by
inserting the center part into the slot
in the wiper arm until it clicks into
place.
4. Make sure the blade assembly is
installed firmly by trying to pull it
slightly.
To prevent damage to the wiper arms
or other components, we recommend
that the wiper blade be replaced by an
authorized HYUNDAI dealer.
Page 390 of 444
10-51
10
WARNING
• Before performing maintenance or
recharging the battery, turn off all
accessories and stop the engine.
• The negative battery cable must be
removed first and installed last when
the battery is disconnected.
Reset items
Items should be reset after the battery
has been discharged or the battery has
been disconnected.
• Auto up/down window
(See chapter 5)
• Climate control system
(See chapter 5)
• Audio (See chapter 5)
Battery replacement
Replacing a Battery required
precautionary measures.
We recommend that you consult an
authorized HYUNDAI dealer.
Page 406 of 444
10-67
10
Fuse NameSymbolFuse
ratingCircuit Protected
HEATED
MIRROR10A RR HEATED MIRROR, ECU
SAFETY
P/WINDOW
25A SAFETY ECU
P/WINDOW
RH
25A POWER WINDOW MOTOR
TCU2
10ADCT/ECLUTCH/TCU, S_MODE_SW/ATM_LEVER,
INHIBITOR SW
MODULE 8
10A MUT/VDMS/MOOD_LAMP_UNIT
MEMORY
10A CLUSTER, FATC, MTC
AMP
25A EXT. AMP
SUNROOF
15A SUNROOF MOTOR
P/WINDOW
LH
25A POWER WINDOW MOTOR
SENSOR7
10A FUEL_WATER_SNSR, GLOW_RLY_UNIT
MODULE 2
10A O/S MIRR SW, AMP, IBU,AUDIO
MULTIMEDIA
20A AUDIO
AIR BAG
10A ACU
POWER
OUTLET
15A POWER OUTLET
Inner Compartment Fuse Panel (ICU)
Page 410 of 444
10-71
10
Engine Compartment Fuse Panel (1.0 T-GDi)
Fuse Name SymbolFuse
RatingCircuit Protected
ALT150A Alternator, Multi Fuse - F3, Fuse - F32/F33/F34/F35
MDPS
80A MDPS Unit
DCT1
40A TCU
E-CLUTCH1
40A Electronic Clutch Module
DCT2
40A TCU
ECU1
30A E/R Junction Block (RLY.1)
IG1
30A[With Smart Key] PDM Relay Box (IG1, ACC Relay)
[W/O Smart Key] Ignition Switch
FUEL PUMP
20A E/R Junction Block (RLY.6)
ECU3
15A ECU
ECU2
15A ECU
A/CON 1
10A E/R Junction Block (RLY.3)
DCT4
40A Smart Gear Actuator
BATT4
40AICU Junction Block
(Power Window Relay, Fuse - F3/F10/F11)
BATT1
50A ICU Junction Block (IPS1, IPS3, IPS5, IPS7, IPS8, IPS11)
BATT3
40AICU Junction Block (Fuse - F8/F21/F25/F29,
Long Term Load Latch Relay)
DCT3
15A TCU
E-CLUTCH2
15A Electronic Clutch Module
HORN
15A E/R Junction Block (RLY.11, RLY.12)