2022 FORD MAVERICK bulb
[x] Cancel search: bulbPage 13 of 533
Driving Hints
Cold Weather Precautions
.......................273
Driving on Snow and Ice ...........................
273
Breaking-In ....................................................
273
Driving Economically .................................
273
Driving in Special Conditions ..................
274
Driving Through Shallow Water .............
275
Floor Mats ......................................................
276
Crash and Breakdown Information
Roadside Assistance .................................
278
High Voltage Battery Vehicle Precautions - Hybrid Electric Vehicle (HEV) .........
279
Switching the Hazard Flashers On and Off ................................................................
280
Jump Starting the Vehicle .......................
280
Post-Crash Alert System .........................
283
Automatic Crash Shutoff ........................
284
Recovery Towing .........................................
284
Transporting the Vehicle .........................
286
Towing Your Vehicle
Towing Your Vehicle Precautions ..........
287
Recreationally Towing Your Vehicle - Gasoline, FWD .........................................
287
Recreationally Towing Your Vehicle - Gasoline, AWD .........................................
287
Recreationally Towing Your Vehicle - Hybrid Electric Vehicle (HEV) ............
287
Emergency Towing - Gasoline ...............
288
Emergency Towing - Hybrid Electric Vehicle (HEV) ..........................................
288
Towing Your Vehicle – Troubleshooting - Hybrid Electric Vehicle (HEV) .........
289
Fuses
Fuse Precautions ........................................
290
Under Hood Fuse Box ..............................
290
Body Control Module Fuse Box ............
296
Identifying Fuse Types .............................
298Fuses – Troubleshooting
.........................
298
Maintenance
Maintenance Precautions .......................
299
Opening and Closing the Hood .............
299
Under Hood Overview - 2.0L EcoBoost™ ........................................................................\
.
301
Under Hood Overview - 2.5L, Hybrid Electric Vehicle (HEV) ..........................
302
Engine Oil ......................................................
303
Checking the Coolant ...............................
304
Changing the Engine Air Filter - 2.0L EcoBoost™ ..............................................
308
Changing the Engine Air Filter - 2.5L, Hybrid Electric Vehicle (HEV) ...........
309
Changing the Fuel Filter ..........................
309
Drive Belt Routing Overview - 2.0L EcoBoost™ ...............................................
310
Changing the 12V Battery .........................
310
Adjusting the Headlamps .........................
312
Exterior Bulbs ................................................
313
Interior Bulbs .................................................
318
Vehicle Care
Cleaning Products .......................................
319
Cleaning the Exterior ..................................
319
Cleaning the Interior ...................................
321
Repairing Minor Paint Damage ..............
323
Waxing Your Vehicle ..................................
323
Body Styling Kits
Body Styling Kit Precautions ..................
324
Storing Your Vehicle
Preparing Your Vehicle for Storage ......
325
Removing Your Vehicle From Storage ........................................................................\
326
Wheel and Tire Information
Locating the Tire label ...............................
327
10
2022 Maverick (CFE) Canada/United States of America, enUSA, Edition date: 202106, First-Printing Table of Contents
Page 33 of 533
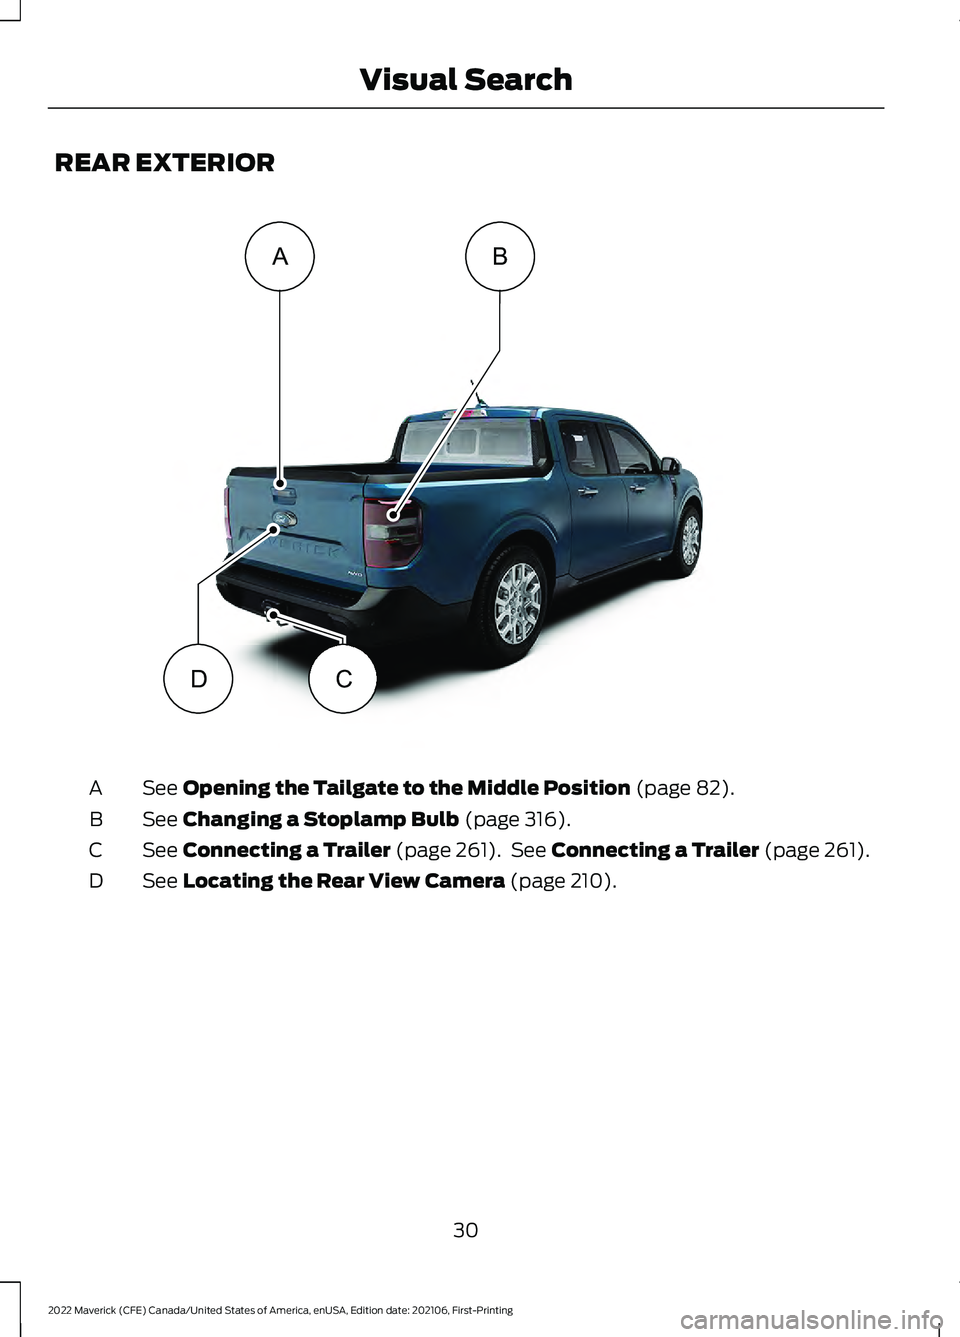
REAR EXTERIOR
See Opening the Tailgate to the Middle Position (page 82).
A
See
Changing a Stoplamp Bulb (page 316).
B
See
Connecting a Trailer (page 261). See Connecting a Trailer (page 261).
C
See
Locating the Rear View Camera (page 210).
D
30
2022 Maverick (CFE) Canada/United States of America, enUSA, Edition date: 202106, First-Printing Visual SearchA
DC
BE358431
Page 285 of 533
Starting the Engine
1.
Start the engine of the booster vehicle
and moderately rev the engine, or
gently press the accelerator to keep
the engine speed between 2000 and
3000 RPM, as shown in your
tachometer.
2. Start the engine of the disabled vehicle.
3. Once you start the disabled vehicle, run
both vehicle engines for an additional
three minutes before disconnecting the
jumper cables.
Removing the Jumper Cables
Remove the jumper cables in the reverse
order that they were connected.
Note: Do not switch the headlamps on
when disconnecting the cables. The peak
voltage could blow the bulbs. JUMP STARTING THE VEHICLE -
HYBRID ELECTRIC VEHICLE (HEV)
Connecting the Jumper Cables WARNING: Do not connect the
negative jumper cable to any other part
of your vehicle. Use the ground point.
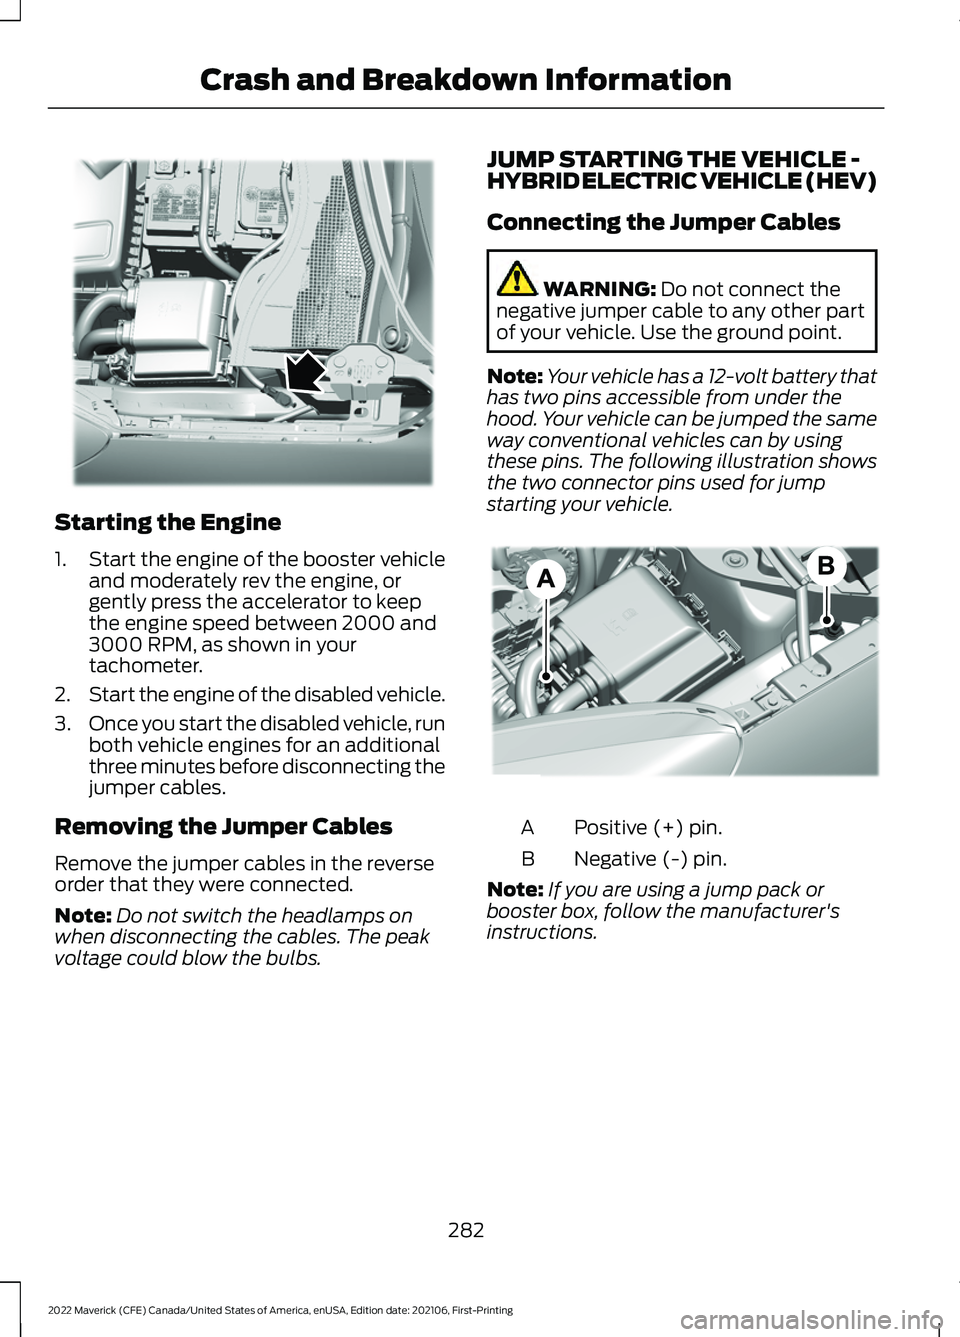
Note: Your vehicle has a 12-volt battery that
has two pins accessible from under the
hood. Your vehicle can be jumped the same
way conventional vehicles can by using
these pins. The following illustration shows
the two connector pins used for jump
starting your vehicle. Positive (+) pin.
A
Negative (-) pin.
B
Note: If you are using a jump pack or
booster box, follow the manufacturer's
instructions.
282
2022 Maverick (CFE) Canada/United States of America, enUSA, Edition date: 202106, First-Printing Crash and Breakdown InformationE338624 E309691
Page 286 of 533

1. Pull the red rubber boot backward.
Connect the positive (+) jumper cable
to the positive (+) terminal of the
discharged battery.
2. Connect the other end of the positive (+) jumper cable to the positive (+)
terminal of the booster vehicle battery.
3. Connect the negative (-) jumper cable
to the negative (-) terminal of the
booster vehicle battery.
4. Make the final connection of the negative (-) jumper cable to an
exposed metal part of the disabled
vehicle's engine, as shown in the
following illustration, away from the
battery and fuel injection system, or
connect the negative (-) jumper cable
to a ground connection point if
available. Starting the Engine
1.
Start the engine of the booster vehicle
and moderately rev the engine, or
gently press the accelerator to keep
the engine speed between 2000 and
3000 RPM, as shown in your
tachometer.
2. Start the engine of the disabled vehicle.
3. Once you start the disabled vehicle, run
both vehicle engines for an additional
three minutes before disconnecting the
jumper cables.
Removing the Jumper Cables
Remove the jumper cables in the reverse
order that they were connected.
Note: Do not switch the headlamps on
when disconnecting the cables. The peak
voltage could blow the bulbs.
POST-CRASH ALERT SYSTEM
WHAT IS THE POST-CRASH
ALERT SYSTEM
The system helps draw attention to your
vehicle in the event of a serious impact.
283
2022 Maverick (CFE) Canada/United States of America, enUSA, Edition date: 202106, First-Printing Crash and Breakdown Information4
2
1
3
E142664 E338715
Page 316 of 533
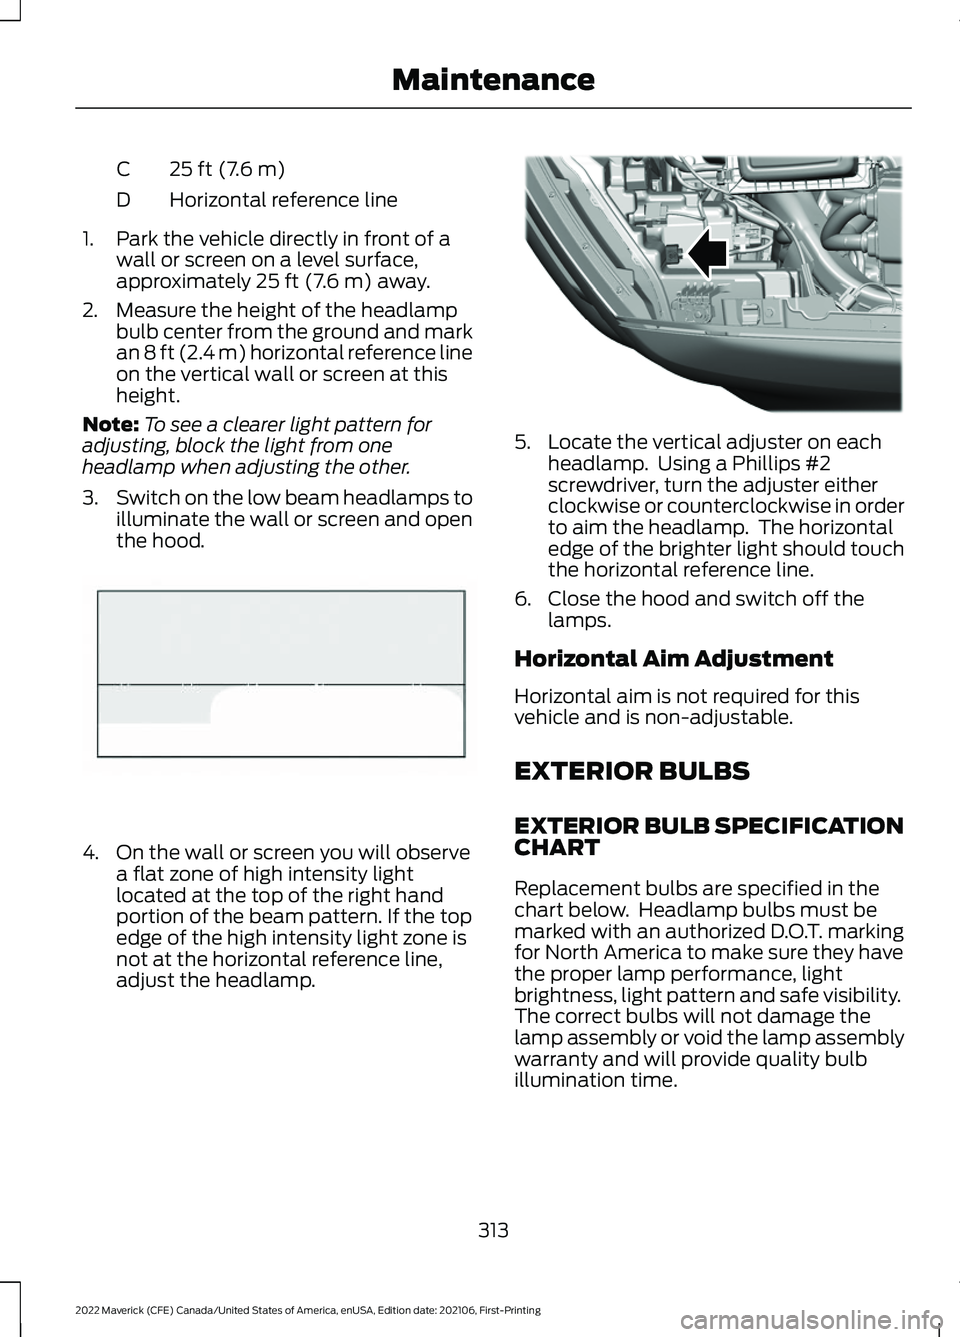
25 ft (7.6 m)
C
Horizontal reference line
D
1. Park the vehicle directly in front of a wall or screen on a level surface,
approximately 25 ft (7.6 m) away.
2. Measure the height of the headlamp bulb center from the ground and mark
an
8 ft (2.4 m) horizontal reference line
on the vertical wall or screen at this
height.
Note: To see a clearer light pattern for
adjusting, block the light from one
headlamp when adjusting the other.
3. Switch on the low beam headlamps to
illuminate the wall or screen and open
the hood. 4. On the wall or screen you will observe
a flat zone of high intensity light
located at the top of the right hand
portion of the beam pattern. If the top
edge of the high intensity light zone is
not at the horizontal reference line,
adjust the headlamp. 5. Locate the vertical adjuster on each
headlamp. Using a Phillips #2
screwdriver, turn the adjuster either
clockwise or counterclockwise in order
to aim the headlamp. The horizontal
edge of the brighter light should touch
the horizontal reference line.
6. Close the hood and switch off the lamps.
Horizontal Aim Adjustment
Horizontal aim is not required for this
vehicle and is non-adjustable.
EXTERIOR BULBS
EXTERIOR BULB SPECIFICATION
CHART
Replacement bulbs are specified in the
chart below. Headlamp bulbs must be
marked with an authorized D.O.T. marking
for North America to make sure they have
the proper lamp performance, light
brightness, light pattern and safe visibility.
The correct bulbs will not damage the
lamp assembly or void the lamp assembly
warranty and will provide quality bulb
illumination time.
313
2022 Maverick (CFE) Canada/United States of America, enUSA, Edition date: 202106, First-Printing MaintenanceE142465 E355886
Page 317 of 533
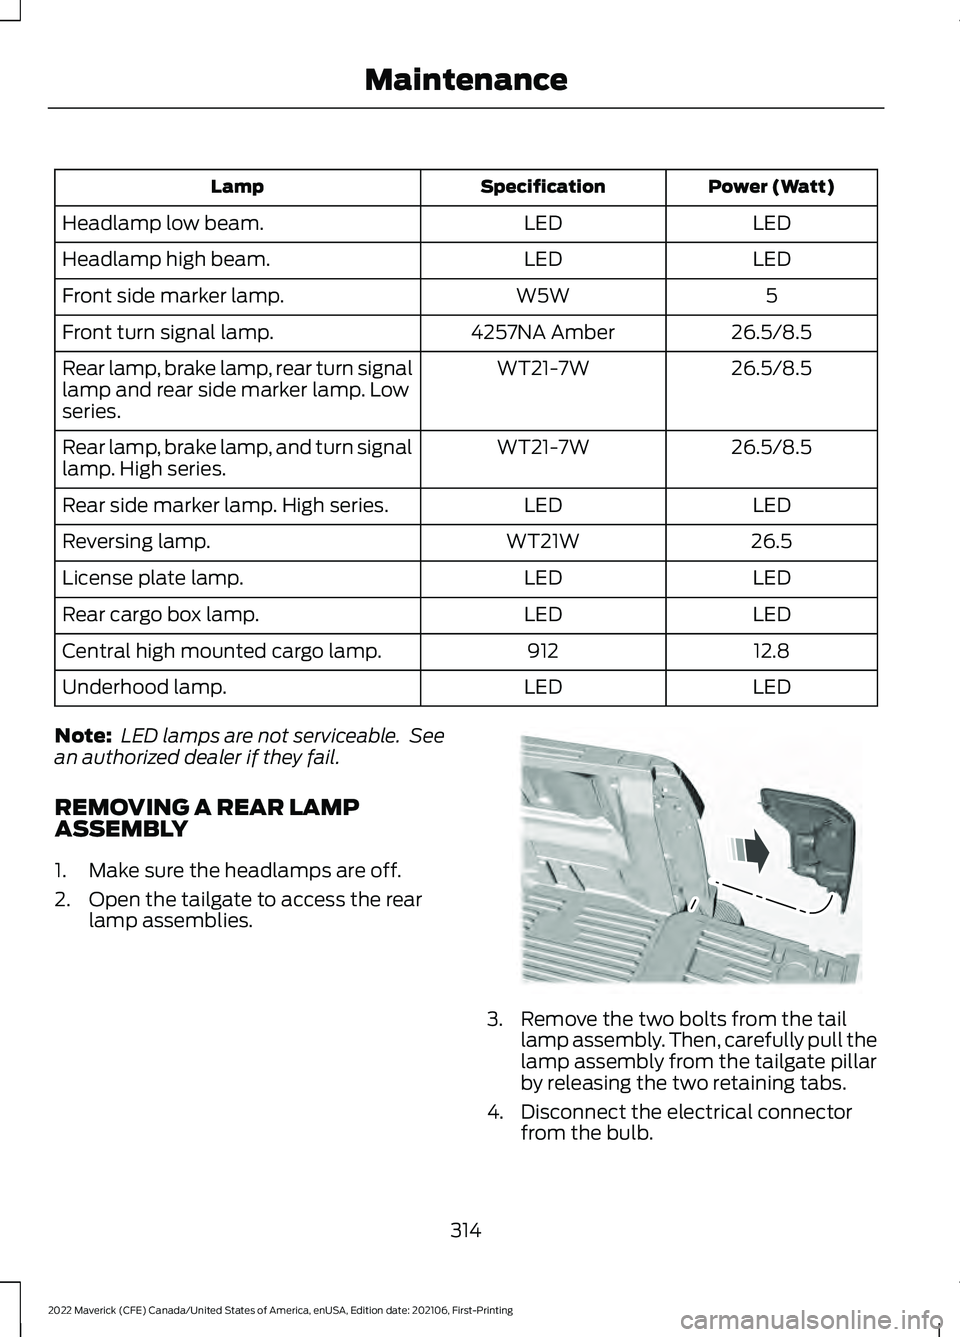
Power (Watt)
Specification
Lamp
LED
LED
Headlamp low beam.
LED
LED
Headlamp high beam.
5
W5W
Front side marker lamp.
26.5/8.5
4257NA Amber
Front turn signal lamp.
26.5/8.5
WT21-7W
Rear lamp, brake lamp, rear turn signal
lamp and rear side marker lamp. Low
series.
26.5/8.5
WT21-7W
Rear lamp, brake lamp, and turn signal
lamp. High series.
LED
LED
Rear side marker lamp. High series.
26.5
WT21W
Reversing lamp.
LED
LED
License plate lamp.
LED
LED
Rear cargo box lamp.
12.8
912
Central high mounted cargo lamp.
LED
LED
Underhood lamp.
Note: LED lamps are not serviceable. See
an authorized dealer if they fail.
REMOVING A REAR LAMP
ASSEMBLY
1. Make sure the headlamps are off.
2. Open the tailgate to access the rear lamp assemblies. 3. Remove the two bolts from the tail
lamp assembly. Then, carefully pull the
lamp assembly from the tailgate pillar
by releasing the two retaining tabs.
4. Disconnect the electrical connector from the bulb.
314
2022 Maverick (CFE) Canada/United States of America, enUSA, Edition date: 202106, First-Printing MaintenanceE187288
Page 318 of 533
5. To install, reverse the removal
procedure.
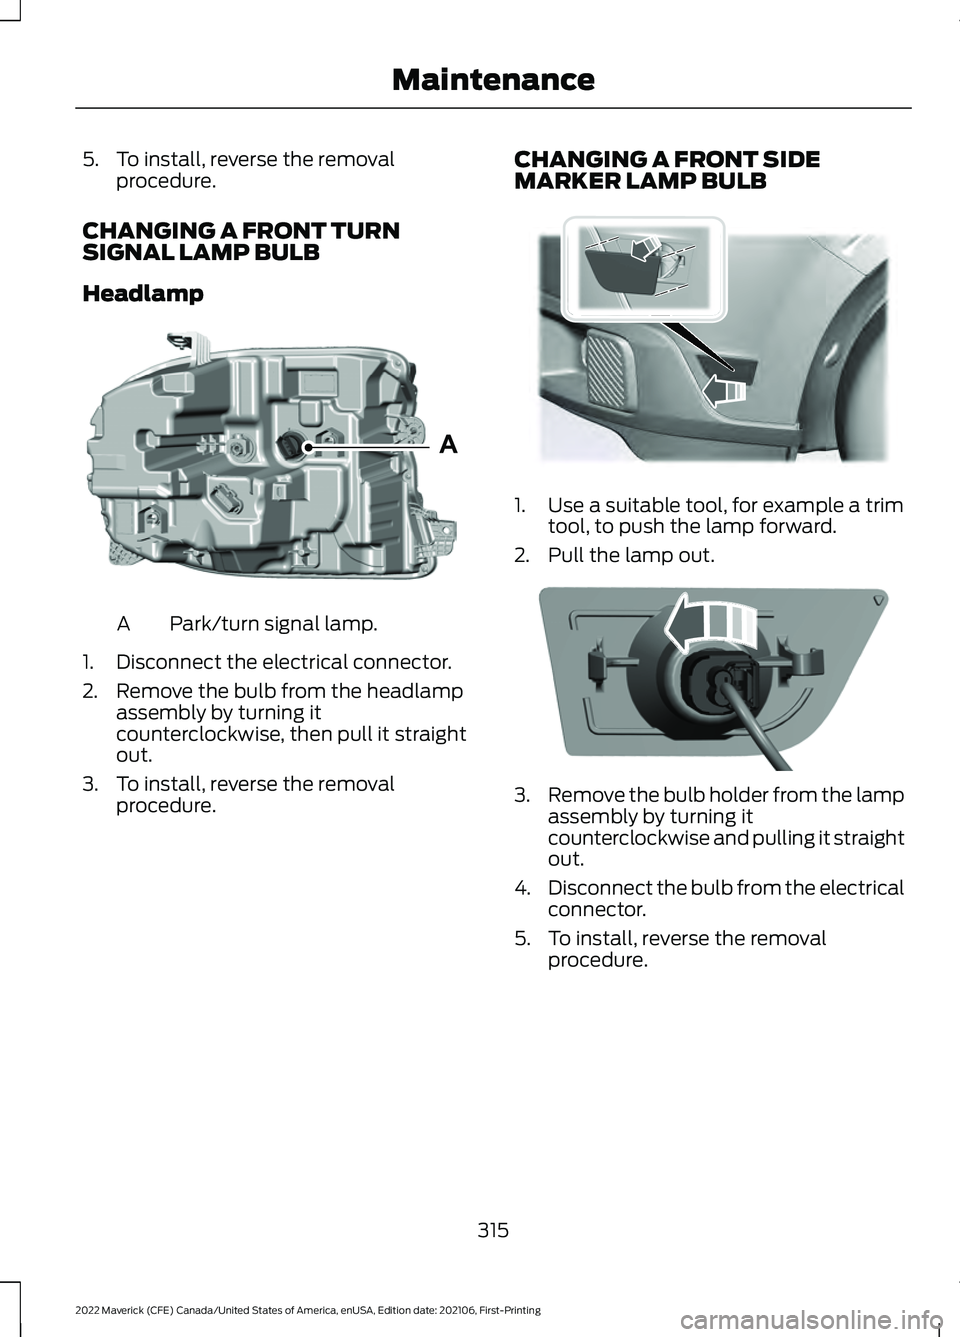
CHANGING A FRONT TURN
SIGNAL LAMP BULB
Headlamp Park/turn signal lamp.
A
1. Disconnect the electrical connector.
2. Remove the bulb from the headlamp assembly by turning it
counterclockwise, then pull it straight
out.
3. To install, reverse the removal procedure. CHANGING A FRONT SIDE
MARKER LAMP BULB 1. Use a suitable tool, for example a trim
tool, to push the lamp forward.
2. Pull the lamp out. 3.
Remove the bulb holder from the lamp
assembly by turning it
counterclockwise and pulling it straight
out.
4. Disconnect the bulb from the electrical
connector.
5. To install, reverse the removal procedure.
315
2022 Maverick (CFE) Canada/United States of America, enUSA, Edition date: 202106, First-Printing MaintenanceAE348847 E349259 E349260
Page 319 of 533
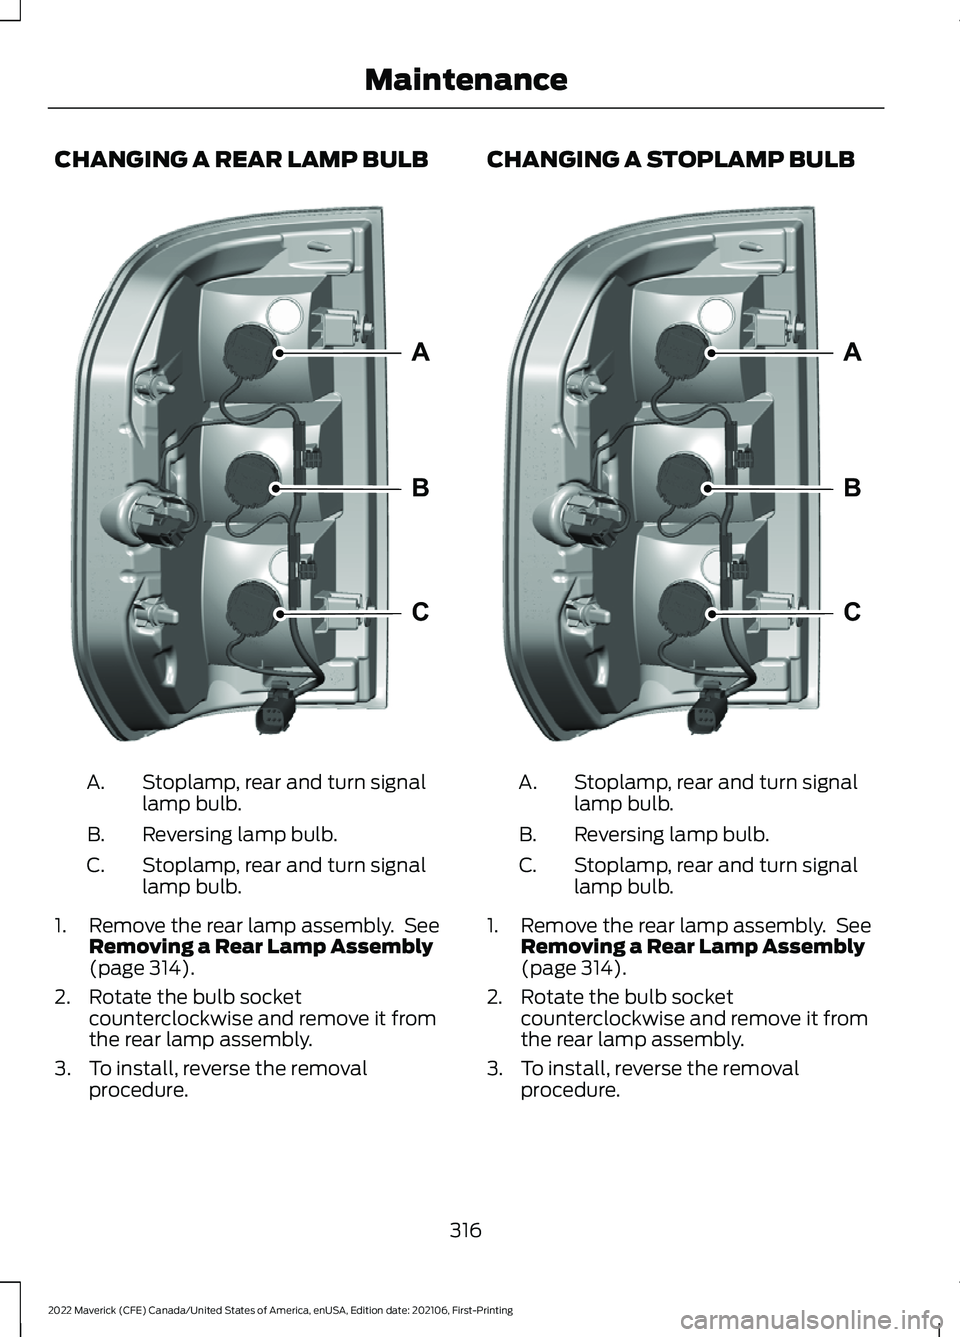
CHANGING A REAR LAMP BULB
Stoplamp, rear and turn signal
lamp bulb.
A.
Reversing lamp bulb.
B.
Stoplamp, rear and turn signal
lamp bulb.
C.
1. Remove the rear lamp assembly. See Removing a Rear Lamp Assembly
(page 314).
2. Rotate the bulb socket counterclockwise and remove it from
the rear lamp assembly.
3. To install, reverse the removal procedure. CHANGING A STOPLAMP BULB
Stoplamp, rear and turn signal
lamp bulb.
A.
Reversing lamp bulb.
B.
Stoplamp, rear and turn signal
lamp bulb.
C.
1. Remove the rear lamp assembly. See Removing a Rear Lamp Assembly
(page 314).
2. Rotate the bulb socket counterclockwise and remove it from
the rear lamp assembly.
3. To install, reverse the removal procedure.
316
2022 Maverick (CFE) Canada/United States of America, enUSA, Edition date: 202106, First-Printing MaintenanceA
B
CE348848 A
B
CE348848