2022 FORD MAVERICK warning light
[x] Cancel search: warning lightPage 60 of 533
CRASH SENSORS AND
AIRBAG INDICATOR
WARNING: Modifying or adding
equipment to the front of your vehicle
could affect the performance of the
airbag system, increasing the risk of
injury. This includes the hood, bumper
system, frame, front body structure, tow
hooks, hood pins, push bar and
snowplows.
Your vehicle has a collection of crash and
occupant sensors. These sensors provide
information to the restraints control
module which deploys (activates) the
following:
• Seatbelt pretensioners.
• Driver airbag.
• Passenger airbag.
• Knee airbag(s).
• Seat mounted side airbags.
• Safety Canopy.
Based on the type of crash, the restraints
control module deploys the appropriate
safety devices.
The restraints control module also
monitors the readiness of the above safety
devices plus the crash and occupant
sensors. The readiness of the safety
system is indicated by a warning indicator
light in the instrument cluster or by a
backup tone if the warning light is not
working. Routine maintenance of the
airbag is not required.
A difficulty with the system is indicated by
one or more of the following: The readiness light will not
illuminate immediately after you
switch the ignition on. •
The readiness light either flashes or
stays on.
• You hear a series of five beeps. The
tone pattern repeats periodically until
the problem, the light or both are
repaired.
If any of these things happen, even
intermittently, have the supplemental
restraint system serviced at an authorized
dealer immediately. Unless serviced, the
system may not function properly in the
event of a crash.
The fact that the seatbelt pretensioners
or front airbags did not activate for both
front seat occupants in a crash does not
mean that something is wrong with the
system. Rather, it means the restraints
control module determined the accident
conditions (crash severity, seatbelt usage)
were not appropriate to activate these
safety devices.
• The design of the front airbags is to
activate only in frontal and near-frontal
crashes (not rollovers, side impacts or
rear impacts) unless the crash causes
sufficient frontal deceleration.
• The design of the front seatbelt
pretensioners is to activate in frontal,
near-frontal and side crashes, and in
rollovers. The design of the rear
seatbelt pretensioners is to activate in
frontal crashes and in rollovers.
• The design of the knee airbag(s) is to
deploy based on crash severity and
occupant conditions.
57
2022 Maverick (CFE) Canada/United States of America, enUSA, Edition date: 202106, First-Printing AirbagsE67017
Page 85 of 533
TAILGATE PRECAUTIONS
WARNING: It is extremely
dangerous to ride in a cargo area, inside
or outside of a vehicle. In a crash, people
riding in these areas are more likely to be
seriously injured or killed. Do not allow
people to ride in any area of your vehicle
that is not equipped with seats and
seatbelts. Make sure everyone in your
vehicle is in a seat and properly using a
seatbelt. Failure to follow this warning
could result in serious personal injury or
death.
OPENING THE TAILGATE
OPENING THE TAILGATE FROM
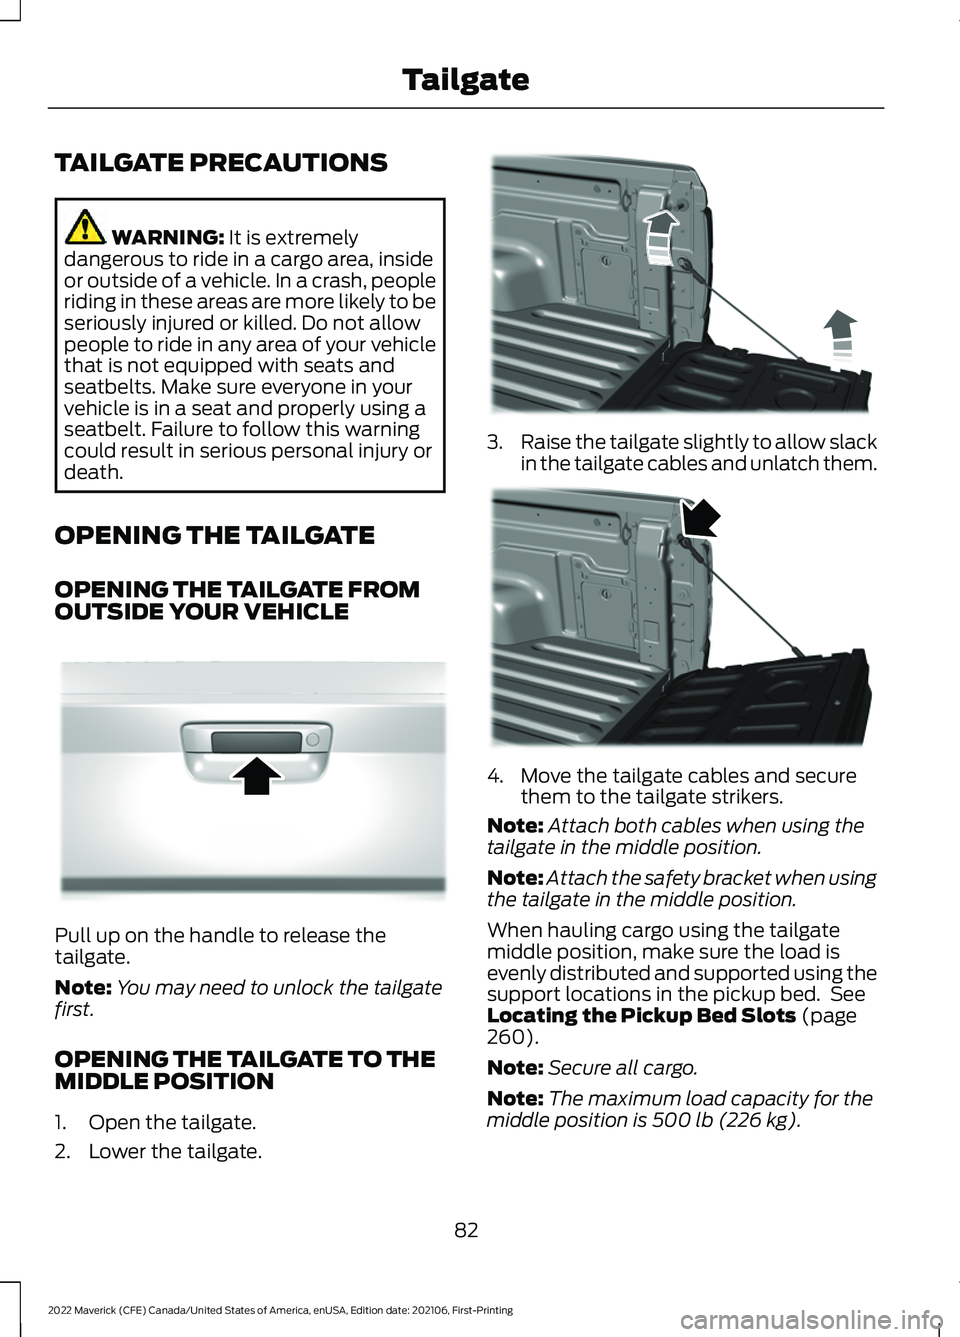
OUTSIDE YOUR VEHICLE Pull up on the handle to release the
tailgate.
Note:
You may need to unlock the tailgate
first.
OPENING THE TAILGATE TO THE
MIDDLE POSITION
1. Open the tailgate.
2. Lower the tailgate. 3.
Raise the tailgate slightly to allow slack
in the tailgate cables and unlatch them. 4. Move the tailgate cables and secure
them to the tailgate strikers.
Note: Attach both cables when using the
tailgate in the middle position.
Note: Attach the safety bracket when using
the tailgate in the middle position.
When hauling cargo using the tailgate
middle position, make sure the load is
evenly distributed and supported using the
support locations in the pickup bed. See
Locating the Pickup Bed Slots
(page
260).
Note: Secure all cargo.
Note: The maximum load capacity for the
middle position is
500 lb (226 kg).
82
2022 Maverick (CFE) Canada/United States of America, enUSA, Edition date: 202106, First-Printing TailgateE348034 E351595 E351596
Page 97 of 533
HEADLAMPS –
TROUBLESHOOTING
HEADLAMPS – FREQUENTLY
ASKED QUESTIONS
Why is there condensation in the
headlamps?
Headlamps have vents to
accommodate normal changes in air
pressure. Condensation can be a
natural by-product of this design.
When moist air enters the lamp
assembly through the vents, there is a
possibility that condensation can
occur when the temperature is cold.
When normal condensation occurs, a
fine mist can form on the interior of the
lens. The fine mist eventually clears
and exits through the vents during
normal operation.
How much condensation is
acceptable? The presence of a fine mist, for
example no streaks, drip marks or
large droplets. A fine mist covers less
than 50% of the lens.
How long may it take for the
acceptable condensation to be
cleared? Clearing time may take as long as 48
hours under dry weather conditions.
How much condensation is
unacceptable? A water puddle inside the lamp.
Streaks, drip marks or large droplets
present on the interior of the lens.
What should I do if unacceptable
condensation is present? Have your vehicle checked as soon as
possible. Why do my headlamps turn off when I
have them switched on when I switch
my vehicle off?
The battery saver turns the headlamps
off after a short period of time after
you switch your vehicle off.
AUTOLAMPS
WHAT ARE AUTOLAMPS WARNING: The system does not
relieve you of your responsibility to drive
with due care and attention. You may
need to override the system if it does not
turn the headlamps on in low visibility
conditions, for example daytime fog.
Autolamps turn the headlamps on in low
light situations or when the windshield
wipers operate.
AUTOLAMP SETTINGS
1. Using the instrument cluster controls on the steering wheel, select Settings.
2. Select
Vehicle.
3. Select
Lighting.
4. Select
Autolamp Delay.
5. Select a setting and press the
OK
button.
94
2022 Maverick (CFE) Canada/United States of America, enUSA, Edition date: 202106, First-Printing Exterior Lighting
Page 98 of 533
EXTERIOR LAMPS
SWITCHING THE TURN SIGNAL
LAMPS ON AND OFF
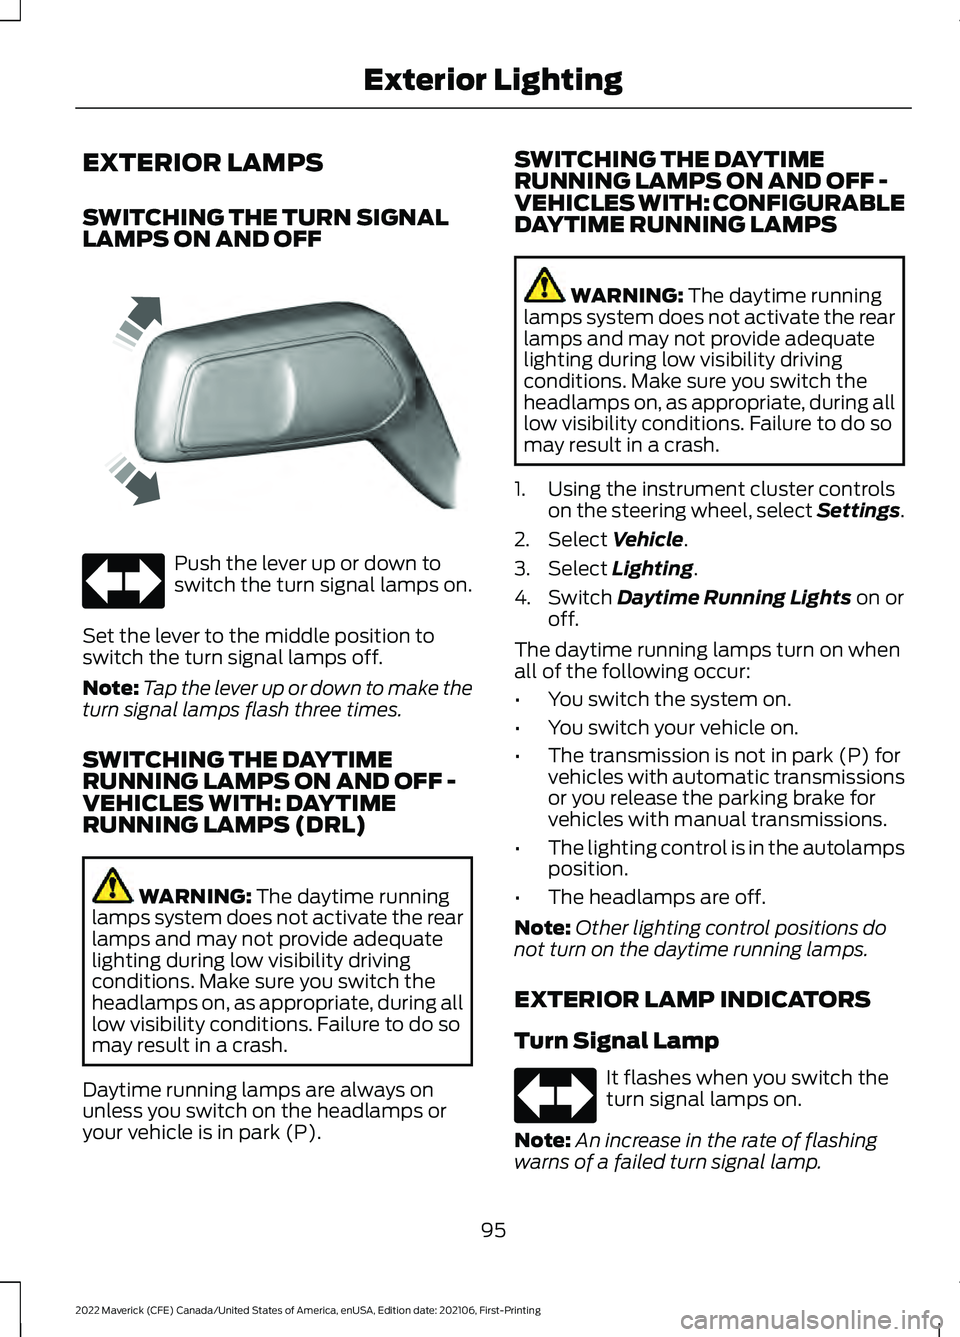
Push the lever up or down to
switch the turn signal lamps on.
Set the lever to the middle position to
switch the turn signal lamps off.
Note: Tap the lever up or down to make the
turn signal lamps flash three times.
SWITCHING THE DAYTIME
RUNNING LAMPS ON AND OFF -
VEHICLES WITH: DAYTIME
RUNNING LAMPS (DRL) WARNING: The daytime running
lamps system does not activate the rear
lamps and may not provide adequate
lighting during low visibility driving
conditions. Make sure you switch the
headlamps on, as appropriate, during all
low visibility conditions. Failure to do so
may result in a crash.
Daytime running lamps are always on
unless you switch on the headlamps or
your vehicle is in park (P). SWITCHING THE DAYTIME
RUNNING LAMPS ON AND OFF -
VEHICLES WITH: CONFIGURABLE
DAYTIME RUNNING LAMPS WARNING:
The daytime running
lamps system does not activate the rear
lamps and may not provide adequate
lighting during low visibility driving
conditions. Make sure you switch the
headlamps on, as appropriate, during all
low visibility conditions. Failure to do so
may result in a crash.
1. Using the instrument cluster controls on the steering wheel, select Settings.
2. Select
Vehicle.
3. Select
Lighting.
4. Switch
Daytime Running Lights on or
off.
The daytime running lamps turn on when
all of the following occur:
• You switch the system on.
• You switch your vehicle on.
• The transmission is not in park (P) for
vehicles with automatic transmissions
or you release the parking brake for
vehicles with manual transmissions.
• The lighting control is in the autolamps
position.
• The headlamps are off.
Note: Other lighting control positions do
not turn on the daytime running lamps.
EXTERIOR LAMP INDICATORS
Turn Signal Lamp It flashes when you switch the
turn signal lamps on.
Note: An increase in the rate of flashing
warns of a failed turn signal lamp.
95
2022 Maverick (CFE) Canada/United States of America, enUSA, Edition date: 202106, First-Printing Exterior LightingE242676
Page 99 of 533
EXTERIOR LAMP AUDIBLE
WARNING
Exterior Lamps On
Sounds when you open the driver door and
the exterior lamps are on.
AUTOMATIC HIGH BEAM
CONTROL
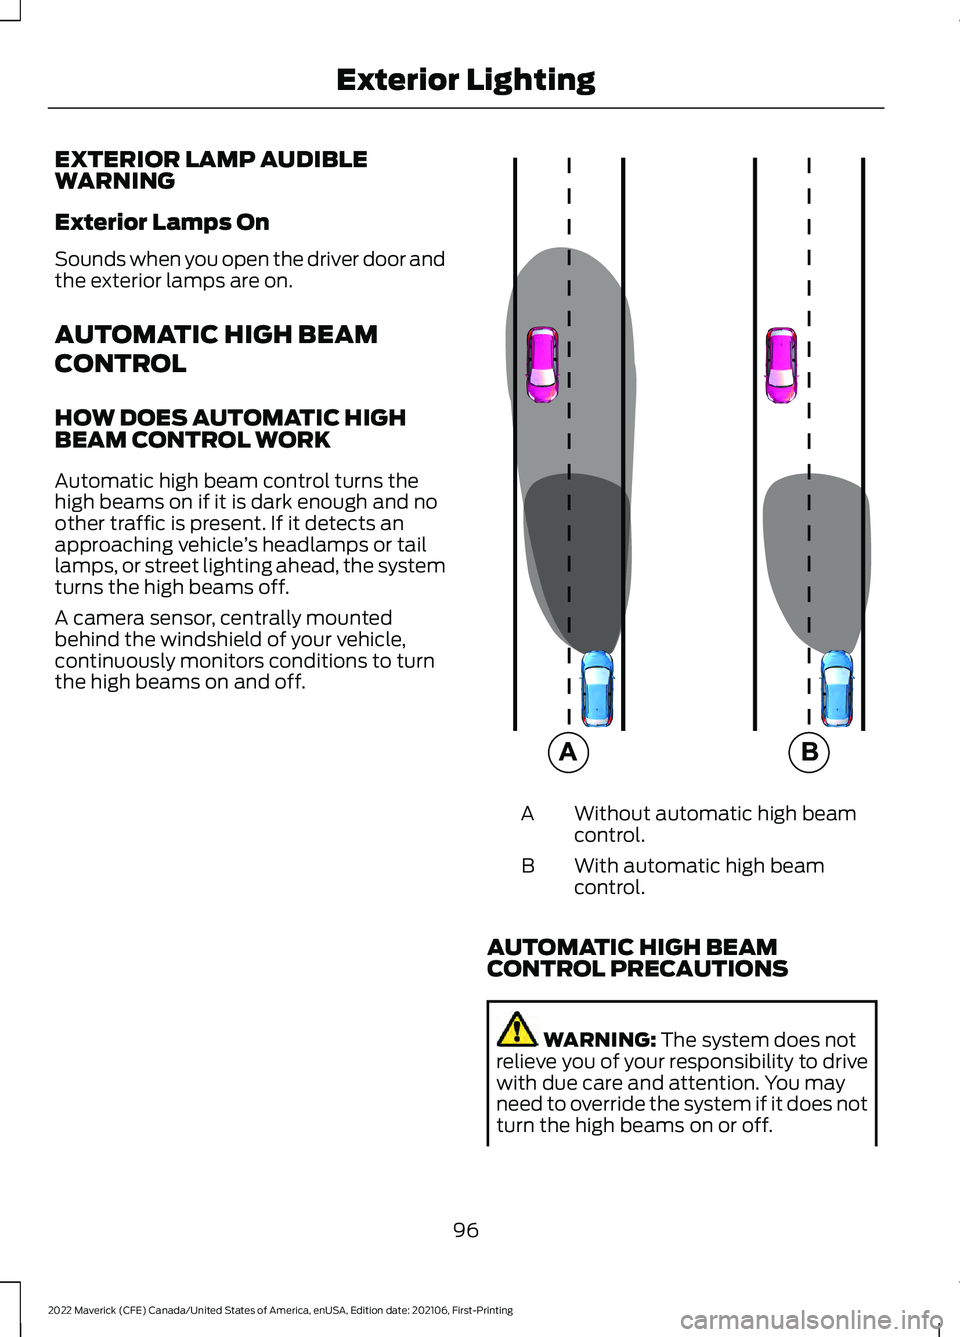
HOW DOES AUTOMATIC HIGH
BEAM CONTROL WORK
Automatic high beam control turns the
high beams on if it is dark enough and no
other traffic is present. If it detects an
approaching vehicle
’s headlamps or tail
lamps, or street lighting ahead, the system
turns the high beams off.
A camera sensor, centrally mounted
behind the windshield of your vehicle,
continuously monitors conditions to turn
the high beams on and off. Without automatic high beam
control.
A
With automatic high beam
control.
B
AUTOMATIC HIGH BEAM
CONTROL PRECAUTIONS WARNING: The system does not
relieve you of your responsibility to drive
with due care and attention. You may
need to override the system if it does not
turn the high beams on or off.
96
2022 Maverick (CFE) Canada/United States of America, enUSA, Edition date: 202106, First-Printing Exterior Lighting E327596
Page 100 of 533
WARNING: Do not use the system
in poor visibility, for example fog, heavy
rain, spray or snow. WARNING:
You may need to
override the system when approaching
other road users. WARNING:
You may need to
override the system during inclement
weather.
AUTOMATIC HIGH BEAM
CONTROL REQUIREMENTS
The system turns the high beams on if all
of the following occur:
• You switch the system on.
• You set the lighting control to the
autolamps position.
• The ambient light level is low enough
that you require high beams.
• There is no traffic in front of your
vehicle.
• The vehicle speed is greater than
approximately
32 mph (52 km/h).
AUTOMATIC HIGH BEAM
CONTROL LIMITATIONS
The system turns the high beams off if any
of the following occur:
• You switch the system off.
• You set the lighting control to any
position except autolamps.
• The ambient light level is high enough
that you do not require high beams.
• The system detects an approaching
vehicle's headlamps or rear lamps.
• The system detects severe rain, snow
or fog. •
The system detects street lighting.
• The camera has reduced visibility.
• The vehicle speed falls below
approximately
27 mph (44 km/h).
SWITCHING AUTOMATIC HIGH
BEAM CONTROL ON AND OFF
1. Using the instrument cluster controls on the steering wheel, select Settings.
2. Select
Vehicle.
3. Select
Lighting.
4. Switch
Auto High Beam on or off.
AUTOMATIC HIGH BEAM
CONTROL INDICATORS Illuminates to confirm when the
system is ready to assist.
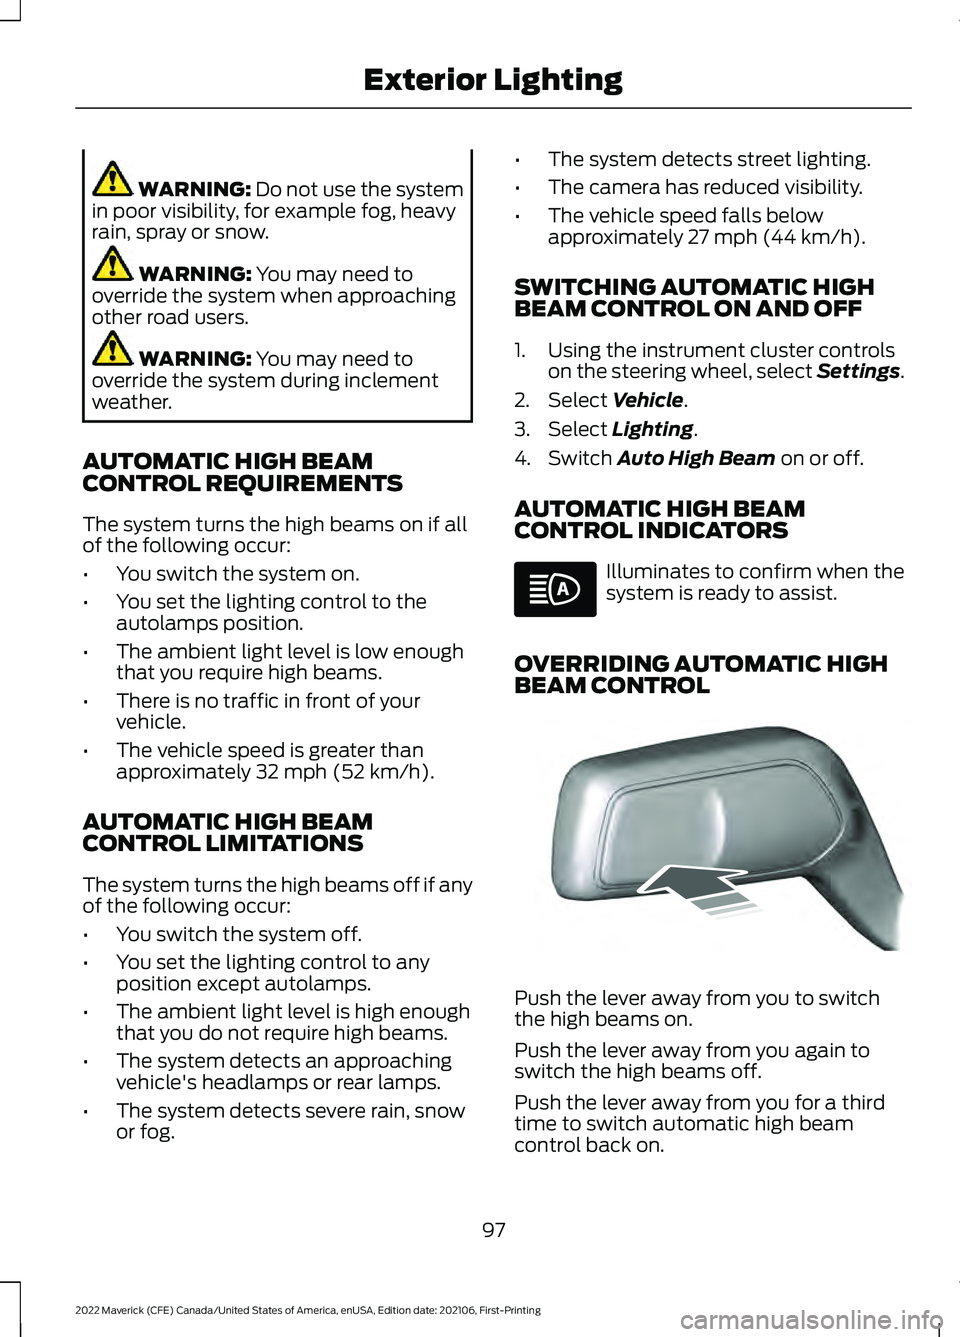
OVERRIDING AUTOMATIC HIGH
BEAM CONTROL Push the lever away from you to switch
the high beams on.
Push the lever away from you again to
switch the high beams off.
Push the lever away from you for a third
time to switch automatic high beam
control back on.
97
2022 Maverick (CFE) Canada/United States of America, enUSA, Edition date: 202106, First-Printing Exterior Lighting E248603
Page 104 of 533
OPENING AND CLOSING THE
WINDOWS
WARNING: Do not leave children
unattended in your vehicle and do not
let them play with the power windows.
Failure to follow this instruction could
result in personal injury. WARNING:
When closing the
power windows, verify they are free of
obstruction and make sure that children
and pets are not in the proximity of the
window openings. Press the window control switch
to open the window. Lift the
window control switch to close
the window.
To reduce wind noise or pulsing noise when
just one window is open, slightly open the
opposite window.
One-Touch Down
(If Equipped)
Press the window control switch fully and
release it. Press again or lift it to stop the
window.
One-Touch Up
(If Equipped)
Lift the window control switch fully and
release it. Press or lift it again to stop the
window.
Resetting One-Touch Up
Start the engine.
1. Lift and hold the window control switch
until you fully close the door window.
Continue to hold the window control
switch for a few seconds after you
close the window.
2. Release the window control switch. 3. Press and hold the window control
switch until you fully open the door
window.
4. Release the window control switch.
5. Lift and hold the window control switch
until you fully close the window.
6. Test for correct window operation by carrying out the one-touch down and
one-touch up features.
Accessory Delay
The window switches remain operational
for several minutes when you switch the
ignition off or until you open either front
door.
WINDOW BOUNCE-BACK
WHAT IS WINDOW BOUNCE-BACK
The window stops and reverses some
distance if it detects an obstacle when
closing.
OVERRIDING WINDOW BOUNCE-
BACK WARNING: If you override
bounce-back, the window does not
reverse if it detects an obstacle. Take
care when closing the windows to avoid
personal injury or damage to your
vehicle. WARNING: Bounce-back is off until
you reset the memory. Take care when
closing the windows to avoid personal
injury or damage to your vehicle.
Note: The window stops if you release the
switch before the window fully closes.
101
2022 Maverick (CFE) Canada/United States of America, enUSA, Edition date: 202106, First-Printing Windows
Page 107 of 533
ADJUSTING THE EXTERIOR
MIRRORS
WARNING: Do not adjust the
mirrors when your vehicle is moving. This
could result in the loss of control of your
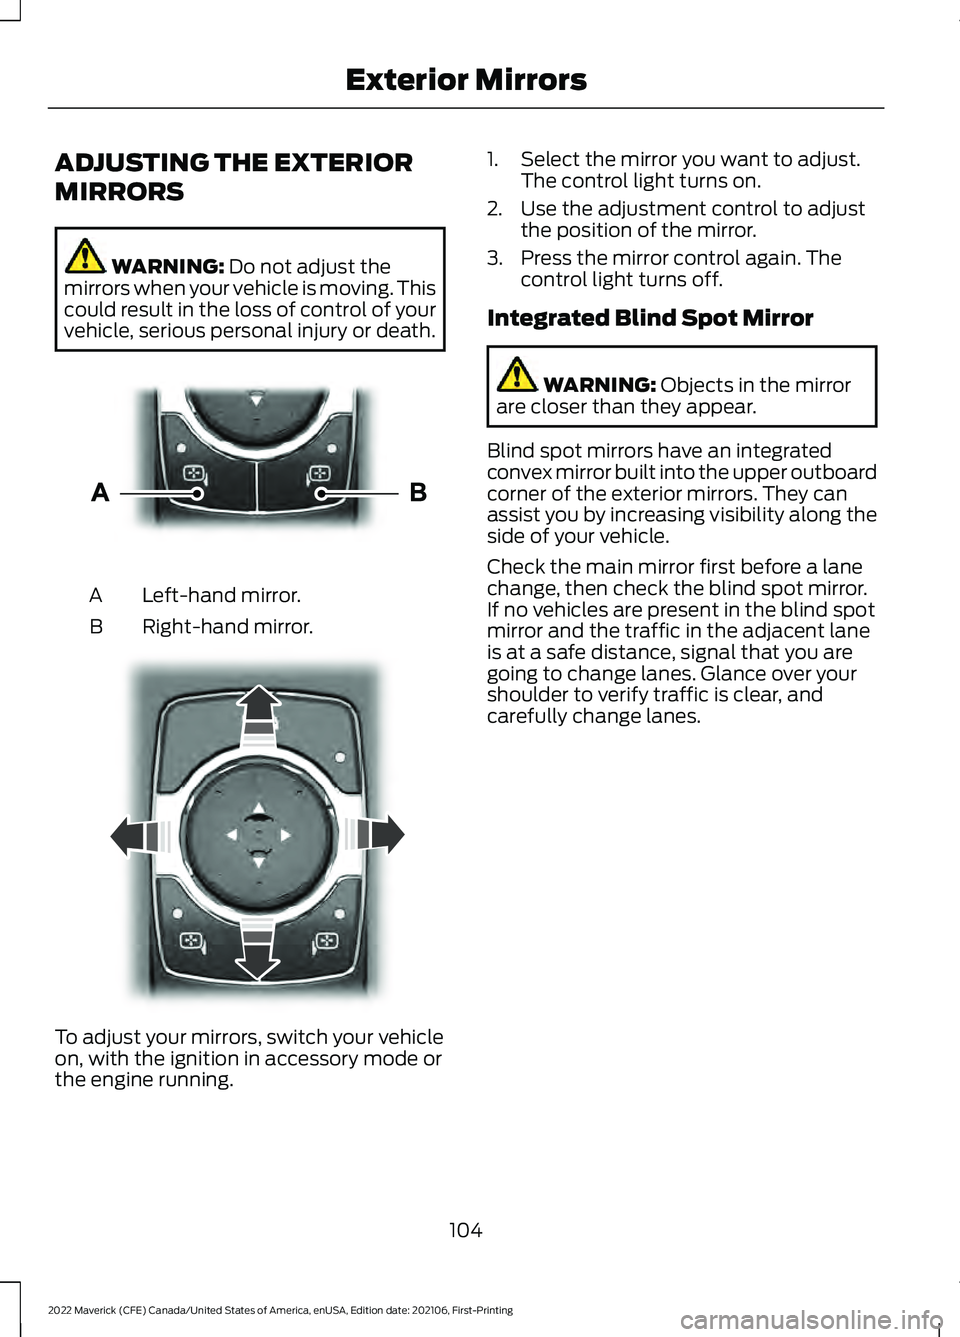
vehicle, serious personal injury or death. Left-hand mirror.
A
Right-hand mirror.
B To adjust your mirrors, switch your vehicle
on, with the ignition in accessory mode or
the engine running. 1. Select the mirror you want to adjust.
The control light turns on.
2. Use the adjustment control to adjust the position of the mirror.
3. Press the mirror control again. The control light turns off.
Integrated Blind Spot Mirror WARNING:
Objects in the mirror
are closer than they appear.
Blind spot mirrors have an integrated
convex mirror built into the upper outboard
corner of the exterior mirrors. They can
assist you by increasing visibility along the
side of your vehicle.
Check the main mirror first before a lane
change, then check the blind spot mirror.
If no vehicles are present in the blind spot
mirror and the traffic in the adjacent lane
is at a safe distance, signal that you are
going to change lanes. Glance over your
shoulder to verify traffic is clear, and
carefully change lanes.
104
2022 Maverick (CFE) Canada/United States of America, enUSA, Edition date: 202106, First-Printing Exterior MirrorsE303926 E303927