2022 FORD MAVERICK height
[x] Cancel search: heightPage 48 of 533
2. The seatbelt should then unlock.
3. Return the seat backrest to its desired
upright position.
For vehicles with rear seats that do not
recline or are locked with the seat in its full
rear recline position:
1. Grasp the seatbelt webbing at the top of the seat backrest.
2. Pull the seatbelt webbing forward, firmly.
3. After pulling the seatbelt forward, allow the seatbelt to feed back into the
seatbelt retractor as much as possible.
If necessary, press the seat backrest
down to allow the seatbelt webbing to
retract further.
4. The seatbelt should then unlock.
5. If the seatbelt does not unlock, repeat steps 1-3.
ADJUSTING THE SEATBELTS
DURING PREGNANCY WARNING: Always ride and drive
with your seatback upright and properly
fasten your seatbelt. Fit the lap portion
of the seatbelt snugly and low across
the hips. Position the shoulder portion of
the seatbelt across your chest. Pregnant
women must follow this practice. See
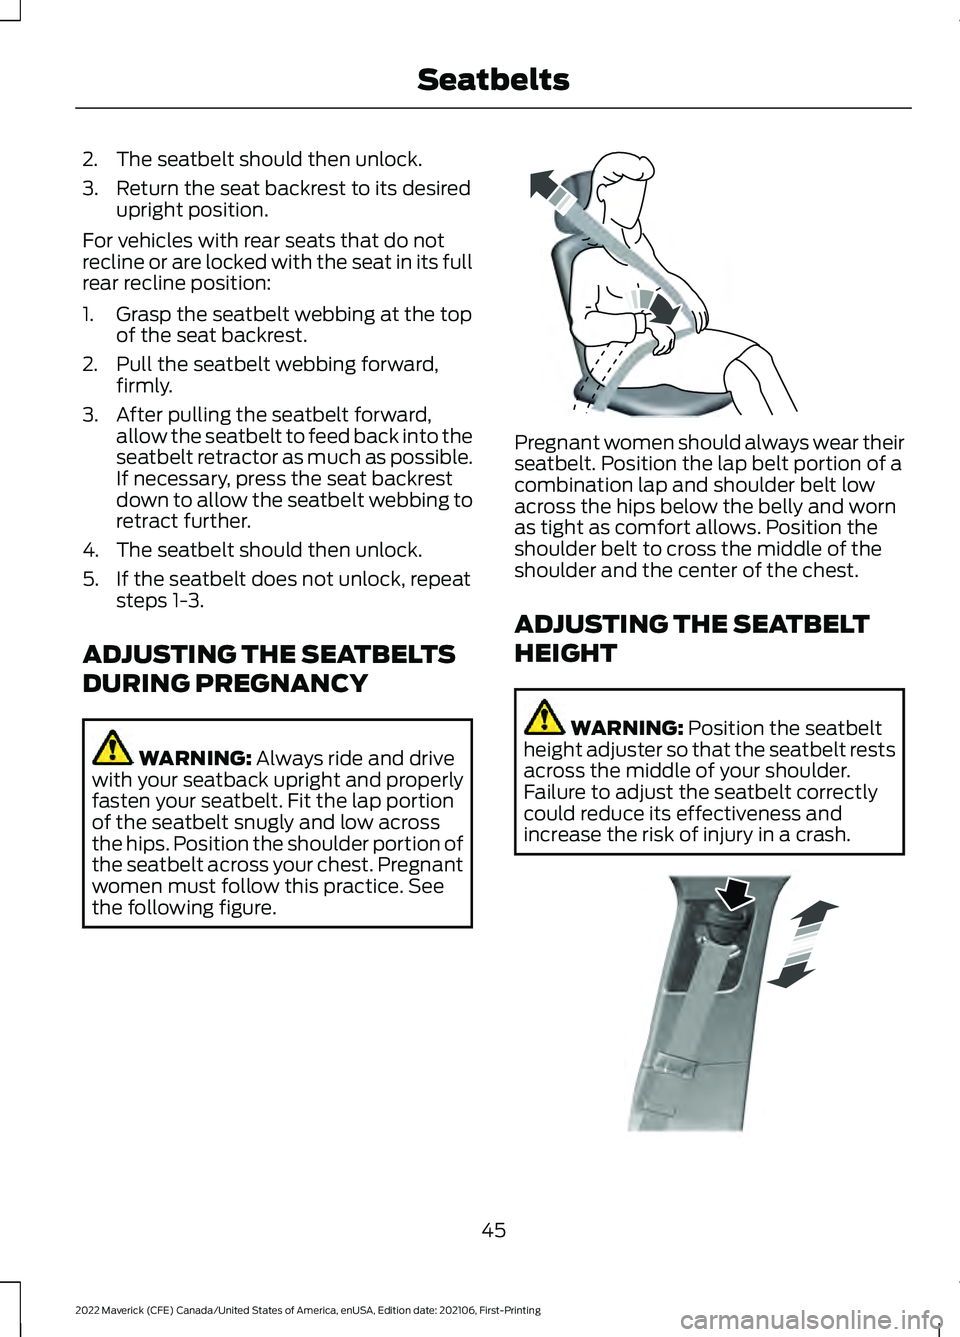
the following figure. Pregnant women should always wear their
seatbelt. Position the lap belt portion of a
combination lap and shoulder belt low
across the hips below the belly and worn
as tight as comfort allows. Position the
shoulder belt to cross the middle of the
shoulder and the center of the chest.
ADJUSTING THE SEATBELT
HEIGHT
WARNING:
Position the seatbelt
height adjuster so that the seatbelt rests
across the middle of your shoulder.
Failure to adjust the seatbelt correctly
could reduce its effectiveness and
increase the risk of injury in a crash. 45
2022 Maverick (CFE) Canada/United States of America, enUSA, Edition date: 202106, First-Printing SeatbeltsE142590 E200161
Page 49 of 533
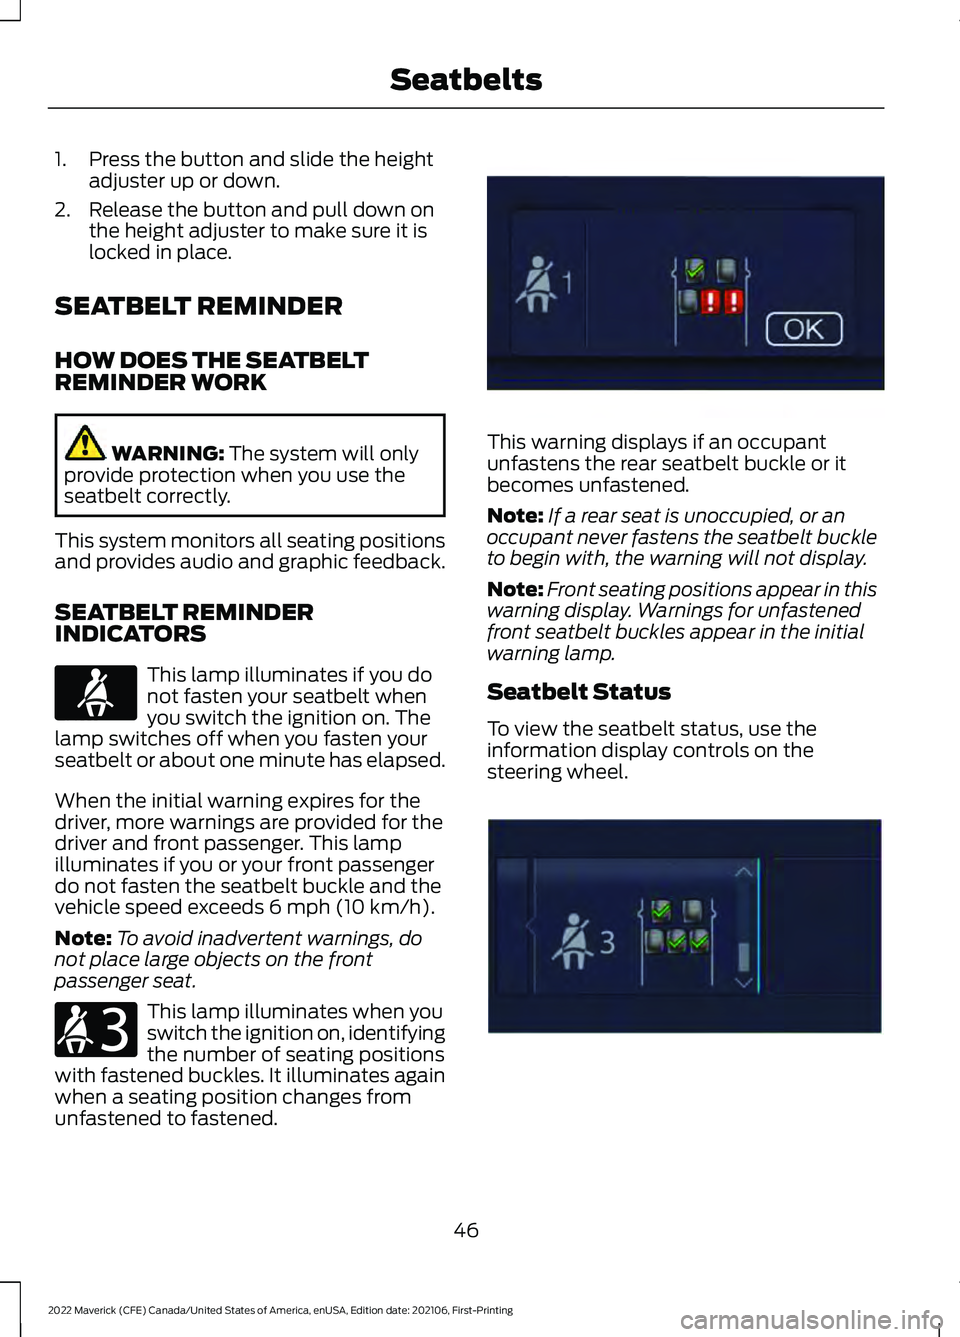
1. Press the button and slide the height
adjuster up or down.
2. Release the button and pull down on the height adjuster to make sure it is
locked in place.
SEATBELT REMINDER
HOW DOES THE SEATBELT
REMINDER WORK WARNING: The system will only
provide protection when you use the
seatbelt correctly.
This system monitors all seating positions
and provides audio and graphic feedback.
SEATBELT REMINDER
INDICATORS This lamp illuminates if you do
not fasten your seatbelt when
you switch the ignition on. The
lamp switches off when you fasten your
seatbelt or about one minute has elapsed.
When the initial warning expires for the
driver, more warnings are provided for the
driver and front passenger. This lamp
illuminates if you or your front passenger
do not fasten the seatbelt buckle and the
vehicle speed exceeds
6 mph (10 km/h).
Note: To avoid inadvertent warnings, do
not place large objects on the front
passenger seat. This lamp illuminates when you
switch the ignition on, identifying
the number of seating positions
with fastened buckles. It illuminates again
when a seating position changes from
unfastened to fastened. This warning displays if an occupant
unfastens the rear seatbelt buckle or it
becomes unfastened.
Note:
If a rear seat is unoccupied, or an
occupant never fastens the seatbelt buckle
to begin with, the warning will not display.
Note: Front seating positions appear in this
warning display. Warnings for unfastened
front seatbelt buckles appear in the initial
warning lamp.
Seatbelt Status
To view the seatbelt status, use the
information display controls on the
steering wheel. 46
2022 Maverick (CFE) Canada/United States of America, enUSA, Edition date: 202106, First-Printing SeatbeltsE71880 E206718 E331448 E281361
Page 51 of 533
CHECKING THE SEATBELTS
Check the seatbelts and child restraints
periodically to make sure they work
properly and are not damaged. Make sure
there are no nicks, tears or cuts. Replace if
necessary.
Check the following seatbelt assemblies
after a crash.
•
Retractors.
• Buckles.
• Front seatbelt buckle assemblies.
• Shoulder belt height adjusters.
• Shoulder belt guide on seat backrest.
• Child restraint LATCH and tether
anchors.
• Attaching hardware.
Read the child restraint manufacturer's
instructions for additional inspection and
maintenance information specific to the
child restraint.
We recommend that all seatbelt
assemblies in use in vehicles involved in a
crash be replaced. However, if the crash
was minor and an authorized dealer finds
that the belts do not show damage and
continue to operate properly, they do not
need to be replaced. Seatbelt assemblies
not in use during a crash should also be
checked and replaced if either damage or
improper operation is noted.
Properly care for seatbelts. See Cleaning
Seatbelts (page 323).
SEATBELT EXTENSIONS WARNING:
Persons who fit into
the vehicle's seatbelt should not use an
extension. Unnecessary use could result
in serious personal injury in the event of
a crash. WARNING:
Only use extensions
provided free of charge by our dealers.
The dealer will provide an extension
designed specifically for this vehicle,
model year and seating position. The use
of an extension intended for another
vehicle, model year or seating position
may not offer you the full protection of
your vehicle's seatbelt restraint system. WARNING:
Never use seatbelt
extensions to install child restraints. WARNING:
Do not use extensions
to change the way the seatbelt fits
across the torso, over the lap or to make
the seatbelt buckle easier to reach.
If, because of body size or driving position,
it is not possible to properly fasten the
seatbelt over your lap and shoulder, an
extension that is compatible with the
seatbelts is available free of charge from
our dealers. Only use our seatbelt
extensions made by the original equipment
seatbelt manufacturer with our seatbelts.
Ask your authorized dealer if your extension
is compatible with your vehicle restraint
system.
48
2022 Maverick (CFE) Canada/United States of America, enUSA, Edition date: 202106, First-Printing Seatbelts
Page 141 of 533
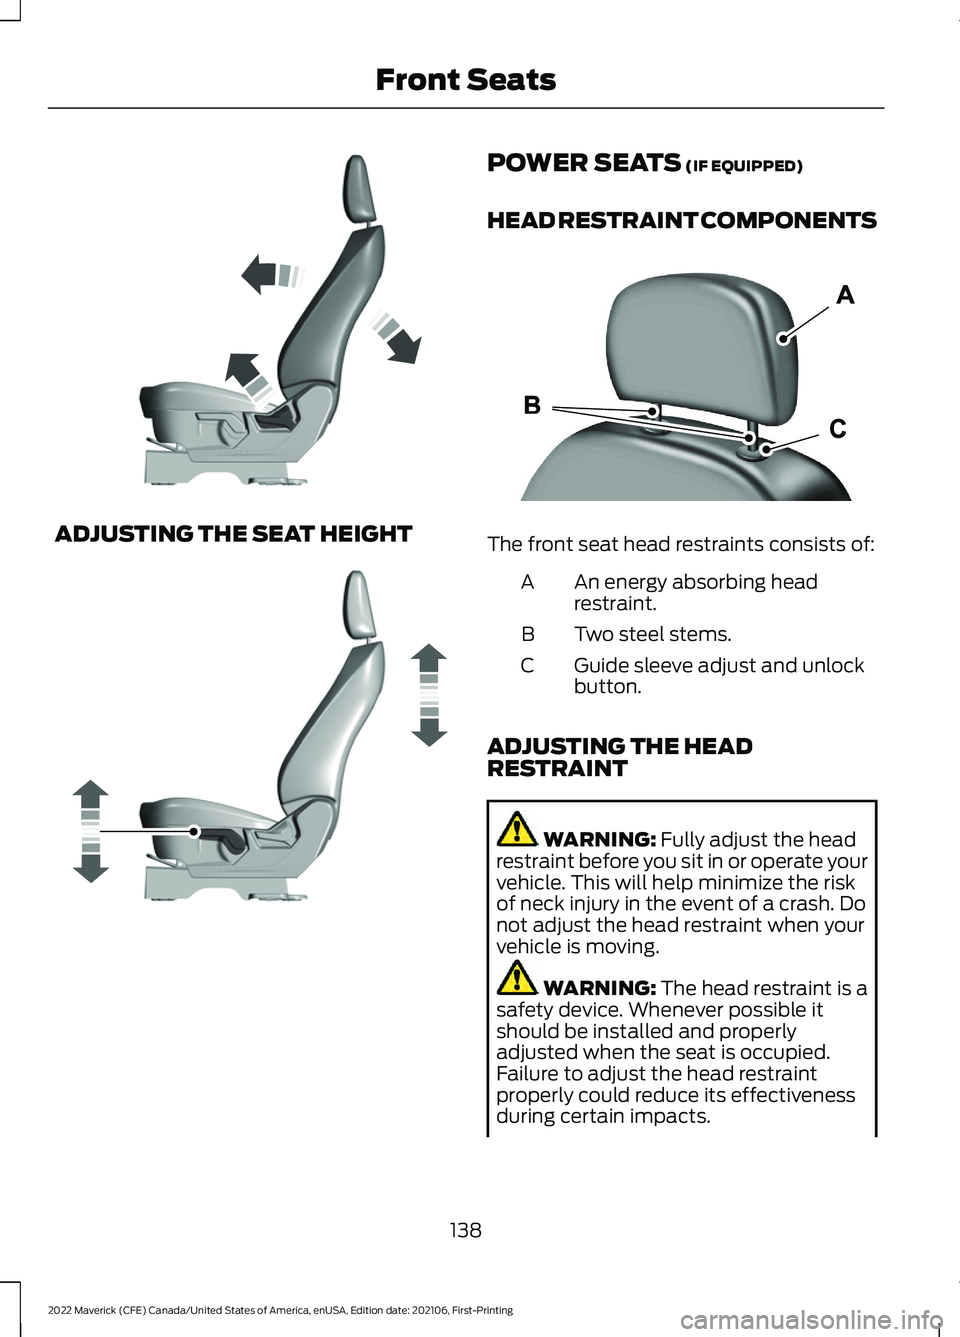
ADJUSTING THE SEAT HEIGHT POWER SEATS (IF EQUIPPED)
HEAD RESTRAINT COMPONENTS The front seat head restraints consists of:
An energy absorbing head
restraint.
A
Two steel stems.
B
Guide sleeve adjust and unlock
button.
C
ADJUSTING THE HEAD
RESTRAINT WARNING:
Fully adjust the head
restraint before you sit in or operate your
vehicle. This will help minimize the risk
of neck injury in the event of a crash. Do
not adjust the head restraint when your
vehicle is moving. WARNING:
The head restraint is a
safety device. Whenever possible it
should be installed and properly
adjusted when the seat is occupied.
Failure to adjust the head restraint
properly could reduce its effectiveness
during certain impacts.
138
2022 Maverick (CFE) Canada/United States of America, enUSA, Edition date: 202106, First-Printing Front SeatsE293558 E293554 E291139
Page 143 of 533
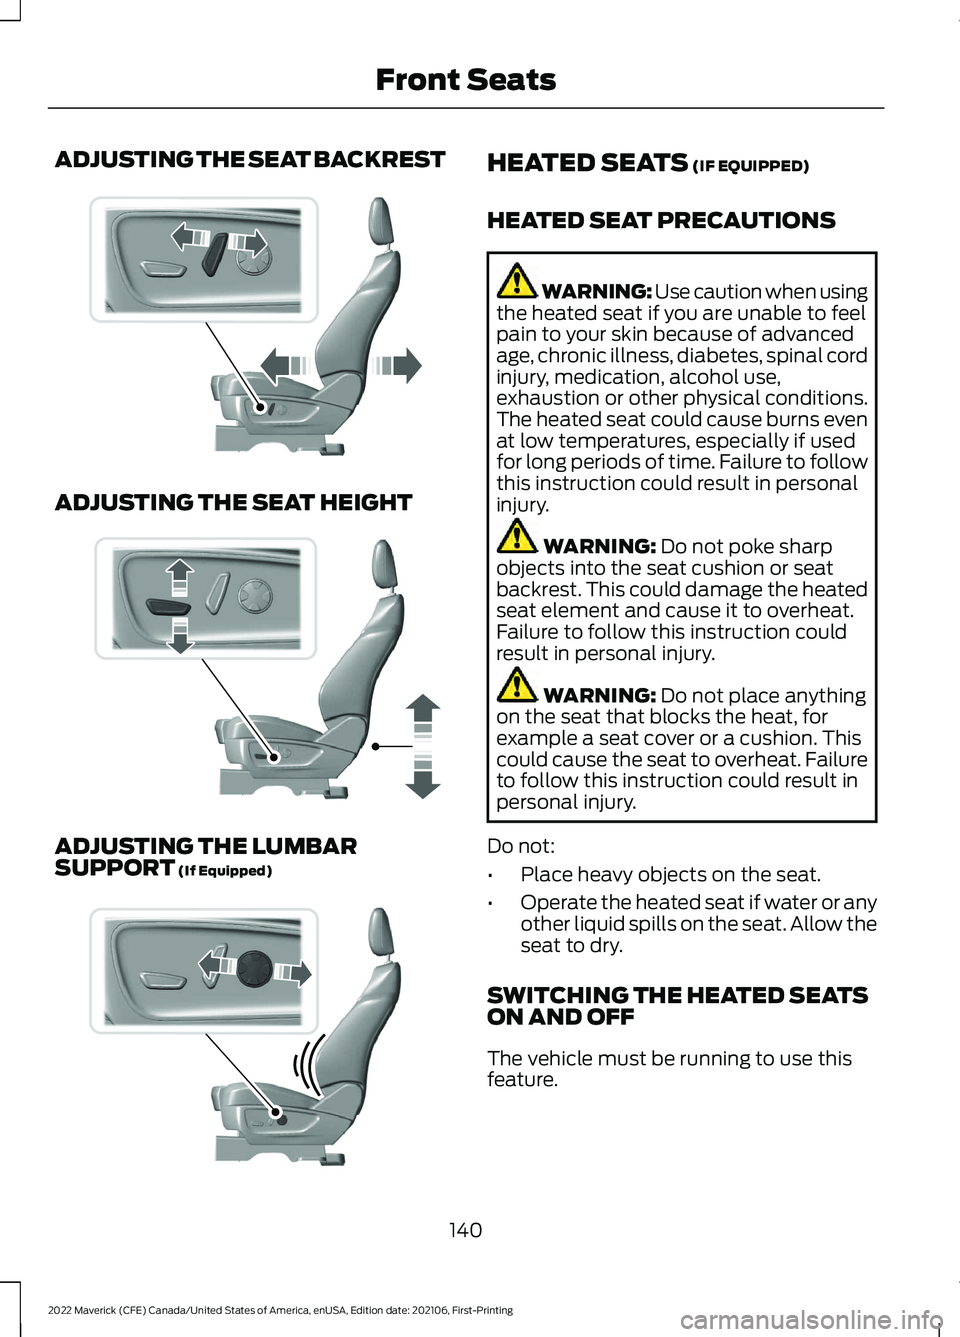
ADJUSTING THE SEAT BACKREST
ADJUSTING THE SEAT HEIGHT
ADJUSTING THE LUMBAR
SUPPORT (If Equipped) HEATED SEATS
(IF EQUIPPED)
HEATED SEAT PRECAUTIONS WARNING: Use caution when using
the heated seat if you are unable to feel
pain to your skin because of advanced
age, chronic illness, diabetes, spinal cord
injury, medication, alcohol use,
exhaustion or other physical conditions.
The heated seat could cause burns even
at low temperatures, especially if used
for long periods of time. Failure to follow
this instruction could result in personal
injury. WARNING:
Do not poke sharp
objects into the seat cushion or seat
backrest. This could damage the heated
seat element and cause it to overheat.
Failure to follow this instruction could
result in personal injury. WARNING:
Do not place anything
on the seat that blocks the heat, for
example a seat cover or a cushion. This
could cause the seat to overheat. Failure
to follow this instruction could result in
personal injury.
Do not:
• Place heavy objects on the seat.
• Operate the heated seat if water or any
other liquid spills on the seat. Allow the
seat to dry.
SWITCHING THE HEATED SEATS
ON AND OFF
The vehicle must be running to use this
feature.
140
2022 Maverick (CFE) Canada/United States of America, enUSA, Edition date: 202106, First-Printing Front SeatsE298773 E298772 E298774
Page 315 of 533
Electrical Accessory Installation
To make sure the battery management
system works correctly, do not connect an
electrical device ground connection
directly to the battery negative post. This
can cause inaccurate measurements of
the battery condition and potential
incorrect system operation.
Note:
If you add electrical accessories or
components to the vehicle, it may adversely
affect battery performance and durability.
This may also affect the performance of
other electrical systems in the vehicle.
Remove and Reinstall the Battery
Install a battery approved for use by our
specifications. See Capacities and
Specifications (page 355).
To disconnect or remove the battery, do
the following:
1. Apply the parking brake and switch the
ignition off.
2. Switch all electrical equipment off, for
example lights and radio.
3. Wait a minimum of two minutes before
disconnecting the battery.
Note: The engine management system has
a power hold function and remains powered
for a period of time after you switch the
ignition off. This is to allow the system to
store diagnostic and adaptive tables.
Disconnecting the battery without waiting
can cause damage not covered by the
vehicle warranty.
4. Disconnect the negative battery cable terminal.
5. Disconnect the positive battery cable terminal.
6. Remove the battery securing clamp.
7. Remove the battery.
8. To install, reverse the removal procedure. Note:
Before reconnecting the battery,
make sure the ignition remains switched off.
Note: Make sure to fully tighten the battery
cables.
If you disconnect or replace the vehicle
battery, you must reset the following
features:
• Window bounce-back. See
What Is
Window Bounce-Back (page 101).
• Clock Settings.
• Pre-set radio stations.
Battery Disposal Make sure that you dispose of
old batteries in an
environmentally friendly way.
Seek advice from your local authority
about recycling old batteries.
ADJUSTING THE HEADLAMPS
Vertical Aim Adjustment
The headlamps on your vehicle are
properly aimed at the assembly plant. If
your vehicle has been in an accident, have
the alignment of your headlamps checked
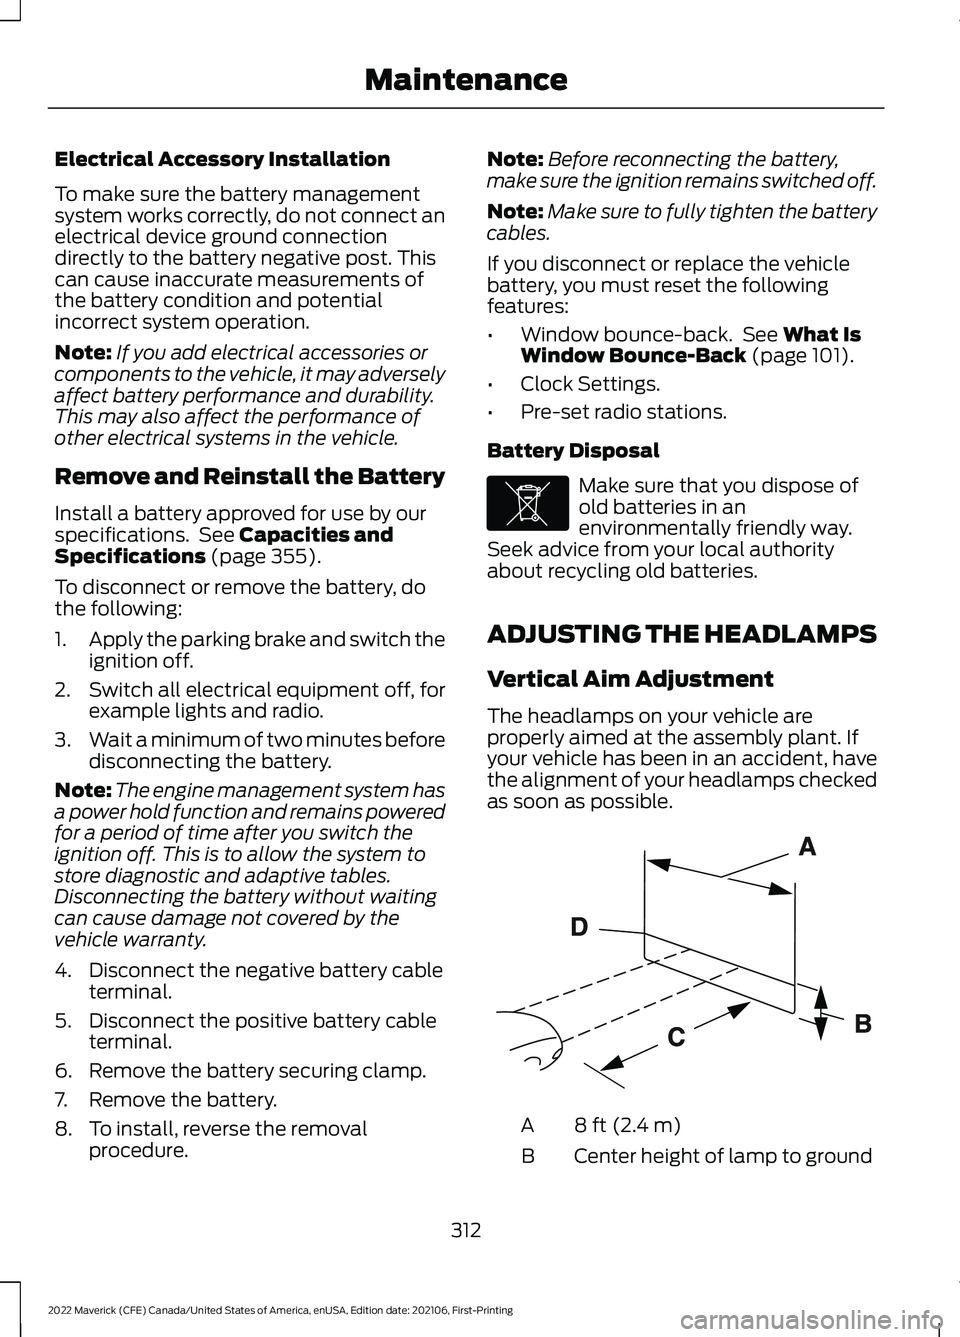
as soon as possible. 8 ft (2.4 m)
A
Center height of lamp to ground
B
312
2022 Maverick (CFE) Canada/United States of America, enUSA, Edition date: 202106, First-Printing MaintenanceE107998 E142592
Page 316 of 533
25 ft (7.6 m)
C
Horizontal reference line
D
1. Park the vehicle directly in front of a wall or screen on a level surface,
approximately 25 ft (7.6 m) away.
2. Measure the height of the headlamp bulb center from the ground and mark
an
8 ft (2.4 m) horizontal reference line
on the vertical wall or screen at this
height.
Note: To see a clearer light pattern for
adjusting, block the light from one
headlamp when adjusting the other.
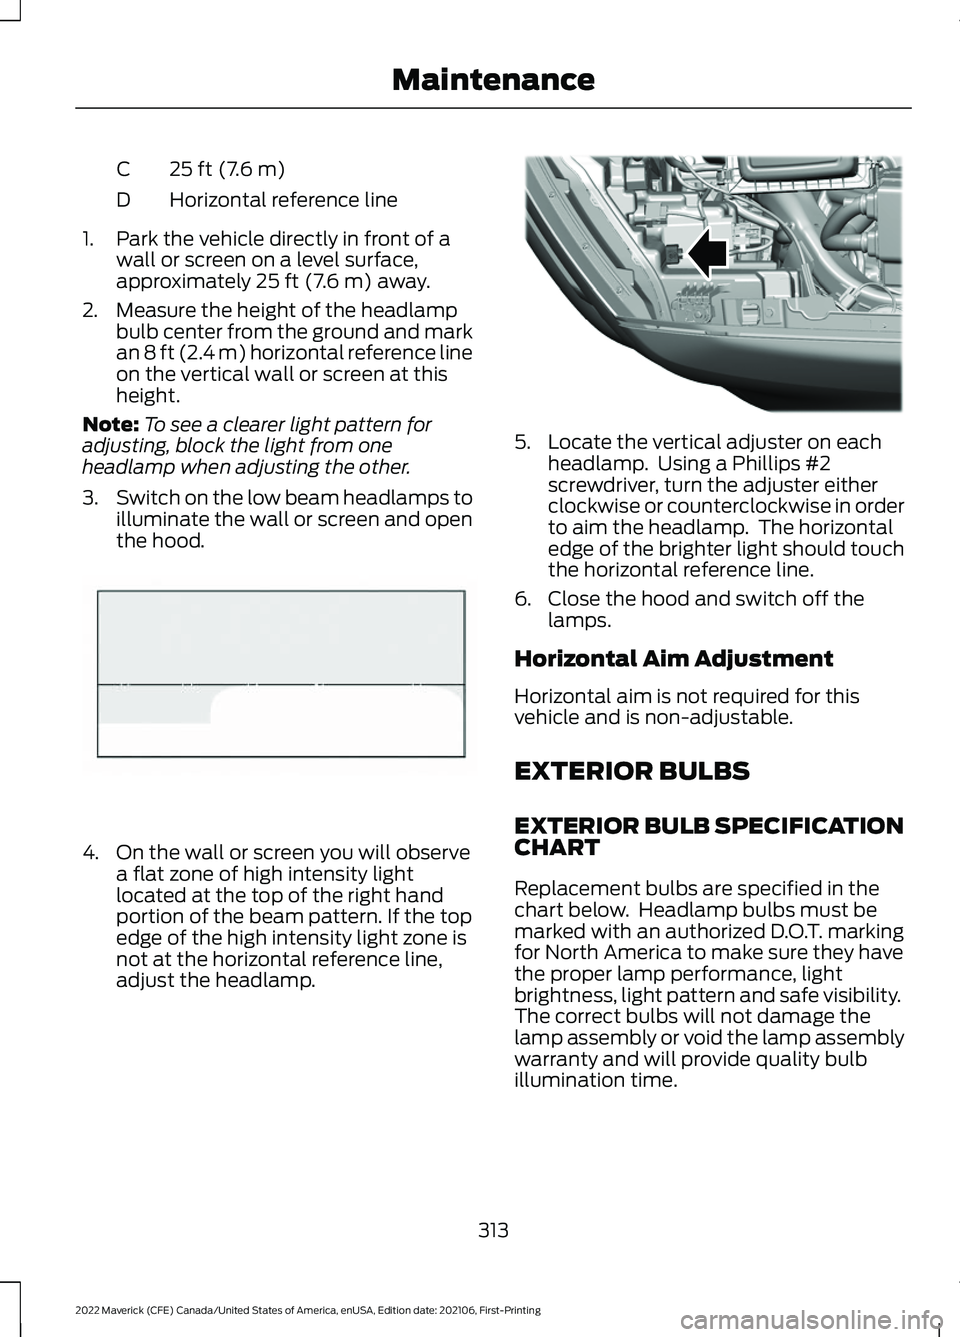
3. Switch on the low beam headlamps to
illuminate the wall or screen and open
the hood. 4. On the wall or screen you will observe
a flat zone of high intensity light
located at the top of the right hand
portion of the beam pattern. If the top
edge of the high intensity light zone is
not at the horizontal reference line,
adjust the headlamp. 5. Locate the vertical adjuster on each
headlamp. Using a Phillips #2
screwdriver, turn the adjuster either
clockwise or counterclockwise in order
to aim the headlamp. The horizontal
edge of the brighter light should touch
the horizontal reference line.
6. Close the hood and switch off the lamps.
Horizontal Aim Adjustment
Horizontal aim is not required for this
vehicle and is non-adjustable.
EXTERIOR BULBS
EXTERIOR BULB SPECIFICATION
CHART
Replacement bulbs are specified in the
chart below. Headlamp bulbs must be
marked with an authorized D.O.T. marking
for North America to make sure they have
the proper lamp performance, light
brightness, light pattern and safe visibility.
The correct bulbs will not damage the
lamp assembly or void the lamp assembly
warranty and will provide quality bulb
illumination time.
313
2022 Maverick (CFE) Canada/United States of America, enUSA, Edition date: 202106, First-Printing MaintenanceE142465 E355886
Page 332 of 533
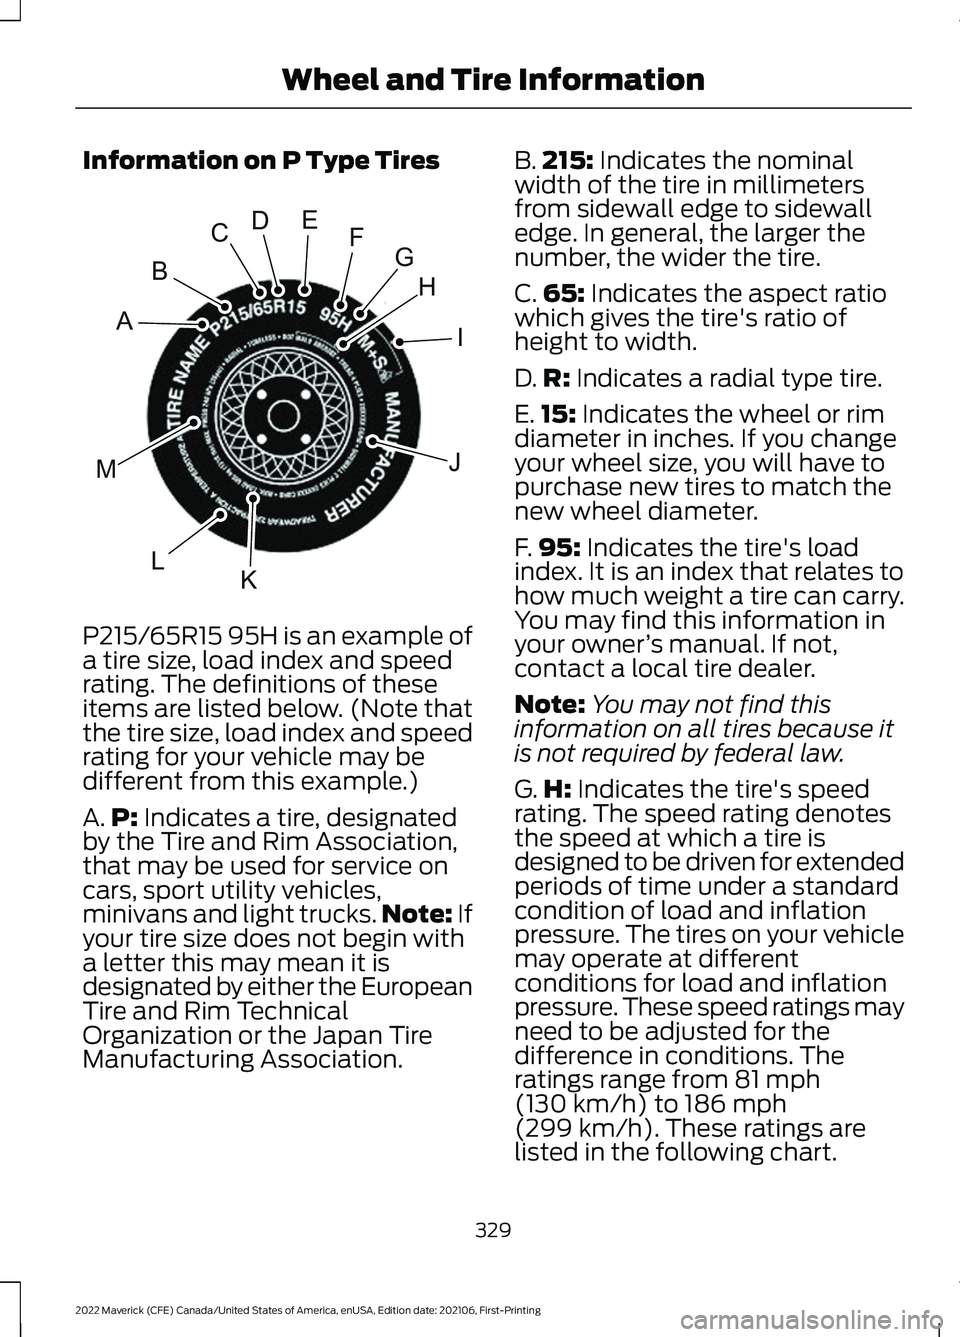
Information on P Type Tires
P215/65R15 95H is an example of
a tire size, load index and speed
rating. The definitions of these
items are listed below. (Note that
the tire size, load index and speed
rating for your vehicle may be
different from this example.)
A.
P: Indicates a tire, designated
by the Tire and Rim Association,
that may be used for service on
cars, sport utility vehicles,
minivans and light trucks. Note:
If
your tire size does not begin with
a letter this may mean it is
designated by either the European
Tire and Rim Technical
Organization or the Japan Tire
Manufacturing Association. B.
215:
Indicates the nominal
width of the tire in millimeters
from sidewall edge to sidewall
edge. In general, the larger the
number, the wider the tire.
C. 65:
Indicates the aspect ratio
which gives the tire's ratio of
height to width.
D. R:
Indicates a radial type tire.
E. 15:
Indicates the wheel or rim
diameter in inches. If you change
your wheel size, you will have to
purchase new tires to match the
new wheel diameter.
F. 95:
Indicates the tire's load
index. It is an index that relates to
how much weight a tire can carry.
You may find this information in
your owner ’s manual. If not,
contact a local tire dealer.
Note: You may not find this
information on all tires because it
is not required by federal law.
G. H:
Indicates the tire's speed
rating. The speed rating denotes
the speed at which a tire is
designed to be driven for extended
periods of time under a standard
condition of load and inflation
pressure. The tires on your vehicle
may operate at different
conditions for load and inflation
pressure. These speed ratings may
need to be adjusted for the
difference in conditions. The
ratings range from
81 mph
(130 km/h) to 186 mph
(299 km/h)
. These ratings are
listed in the following chart.
329
2022 Maverick (CFE) Canada/United States of America, enUSA, Edition date: 202106, First-Printing Wheel and Tire InformationH
I
J
KL
M
A
B
CDEFGE142543