2022 FORD F-350 warning light
[x] Cancel search: warning lightPage 179 of 740

WHAT IS THE GARAGE DOOR
OPENER
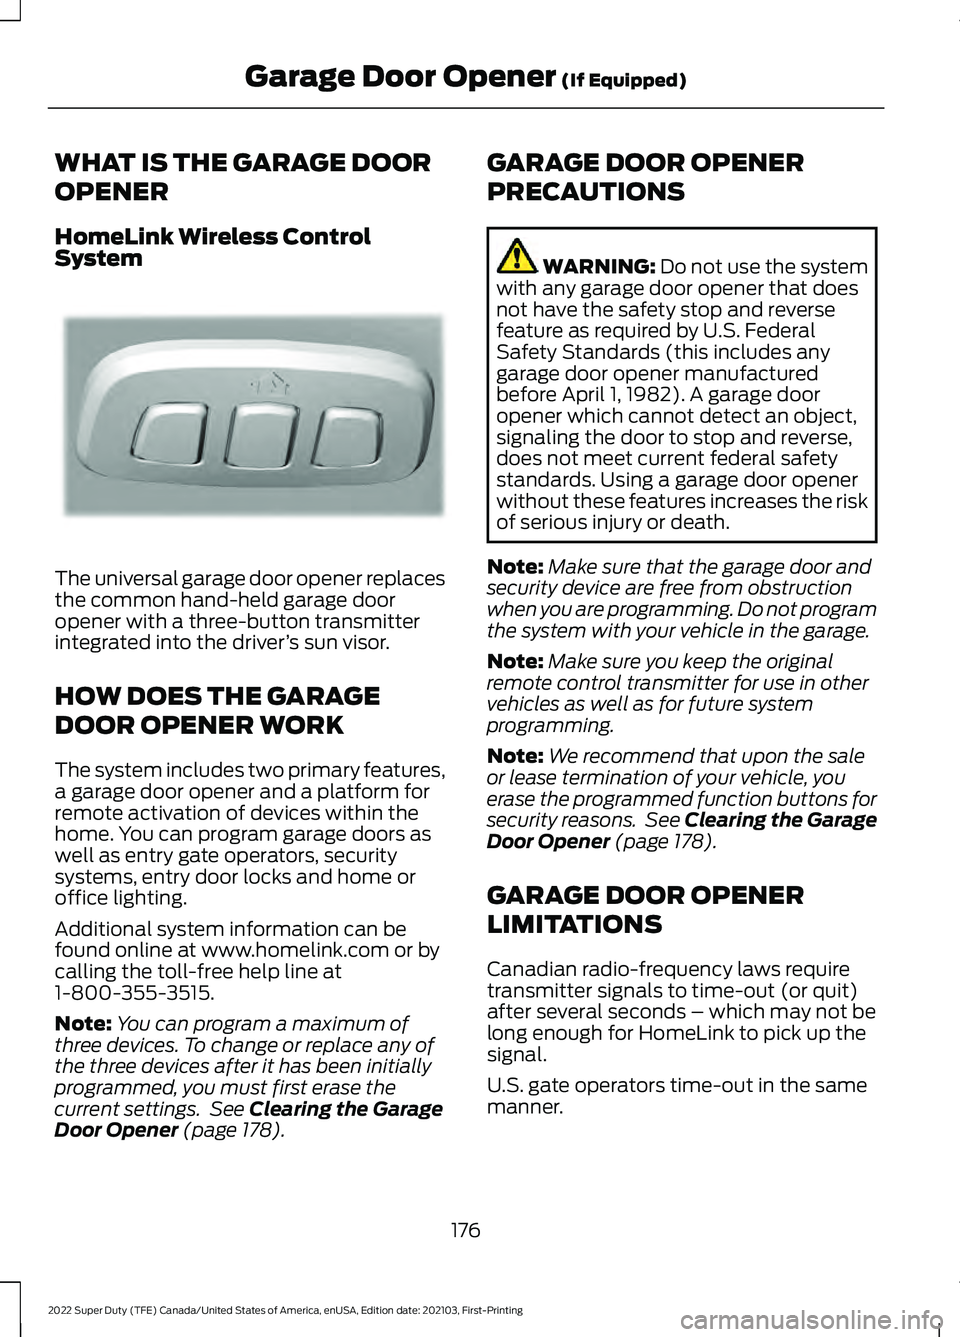
HomeLink Wireless Control
System
The universal garage door opener replaces
the common hand-held garage door
opener with a three-button transmitter
integrated into the driver
’s sun visor.
HOW DOES THE GARAGE
DOOR OPENER WORK
The system includes two primary features,
a garage door opener and a platform for
remote activation of devices within the
home. You can program garage doors as
well as entry gate operators, security
systems, entry door locks and home or
office lighting.
Additional system information can be
found online at www.homelink.com or by
calling the toll-free help line at
1-800-355-3515.
Note: You can program a maximum of
three devices. To change or replace any of
the three devices after it has been initially
programmed, you must first erase the
current settings. See Clearing the Garage
Door Opener (page 178). GARAGE DOOR OPENER
PRECAUTIONS WARNING:
Do not use the system
with any garage door opener that does
not have the safety stop and reverse
feature as required by U.S. Federal
Safety Standards (this includes any
garage door opener manufactured
before April 1, 1982). A garage door
opener which cannot detect an object,
signaling the door to stop and reverse,
does not meet current federal safety
standards. Using a garage door opener
without these features increases the risk
of serious injury or death.
Note: Make sure that the garage door and
security device are free from obstruction
when you are programming. Do not program
the system with your vehicle in the garage.
Note: Make sure you keep the original
remote control transmitter for use in other
vehicles as well as for future system
programming.
Note: We recommend that upon the sale
or lease termination of your vehicle, you
erase the programmed function buttons for
security reasons. See Clearing the Garage
Door Opener
(page 178).
GARAGE DOOR OPENER
LIMITATIONS
Canadian radio-frequency laws require
transmitter signals to time-out (or quit)
after several seconds – which may not be
long enough for HomeLink to pick up the
signal.
U.S. gate operators time-out in the same
manner.
176
2022 Super Duty (TFE) Canada/United States of America, enUSA, Edition date: 202103, First-Printing Garage Door Opener
(If Equipped)E188211
Page 182 of 740

2. When the indicator light flashes,
release the buttons.
Note: You cannot erase individual buttons.
REPROGRAMMING THE
GARAGE DOOR OPENER
To program a device to a previously trained
button, follow these steps:
1. Press and hold the desired button. Do NOT release the button.
2. The indicator light begins to flash after
20 seconds. Without releasing the
button, follow programming steps.
GARAGE DOOR OPENER
RADIO FREQUENCIES
FCC and RSS-210 Industry Canada
Compliance WARNING: Changes or
modifications not expressively approved
by the party responsible for compliance
could void the user's authority to operate
the equipment. The term "IC:" before the
radio certification number only signifies
that Industry Canada technical
specifications were met.
This device complies with Part 15 of the
FCC Rules and with RSS-210 of Industry
Canada. Operation is subject to the
following two conditions: (1) this device
may not cause harmful interference, and
(2) this device must accept any
interference received, including
interference that could cause undesired
operation. This equipment complies with FCC
radiation exposure limits set forth for an
uncontrolled environment. End Users must
follow the specific operating instructions
for satisfying RF exposure compliance. This
transmitter must be at least
8 in (20 cm)
from the user and must not be co-located
or operating in conjunction with any other
antenna or transmitter.
179
2022 Super Duty (TFE) Canada/United States of America, enUSA, Edition date: 202103, First-Printing Garage Door Opener
(If Equipped)
Page 195 of 740

Starting the Engine
Turn the key to position III. Release the
key when the engine starts.
PUSH BUTTON IGNITION
SWITCH
(IF EQUIPPED) Switching the Ignition Off
When the ignition is on or in accessory
mode, press the push button ignition
switch once without your foot on the brake
pedal.
Switching the Ignition to
Accessory Mode
When the ignition is off, press the push
button ignition switch once without your
foot on the brake pedal.
All electrical circuits and accessories are
operational and the warning lamps and
indicators illuminate.
Note:
Your vehicle has a battery saver
feature that shuts your vehicle off when it
detects a certain amount of battery drain,
or after approximately 30 minutes of
inactivity in accessory mode.
Starting the Engine
With the transmission in park (P), press
the brake pedal and press the push button
ignition switch. An indicator light on the
button illuminates when the ignition is on
and when the engine starts. Note:
The system may not function if the
passive key is close to metal objects or
electronic devices, for example keys or a cell
phone.
Note: A valid key must be inside your
vehicle to switch the ignition on and start
the engine.
STARTING THE ENGINE
STARTING A GASOLINE ENGINE -
VEHICLES WITHOUT: PUSH
BUTTON START
Before starting your vehicle, check the
following:
• Make sure that the headlamps and
electrical accessories are off.
• Make sure that the parking brake is on.
• Make sure that the transmission is in
park (P).
1. Fully press the brake pedal.
Note: Do not touch the accelerator pedal. 2. Turn the key to position
III.
Note: The engine may continue cranking
for up to 15 seconds or until it starts.
Note: The engine takes longer to start at
lower temperatures. It may crank for several
seconds when very cold.
192
2022 Super Duty (TFE) Canada/United States of America, enUSA, Edition date: 202103, First-Printing Starting and Stopping the EngineE321258 E322354
Page 216 of 740

Failure to perform active or manual
regeneration when instructed could result
in a clogged diesel particulate filter. If the
diesel particulate filter fills beyond the
regeneration threshold, your vehicle
disables the ability for active and manual
regeneration. This could result in
irreversible damage your vehicle Warranty
may not cover.
DIESEL PARTICULATE FILTER
REQUIREMENTS
The diesel particulate filter on your vehicle
requires periodic regeneration to maintain
its correct function.
If your journeys meet one of the following
conditions:
•
You drive only short distances.
• You frequently switch the ignition on
and off.
• Your journeys contain a high level of
acceleration and deceleration.
You must carry out occasional trips with
the following conditions to assist the
regeneration process:
• Drive your vehicle in more favorable
conditions, which you will find at higher
vehicle speeds in normal driving, on a
main road or freeway for a minimum
of 20 minutes. This drive may include
short stops that will not affect the
regeneration process.
• Avoid prolonged idling and observe
speed limits and road conditions.
• Do not switch the ignition off.
• Select a suitable gear to ideally
maintain engine speed between 1500
and 3000 RPM. DIESEL PARTICULATE FILTER
MANUAL REGENERATION
WHAT IS DIESEL PARTICULATE
FILTER MANUAL REGENERATION
Diesel particulate filter manual
regeneration allows you to manually start
regeneration of the diesel particulate filter
at idle to clean the filter.
Note:
If you are not sure whether your
vehicle has this feature, contact your
authorized dealer.
DIESEL PARTICULATE FILTER
MANUAL REGENERATION
PRECAUTIONS WARNING: Stay clear of the
exhaust tailpipe during regeneration. Hot
exhaust gases can burn you badly.
You may not be able to use manual
regeneration if the service engine soon
warning lamp appears in the information
display.
Note: During the use of manual
regeneration, you may observe a light
amount of white smoke. This is normal.
DIESEL PARTICULATE FILTER
MANUAL REGENERATION
REQUIREMENTS
You can use the manual regeneration
feature when a message appears in the
information display and you are not able
to drive in a manner that allows effective
automatic active regeneration or if you
choose to manually start the regeneration
of the diesel particulate filter while the
vehicle is idle.
213
2022 Super Duty (TFE) Canada/United States of America, enUSA, Edition date: 202103, First-Printing Diesel Particulate Filter
Page 229 of 740

WARNING: If the parking brake is
fully released, but the brake warning
lamp remains illuminated, the brakes
may not be working properly. Have your
vehicle checked as soon as possible.
In the event of an electrical malfunction,
it is possible that a fuse has blown or the
stoplamps are not working. See
Fuse
Precautions (page 387).
If the vehicle battery has no charge, jump
start your vehicle.
USING BRAKE SHIFT INTERLOCK
Brake-Shift Interlock
The following procedure allows you to
move the gearshift lever from park (P):
1. Apply the parking brake. Switch the ignition key to 1 - 0, then remove the
key.
2. Move the steering column to the full down and full rearward position,
toward the driver seat.
3. Remove the gearshift lever boot.
4. Place your fingers into the hole where you removed the gearshift lever boot
and pull the top half of the shroud up
and forward to separate it from the
lower half of the shroud. There is a
hinge at the forward edge of the top
shroud. Roll the top half of the shroud
upward on the hinge point, then pull
straight rearward toward the driver
seat to remove.
5. Remove the top half of the shroud.
6. Remove the three fasteners under the column that secure the lower shroud
half to the column. 7. Pull the lock lever into the fully
unlocked position and remove the
lower shroud cover by pulling the lever
handle through the slot in the cover.
8. Apply the brake. Gently lift the override
disk and move the gearshift lever into
neutral (N). 9. Start your vehicle.
Perform steps 4 through 8 in reverse order
to get the shroud back together, making
sure to engage the hinge pivots between
the upper and lower halves of the shroud.
Keep slight pressure in the forward
direction as you rotate the halves together.
226
2022 Super Duty (TFE) Canada/United States of America, enUSA, Edition date: 202103, First-Printing Automatic TransmissionE163185 E163186
Page 236 of 740

Mud
Be cautious of sudden changes in vehicle
speed or direction when you are driving in
mud. Even four-wheel drive vehicles can
lose traction in slick mud. If your vehicle
does slide, steer in the direction of the slide
until you regain control of your vehicle.
After driving through mud, clean off residue
stuck to rotating driveshafts and tires.
Excess mud stuck on tires and rotating
driveshafts can cause an imbalance that
could damage drive components.
Water
If you must drive through high water, drive
slowly. Traction or brake capability may
be limited. When driving through water,
determine the depth and avoid water
higher than the bottom of the hubs. If the
ignition system gets wet, your vehicle may
stall. Once through water, test the brakes.
Wet brakes do not stop your vehicle as
effectively as dry brakes. Drying improves
by applying light pressure to the brake
pedal while moving slowly.
Note:
Driving through deep water may
damage the transmission. If the front or rear
axle is submerged in water, the axle
lubricant and power transfer unit lubricant
should be checked and changed if
necessary.
DRIVING ON HILLY OR SLOPING
TERRAIN
Although natural obstacles may make it
necessary to travel diagonally up or down
a hill or steep incline, you should try to drive
straight up or straight down. Note:
Avoid turning on steep slopes or hills.
A danger lies in losing traction, slipping
sideways and possible vehicle roll over.
Whenever driving on a hill, determine
beforehand the route you can use. Do not
drive over the crest of a hill without seeing
what conditions are on the other side. Do
not drive in reverse over a hill without the
aid of an observer.
When climbing a steep slope or hill, start
in a lower gear rather than downshifting to
a lower gear from a higher gear once the
ascent has started. This reduces strain on
the engine and the possibility of stalling.
If your vehicle stalls, do not try to
turnaround because this could cause
vehicle roll over. It is better to reverse back
to a safe location.
Apply just enough power to the wheels to
climb the hill. Too much power can cause
the tires to slip, spin or lose traction,
resulting in loss of vehicle control.
Descend a hill in the same gear you would
use to climb up the hill to avoid excessive
brake application and brake overheating.
Do not descend in neutral. Disengage
overdrive or move the transmission
selector lever to a lower gear. When
descending a steep hill, avoid sudden hard
braking as you could lose control. The front
wheels have to be turning in order to steer
your vehicle.
Note: If your vehicle has anti-lock brakes,
apply the brakes steadily. Do not pump the
brakes.
DRIVING ON SNOW AND ICE WARNING: If you are driving in
slippery conditions that require tire
chains or cables, then it is critical that
you drive cautiously. Keep speeds down,
allow for longer stopping distances and
avoid aggressive steering to reduce the
233
2022 Super Duty (TFE) Canada/United States of America, enUSA, Edition date: 202103, First-Printing Four-Wheel Drive
(If Equipped)
Page 252 of 740

HOW DOES STABILITY
CONTROL WORK
WARNING: Vehicle modifications
involving braking system, aftermarket
roof racks, suspension, steering system,
tire construction and wheel and tire size
may change the handling characteristics
of your vehicle and may adversely affect
the performance of the electronic
stability control system. In addition,
installing any stereo speakers may
interfere with and adversely affect the
electronic stability control system.
Reducing the effectiveness of the
electronic stability control system could
lead to an increased risk of loss of vehicle
control, vehicle rollover, personal injury
and death. WARNING:
Remember that even
advanced technology cannot defy the
laws of physics. It's always possible to
lose control of a vehicle due to
inappropriate driver input for the
conditions. Aggressive driving on any
road condition can cause you to lose
control of your vehicle increasing the risk
of personal injury or property damage.
Activation of the electronic stability
control system is an indication that at
least some of the tires have exceeded
their ability to grip the road; this could
reduce the operator's ability to control
the vehicle potentially resulting in a loss
of vehicle control, vehicle rollover,
personal injury and death. WARNING: You are responsible for
controlling your vehicle at all times. The
system is designed to be an aid and does
not relieve you of your responsibility to
drive with due care and attention. Failure
to follow this instruction could result in
the loss of control of your vehicle,
personal injury or death.
If a driving condition activates either the
stability control or traction control you may
experience the following conditions:
• The stability and traction control light
flashes.
• Your vehicle slows down.
• Reduced engine power.
The stability control system has several
features built into it to help you maintain
control of your vehicle:
Electronic Stability Control
Electronic stability control enhances your
vehicle ’s ability to prevent skids or lateral
slides by applying brakes to one or more
of the wheels individually and, if necessary,
reducing engine power.
Roll Stability Control
Roll stability control enhances your
vehicle ’s ability to prevent rollovers by
detecting your vehicle ’s roll motion and
the rate at which it changes by applying
the brakes to one or more wheels
individually.
Curve Control
Curve control enhances your vehicle ’s
ability to follow the road when cornering
severely or avoiding objects in the roadway.
Curve control operates by reducing engine
power and, if necessary, applying brakes
to one or more of the wheels individually.
249
2022 Super Duty (TFE) Canada/United States of America, enUSA, Edition date: 202103, First-Printing Stability Control
Page 257 of 740

WHAT IS HILL DESCENT
CONTROL
Hill descent control allows the driver to set
and maintain vehicle speed while
descending steep slopes in various surface
conditions.
HOW DOES HILL DESCENT
CONTROL WORK
Hill descent control can maintain vehicle
speeds on downhill slopes between
2
– 20 mph (3– 32 km/h). Above 20 mph
(32 km/h), the system remains on but the
descent speed cannot be set or
maintained.
Note: The system does not function below
2 mph (3 km/h)
.
The system requires a cool down interval
after a period of sustained use. Hill descent
control provides a warning in the message
center and a tone sounds when the system
is about to disengage for cooling. At this
time, manually apply the brakes as needed
to maintain descent speed.
Note: The amount of time that the system
can remain active before cooling varies with
conditions.
HILL DESCENT CONTROL
PRECAUTIONS WARNING:
The system does not
control speed in low traction conditions
or extremely steep slopes. The system
is designed to be an aid and does not
relieve you of your responsibility to drive
with due care and attention. Failure to
follow this instruction could result in
personal injury. WARNING:
Hill descent control
cannot control descent in all surface
conditions and circumstances, such as
ice or extremely steep grades. Hill
descent control is a driver assist system
and cannot substitute for good judgment
by the driver. Failure to do so may result
in loss of vehicle control, crash or serious
injury. WARNING:
The system does not
replace the parking brake. When you
leave your vehicle, always apply the
parking brake and shift the transmission
into park (P) for automatic transmission
or first gear for manual transmission.
SWITCHING HILL DESCENT
CONTROL ON AND OFF Press the button on the
instrument panel. A light
illuminates and a tone sounds
when the system is active.
SETTING THE HILL DESCENT
SPEED
To increase or decrease the descent speed,
press the accelerator or brake pedal, or use
the SET
+ and SET - buttons on the
steering wheel. Once you reach the
preferred speed remove your feet from the
pedals.
HILL DESCENT CONTROL
INDICATOR Illuminates when you switch hill
descent control on.
254
2022 Super Duty (TFE) Canada/United States of America, enUSA, Edition date: 202103, First-Printing Hill Descent Control
(If Equipped)E163171 E163171