2022 FORD F-250 lock
[x] Cancel search: lockPage 426 of 740

Note:
If your vehicle has an engine cover
remove the cover before application of
shampoo and degreaser.
• Spray an approved engine shampoo
and degreaser on all parts that require
cleaning and rinse with water.
CLEANING STRIPES OR
GRAPHICS
It is recommended to wash your vehicle by
hand however, pressure washing may be
used under the following conditions:
• Use a spray with a 40° wide spray
angle pattern.
• Keep the nozzle at a
12 in (305 mm)
distance and 90° angle to your
vehicle's surface.
• Do not use water pressure higher than
2,000 psi (14,000 kPa)
.
• Do not use water hotter than
179°F
(82°C).
Note: Holding the pressure washer nozzle
at an angle to the vehicle's surface may
damage graphics and cause the edges to
peel away from the vehicle's surface.
CLEANING CAMERA LENSES AND
SENSORS
We recommend that you only use
lukewarm or cold water and a soft cloth
to clean the camera lens and sensors.
Note: Do not pressure wash camera lens
and sensors.
CLEANING THE UNDERBODY
Flush the complete underside of your
vehicle frequently. Keep body and door
drain holes free from packed dirt. Rear suspension components may require
regular cleaning with a power washer or a
thorough rinse with a strong stream of
water if the vehicle is operated in dusty or
muddy environments. Rear leaf springs or
other suspension components may emit
squeaking or popping noises while
operating the vehicle if particles, such as
dirt, rocks, or other debris, are present in
the components.
CLEANING THE EXHAUST
WARNING:
Do not modify or
remove the exhaust tailpipe. Blocked
holes may result in increased exhaust
gas temperatures, vehicle damage,
property damage or personal injury. WARNING:
Failure to keep the
holes in the exhaust tailpipe clean and
free of debris or foreign material may
result in blocked holes. Blocked holes
may result in increased exhaust gas
temperatures, vehicle damage, property
damage or personal injury. WARNING:
The normal operating
temperature of the exhaust system is
very high. Never work around or attempt
to repair any part of the exhaust system
until it has cooled. Use special care when
working around the diesel oxidation
catalytic converter or the diesel
particulate filter. The diesel oxidation
catalytic converter and the diesel
particulate filter heat up to very high
temperatures after only a short period
of engine operation and remain hot after
you switch the engine off.
423
2022 Super Duty (TFE) Canada/United States of America, enUSA, Edition date: 202103, First-Printing Vehicle Care
Page 458 of 740

CHANGING A FLAT TIRE
WARNING: If the tire pressure
monitor sensor becomes damaged it
may not function.
Note: The use of tire sealant may damage
your tire pressure monitoring system and
should only be used in roadside
emergencies.
Note: The tire pressure monitoring system
indicator light illuminates when the spare
tire is in use. To restore the full function of
the monitoring system, all road wheels
equipped with tire pressure monitoring
sensors must be mounted on this vehicle.
If you get a flat tire when driving, do not
apply the brake heavily. Instead, gradually
decrease your speed. Hold the steering
wheel firmly and slowly move to a safe
place on the side of the road.
Have a flat serviced by an authorized
dealer to prevent damage to the system
sensors.
See Tire Pressure Monitoring
System Precautions (page 449). Replace
the spare tire with a road tire as soon as
possible. During repairing or replacing the
flat tire, have the authorized dealer inspect
the system sensor for damage.
Dissimilar Spare Wheel and Tire
Assembly Information WARNING:
Failure to follow these
guidelines could result in an increased
risk of loss of vehicle control, injury or
death. If you have a dissimilar spare wheel and
tire, then it is intended for temporary use
only. This means that if you need to use it,
you should replace it as soon as possible
with a road wheel and tire assembly that
is the same size and type as the road tires
and wheels that were originally provided
by Ford. If the dissimilar spare tire or wheel
is damaged, it should be replaced rather
than repaired.
A dissimilar spare wheel and tire assembly
is defined as a spare wheel and tire
assembly that is different in brand, size or
appearance from the road tires and
wheels.
Full-size dissimilar spare
When driving with the full-size dissimilar
spare wheel and tire assembly, do not:
•
Exceed
70 mph (113 km/h).
• Use more than one dissimilar spare
wheel and tire assembly at a time.
• Use snow chains on the end of the
vehicle with the dissimilar spare wheel
and tire assembly.
When driving with the full-size dissimilar
spare wheel and tire assembly, 4WD
functionality may be limited. You may
experience the following:
• Additional noise from the transfer case
or other drive components.
• Difficulty shifting out of a mechanically
locked 4WD mode.
When driving with the full-size dissimilar
spare wheel and tire assembly, it is
recommended that you do not:
• Exceed
50 mph (80 km/h) in 4WD.
• Engage 4WD unless the vehicle is
stationary.
• Use 4WD on dry pavement.
455
2022 Super Duty (TFE) Canada/United States of America, enUSA, Edition date: 202103, First-Printing Changing a Road Wheel
Page 460 of 740

WARNING: To help prevent your
vehicle from moving when changing a
wheel, shift the transmission into park
(P), set the parking brake and use an
appropriate block or wheel chock to
secure the wheel diagonally opposite to
the wheel being changed. For example,
when changing the front left wheel,
place an appropriate block or wheel
chock on the right rear wheel. WARNING:
Always use the jack
provided as original equipment with your
vehicle. If using a jack other than the one
provided, make sure the jack capacity is
adequate for the vehicle weight,
including any vehicle cargo or
modifications. If you are unsure if the jack
capacity is adequate, contact the
authorized dealer. WARNING:
Failure to follow these
guidelines could result in an increased
risk of loss of vehicle control, injury or
death. WARNING:
Never place anything
between the vehicle jack and your
vehicle. WARNING:
Never place anything
between the vehicle jack and the ground. WARNING:
Park your vehicle so
that you do not obstruct the flow of
traffic or place yourself in any danger and
set up a warning triangle. WARNING:
The jack supplied with
this vehicle is only intended for changing
a flat tire in an emergency. Do not
attempt to do any other work on your
vehicle when it is supported by the jack,
as your vehicle could slip off the jack.
Failure to follow this instruction could
result in personal injury or death. WARNING:
Do not attempt to
change a tire on the side of the vehicle
close to moving traffic. Pull far enough
off the road to avoid the danger of being
hit when operating the jack or changing
the wheel. WARNING:
Only use the spare
wheel carrier to stow wheels provided
with your vehicle.
Note: Do not use impact tools or power
tools operating at over 200 RPM on the
spare wheel carrier winch, which may cause
it to malfunction and result in the wheel and
tire not being securely stowed.
Note: Passengers should not remain in the
vehicle when the vehicle is being jacked.
1. Park the vehicle on a level firm ground and activate the hazard flashers.
2. Apply the parking brake, place the transmission in park (P), switch the
engine off.
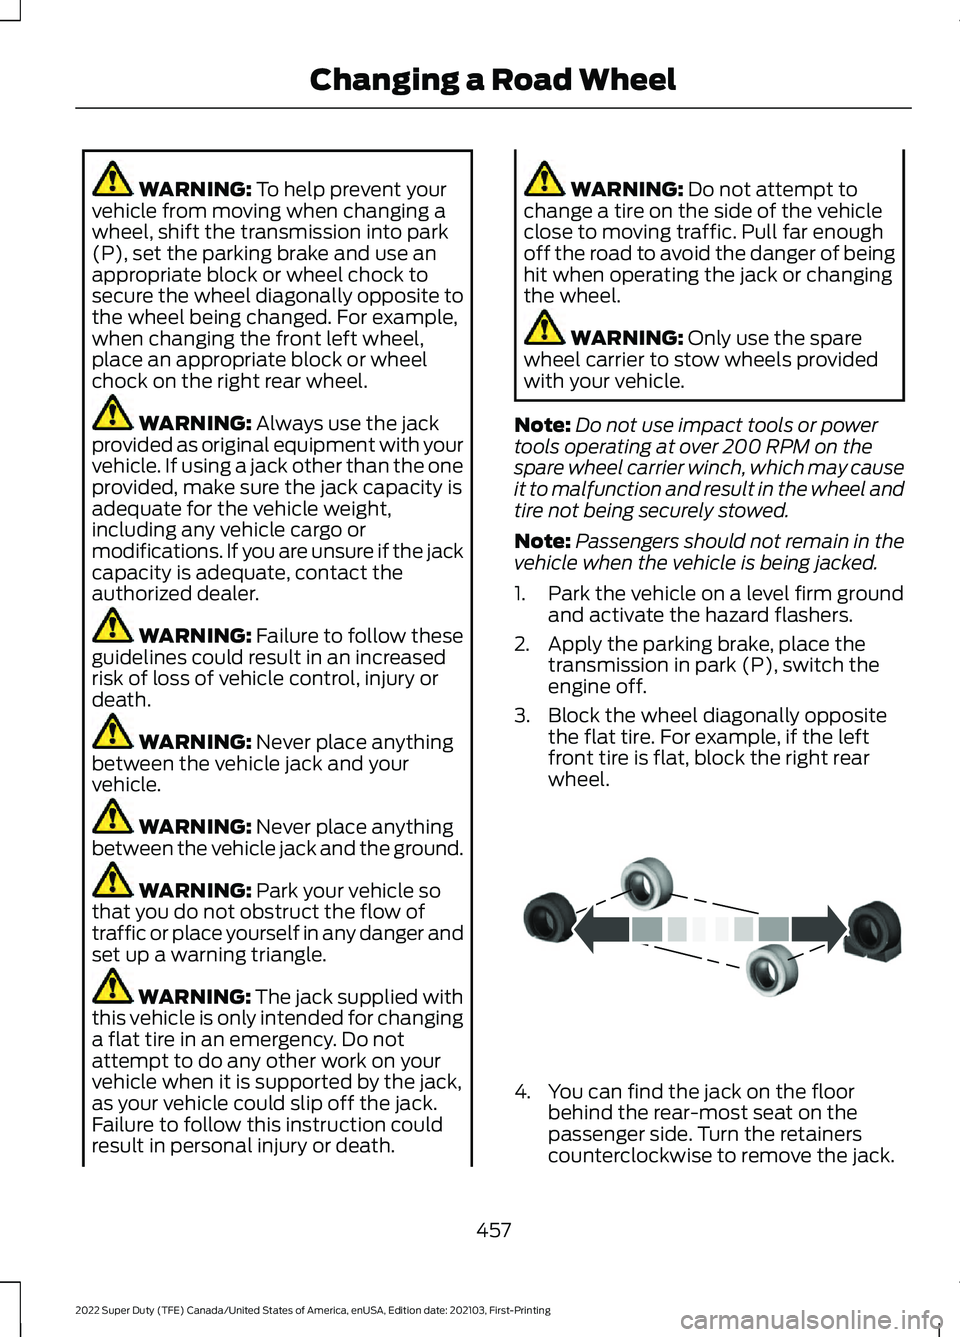
3. Block the wheel diagonally opposite the flat tire. For example, if the left
front tire is flat, block the right rear
wheel. 4. You can find the jack on the floor
behind the rear-most seat on the
passenger side. Turn the retainers
counterclockwise to remove the jack.
457
2022 Super Duty (TFE) Canada/United States of America, enUSA, Edition date: 202103, First-Printing Changing a Road WheelE175447
Page 461 of 740

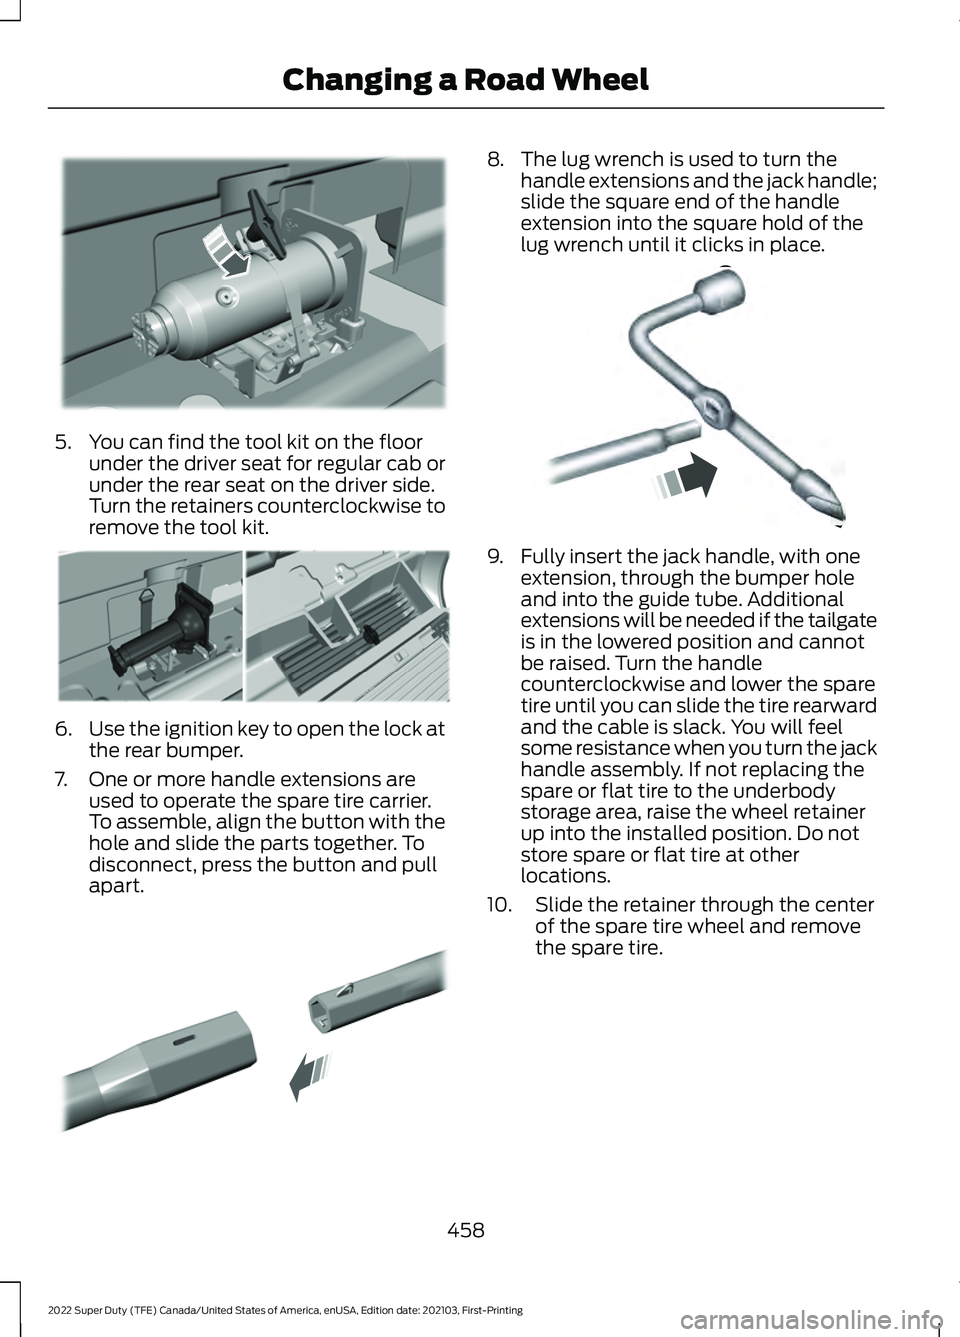
5. You can find the tool kit on the floor
under the driver seat for regular cab or
under the rear seat on the driver side.
Turn the retainers counterclockwise to
remove the tool kit. 6.
Use the ignition key to open the lock at
the rear bumper.
7. One or more handle extensions are used to operate the spare tire carrier.
To assemble, align the button with the
hole and slide the parts together. To
disconnect, press the button and pull
apart. 8. The lug wrench is used to turn the
handle extensions and the jack handle;
slide the square end of the handle
extension into the square hold of the
lug wrench until it clicks in place. 9. Fully insert the jack handle, with one
extension, through the bumper hole
and into the guide tube. Additional
extensions will be needed if the tailgate
is in the lowered position and cannot
be raised. Turn the handle
counterclockwise and lower the spare
tire until you can slide the tire rearward
and the cable is slack. You will feel
some resistance when you turn the jack
handle assembly. If not replacing the
spare or flat tire to the underbody
storage area, raise the wheel retainer
up into the installed position. Do not
store spare or flat tire at other
locations.
10. Slide the retainer through the center of the spare tire wheel and remove
the spare tire.
458
2022 Super Duty (TFE) Canada/United States of America, enUSA, Edition date: 202103, First-Printing Changing a Road WheelE309424 E309795 E308882 E162796
Page 462 of 740

11. Remove the wheel trim with the lug
wrench tip, or use the wheel trim tool
described later in this section.
12. Loosen each wheel lug nut one-half turn counterclockwise, but do not
remove them until the wheel is raised
off the ground. For dual rear wheel,
assemble the lug wrench and
extension tool together to access the
lug nuts. 13. Position the jack under the correct
jacking points.
Removing Wheel Trim With Single
Wheels
1. Insert the flat end of the lug wrench between the wheel rim and the wheel
trim.
2. Carefully remove the wheel trim. Vehicles With Dual Rear Alloy Wheels
The wheel trim removal tool is in the
storage bag near the lug wrench.
459
2022 Super Duty (TFE) Canada/United States of America, enUSA, Edition date: 202103, First-Printing Changing a Road WheelE310417 E309794 E338541 E338539
Page 465 of 740

Note:
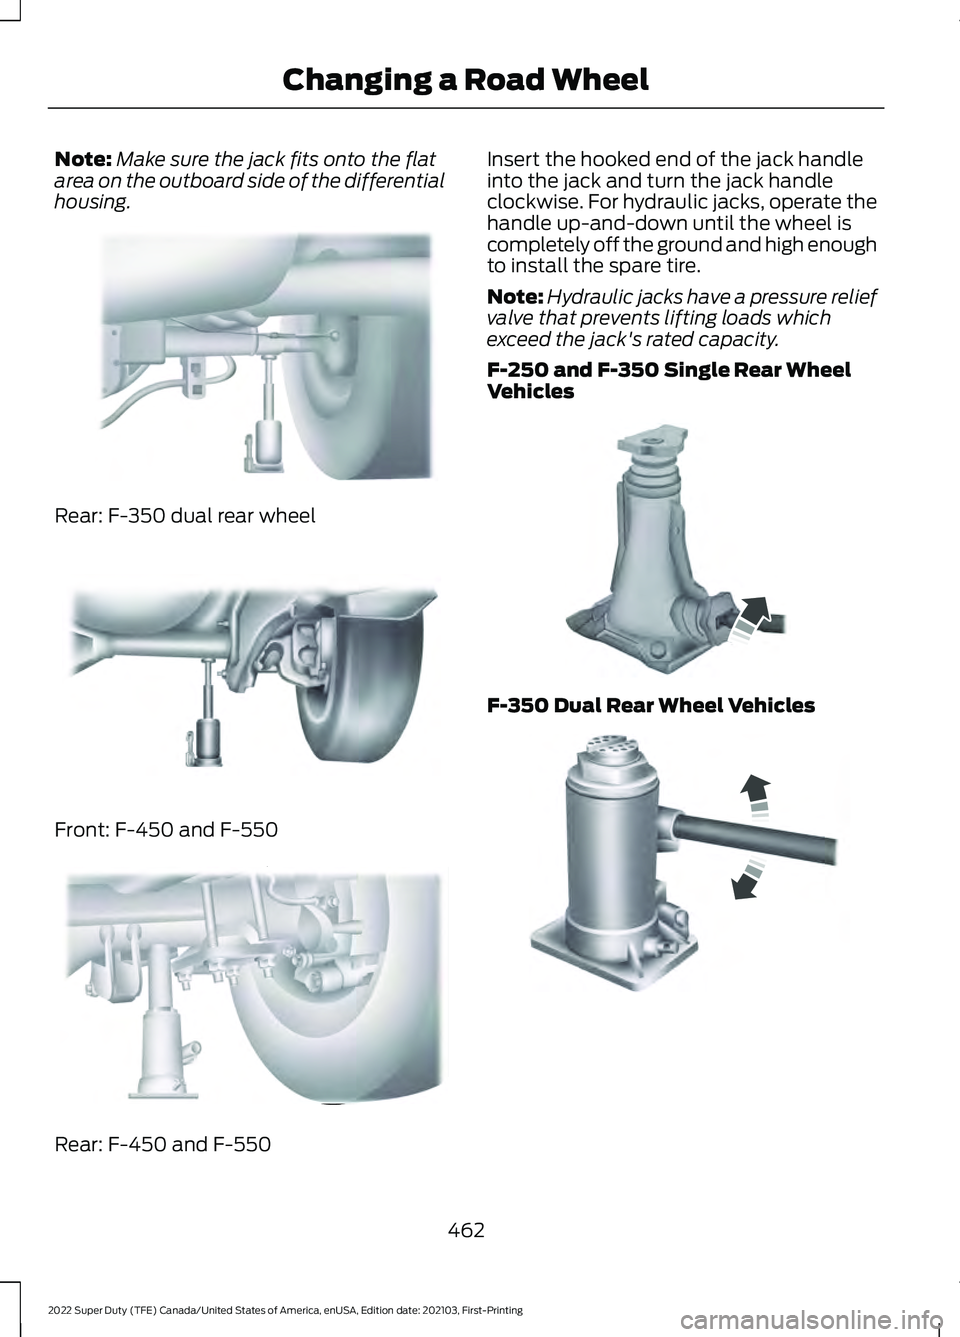
Make sure the jack fits onto the flat
area on the outboard side of the differential
housing. Rear: F-350 dual rear wheel
Front: F-450 and F-550
Rear: F-450 and F-550 Insert the hooked end of the jack handle
into the jack and turn the jack handle
clockwise. For hydraulic jacks, operate the
handle up-and-down until the wheel is
completely off the ground and high enough
to install the spare tire.
Note:
Hydraulic jacks have a pressure relief
valve that prevents lifting loads which
exceed the jack's rated capacity.
F-250 and F-350 Single Rear Wheel
Vehicles F-350 Dual Rear Wheel Vehicles
462
2022 Super Duty (TFE) Canada/United States of America, enUSA, Edition date: 202103, First-Printing Changing a Road WheelE162817 E162816 E162818 E162811 E162819
Page 466 of 740

Remove the lug nuts with the lug wrench,
replace the flat tire with the spare, making
sure the valve stem of the spare is facing
outward when replacing a front wheel. For
the rear wheel position on vehicles with
single rear wheel fitments, install the spare
with the valve stem facing outward. For
vehicles with dual rear wheels, the valve
stem of the spare must face outward when
replacing an inner wheel, but must face
inward when replacing an outboard wheel.
Reinstall the lug nuts until the wheel is
snug against the hub. Do not fully tighten
the lug nuts until the wheel has been
lowered.
Lower the vehicle completely by turning
the jack handle counterclockwise until the
vehicle is completely lowered.
Note:
For F-350 Dual Rear Wheel, F-450
and F-550 Vehicles, insert the notched end
of the jack handle to the release valve, open
the release valve slightly by turning the
handle counterclockwise. Stop turning the
release valve when vehicle start to lower.
Make sure to close the valve when you
completely lower your vehicle.
F-350 Dual Rear Wheel, F-450 and
F-550 Vehicles. Installing the lug Nuts and Ornaments
8-lug nut torque sequence
10-lug nut torque sequence
Note:
When installing the wheel center
ornaments, make sure that the ornament
retention towers on the back side of the
ornament are aligned with the studs or nuts
and retain to the flange on the lug nuts.
463
2022 Super Duty (TFE) Canada/United States of America, enUSA, Edition date: 202103, First-Printing Changing a Road WheelE162812 13
4
27
6
5
8E161441 1
2
3
4
5
6
7 8
9
10E169375
Page 468 of 740

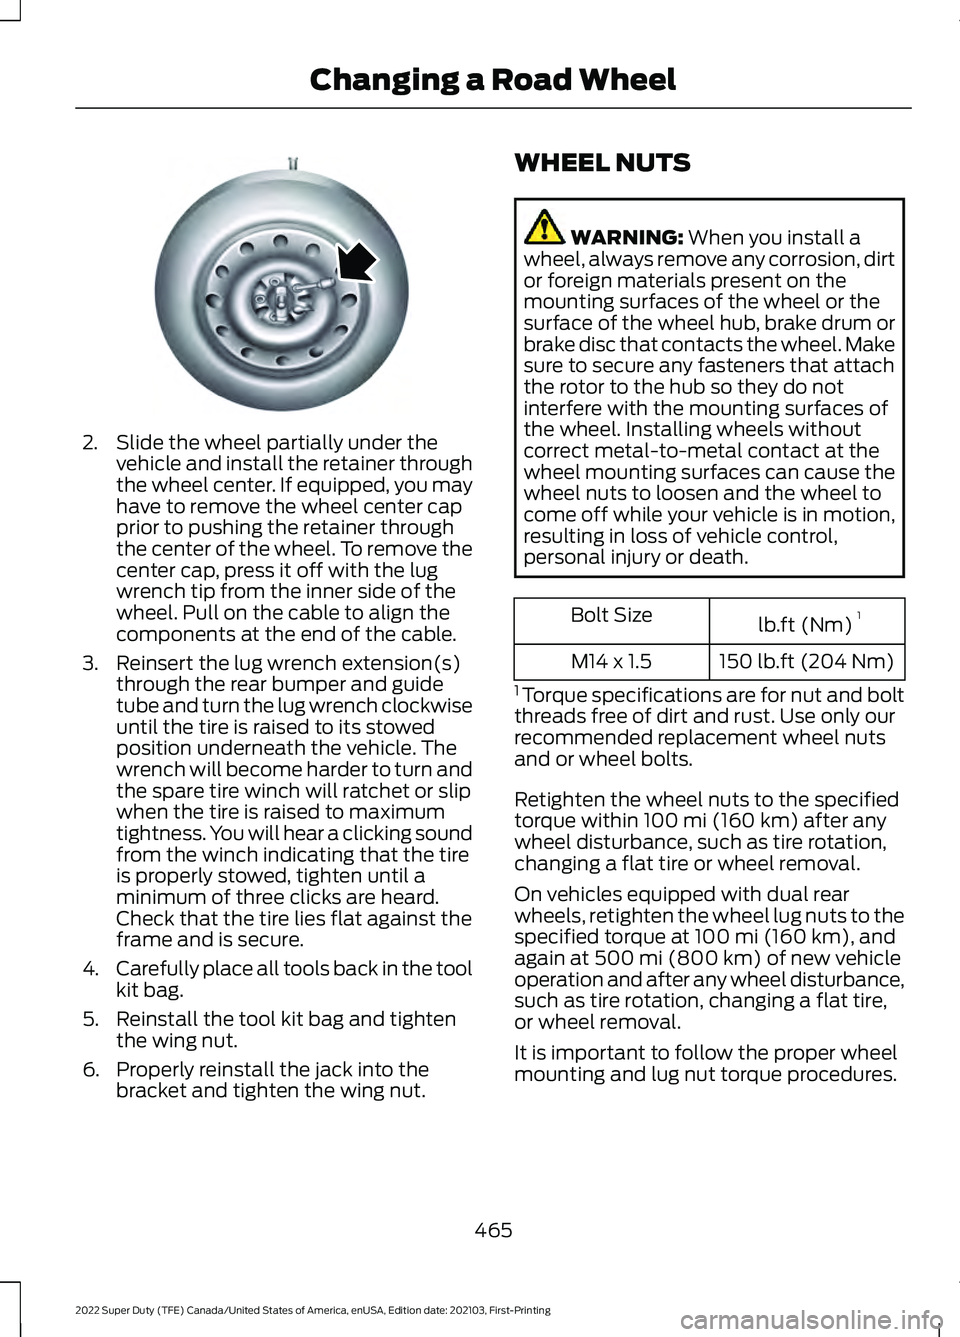
2. Slide the wheel partially under the
vehicle and install the retainer through
the wheel center. If equipped, you may
have to remove the wheel center cap
prior to pushing the retainer through
the center of the wheel. To remove the
center cap, press it off with the lug
wrench tip from the inner side of the
wheel. Pull on the cable to align the
components at the end of the cable.
3. Reinsert the lug wrench extension(s) through the rear bumper and guide
tube and turn the lug wrench clockwise
until the tire is raised to its stowed
position underneath the vehicle. The
wrench will become harder to turn and
the spare tire winch will ratchet or slip
when the tire is raised to maximum
tightness. You will hear a clicking sound
from the winch indicating that the tire
is properly stowed, tighten until a
minimum of three clicks are heard.
Check that the tire lies flat against the
frame and is secure.
4. Carefully place all tools back in the tool
kit bag.
5. Reinstall the tool kit bag and tighten the wing nut.
6. Properly reinstall the jack into the bracket and tighten the wing nut. WHEEL NUTS WARNING: When you install a
wheel, always remove any corrosion, dirt
or foreign materials present on the
mounting surfaces of the wheel or the
surface of the wheel hub, brake drum or
brake disc that contacts the wheel. Make
sure to secure any fasteners that attach
the rotor to the hub so they do not
interfere with the mounting surfaces of
the wheel. Installing wheels without
correct metal-to-metal contact at the
wheel mounting surfaces can cause the
wheel nuts to loosen and the wheel to
come off while your vehicle is in motion,
resulting in loss of vehicle control,
personal injury or death. lb.ft (Nm)
1
Bolt Size
150 lb.ft (204 Nm)
M14 x 1.5
1 Torque specifications are for nut and bolt
threads free of dirt and rust. Use only our
recommended replacement wheel nuts
and or wheel bolts.
Retighten the wheel nuts to the specified
torque within
100 mi (160 km) after any
wheel disturbance, such as tire rotation,
changing a flat tire or wheel removal.
On vehicles equipped with dual rear
wheels, retighten the wheel lug nuts to the
specified torque at
100 mi (160 km), and
again at 500 mi (800 km) of new vehicle
operation and after any wheel disturbance,
such as tire rotation, changing a flat tire,
or wheel removal.
It is important to follow the proper wheel
mounting and lug nut torque procedures.
465
2022 Super Duty (TFE) Canada/United States of America, enUSA, Edition date: 202103, First-Printing Changing a Road WheelE162800