2022 CHRYSLER PACIFICA Seat
[x] Cancel search: SeatPage 88 of 384

86GETTING TO KNOW YOUR VEHICLE
STORAGE BIN SAFETY WARNING
Carefully follow these warnings to help prevent
personal injury or damage to your vehicle:
SEAT STORAGE BIN COVER EMERGENCY
RELEASE LEVER
As a security measure, the Seat Storage Bin Cover
has an Emergency Release Lever built into the
latching mechanism.
Storage Bin Cover Emergency Release Lever
NOTE:In the event of an individual being locked inside
the storage bin, the storage bin cover can be
opened from inside of the bin by pushing on the
glow-in-the-dark lever attached to the storage bin
cover latching mechanism.
WARNING!
In a collision, serious injury could result if the
seat storage bin covers are not properly latched.
Do not drive the vehicle with the storage bin
covers open.
Keep the storage bin covers closed and
latched while the vehicle is in motion.
Do not operate the storage bin covers while
the vehicle is in motion.
Do not use a storage bin latch as a tie down.
CAUTION!
The storage bin cover must lay flat and be
latched to avoid damage from contact with the
front seat tracks, which have minimal clearance
to the cover. If the storage bin cover is left in the
open position, front seat adjustment may
damage the cover.
WARNING!
Always close the storage bin covers when your
vehicle is unattended.
Do not allow children to have access to the
second row seat storage bins. Once in the
storage bin, young children may not be able to
escape. If trapped in the storage bin, children
can die from suffocation or heat stroke.
In a collision, serious injury could result if the
seat storage bin covers are not properly latched.
Do not drive the vehicle with the storage bin
covers open. Keep the storage bin covers
closed and latched while the vehicle is in
motion.
Do not operate the storage bin covers while
the vehicle is in motion.
Do not use a storage bin latch as a tie down.
CAUTION!
The storage bin cover must lay flat and be
latched to avoid damage from contact with the
front seat tracks, which have minimal clearance
to the cover. If the storage bin cover is left in the
open position, front seat adjustment may
damage the cover.
22_RUP_OM_EN_USC_t.book Page 86
Page 89 of 384

GETTING TO KNOW YOUR VEHICLE87
SUN SCREENS — IF EQUIPPED
Sun screens are available for second and third row
seating windows. The screens store in the sill trim
panels, and the tops of the windows are equipped
with hooks that the sun screens attach to when
pulled out.
Gently pull up on the tab to raise the sun screen.
Continue pulling the sun screen until the tab is
near the top of the window.
Once the screen is completely to the top of the
window, extend the top bar of the sun screen over
the two hooks attached to the top of the window.
Sun Screen Extended
To lower the sun screen, gently lift the tab upward
to disengage the hooks, and feed the screen back
into the base sill.
USB/AUX CONTROL
There are numerous USB ports located throughout
the vehicle that allow an external USB device to be
plugged into the USB port.
NOTE:
If a smartphone is plugged into a video USB
port, the device will only have charging capa
-
bility and allow for files/media to be stored, if
equipped with Uconnect Theater.
Once a device is connected to the USB port, it
will begin charging and is ready for use with the
system. Type C and Type A charge-only USB
ports can be used at the same time but cannot
be used simultaneously while playing media.
When both Type C and Type A charge-only USB
ports are in use they will be charged at a
reduced rate. For example, if a device is plugged into the Type A
USB port and another device is plugged into the
Type C USB port, a message will appear and allow
you to select which device to use.
Front Center Stack AUX Jack And USB Ports
1 — Type C And Type A USB Ports 1
2 — Type C And Type A USB Ports 2
3 — AUX Port
2
22_RUP_OM_EN_USC_t.book Page 87
Page 90 of 384

88GETTING TO KNOW YOUR VEHICLE
There are multiple USB “Charge Only” ports in this
vehicle.
In the center console
On the instrument panel
On the back of the front row seats in the Ucon -
nect Theater Media Hubs (if equipped)
On the back of the front row seats
Above the rear cup holder in the third row of
seats
Charge Only USB In The Center Console
NOTE:The USB outlet in the bottom of the instrument
panel can be switched from ignition only to
constant battery powered all the time. See an
authorized dealer for details.
Rear Seat USB Charging Port Without Uconnect Theater
Rear Seat USB Media Hub With Uconnect Theater 3rd Row USB Charging Port
NOTE:The USB “Charge Only” ports will recharge battery
operated USB devices when connected.
Different scenarios are listed below when a
non-phone device is plugged into the smaller and
larger USB ports, and when a phone device is
plugged into the smaller and larger USB ports:
“A new device is now connected. Previous
connection was lost”.
“(Phone Name) now connected. Previous
connection was lost”.
“Another device is in use through the same USB
port. Please disconnect the first device to use
the second device”.1 — Headphone Jack (Headphone Output Only)
2 — HDMI Port
3 — USB Port (Charge Only)
22_RUP_OM_EN_USC_t.book Page 88
Page 93 of 384

GETTING TO KNOW YOUR VEHICLE91
POWER INVERTER — IF EQUIPPED
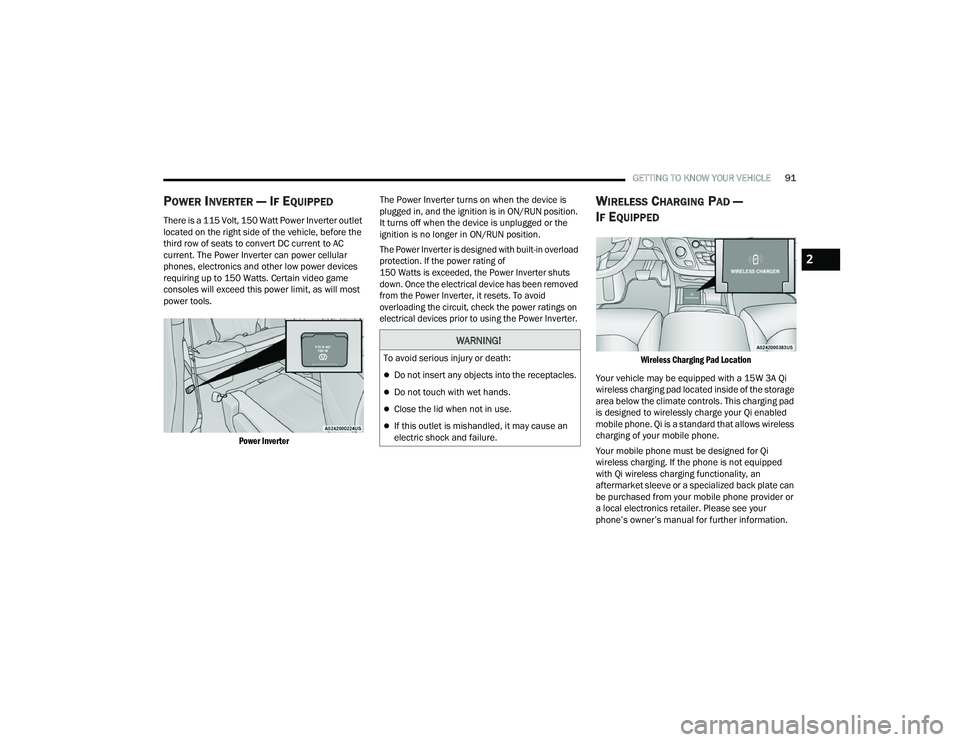
There is a 115 Volt, 150 Watt Power Inverter outlet
located on the right side of the vehicle, before the
third row of seats to convert DC current to AC
current. The Power Inverter can power cellular
phones, electronics and other low power devices
requiring up to 150 Watts. Certain video game
consoles will exceed this power limit, as will most
power tools.
Power Inverter
The Power Inverter turns on when the device is
plugged in, and the ignition is in ON/RUN position.
It turns off when the device is unplugged or the
ignition is no longer in ON/RUN position.
The Power Inverter is designed with built-in overload
protection. If the power rating of
150 Watts is exceeded, the Power Inverter shuts
down. Once the electrical device has been removed
from the Power Inverter, it resets. To avoid
overloading the circuit, check the power ratings on
electrical devices prior to using the Power Inverter.
WIRELESS CHARGING PAD —
I
F EQUIPPED
Wireless Charging Pad Location
Your vehicle may be equipped with a 15W 3A Qi
wireless charging pad located inside of the storage
area below the climate controls. This charging pad
is designed to wirelessly charge your Qi enabled
mobile phone. Qi is a standard that allows wireless
charging of your mobile phone.
Your mobile phone must be designed for Qi
wireless charging. If the phone is not equipped
with Qi wireless charging functionality, an
aftermarket sleeve or a specialized back plate can
be purchased from your mobile phone provider or
a local electronics retailer. Please see your
phone’s owner’s manual for further information.
WARNING!
To avoid serious injury or death:
Do not insert any objects into the receptacles.
Do not touch with wet hands.
Close the lid when not in use.
If this outlet is mishandled, it may cause an
electric shock and failure.
2
22_RUP_OM_EN_USC_t.book Page 91
Page 96 of 384

94GETTING TO KNOW YOUR VEHICLE
(Continued)
WIND BUFFETING
Wind buffeting can be described as the perception
of pressure on the ears or a helicopter-type sound
in the ears. Your vehicle may exhibit wind buffeting
with the windows down, or the sunroof (if
equipped) in certain open or partially open
positions. This is a normal occurrence and can be
minimized. If the buffeting occurs with the rear
windows open, open the front and rear windows
together to minimize the buffeting. If the buffeting
occurs with the sunroof open, adjust the sunroof
opening to minimize the buffeting or open any
window.
PANORAMIC SUNROOF — IF EQUIPPED
The Panoramic Sunroof switch is located to the left
between the sun visors on the overhead console.
The Power Shade switch is located to the right
between the sun visors on the overhead console.
Panoramic Sunroof And Power Shade Switches
OPENING AND CLOSING THE SUNROOF
Express Open/Close
Push the open switch and release it within one
second. The sunroof will open automatically from
any position and stop at the full open position.
This is called Express Open.
Push the close switch and release it within one
second and the sunroof will close automatically
from any position. The sunroof will close fully and
stop automatically. This is called Express Close.
1 — Sunroof Switch
2 — Power Shade Switch
3 — Vent Button
WARNING!
Never leave children unattended in a vehicle,
or with access to an unlocked vehicle. Never
leave the key fob in or near the vehicle, or in a
location accessible to children. Do not leave
the Keyless Enter ‘n Go™ Ignition in the ACC or
ON/RUN position. Occupants, particularly
unattended children, can become entrapped
by the power sunroof while operating the
power sunroof switch. Such entrapment may
result in serious injury or death.
In a collision, there is a greater risk of being
thrown from a vehicle with an open sunroof.
You could also be seriously injured or killed.
Always fasten your seat belt properly and
make sure all passengers are also properly
secured.
Do not allow small children to operate the
sunroof. Never allow your fingers, other body
parts, or any object, to project through the
sunroof opening. Injury may result.
WARNING!
22_RUP_OM_EN_USC_t.book Page 94
Page 98 of 384

96GETTING TO KNOW YOUR VEHICLE
IGNITION OFF OPERATION
The power sunroof switch will remain active for up
to approximately 10 minutes after the ignition
switch is placed in the OFF position. Opening either
front door will cancel this feature.
NOTE:Ignition off time is programmable through the
Uconnect system Úpage 188.
SUNROOF MAINTENANCE
Use only a non-abrasive cleaner and a soft cloth to
clean the glass panel. Periodically check for and
clear out any debris that may have collected in the
tracks.
HOOD
OPENING
If applicable, refer to the “Hybrid Supplement” for
additional information.
The hood release lever (to open the primary latch)
and safety latch (to open the secondary latch)
must be released to open the hood.
1. Pull the hood release lever located under the
driver’s side of the instrument panel.
Hood Release Lever
2. Move to the outside of the front of the vehicle.
3. Push the safety latch release lever toward the passenger side of the vehicle. The safety latch
is located behind the center front edge of the
hood.
Safety Latch Release Lever Location
4. Remove the support rod from the locking tab
and insert it into the seat located on the
underside of the hood.
NOTE:
Before lifting the hood, check that the wiper arms
are not in motion and not in the lifted position.
While lifting the hood, use both hands.
Vehicle must be at a stop and the gear selector
must be in PARK.
CLOSING
If applicable, refer to the “Hybrid Supplement” for
additional information.
1. Hold up the hood with one hand and with the other hand remove the support rod from its
seat and reinsert it into the locking tab.
2. Lower the hood to approximately 12 inches (30 cm) from the engine compartment and
drop it. Make sure that the hood is completely
closed.
WARNING!
Be sure the hood is fully latched before driving
your vehicle. If the hood is not fully latched, it
could open when the vehicle is in motion and
block your vision. Failure to follow this warning
could result in serious injury or death.
22_RUP_OM_EN_USC_t.book Page 96
Page 102 of 384

100GETTING TO KNOW YOUR VEHICLE
If the power liftgate encounters multiple
obstructions within the same cycle, the system
will automatically stop. If this occurs, the liftgate
must be operated manually.
The power liftgate will release, but not power
open, in temperatures below −12°F (−24°C).
Be sure to remove any buildup of snow or ice
from the liftgate before opening the liftgate.
If the liftgate is left open for an extended period
of time, the liftgate may need to be closed
manually to reset power liftgate functionality.
The Hands-Free Liftgate only works to open the
liftgate. Gas props support the liftgate in the open position.
However, because the gas pressure drops with
temperature, it may be necessary to assist the
props when opening the liftgate in cold weather.
NOTE:Allow the power system to open the liftgate.
Manually pushing or pulling the liftgate may
activate the liftgate obstacle detection feature and
stop the power operation or reverse its direction.
CARGO AREA FEATURES
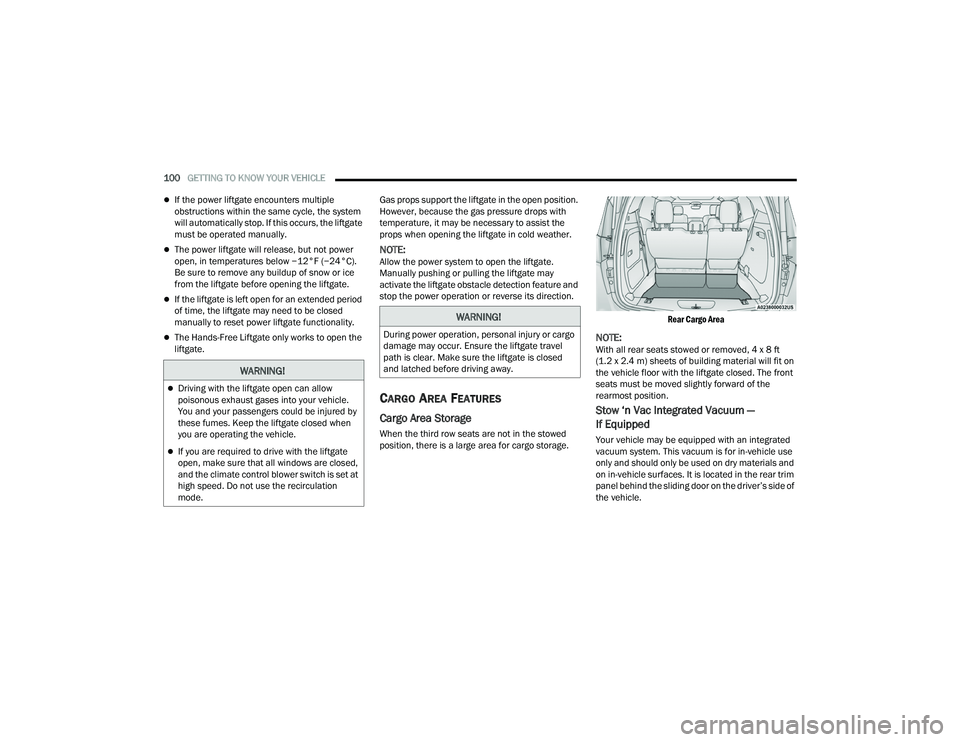
Cargo Area Storage
When the third row seats are not in the stowed
position, there is a large area for cargo storage.
Rear Cargo Area
NOTE:With all rear seats stowed or removed, 4 x 8 ft
(1.2 x 2.4 m) sheets of building material will fit on
the vehicle floor with the liftgate closed. The front
seats must be moved slightly forward of the
rearmost position.
Stow ‘n Vac Integrated Vacuum —
If Equipped
Your vehicle may be equipped with an integrated
vacuum system. This vacuum is for in-vehicle use
only and should only be used on dry materials and
on in-vehicle surfaces. It is located in the rear trim
panel behind the sliding door on the driver’s side of
the vehicle.
WARNING!
Driving with the liftgate open can allow
poisonous exhaust gases into your vehicle.
You and your passengers could be injured by
these fumes. Keep the liftgate closed when
you are operating the vehicle.
If you are required to drive with the liftgate
open, make sure that all windows are closed,
and the climate control blower switch is set at
high speed. Do not use the recirculation
mode.
WARNING!
During power operation, personal injury or cargo
damage may occur. Ensure the liftgate travel
path is clear. Make sure the liftgate is closed
and latched before driving away.
22_RUP_OM_EN_USC_t.book Page 100
Page 105 of 384

GETTING TO KNOW YOUR VEHICLE103
(Continued)
(Continued)
NOTE:To access crevice or upholstery attachments, open
the front Attachment Compartment.
Crevice Tool — Able to reach into tight
spaces including the seat latches located in
the floor.
Upholstery Tool — Use to agitate dirt and
debris from carpets and seats. This tool can
also be used to pick up pet hair.
Hose Extension — Use to add another 12 ft
(3.6 m) of usable length to the vacuum
hose. Hose extension is provided in a bag
attached to a grocery hook behind the third
row seat on the driver’s side.
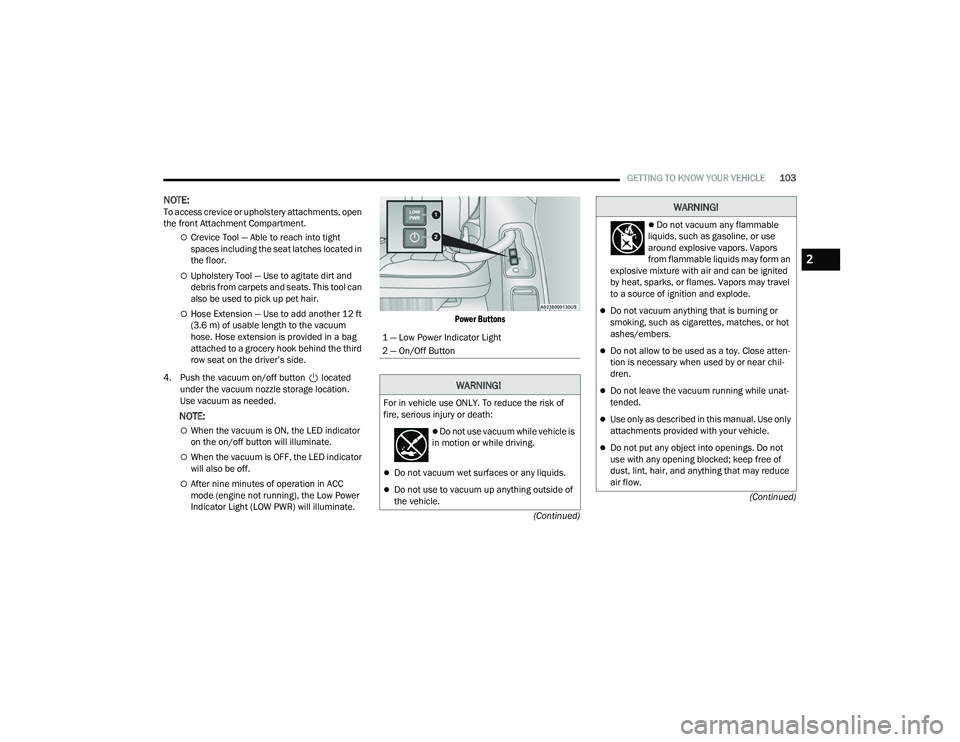
4. Push the vacuum on/off button located under the vacuum nozzle storage location.
Use vacuum as needed.
NOTE:
When the vacuum is ON, the LED indicator
on the on/off button will illuminate.
When the vacuum is OFF, the LED indicator
will also be off.
After nine minutes of operation in ACC
mode (engine not running), the Low Power
Indicator Light (LOW PWR) will illuminate.
Power Buttons
1 — Low Power Indicator Light
2 — On/Off Button
WARNING!
For in vehicle use ONLY. To reduce the risk of
fire, serious injury or death:
Do not use vacuum while vehicle is
in motion or while driving.
Do not vacuum wet surfaces or any liquids.
Do not use to vacuum up anything outside of
the vehicle.
Do not vacuum any flammable
liquids, such as gasoline, or use
around explosive vapors. Vapors
from flammable liquids may form an
explosive mixture with air and can be ignited
by heat, sparks, or flames. Vapors may travel
to a source of ignition and explode.
Do not vacuum anything that is burning or
smoking, such as cigarettes, matches, or hot
ashes/embers.
Do not allow to be used as a toy. Close atten -
tion is necessary when used by or near chil -
dren.
Do not leave the vacuum running while unat -
tended.
Use only as described in this manual. Use only
attachments provided with your vehicle.
Do not put any object into openings. Do not
use with any opening blocked; keep free of
dust, lint, hair, and anything that may reduce
air flow.
WARNING!
2
22_RUP_OM_EN_USC_t.book Page 103