2022 CHEVROLET MALIBU instrument cluster
[x] Cancel search: instrument clusterPage 199 of 351

Chevrolet Malibu Owner Manual (GMNA-Localizing-U.S./Canada-
14584249) - 2021 - CRC - 11/9/20
198 Driving and Operating
5:Press to turn the system on or off.
A white cruise control indicator comes on in
the instrument cluster.
+RES : Press briefly to resume the previous
set speed or to increase vehicle speed if ACC
is already activated. To increase speed by
about 1 km/h (1 mph), press RES+ briefly. To
increase speed to the next 5 km/h (5 mph)
mark on the speedometer, hold RES+.
−SET : Press briefly to set the speed and
activate ACC or to decrease vehicle speed if
ACC is already activated. To decrease speed
by about 1 km/h (1 mph), press SET– briefly.
To decrease speed to the next 5 km/h
(5 mph) mark on the speedometer, hold
SET– .
*:Press briefly to set the speed and
activate ACC or to decrease vehicle speed if
ACC is already activated. To decrease speed
by about 1 km/h (1 mph), press SET– briefly.
To decrease speed to the next 5 km/h
(5 mph) mark on the speedometer, hold
SET– .
[:Press to select a following gap time
(or distance) setting for ACC of Far, Medium,
or Near.
Switching Between ACC and Regular Cruise
Control
To switch between ACC and regular cruise
control, press and hold
*. A Driver
Information Display (DIC) message displays.
See Vehicle Messages 099.
ACC IndicatorRegular Cruise Control
Indicator
When ACC is engaged, a green
]indicator
will be lit on the instrument cluster. When
the regular cruise control is engaged, a green
Jindicator will be lit on the
instrument cluster; the following gap will
not display.
When the vehicle is turned on, the cruise
control mode will be set to the last mode
used before the vehicle was turned off.
{Warning
Always check the cruise control indicator
on the instrument cluster to determine
which mode cruise control is in before
using the feature. If ACC is not active, the
vehicle will not automatically brake for
other vehicles, which could cause a crash
if the brakes are not applied manually.
You and others could be seriously injured
or killed.
Setting Adaptive Cruise Control
If ACC is on when not in use,
5could get
pressed and cruise control could become
active when not desired. Keep the cruise
control off when cruise is not being used.
Select the set speed desired for cruise. This
is the vehicle speed when no vehicle is
detected in its path.
Page 200 of 351
Chevrolet Malibu Owner Manual (GMNA-Localizing-U.S./Canada-
14584249) - 2021 - CRC - 11/9/20
Driving and Operating 199
ACC will not set at a speed less than
25 km/h (15 mph), although it can be
resumed when driving at lower speeds. The
minimum allowable set speed is 25 km/h
(15 mph).
To set ACC:1. Press
5.
2. Get up to the desired speed.
3. Press and release -SET.
4. Remove your foot from the accelerator.
After ACC is set, it may immediately apply
the brakes if a vehicle ahead is detected
closer than the selected following gap.
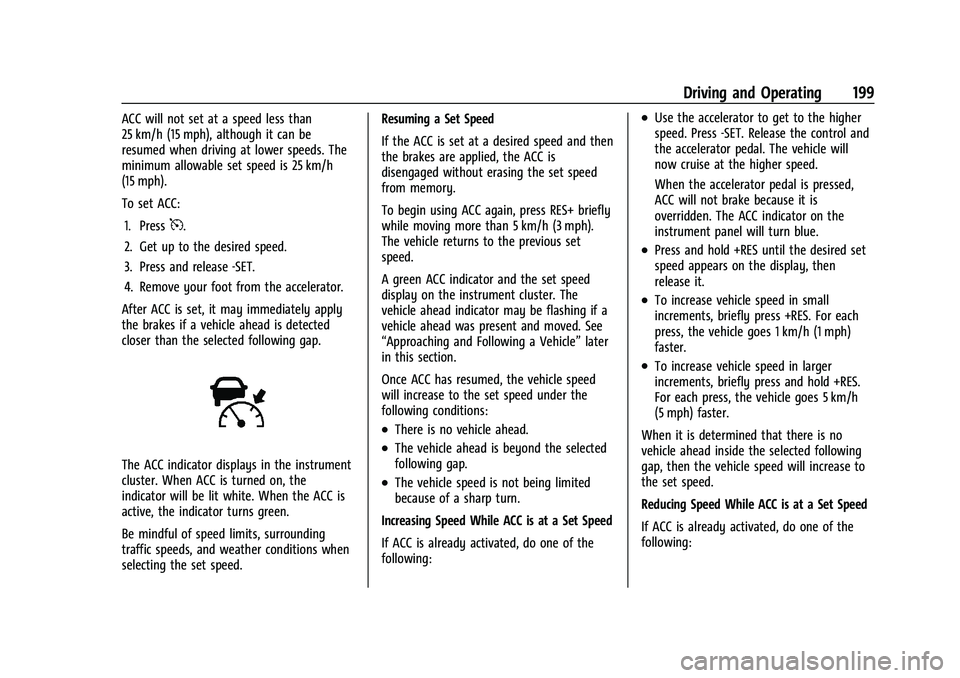
The ACC indicator displays in the instrument
cluster. When ACC is turned on, the
indicator will be lit white. When the ACC is
active, the indicator turns green.
Be mindful of speed limits, surrounding
traffic speeds, and weather conditions when
selecting the set speed. Resuming a Set Speed
If the ACC is set at a desired speed and then
the brakes are applied, the ACC is
disengaged without erasing the set speed
from memory.
To begin using ACC again, press RES+ briefly
while moving more than 5 km/h (3 mph).
The vehicle returns to the previous set
speed.
A green ACC indicator and the set speed
display on the instrument cluster. The
vehicle ahead indicator may be flashing if a
vehicle ahead was present and moved. See
“Approaching and Following a Vehicle”
later
in this section.
Once ACC has resumed, the vehicle speed
will increase to the set speed under the
following conditions:
.There is no vehicle ahead.
.The vehicle ahead is beyond the selected
following gap.
.The vehicle speed is not being limited
because of a sharp turn.
Increasing Speed While ACC is at a Set Speed
If ACC is already activated, do one of the
following:
.Use the accelerator to get to the higher
speed. Press -SET. Release the control and
the accelerator pedal. The vehicle will
now cruise at the higher speed.
When the accelerator pedal is pressed,
ACC will not brake because it is
overridden. The ACC indicator on the
instrument panel will turn blue.
.Press and hold +RES until the desired set
speed appears on the display, then
release it.
.To increase vehicle speed in small
increments, briefly press +RES. For each
press, the vehicle goes 1 km/h (1 mph)
faster.
.To increase vehicle speed in larger
increments, briefly press and hold +RES.
For each press, the vehicle goes 5 km/h
(5 mph) faster.
When it is determined that there is no
vehicle ahead inside the selected following
gap, then the vehicle speed will increase to
the set speed.
Reducing Speed While ACC is at a Set Speed
If ACC is already activated, do one of the
following:
Page 201 of 351
Chevrolet Malibu Owner Manual (GMNA-Localizing-U.S./Canada-
14584249) - 2021 - CRC - 11/9/20
200 Driving and Operating
.Use the brake to get to the desired lower
speed. Release the brake and press -SET.
The vehicle will now cruise at the lower
speed.
.Press and hold -SET until the desired
lower speed is reached, then release it.
.To decrease the vehicle speed in smaller
increments, press -SET down briefly. For
each press, the vehicle goes about 1 km/h
(1 mph) slower.
.To decrease vehicle speed in larger
increments, briefly press and hold -SET.
For each press, the vehicle goes 5 km/h
(5 mph) slower.
Selecting the Follow Distance
When a slower moving vehicle is detected
ahead within the selected following gap,
ACC will adjust the vehicle's speed and
attempt to maintain the follow distance gap
selected.
Press
[on the steering wheel to adjust
the following gap. When pressed, the
current gap setting displays briefly on the
instrument cluster. Subsequent presses cycle
the gap button through three settings: Far,
Medium, or Near. The gap setting will be
maintained until it is changed. Since each gap setting corresponds to a
following time (Far, Medium, or Near), the
following distance will vary based on vehicle
speed. The faster the vehicle speed, the
further back your vehicle will follow a
vehicle detected ahead. Consider traffic and
weather conditions when selecting the
following gap. The range of selectable gaps
may not be appropriate for all drivers and
driving conditions.
Changing the gap setting automatically
changes the alert timing sensitivity (Far,
Medium, or Near) for the Forward Collision
Alert (FCA) feature. See
Forward Collision
Alert (FCA) System 0209.
Alerting the Driver
If ACC is engaged, driver action may be
required when ACC cannot apply sufficient
braking because of approaching a vehicle
too rapidly. When this condition occurs, a series of red
lights will flash on the windshield and eight
beeps will sound from the front.
See
Defensive Driving 0173.
Approaching and Following a Vehicle
The vehicle ahead indicator is in the
instrument cluster.
It only displays when a vehicle is detected
in your vehicle’s path moving in the same
direction.
If this symbol is not displaying, ACC will not
respond to or brake to vehicles ahead.
ACC automatically slows the vehicle down
and adjusts vehicle speed to follow the
vehicle in front at the selected following
gap. The vehicle speed increases or
decreases to follow the vehicle in front of
you, but will not exceed the set speed.
It may apply limited braking, if necessary.
When braking is active, the brake lamps will
Page 203 of 351
Chevrolet Malibu Owner Manual (GMNA-Localizing-U.S./Canada-
14584249) - 2021 - CRC - 11/9/20
202 Driving and Operating
{Warning
If ACC has stopped the vehicle, and if ACC
is disengaged, turned off, or canceled, the
vehicle will no longer be held at a stop.
The vehicle can move. When ACC is
holding the vehicle at a stop, always be
prepared to manually apply the brakes.
{Warning
Leaving the vehicle without placing it in
P (Park) can be dangerous. Do not leave
the vehicle while it is being held at a
stop by ACC. Always place the vehicle in
P (Park) and turn off the ignition before
leaving the vehicle.
ACC Override
If using the accelerator pedal while ACC is
active, the ACC indicator turns blue on the
instrument cluster to indicate that automatic
braking will not occur. ACC will resume
operation when the accelerator pedal is not
being pressed.
{Warning
The ACC will not automatically apply the
brakes if your foot is resting on the
accelerator pedal. You could crash into a
vehicle ahead of you.
Curves in the Road
{Warning
On curves, ACC may not detect a vehicle
ahead in your lane. You could be startled
if the vehicle accelerates up to the set
speed, especially when following a vehicle
exiting or entering exit ramps. You could
lose control of the vehicle or crash. Do
not use ACC while driving on an entrance
or exit ramp. Always be ready to use the
brakes if necessary.
{Warning
On curves, ACC may respond to a vehicle
in another lane, or may not have time to
react to a vehicle in your lane. You could
crash into a vehicle ahead of you, or lose
control of your vehicle. Give extra (Continued)
Warning (Continued)
attention in curves and be ready to use
the brakes if necessary. Select an
appropriate speed while driving in curves.
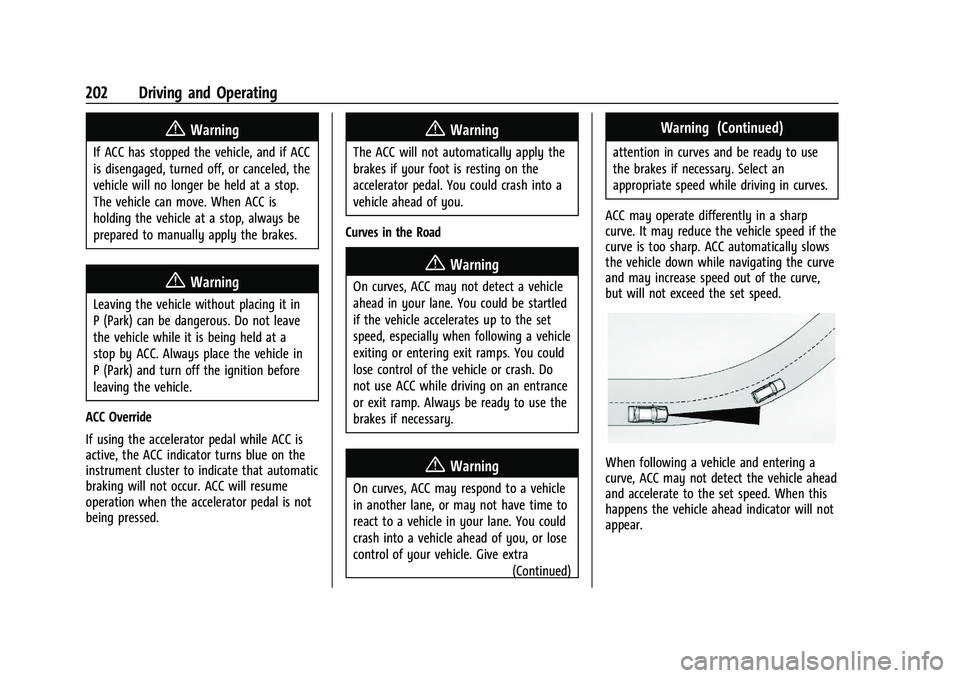
ACC may operate differently in a sharp
curve. It may reduce the vehicle speed if the
curve is too sharp. ACC automatically slows
the vehicle down while navigating the curve
and may increase speed out of the curve,
but will not exceed the set speed.
When following a vehicle and entering a
curve, ACC may not detect the vehicle ahead
and accelerate to the set speed. When this
happens the vehicle ahead indicator will not
appear.
Page 208 of 351
Chevrolet Malibu Owner Manual (GMNA-Localizing-U.S./Canada-
14584249) - 2021 - CRC - 11/9/20
Driving and Operating 207
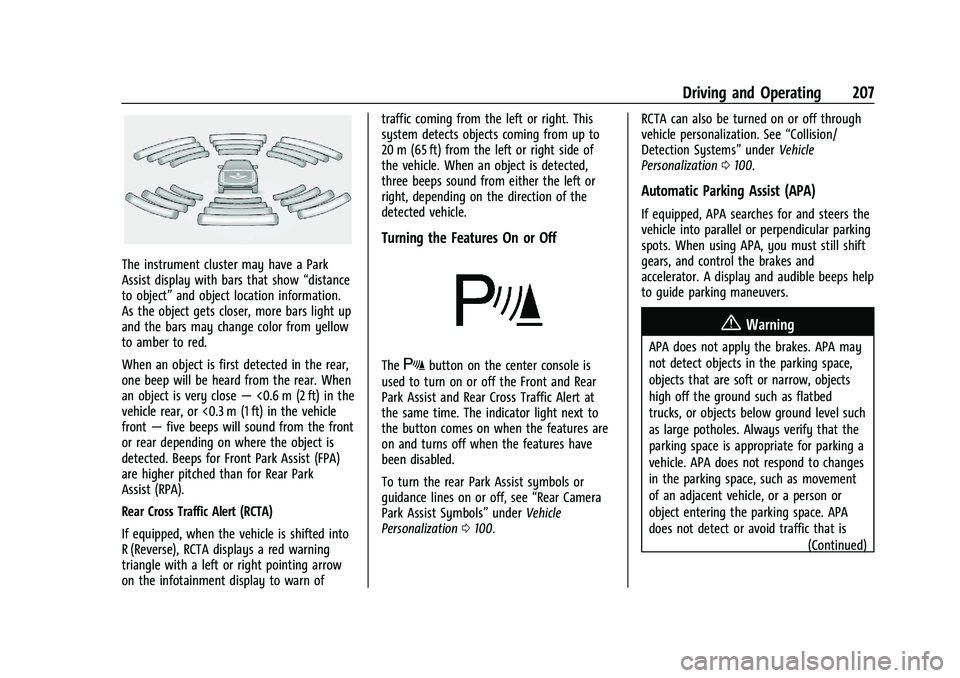
The instrument cluster may have a Park
Assist display with bars that show“distance
to object” and object location information.
As the object gets closer, more bars light up
and the bars may change color from yellow
to amber to red.
When an object is first detected in the rear,
one beep will be heard from the rear. When
an object is very close —<0.6 m (2 ft) in the
vehicle rear, or <0.3 m (1 ft) in the vehicle
front —five beeps will sound from the front
or rear depending on where the object is
detected. Beeps for Front Park Assist (FPA)
are higher pitched than for Rear Park
Assist (RPA).
Rear Cross Traffic Alert (RCTA)
If equipped, when the vehicle is shifted into
R (Reverse), RCTA displays a red warning
triangle with a left or right pointing arrow
on the infotainment display to warn of traffic coming from the left or right. This
system detects objects coming from up to
20 m (65 ft) from the left or right side of
the vehicle. When an object is detected,
three beeps sound from either the left or
right, depending on the direction of the
detected vehicle.
Turning the Features On or Off
TheXbutton on the center console is
used to turn on or off the Front and Rear
Park Assist and Rear Cross Traffic Alert at
the same time. The indicator light next to
the button comes on when the features are
on and turns off when the features have
been disabled.
To turn the rear Park Assist symbols or
guidance lines on or off, see “Rear Camera
Park Assist Symbols” underVehicle
Personalization 0100. RCTA can also be turned on or off through
vehicle personalization. See
“Collision/
Detection Systems” underVehicle
Personalization 0100.
Automatic Parking Assist (APA)
If equipped, APA searches for and steers the
vehicle into parallel or perpendicular parking
spots. When using APA, you must still shift
gears, and control the brakes and
accelerator. A display and audible beeps help
to guide parking maneuvers.
{Warning
APA does not apply the brakes. APA may
not detect objects in the parking space,
objects that are soft or narrow, objects
high off the ground such as flatbed
trucks, or objects below ground level such
as large potholes. Always verify that the
parking space is appropriate for parking a
vehicle. APA does not respond to changes
in the parking space, such as movement
of an adjacent vehicle, or a person or
object entering the parking space. APA
does not detect or avoid traffic that is
(Continued)
Page 227 of 351
Chevrolet Malibu Owner Manual (GMNA-Localizing-U.S./Canada-
14584249) - 2021 - CRC - 11/9/20
226 Driving and Operating
Trailer Lamps
Always check all trailer lamps are working at
the beginning of each trip, and periodically
on longer trips.
Turn Signals When Towing a Trailer
When properly connected, the trailer turn
signals will illuminate to indicate the vehicle
is turning, changing lanes, or stopping.
When towing a trailer, the arrows on the
instrument cluster will illuminate even if the
trailer is not properly connected or the bulbs
are burned out.
Trailer Tires
Special Trailer (ST) tires differ from vehicle
tires. Trailer tires are designed with stiff
sidewalls to help prevent sway and to
support heavy loads. These features can
make it difficult to determine if the trailer
tire pressures are low only based on a visual
inspection.
Always check all trailer tire pressures before
each trip when the tires are cool. Low trailer
tire pressure is a leading cause of trailer tire
blow-outs.Trailer tires deteriorate over time. The trailer
tire sidewall will show the week and year
the tire was manufactured. Many trailer tire
manufacturers recommend replacing tires
more than six years old.
Overloading is another leading cause of
trailer tire blow-outs. Never load your trailer
with more weight than the tires are
designed to support. The load rating is
located on the trailer tire sidewall.
Always know the maximum speed rating for
the trailer tires before driving. This may be
significantly lower than the vehicle tire
speed rating. The speed rating may be on
the trailer tire sidewall. If the speed rating is
not shown, the default trailer tire speed
rating is 105 km/h (65 mph).
Conversions and Add-Ons
Add-On Electrical Equipment
{Warning
The Data Link Connector (DLC) is used for
vehicle service and Emission Inspection/
Maintenance testing. See
Malfunction
Indicator Lamp (Check Engine Light) 087.
(Continued)
Warning (Continued)
A device connected to the DLC —such as
an aftermarket fleet or driver-behavior
tracking device —may interfere with
vehicle systems. This could affect vehicle
operation and cause a crash. Such devices
may also access information stored in the
vehicle’s systems.
Caution
Some electrical equipment can damage
the vehicle or cause components to not
work and would not be covered by the
vehicle warranty. Always check with your
dealer before adding electrical equipment.
Add-on equipment can drain the vehicle's
12-volt battery, even if the vehicle is not
operating.
The vehicle has an airbag system. Before
attempting to add anything electrical to the
vehicle, see Servicing the Airbag-Equipped
Vehicle 053 and
Adding Equipment to the Airbag-Equipped
Vehicle 053.
Page 242 of 351
Chevrolet Malibu Owner Manual (GMNA-Localizing-U.S./Canada-
14584249) - 2021 - CRC - 11/9/20
Vehicle Care 241
Warning (Continued)
including the pressure cap, is hot. Wait
for the cooling system and pressure cap
to cool.
Caution
Failure to follow the specific coolant fill
procedure could cause the engine to
overheat and could cause system
damage. If coolant is not visible in the
surge tank, contact your dealer.
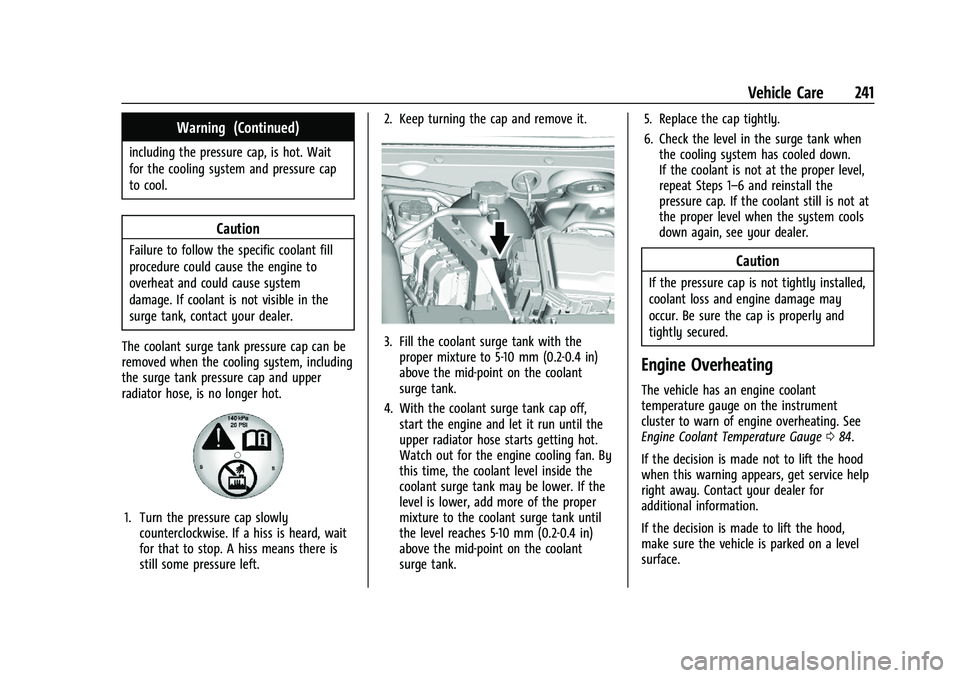
The coolant surge tank pressure cap can be
removed when the cooling system, including
the surge tank pressure cap and upper
radiator hose, is no longer hot.
1. Turn the pressure cap slowly counterclockwise. If a hiss is heard, wait
for that to stop. A hiss means there is
still some pressure left. 2. Keep turning the cap and remove it.
3. Fill the coolant surge tank with the
proper mixture to 5-10 mm (0.2-0.4 in)
above the mid-point on the coolant
surge tank.
4. With the coolant surge tank cap off, start the engine and let it run until the
upper radiator hose starts getting hot.
Watch out for the engine cooling fan. By
this time, the coolant level inside the
coolant surge tank may be lower. If the
level is lower, add more of the proper
mixture to the coolant surge tank until
the level reaches 5-10 mm (0.2-0.4 in)
above the mid-point on the coolant
surge tank. 5. Replace the cap tightly.
6. Check the level in the surge tank when
the cooling system has cooled down.
If the coolant is not at the proper level,
repeat Steps 1–6 and reinstall the
pressure cap. If the coolant still is not at
the proper level when the system cools
down again, see your dealer.
Caution
If the pressure cap is not tightly installed,
coolant loss and engine damage may
occur. Be sure the cap is properly and
tightly secured.
Engine Overheating
The vehicle has an engine coolant
temperature gauge on the instrument
cluster to warn of engine overheating. See
Engine Coolant Temperature Gauge 084.
If the decision is made not to lift the hood
when this warning appears, get service help
right away. Contact your dealer for
additional information.
If the decision is made to lift the hood,
make sure the vehicle is parked on a level
surface.
Page 270 of 351
Chevrolet Malibu Owner Manual (GMNA-Localizing-U.S./Canada-
14584249) - 2021 - CRC - 11/9/20
Vehicle Care 269
your vehicle to ensure that the replacement
or alternate tires and wheels allow the
TPMS to continue to function properly.
SeeTire Pressure Monitor Operation 0269.
See Radio Frequency Statement 0328.
Tire Pressure Monitor Operation
This vehicle may have a Tire Pressure
Monitor System (TPMS). The TPMS is
designed to warn the driver when a low tire
pressure condition exists. TPMS sensors are
mounted onto each tire and wheel
assembly, excluding the spare tire and
wheel assembly. The TPMS sensors monitor
the air pressure in the tires and transmit the
tire pressure readings to a receiver located
in the vehicle.
When a low tire pressure condition is
detected, the TPMS illuminates the low tire
pressure warning light located on the
instrument cluster. If the warning light
comes on, stop as soon as possible and inflate the tires to the recommended
pressure shown on the Tire and Loading
Information label. See
Vehicle Load Limits
0 179.
A message to check the pressure in a
specific tire displays in the Driver
Information Center (DIC). The low tire
pressure warning light and the DIC warning
message come on at each ignition cycle
until the tires are inflated to the correct
inflation pressure. Using the DIC, tire
pressure levels can be viewed. For additional
information and details about the DIC
operation and displays see Driver
Information Center (DIC) (Base Level) 094 or
Driver Information Center (DIC) (Uplevel)
0 96.
The low tire pressure warning light may
come on in cool weather when the vehicle is
first started, and then turn off as the vehicle
is driven. This could be an early indicator
that the air pressure is getting low and
needs to be inflated to the proper pressure.
A Tire and Loading Information label,
attached to your vehicle, shows the size of
the original equipment tires and the correct
inflation pressure for the tires when they
are cold. See Vehicle Load Limits 0179, for an example of the Tire and Loading
Information label and its location. Also see
Tire Pressure
0266.
The TPMS can warn about a low tire
pressure condition but it does not replace
normal tire maintenance. See Tire Inspection
0 272, Tire Rotation 0272 and
Tires 0259.
Caution
Tire sealant materials are not all the
same. A non-approved tire sealant could
damage the TPMS sensors. TPMS sensor
damage caused by using an incorrect tire
sealant is not covered by the vehicle
warranty. Always use only the GM
approved tire sealant available through
your dealer or included in the vehicle.
Factory-installed Tire Inflator Kits use a
GM-approved liquid tire sealant. Using
non-approved tire sealants could damage the
TPMS sensors. See Tire Sealant and
Compressor Kit 0279 for information
regarding the inflator kit materials and
instructions.