2022 CHEVROLET CORVETTE brakes
[x] Cancel search: brakesPage 182 of 338
Chevrolet Corvette Owner Manual (GMNA-Localizing-U.S./Canada/Mexico-
15342622) - 2022 - CRC - 5/4/21
Driving and Operating 181
4. Apply the brakes 25 times from100 km/h (60 mph) to 50 km/h (30 mph)
while decelerating at 0.4 g. This is a
medium brake application. Drive for at
least 1 km (0.6 mi) between applications.
As with all high performance brake systems,
some amount of brake squeal is normal.
Alternative Closed Course Brake Burnishing
Procedure
This brake burnish procedure should only be
run on vehicles with the J55 Z51 factory
equipped brake system.
This procedure should only be run on a
track and only on dry pavement. Brake
pedal fade will occur during this track
burnish procedure and can cause brake pedal
travel and force to increase. This could
extend stopping distance until the brakes
are fully burnished. 1. Start track lapping at lower speeds and lower braking efforts for three minutes
of driving. Allow for increased braking
distances due to reduced brake output. 2. After Step 1, increase speed and braking
effort for the next six minutes of
lapping, gradually ending up at 90%
effort. Continue to allow for increased
braking distance due to reduced brake
output.
3. Cool the brakes by lapping with minimal light braking for six minutes.
Brake Cooling Kit
Prior to any track event, high speed driving
event, or competitive driving, the following
should be completed:
.Ensure all brake cooling parts are
correctly and securely installed.
.Install the rear lower control arm cooling
ducts per the instructions below also
included with the kit. After any track
event or competitive driving, remove the
rear lower control arm cooling ducts.
These parts are for track use only.
Removing the ducts helps prevent debris
from being channeled into the rear brakes
during regular use of the vehicle.
.Inspect for and remove any blockage in
the ducts.
.Inspect and replace any duct that has
damage.
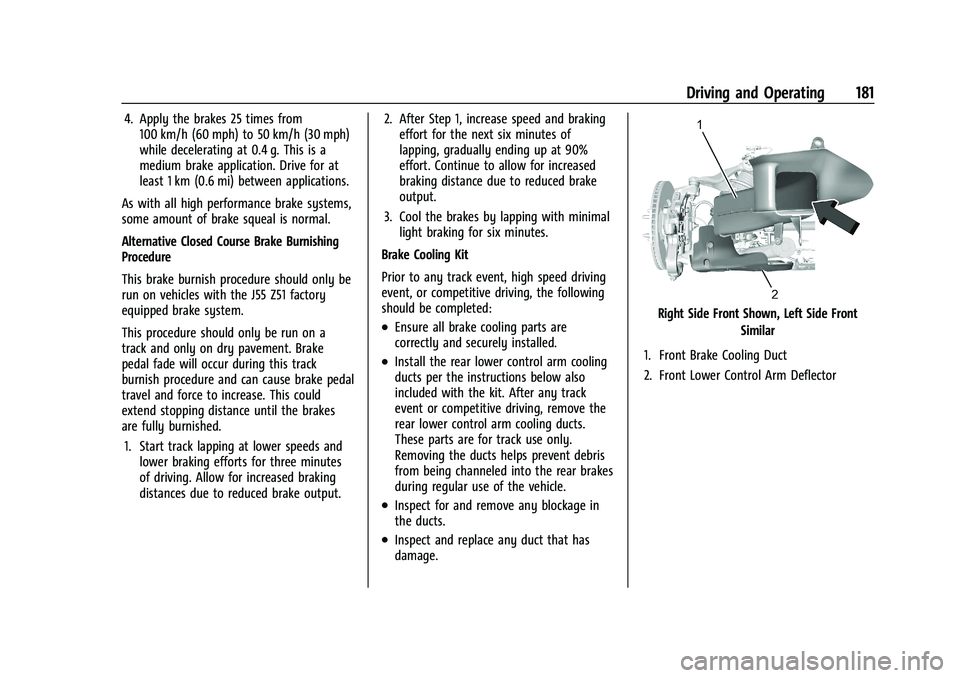
Right Side Front Shown, Left Side Front Similar
1. Front Brake Cooling Duct
2. Front Lower Control Arm Deflector
Page 184 of 338
Chevrolet Corvette Owner Manual (GMNA-Localizing-U.S./Canada/Mexico-
15342622) - 2022 - CRC - 5/4/21
Driving and Operating 183
Load Limit
Limit vehicle load to the driver only, with no
other cargo. Inflate the front tires to 159 kPa
(23 psi) and the rear tires to 165 kPa (24 psi).
Drive at a maximum speed of 296 km/h
(184 mph).
Road Course target hot pressures of
220–240 kPa (32–35 psi). Value will vary
based on driving style, track, temperature,
and weather conditions.
Wheel AlignmentCaution
Using these wheel alignment settings
may cause excessive tire wear. Only use
these wheel alignment settings for racing
or competitive driving. Excessive tire wear
is not covered under the vehicle
warranty.
Caution
Do not use power tools when removing
or installing the fasteners. Damage to the
threads may occur. Use hand tools only,
(Continued)
Caution (Continued)
and do not overtighten. Hand start the
fasteners to ensure that the threads do
not bind or cross thread.
The racing and competitive driving wheel
alignment settings should be set as
described here.
To achieve the track alignment specified
settings: 1. The upper control arm to body washers on all four corners will need to be
moved from between the body and the
control arm and relocated between the
head of the bolt and the control arm.
2. Adjust the lower control arm cam bolt position to achieve the following
specifications.
Front (per corner)
.Caster: +8.0 degrees
.Camber: -3.0 degrees
.Toe (total): 0.1 degrees toe in
Rear (per corner)
.Caster: 0 degrees
.Camber: -2.5 degrees
.Toe (total): 0.1 degrees toe in
.Thrust Angle: 0 degrees
After track use, reinstall washers between
the body and the control arms. Reset to
factory alignment settings. See your dealer.
Driving on Wet Roads
Rain and wet roads can reduce vehicle
traction and affect your ability to stop and
accelerate. Always drive slower in these
types of driving conditions and avoid driving
through large puddles and deep-standing or
flowing water.
{Warning
Wet brakes can cause crashes. They
might not work as well in a quick stop
and could cause pulling to one side. You
could lose control of the vehicle.
After driving through a large puddle of
water or a car/vehicle wash, lightly apply
the brake pedal until the brakes work
normally.
Flowing or rushing water creates strong
forces. Driving through flowing water
could cause the vehicle to be carried
away. If this happens, you and other (Continued)
Page 185 of 338
Chevrolet Corvette Owner Manual (GMNA-Localizing-U.S./Canada/Mexico-
15342622) - 2022 - CRC - 5/4/21
184 Driving and Operating
Warning (Continued)
vehicle occupants could drown. Do not
ignore police warnings and be very
cautious about trying to drive through
flowing water.
Caution
Driving through deep puddles or standing
water can cause water to come in
through the engine air intake and
damage the engine. If deep puddles or
standing water cannot be avoided,
proceed with caution and do not exceed
8 km/h (5 mph). Do not drive through
water that may come close to or cover
the vehicle’s underbody.
Hydroplaning
Hydroplaning is dangerous. Water can build
up under the vehicle's tires so they actually
ride on the water. This can happen if the
road is wet enough and you are going fast
enough. When the vehicle is hydroplaning, it
has little or no contact with the road.There is no hard and fast rule about
hydroplaning. The best advice is to slow
down when the road is wet.
Other Rainy Weather Tips
Besides slowing down, other wet weather
driving tips include:
.Allow extra following distance.
.Pass with caution.
.Keep windshield wiping equipment in
good shape.
.Keep the windshield washer fluid reservoir
filled.
.Have good tires with proper tread depth.
See
Tires 0259.
.Turn off cruise control.
Hill and Mountain Roads
Driving on steep hills or through mountains
is different than driving on flat or rolling
terrain. Tips include:
.When driving downhill in D (Drive), the
vehicle may automatically downshift to
assist with speed control.
.A lower gear may also be selected to
provide further speed control.
{Warning
Using the brakes to slow the vehicle on a
long downhill slope can cause brake
overheating, can reduce brake
performance, and could result in a loss of
braking. Shift the transmission to a lower
gear to let the engine assist the brakes
on a steep downhill slope.
{Warning
Coasting downhill in N (Neutral) or with
the ignition off is dangerous. This can
cause overheating of the brakes and loss
of steering assist. Always have the engine
running and the vehicle in gear.
.Drive at speeds that keep the vehicle in
its own lane. Do not swing wide or cross
the center line.
.Be alert on top of hills; something could
be in your lane (e.g., stalled car, crash).
.Pay attention to special road signs (e.g.,
falling rocks area, winding roads, long
grades, passing or no-passing zones) and
take appropriate action.
Page 186 of 338
Chevrolet Corvette Owner Manual (GMNA-Localizing-U.S./Canada/Mexico-
15342622) - 2022 - CRC - 5/4/21
Driving and Operating 185
Winter Driving
Driving on Snow or IceCaution
To avoid damage to the wheels and
brake components, always clear snow and
ice from inside the wheels and
underneath the vehicle before driving.
Snow or ice between the tires and the road
creates less traction or grip, so drive
carefully. Wet ice can occur at about 0 °C
(32 °F) when freezing rain begins to fall.
Avoid driving on wet ice or in freezing rain
until roads can be treated.
For Slippery Road Driving:
.Accelerate gently. Accelerating too quickly
causes the wheels to spin and makes the
surface under the tires slick.
.Turn on Traction Control. See Traction
Control/Electronic Stability Control 0205.
.The Antilock Brake System (ABS) improves
vehicle stability during hard stops, but
the brakes should be applied sooner than
when on dry pavement. See Antilock
Brake System (ABS) 0202.
.Allow greater following distance and
watch for slippery spots. Icy patches can
occur on otherwise clear roads in shaded
areas. The surface of a curve or an
overpass can remain icy when the
surrounding roads are clear. Avoid sudden
steering maneuvers and braking while
on ice.
.Turn off cruise control.
.Turn on Weather Mode. See Driver Mode
Control 0206.
Blizzard Conditions
Stop the vehicle in a safe place and signal
for help. Stay with the vehicle unless there
is help nearby. If possible, use Roadside
Assistance. See Roadside Assistance Program
0 310. To get help and keep everyone in the
vehicle safe:
.Turn on the hazard warning flashers.
.Tie a red cloth to an outside mirror.
{Warning
Snow can trap engine exhaust under the
vehicle. This may cause exhaust gases to
get inside. Engine exhaust contains
(Continued)
Warning (Continued)
carbon monoxide (CO), which cannot be
seen or smelled. It can cause
unconsciousness and even death.
If the vehicle is stuck in snow:
.Clear snow from the base of the
vehicle, especially any blocking the
exhaust pipe.
.Open a window about 5 cm (2 in) on
the vehicle side that is away from the
wind, to bring in fresh air.
.Fully open the air outlets on or under
the instrument panel.
.Adjust the climate control system to
circulate the air inside the vehicle and
set the fan speed to the highest
setting. See“Climate Control Systems.”
For more information about CO, see
Engine Exhaust 0195.
To save fuel, run the engine for short
periods to warm the vehicle and then shut
the engine off and partially close the
window. Moving about to keep warm also
helps.
Page 192 of 338
Chevrolet Corvette Owner Manual (GMNA-Localizing-U.S./Canada/Mexico-
15342622) - 2022 - CRC - 5/4/21
Driving and Operating 191
Stopping the Engine/OFF (No Indicator
Lights) :When the vehicle is stopped, press
ENGINE START/STOP once to turn the
engine off.
If the vehicle is in P (Park), the ignition will
turn off, and Retained Accessory Power (RAP)
will remain active. See Retained Accessory
Power (RAP) 0193.
If the vehicle is in R (Reverse), D (Drive),
or M (Manual Mode), the vehicle will shift
to P (Park), the ignition will turn off, and
RAP will remain active.
If the vehicle is in N (Neutral), the ignition
will return to ACC/ACCESSORY and display
the message SHIFT TO PARK in the Driver
Information Center (DIC). When the vehicle
is shifted into P (Park), the ignition will
turn off.
Do not turn the engine off when the vehicle
is moving. This will cause a loss of power
assist in the brake and steering systems and
disable the airbags.
If the vehicle must be turned off in an
emergency: 1. Brake using a firm and steady pressure. Do not pump the brakes repeatedly. This
may deplete power assist, requiring
increased brake pedal force. 2. Shift into N (Neutral). This can be done
while the vehicle is moving. After
shifting into N (Neutral), firmly apply the
brakes and steer the vehicle to a safe
location.
3. Come to a complete stop. Shift into P (Park).
4. Set the parking brake. See Electric
Parking Brake 0203. Press ENGINE
START/STOP to turn the vehicle off.
{Warning
Turning off the vehicle while moving may
cause loss of power assist in the brake
and steering systems and disable the
airbags. While driving, only shut the
vehicle off in an emergency.
If the vehicle cannot be pulled over and
must be turned off while driving, press and
hold ENGINE START/STOP for more than
two seconds, or press twice within
five seconds.
ACC/ACCESSORY (Amber Indicator Light) :
This mode allows the use of some electrical
accessories when the engine is off. With the ignition off, pressing the button
one time without the brake pedal applied
will place the ignition in ACC/ACCESSORY.
The ignition will switch from ACC/
ACCESSORY to off after five minutes to
prevent battery rundown.
ON/RUN/START (Green Indicator Light) :
This
mode is for driving and starting. With the
ignition off and the brake pedal applied,
pressing the button once will place the
ignition in ON/RUN/START. Once engine
cranking begins, release the button. Engine
cranking will continue until the engine
starts. See Starting the Engine 0192. The
ignition will then remain in ON/RUN.
Service Mode
This power mode is available for service and
diagnostics, and to verify the proper
operation of the malfunction indicator lamp
as may be required for emission inspection
purposes. With the vehicle off and the brake
pedal not applied, pressing and holding
ENGINE START/STOP for more than
five seconds will place the vehicle in Service
Mode. The instruments and audio systems
will operate as they do in ON/RUN, but the
vehicle will not be able to be driven. The
Page 199 of 338

Chevrolet Corvette Owner Manual (GMNA-Localizing-U.S./Canada/Mexico-
15342622) - 2022 - CRC - 5/4/21
198 Driving and Operating
Caution
A transmission hot message may display
if the transmission fluid is too hot.
Driving under this condition can damage
the vehicle. Stop and idle the engine to
cool the transmission fluid. This message
clears when the transmission fluid has
cooled sufficiently.
D : This position is for normal driving.
If more power is needed for passing, press
the accelerator pedal.
If the vehicle is shifted into D (Drive) while
the speed is too high, the transmission will
get ready to engage D (Drive). Reduce the
vehicle speed, then the transmission will
engage D (Drive).
To shift into D (Drive):
1. Bring the vehicle to a complete stop.
2. Pull the D (Drive) switch on the center console. To shift out of D (Drive):
1. Bring the vehicle to a complete stop.
2. Shift to the desired gear.
Downshifting the transmission in slippery
road conditions could result in skidding. See
“Skidding” underLoss of Control 0177.
The transmission can be shifted like a
manual transmission using the paddle shift
controls while in D (Drive). See Manual
Mode 0198.
Caution
Spinning the tires or holding the vehicle
in one place on a hill using only the
accelerator pedal may damage the
transmission. The repair will not be
covered by the vehicle warranty. If the
vehicle is stuck, do not spin the tires.
When stopping on a hill, use the brakes
to hold the vehicle in place.
Manual Mode
Manual Paddle Shift
With the transmission in D (Drive), press the
M (Manual Mode) switch on the center
console to enter Manual Mode. Use the
paddles on the steering wheel to manually
upshift or downshift the transmission. The
right + (plus) paddle upshifts, and the
left −(minus) paddle downshifts.
When using the Manual Paddle Shift
feature, the current gear will be displayed in
the instrument cluster or the Head-Up
Display (HUD), if equipped. See Head-Up
Display (HUD) 094.
Page 203 of 338
Chevrolet Corvette Owner Manual (GMNA-Localizing-U.S./Canada/Mexico-
15342622) - 2022 - CRC - 5/4/21
202 Driving and Operating
rate of launch. Tire spin may occur with the
accelerator pedal pressed and the Traction
Control System (TCS) turned off.
This launch occurs when both of these
conditions are met:
.Vehicle speed is below 10 km/h (6 mph).
.Both the + paddle and−paddle are
released at the same time.
With the accelerator fully pressed and the
engine at the rev limiter, peak performance
only occurs if the paddles are released
within a short period of time after reaching
the rev limit (i.e., a few seconds).
Applying the brakes while the tires are
spinning may result in the clutch releasing.
Standard Exit : Engine power is reapplied to
the wheels gently to support normal vehicle
operation on public roads.
This occurs when paddles are released under
any of the these conditions:
.Vehicle speed is above 10 km/h (6 mph).
.The vehicle is in R (Reverse).
.The + paddle and −paddle are not
released at the same time. If the vehicle was in Temporary Manual
Paddle Shift mode before entering Double
Paddle Declutch, the vehicle will return to D
(Drive) with automatic shifting upon exiting
Double Paddle Declutch.
{Warning
When exiting Double Paddle Declutch, the
vehicle may move rapidly. You could lose
control and cause a crash with nearby
people or objects. Be ready to release the
accelerator pedal or apply the brakes
immediately if the vehicle moves too
quickly. Do not use the Double Paddle
Declutch when people or objects are near.
Brakes
Electric Brake Boost
Vehicles equipped with electric brake boost
have hydraulic brake circuits that are
electronically controlled when the brake
pedal is applied during normal operation.
The system performs routine tests and turns
off within a few minutes after the vehicle is
turned off. Noise may be heard during this
time. If the brake pedal is pressed during the tests or when the electric brake boost
system is off, a noticeable change in pedal
force and travel may be felt. This is normal.
Antilock Brake System (ABS)
The Antilock Brake System (ABS) helps
prevent a braking skid and maintain steering
while braking hard.
If there is a problem with ABS, this warning
light stays on. See
Antilock Brake System
(ABS) Warning Light 089.
ABS does not change the time needed to
get a foot on the brake pedal and does not
always decrease stopping distance. If you
get too close to the vehicle ahead, there will
not be enough time to apply the brakes if
that vehicle suddenly slows or stops. Always
leave enough room ahead to stop, even
with ABS.
Page 204 of 338
Chevrolet Corvette Owner Manual (GMNA-Localizing-U.S./Canada/Mexico-
15342622) - 2022 - CRC - 5/4/21
Driving and Operating 203
Using ABS
Do not pump the brakes. Just hold the brake
pedal down firmly. Hearing and feeling ABS
operate is normal.
Braking in Emergencies
ABS allows steering and braking at the same
time. In many emergencies, steering can
help even more than braking.
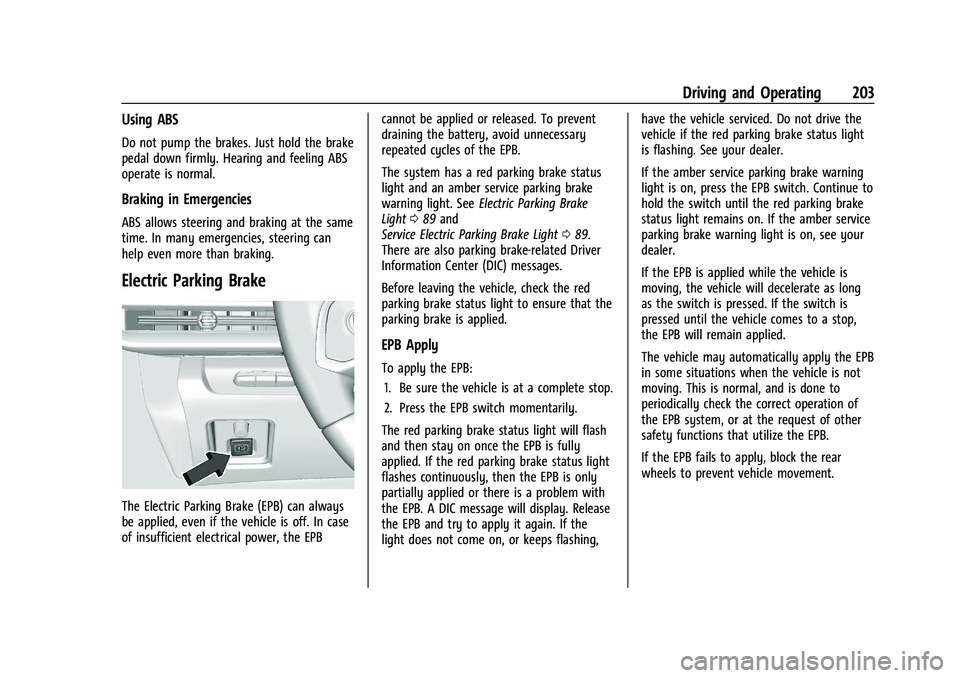
Electric Parking Brake
The Electric Parking Brake (EPB) can always
be applied, even if the vehicle is off. In case
of insufficient electrical power, the EPBcannot be applied or released. To prevent
draining the battery, avoid unnecessary
repeated cycles of the EPB.
The system has a red parking brake status
light and an amber service parking brake
warning light. See
Electric Parking Brake
Light 089 and
Service Electric Parking Brake Light 089.
There are also parking brake-related Driver
Information Center (DIC) messages.
Before leaving the vehicle, check the red
parking brake status light to ensure that the
parking brake is applied.
EPB Apply
To apply the EPB:
1. Be sure the vehicle is at a complete stop.
2. Press the EPB switch momentarily.
The red parking brake status light will flash
and then stay on once the EPB is fully
applied. If the red parking brake status light
flashes continuously, then the EPB is only
partially applied or there is a problem with
the EPB. A DIC message will display. Release
the EPB and try to apply it again. If the
light does not come on, or keeps flashing, have the vehicle serviced. Do not drive the
vehicle if the red parking brake status light
is flashing. See your dealer.
If the amber service parking brake warning
light is on, press the EPB switch. Continue to
hold the switch until the red parking brake
status light remains on. If the amber service
parking brake warning light is on, see your
dealer.
If the EPB is applied while the vehicle is
moving, the vehicle will decelerate as long
as the switch is pressed. If the switch is
pressed until the vehicle comes to a stop,
the EPB will remain applied.
The vehicle may automatically apply the EPB
in some situations when the vehicle is not
moving. This is normal, and is done to
periodically check the correct operation of
the EPB system, or at the request of other
safety functions that utilize the EPB.
If the EPB fails to apply, block the rear
wheels to prevent vehicle movement.