2022 CADILLAC XT5 electric
[x] Cancel search: electricPage 282 of 432

Cadillac XT5 Owner Manual (GMNA-Localizing-U.S./Canada/Mexico-
15227431) - 2022 - CRC - 8/11/21
DRIVING AND OPERATING 281
TIER Detergent Gasoline and ACDelco
Fuel System Treatment Plus−Gasoline
will help keep your vehicle’s engine
fuel deposit free and performing
optimally.
Filling the Tank
An arrow on the fuel gauge indicates
which side of the vehicle the fuel door
is on. SeeFuel Gauge 0107.
{Warning
Fuel vapors and fuel fires burn
violently and can cause injury or
death.
Follow these guidelines to help
avoid injuries to you and others:
.Read and follow all the
instructions on the fuel pump
island.
.Turn off the engine when
refueling.
.Keep sparks, flames, and
smoking materials away
from fuel.
(Continued)
Warning (Continued)
.Do not leave the fuel pump
unattended.
.Avoid using electronic devices
while refueling.
.Do not re-enter the vehicle while
pumping fuel.
.Keep children away from the fuel
pump and never let children
pump fuel.
.Before touching the fill nozzle,
touch a metallic object to
discharge static electricity from
your body.
.Fuel can spray out if the fill
nozzle is inserted too quickly.
This spray can happen if the
tank is nearly full, and is more
likely in hot weather. Insert the
fill nozzle slowly and wait for any
hiss noise to stop before
beginning to flow fuel.
If equipped, the fuel door unlocks
when the vehicle doors are unlocked.
See Remote Keyless Entry (RKE) System
Operation 07.
To open the fuel door, push and
release the rearward center edge of
the door.
The capless refueling system does not
have a fuel cap. Fully insert and latch
the fill nozzle, then begin fueling.
{Warning
Overfilling the fuel tank by more
than three clicks of a standard fill
nozzle may cause:
.Vehicle performance issues,
including engine stalling and
damage to the fuel system.
.Fuel spills.
(Continued)
Page 283 of 432

Cadillac XT5 Owner Manual (GMNA-Localizing-U.S./Canada/Mexico-
15227431) - 2022 - CRC - 8/11/21
282 DRIVING AND OPERATING
Warning (Continued)
.Under certain conditions, fuel
fires.
Be careful not to spill fuel. Wait
five seconds after you have finished
pumping before removing the fill
nozzle. Clean fuel from painted
surfaces as soon as possible. See
Exterior Care 0370. Push the fuel door
closed until it latches.
{Warning
If a fire starts while you are
refueling, do not remove the fill
nozzle. Shut off the flow of fuel by
shutting off the pump or by
notifying the station attendant.
Leave the area immediately.
Filling the Tank with a Portable Fuel
Container
If the vehicle runs out of fuel and
must be filled from a portable fuel
container:
1. Locate the capless funnel adapter in the rear cargo area under the
load floor tray.
2. Insert and latch the funnel into the capless fuel system.
{Warning
Attempting to refuel from a
portable fuel container without
using the funnel adapter may cause
fuel spillage and damage the
capless fuel system. This could
cause a fire. You or others could be
badly burned and the vehicle could
be damaged.
3. Remove and clean the funnel adapter and return it to the storage
location.
Filling a Portable Fuel
Container
{Warning
Never fill a portable fuel container
while it is in the vehicle. Static
electricity discharge from the
container can ignite the fuel vapor.
You or others could be badly
burned and the vehicle could be
damaged. To help avoid injury to
you and others:
.Dispense fuel only into approved
containers.
.Do not fill a container while it is
inside a vehicle, in a vehicle's
trunk, in a pickup bed, or on any
surface other than the ground.
.Bring the fill nozzle in contact
with the inside of the fill opening
before operating the nozzle.
Maintain contact until filling is
complete.
.Keep sparks, flames, and
smoking materials away
from fuel.
(Continued)
Page 285 of 432

Cadillac XT5 Owner Manual (GMNA-Localizing-U.S./Canada/Mexico-
15227431) - 2022 - CRC - 8/11/21
284 DRIVING AND OPERATING
.During the first 800 km (500 mi) of
trailer towing, do not drive over
80 km/h (50 mph) and do not make
starts at full throttle.
.Vehicles can tow in D (Drive). If the
transmission downshifts too often, a
lower gear may be selected using
Manual Mode SeeManual Mode
0 237.
If equipped, the following driver
assistance features should be turned
off when towing a trailer:
.Adaptive Cruise Control (ACC)
.Super Cruise Control
.Lane Keep Assist (LKA)
.Park Assist
.Automatic Parking Assist (APA)
.Reverse Automatic Braking (RAB)
If equipped, the following driver
assistance features should be turned
to alert or off when towing a trailer:
.Automatic Emergency
Braking (AEB)
.Intelligent Brake Assist (IBA)
.Front Pedestrian Braking (FPB) If equipped with Lane Change Alert
(LCA), the LCA detection zones that
extend back from the side of the
vehicle do not move further back
when a trailer is towed. Use caution
while changing lanes when towing a
trailer.
If equipped with Rear Cross Traffic
Alert (RCTA), use caution while
backing up when towing a trailer, as
the RCTA detection zones that extend
out from the back of the vehicle do
not move further back when a trailer
is towed.
{Warning
To prevent serious injury or death
from carbon monoxide (CO), when
towing a trailer:
.Do not drive with the liftgate,
trunk/hatch, or rear-most
window open.
.Fully open the air outlets on or
under the instrument panel.
(Continued)
Warning (Continued)
.Adjust the climate control
system to a setting that brings in
only outside air. See“Climate
Control Systems” in the Index.
For more information about carbon
monoxide, see Engine Exhaust
0 232.
Towing a trailer requires experience.
The combination of the vehicle and
trailer is longer and not as responsive
as the vehicle itself. Get used to the
handling and braking of the
combination by driving on a level road
surface before driving on public roads.
The trailer structure, the tires, and the
brakes must be all be rated to carry
the intended cargo. Inadequate trailer
equipment can cause the combination
to operate in an unexpected or unsafe
manner. Before driving, inspect all
trailer hitch parts and attachments,
safety chains, electrical connectors,
lamps, tires, and mirrors. See Towing
Equipment 0290. If the trailer has
electric brakes, start the combination
moving and then manually apply the
Page 293 of 432

Cadillac XT5 Owner Manual (GMNA-Localizing-U.S./Canada/Mexico-
15227431) - 2022 - CRC - 8/11/21
292 DRIVING AND OPERATING
Always leave just enough slack so the
combination can turn. Never allow
safety chains to drag on the ground.
Trailer Brakes
Loaded trailers over 450 kg (1,000 lb)
must be equipped with brake systems
and with brakes for each axle. Trailer
braking equipment conforming to
Canadian Standards Association (CSA)
requirement CAN3-D313, or its
equivalent, is recommended.
State or local regulations may require
trailers to have their own braking
system if the loaded weight of the
trailer exceeds certain requirements
that can vary from state to state.
Read and follow the instructions for
the trailer brakes so they are installed,
adjusted, and maintained properly.
Never attempt to tap into your
vehicle's hydraulic brake system.
If you do, both the vehicle anti-lock
brakes and the trailer brakes may not
function and could result in a crash.
Trailer Wiring
The trailer wiring harness (if
equipped), with a seven-pin connector
is located at the rear of the vehicle,
and it is tied to the vehicle's frame.
If the vehicle is not equipped with a
seven-pin trailer connector, the body
harness has provisions to connect a
trailer harness and a seven-pin trailer
connector which is available through
your dealer.
Use only a round, seven-wire
connector with flat blade terminals
meeting SAE J2863 specifications for
proper electrical connectivity.The seven-wire harness contains the
following trailer circuits:
Stop/Turn
Signal Left Yellow/Blue
Stop/Turn Signal
Right Green/Brown
Tail/Parking
Lamps Gray/Brown or
Brown
Reverse Lamps White/Green
or Gray
Battery Feed Red/Green or
Orange
Ground Black or White
Electric Trailer
Brake* Blue
* Circuit powered by electric trailer
brake control wiring provisions.
Electric Trailer Brake Control
Wiring Provisions
Wiring provisions for an aftermarket
electric trailer brake controller are
included with the vehicle as part of
the trailer wiring package. The
harness contains the following
circuits:
Page 294 of 432
Cadillac XT5 Owner Manual (GMNA-Localizing-U.S./Canada/Mexico-
15227431) - 2022 - CRC - 8/11/21
DRIVING AND OPERATING 293
Electric Trailer
BrakesBlue
Battery Feed Red/Green or
Red/Blue
Brake Apply
Signal White/Blue
Ground Black or White
Refer to the aftermarket electric trailer
brake controller owner's manual to
determine wire color coding of the
electric trailer brake controller. The
wire colors on the brake controller
may be different from the vehicle. The
electric trailer brake controller should
be installed by your dealer or a
qualified service center.
If equipped, there are four blunt cut
wires inside the front driver side
instrument panel. It will be necessary
to have a technician connect the
12-volt power to the engine
compartment fuse block.
Trailer Lamps
Always check all trailer lamps are
working at the beginning of each trip,
and periodically on longer trips.
Turn Signals When Towing a
Trailer
When properly connected, the trailer
turn signals will illuminate to indicate
the vehicle is turning, changing lanes,
or stopping. When towing a trailer,
the arrows on the instrument cluster
will illuminate even if the trailer is not
properly connected or the bulbs are
burned out.
Always check all trailer lamps are
working at the beginning of each trip,
and periodically on longer trips.
Trailer Sway Control (TSC)
Vehicles with StabiliTrak/Electronic
Stability Control (ESC) have a Trailer
Sway Control (TSC) feature. Trailer
sway is unintended side-to-side
motion of a trailer while towing. If the
vehicle is towing a trailer and the TSC
detects that sway is increasing, the
vehicle brakes are selectively applied
at each wheel, to help reduce
excessive trailer sway. If equipped with
the Integrated Trailer Brake Control
(ITBC) system, and the trailer has an
electric brake system, StabiliTrak/ESC
may also apply the trailer brakes.
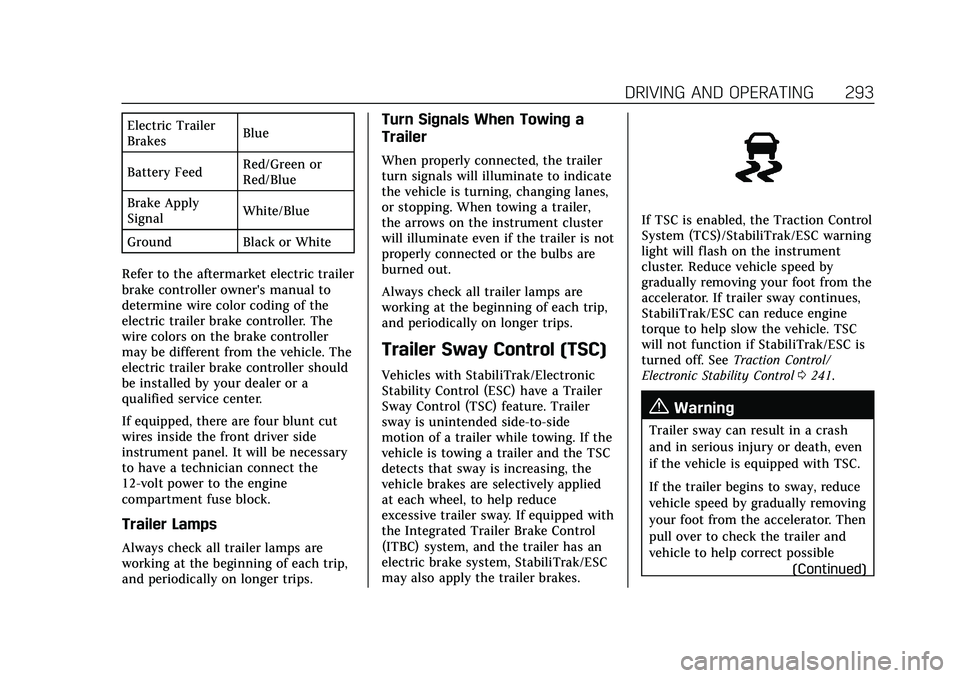
If TSC is enabled, the Traction Control
System (TCS)/StabiliTrak/ESC warning
light will flash on the instrument
cluster. Reduce vehicle speed by
gradually removing your foot from the
accelerator. If trailer sway continues,
StabiliTrak/ESC can reduce engine
torque to help slow the vehicle. TSC
will not function if StabiliTrak/ESC is
turned off. See Traction Control/
Electronic Stability Control 0241.
{Warning
Trailer sway can result in a crash
and in serious injury or death, even
if the vehicle is equipped with TSC.
If the trailer begins to sway, reduce
vehicle speed by gradually removing
your foot from the accelerator. Then
pull over to check the trailer and
vehicle to help correct possible
(Continued)
Page 295 of 432

Cadillac XT5 Owner Manual (GMNA-Localizing-U.S./Canada/Mexico-
15227431) - 2022 - CRC - 8/11/21
294 DRIVING AND OPERATING
Warning (Continued)
causes, including an improperly or
overloaded trailer, unrestrained
cargo, improper trailer hitch
configuration, or improperly
inflated or incorrect vehicle or
trailer tires. SeeTowing Equipment
0 290 for trailer ratings and hitch
setup recommendations.
Trailer Tires
Special Trailer (ST) tires differ from
vehicle tires. Trailer tires are designed
with stiff sidewalls to help prevent
sway and to support heavy loads.
These features can make it difficult to
determine if the trailer tire pressures
are low only based on a visual
inspection.
Always check all trailer tire pressures
before each trip when the tires are
cool. Low trailer tire pressure is a
leading cause of trailer tire blow-outs. Trailer tires deteriorate over time. The
trailer tire sidewall will show the week
and year the tire was manufactured.
Many trailer tire manufacturers
recommend replacing tires more than
six years old.
Overloading is another leading cause
of trailer tire blow-outs. Never load
your trailer with more weight than the
tires are designed to support. The load
rating is located on the trailer tire
sidewall.
Always know the maximum speed
rating for the trailer tires before
driving. This may be significantly
lower than the vehicle tire speed
rating. The speed rating may be on
the trailer tire sidewall. If the speed
rating is not shown, the default trailer
tire speed rating is 105 km/h
(65 mph).
Conversions and
Add-Ons
Add-On Electrical
Equipment
{Warning
The Data Link Connector (DLC) is
used for vehicle service and
Emission Inspection/Maintenance
testing. See
Malfunction Indicator
Lamp (Check Engine Light) 0110.
A device connected to the DLC —
such as an aftermarket fleet or
driver-behavior tracking device —
may interfere with vehicle systems.
This could affect vehicle operation
and cause a crash. Such devices
may also access information stored
in the vehicle’s systems.
Caution
Some electrical equipment can
damage the vehicle or cause
components to not work and would (Continued)
Page 296 of 432

Cadillac XT5 Owner Manual (GMNA-Localizing-U.S./Canada/Mexico-
15227431) - 2022 - CRC - 8/11/21
DRIVING AND OPERATING 295
Caution (Continued)
not be covered by the vehicle
warranty. Always check with your
dealer before adding electrical
equipment.
Add-on equipment can drain the
vehicle's 12-volt battery, even if the
vehicle is not operating.
The vehicle has an airbag system.
Before attempting to add anything
electrical to the vehicle, see Servicing
the Airbag-Equipped Vehicle 067 and
Adding Equipment to the
Airbag-Equipped Vehicle 068.
Page 297 of 432

Cadillac XT5 Owner Manual (GMNA-Localizing-U.S./Canada/Mexico-
15227431) - 2022 - CRC - 8/11/21
296 VEHICLE CARE
Vehicle Care
General Information
General Information . . . . . . . . . . . . . 297
California Perchlorate MaterialsRequirements . . . . . . . . . . . . . . . . . . . 297
Accessories and Modifications . . . . . . . . . . . . . . . . . . . 297
Vehicle Checks
Doing Your OwnService Work . . . . . . . . . . . . . . . . . . . . 298
Hood . . . . . . . . . . . . . . . . . . . . . . . . . . . . . . 298
Engine Compartment Overview . . . . . . . . . . . . . . . . . . . . . . . . . 300
Engine Oil . . . . . . . . . . . . . . . . . . . . . . . . . 303
Engine Oil Life System . . . . . . . . . . . 305
Automatic Transmission Fluid . . . . . . . . . . . . . . . . . . . . . . . . . . . . . 306
Engine Air Filter Life System . . . . 306
Engine Air Cleaner/Filter . . . . . . . . . 307
Cooling System . . . . . . . . . . . . . . . . . . . 308
Engine Overheating . . . . . . . . . . . . . . 312
Washer Fluid . . . . . . . . . . . . . . . . . . . . . 313
Brakes . . . . . . . . . . . . . . . . . . . . . . . . . . . . . 314
Brake Fluid . . . . . . . . . . . . . . . . . . . . . . . 315
Battery - North America . . . . . . . . . 316
All-Wheel Drive . . . . . . . . . . . . . . . . . . 316
Park Brake and P (Park) Mechanism Check . . . . . . . . . . . . . . 316 Wiper Blade Replacement . . . . . . . 317
Windshield Replacement . . . . . . . . 318
Gas Strut(s) . . . . . . . . . . . . . . . . . . . . . . . 318
Headlamp Aiming
Front Headlamp Aiming . . . . . . . . . 319
Bulb Replacement
Bulb Replacement . . . . . . . . . . . . . . . . 319
LED Lighting . . . . . . . . . . . . . . . . . . . . . 319
Electrical System
Electrical System Overload . . . . . . 319
Fuses and Circuit Breakers . . . . . . 321
Engine Compartment Fuse
Block . . . . . . . . . . . . . . . . . . . . . . . . . . . . 322
Instrument Panel Fuse Block . . . . 325
Rear Compartment Fuse Block . . . . . . . . . . . . . . . . . . . . . . . . . . . . 328
Wheels and Tires
Tires . . . . . . . . . . . . . . . . . . . . . . . . . . . . . . . 330
All-Season Tires . . . . . . . . . . . . . . . . . . 331
Winter Tires . . . . . . . . . . . . . . . . . . . . . . 331
Summer Tires . . . . . . . . . . . . . . . . . . . . 331
Tire Sidewall Labeling . . . . . . . . . . . 332
Tire Designations . . . . . . . . . . . . . . . . . 334
Tire Terminology andDefinitions . . . . . . . . . . . . . . . . . . . . . . 334
Tire Pressure . . . . . . . . . . . . . . . . . . . . . . 337
Tire Pressure for High-Speed Operation . . . . . . . . . . . . . . . . . . . . . . . . 338 Tire Pressure Monitor System . . . 339
Tire Pressure Monitor
Operation . . . . . . . . . . . . . . . . . . . . . . . . 340
Tire Inspection . . . . . . . . . . . . . . . . . . . 343
Tire Rotation . . . . . . . . . . . . . . . . . . . . . 344
When It Is Time for New Tires . . . . . . . . . . . . . . . . . . . . . . . . . . . . . 345
Buying New Tires . . . . . . . . . . . . . . . . 346
Different Size Tires and Wheels . . . . . . . . . . . . . . . . . . . . . . . . . . 347
Uniform Tire Quality Grading . . . 347
Wheel Alignment and Tire Balance . . . . . . . . . . . . . . . . . . . . . . . . . . 349
Wheel Replacement . . . . . . . . . . . . . . 349
Tire Chains . . . . . . . . . . . . . . . . . . . . . . . 349
If a Tire Goes Flat . . . . . . . . . . . . . . . . 350
Tire Sealant and Compressor Kit . . . . . . . . . . . . . . . . . 352
Storing the Tire Sealant and Compressor Kit . . . . . . . . . . . . . . . . . 357
Tire Changing . . . . . . . . . . . . . . . . . . . . . 358
Compact Spare Tire . . . . . . . . . . . . . . 363
Jump Starting
Jump Starting - North America . . . . . . . . . . . . . . . . . . . . . . . . . 364
Towing the Vehicle
Towing the Vehicle . . . . . . . . . . . . . . . 366
Recreational Vehicle Towing . . . . 368