Page 177 of 248

175
JUMP STARTING
If your vehicle has a discharged battery, it can be
jump started from the remote battery
connections by using a set of jumper cables and
a battery in another vehicle, or by using a portable
battery booster pack. Jump starting can be
dangerous if done improperly, so please follow
the procedures in this section carefully.
NOTE:
When using a portable battery booster pack,
follow the manufacturer's operating instructions
and precautions.
REMOTE BATTERY CONNECTION POSTS
Your vehicle is equipped with remote battery
connection posts for jump starting. Depending on
the vehicle model, remote post locations may
vary.
Non Quadrifoglio Model
The remote posts of the battery for jump starting
can be found inside the engine compartment.Remote Jump Starting Post Locations
The remote positive (+) post is located at the rear
of the engine compartment, which can be
accessed by removing the cowl cover, and
opening the spring loaded protective flap. Protective Cowl Cover
Protective Flap And Remote Positive (+) Post
WARNING!
Do not attempt jump starting if the battery is
frozen. It could rupture or explode and cause
personal injury.
CAUTION!
Do not use the battery for jump starting the
vehicle. Improperly connecting the jumper
cables or booster pack to the battery can
result in electrical system and fuse failure.
Always use the remote battery connection
posts to jump start your vehicle.
Do not use a portable battery booster pack or
any other booster source with a system
voltage greater than 12 Volts or damage to
the battery, starter motor, alternator or
electrical system may occur.
Remote Positive (+) Post
Remote Negative (-) Post
22_GA_OM_EN_USC_t.book Page 175
Page 178 of 248
 post is an exposed stud,
positioned next to the passenger side hood lock
on the upper frame rail.
Remote Negative (-) Post Location
To carry out th")
IN CASE OF EMERGENCY
176
The remote negative (-) post is an exposed stud,
positioned next to the passenger side hood lock
on the upper frame rail.
Remote Negative (-) Post Location
To carry out the operation, you need to have the
correct cables to connect to the battery of
another vehicle or a portable battery booster
pack to the remote posts of the discharged
battery. Usually, these cables have terminals at
the ends and are identified by different sheath
colors (red = positive, black = negative).Quadrifoglio Model
Remote Jump Starting Post Locations
The remote negative (-) post is an exposed stud,
positioned next to the passenger side hood lock
on the upper frame rail.
Remote Negative (-) Post Location The remote positive
(+) post is located next to the
passenger side hood lock on the inside of the
upper frame rail, and can be accessed by
removing the protective flap.
Remote Positive (+) Protective Flap
WARNING!
Do not connect the jumper cable to the
negative (-) post of the discharged battery. The
resulting electrical spark could cause the
battery to explode and could result in serious
injury. Only use the specific ground point, do
not use any other exposed metal parts.
Remote Negative (-) Post
Remote Positive (+) Post
WARNING!
Do not connect the jumper cable to the
negative (-) post of the discharged battery. The
resulting electrical spark could cause the
battery to explode and could result in serious
injury. Only use the specific ground point, do
not use any other exposed metal parts.
22_GA_OM_EN_USC_t.book Page 176
Page 179 of 248
 Post Location
To carry out the operation, you need to have the
correct cables to connect to the battery of
another vehicle or a portable battery booster
pack to the remote")
177
Remote Positive (+) Post Location
To carry out the operation, you need to have the
correct cables to connect to the battery of
another vehicle or a portable battery booster
pack to the remote posts of the discharged
battery. Usually, these cables have terminals at
the ends and are identified by different sheath
colors (red = positive, black = negative).
JUMP STARTING PROCEDURE
Preparation For Jump Starting:
1. Firmly apply the park brake, and cycle the ignition to OFF.
2. Turn off all electrical features in the vehicle.
3. If using another vehicle to jump start the battery, park the vehicle within the jumper
cables reach, apply the park brake and make
sure the ignition is OFF.
Cable Connection
Proceed as follows to perform a jump starting
procedure:
1. Connect the positive (+) end of the jumper
cable to the remote positive (+) post of the
vehicle with the discharged battery.
2. Connect the opposite end of the positive (+)
jumper cable to the positive (+) post of the
booster battery.
3. Connect the negative (-) end of the jumper
cable to the negative (-) post of the booster
battery.
4. Connect the opposite end of the negative (-)
jumper cable to the remote negative (-) post
of the discharged vehicle. 5. Start the engine in the vehicle that has the
booster battery, let the engine idle a few
minutes, and then start the engine in the
vehicle with the discharged battery. If using a
portable battery booster pack, before starting
the vehicle, wait a few seconds after
completing the connection.
6. Once the engine is started, follow the discon -
nection procedure below.
Cable Disconnection
1. Disconnect the negative (-) end of the jumper
cable from the remote negative (-) post of the
vehicle with the discharged battery.
2. Disconnect the opposite end of the negative (-) jumper cable from the negative (-) post of
the booster battery.
3. Disconnect the positive (+) end of the jumper
cable from the positive (+) post of the booster
battery.
4. Disconnect the opposite end of the positive (+) jumper cable from the remote positive (+)
post of the vehicle with the discharged
battery, and reinstall the protective cap.
WARNING!
Failure to follow this jump starting procedure
could result in personal injury or property
damage due to battery explosion.
CAUTION!
Failure to follow these procedures could result
in damage to the charging system of the
booster vehicle or the discharged vehicle.
WARNING!
Do not allow vehicles to touch each other as
this could establish a ground connection and
personal injury could result.
WARNING!
Do not connect the jumper cable to the
negative (-) post of the discharged battery. The
resulting electrical spark could cause the
battery to explode and could result in serious
injury. Only use the specific ground point, do
not use any other exposed metal parts.
22_GA_OM_EN_USC_t.book Page 177
Page 180 of 248

IN CASE OF EMERGENCY
178
If frequent jump starting is required to start your
vehicle, you should have the battery and charging
system inspected at an authorized dealer.
BUMP STARTING
Never jump start the engine by pushing, towing or
coasting downhill.
NOTE:
You cannot start a vehicle with an automatic
transmission by pushing it.
IF YOUR ENGINE
OVERHEATS
Engine overheating may occur in situations of
extreme environmental temperatures, frequent
engine stops/starts, or driving in heavy traffic. If
the engine becomes overheated, the Engine
Temperature Warning Light in the instrument
cluster will illuminate along with a dedicated
message
Ú
page 70.
If the vehicle is overheating, it will need to be
serviced by an authorized dealer. In any of the following situations, you can reduce
the potential for overheating by taking the
appropriate action.
On the highways — slow down.
In city traffic — while stopped, place the
transmission in NEUTRAL, but do not increase
engine idle speed.
NOTE:
There are steps that you can take to slow down
an impending overheat condition:
If your Air Conditioner (A/C) is on, turn it off.
The A/C system adds heat to the engine
cooling system and turning the A/C off can
help remove this heat.
You can also turn the temperature control to
maximum heat, the mode control to floor and
the blower control to high. This allows the
heater core to act as a supplement to the
radiator and aids in removing heat from the
engine cooling system.
If Steam Is Coming From The Engine
Compartment
Do not go near the front of the vehicle. Stop the
engine. Wait until the steam dissipates. Then,
open the hood and start the engine.
If Neither Coolant Nor Steam Is Escaping
Open the hood and idle the engine until it cools.
NOTE:
If the cooling fan does not operate while the
engine is running, the engine temperature will
increase. Stop the engine and contact an
authorized dealer.
If the engine continues to overheat or
frequently overheats, have the cooling system
inspected. The engine could be seriously
damaged unless repairs are made. Contact an
authorized dealer.
CAUTION!
Accessories plugged into the vehicle power
outlets draw power from the vehicle’s battery,
even when not in use (i.e., cellular phones,
etc.). Eventually, if plugged in long enough
without engine operation, the vehicle’s battery
will discharge sufficiently to degrade battery
life and/or prevent the engine from starting.
WARNING!
You or others can be badly burned by hot
engine coolant (antifreeze) or steam from your
radiator. If you see or hear steam coming from
under the hood, do not open the hood until
the radiator has had time to cool. Never try to
open a cooling system pressure cap when the
radiator or coolant bottle is hot.
CAUTION!
Driving with a hot cooling system could
damage your vehicle. If temperature gauge
reads “H”, pull over and stop the vehicle. Idle
the vehicle with the air conditioner turned off
until the pointer drops back into the normal
range. If the pointer remains on the “H”, turn
the engine off immediately, and call for
service.
22_GA_OM_EN_USC_t.book Page 178
Page 181 of 248

MANUAL PARK RELEASE
See an authorized dealer to disengage the
manual park release lever.
TOWING A DISABLED
VEHICLE
This section describes procedures for towing a
disabled vehicle u")
179
(Continued)
MANUAL PARK RELEASE
See an authorized dealer to disengage the
manual park release lever.
TOWING A DISABLED
VEHICLE
This section describes procedures for towing a
disabled vehicle using a commercial towing
service.The operators of the assistance vehicle must be
informed with regard to the vehicle's minimum
height from ground in order to avoid contact
between the ends of the fascia/bumper with the
equipment of the breakdown truck.
The following image illustrates the front and rear
attachment corners of the vehicle, to be taken
into consideration when loading the vehicle on
the assistance vehicle.
Front And Rear Loading Angles
REAR WHEEL DRIVE (RWD) MODELS
It is recommended to tow the vehicle with all four
wheels OFF the ground on the flatbed of a
roadside assistance vehicle.
If an assistance vehicle with a flatbed is not
available, the vehicle must be towed with the rear
wheels lifted from the ground using a trailer or
special equipment allowing lifting of the rear
wheels.
WARNING!
A special tool is required to perform this proce -
dure. Damage to the vehicle or serious injury
or death may occur if the procedure is per -
formed improperly. Please contact an autho -
rized dealer to have this procedure performed.
CAUTION!
The vehicle should be transported with all
four wheels OFF the ground on the flatbed of
a roadside assistance vehicle. Avoid towing
with only the front (or rear) wheels lifted.
When towing with only the front (or rear)
wheels lifted, in addition to damaging the
body, it could damage the transmission.
Do not use sling-type equipment when
towing. Vehicle damage may occur.
When securing the vehicle to a flatbed truck,
do not attach to front or rear suspension
components. Damage to your vehicle may
result from improper towing.
Ensure that the Electric Park Brake is
released, and remain released, while being
towed.
Damage from improper towing is not covered
under the New Vehicle Limited Warranty.
CAUTION!RWD
ModelsAWD
Models
A — Front Loading
Angle 12.880° 15.160°
B — Rear Loading
Angle 17.105° 18.400°
CAUTION!
Do not use sling type equipment when
towing. Vehicle damage may occur.
When securing the vehicle to a flat bed truck,
do not attach to front or rear suspension
components. Damage to your vehicle may
result from improper towing.
Ensure that the Electric Park Brake is
released, and remains released, while being
towed.
22_GA_OM_EN_USC_t.book Page 179
Page 182 of 248

ALL WHEEL DRIVE (AWD) MODELS
It is recommended to tow the vehicle with all four
wheels OFF the ground on the flatbed of a
roadside assistance vehicle.
TOW EYES")
IN CASE OF EMERGENCY
180
(Continued)
ALL WHEEL DRIVE (AWD) MODELS
It is recommended to tow the vehicle with all four
wheels OFF the ground on the flatbed of a
roadside assistance vehicle.
TOW EYES
If the vehicle has been in an accident or has
broken down, a tow eye is provided in the tools
container located inside the luggage
compartment for vehicle towing. There are two
locations on the front fascia/bumper available
for Tow Eye installation, and one in the rear on
the passenger side. Towing is meant only for
short distances on a paved road surface.
Proceed as follows to use the tow eye:
1. Unhook the cap on the front (left or right side)or rear fascia/bumper, pushing on the upper
part. Front Tow Eye Cap Locations
Rear Tow Eye Cap Location
2. Remove the tow eye from its housing in the trunk and carefully clean the threaded
housing on the vehicle before using it.
3. Tighten the vehicle's tow eye in place (about 11 turns).
NOTE:
The largest work angle of a tow cable to fix on the
tow hook must not exceed 15°. Work Angle Of Tow Cable
CAUTION!
DO NOT flat tow this vehicle. Damage to the
drivetrain will result.
DO NOT dolly tow this vehicle. Use of a towing
dolly can cause significant damage to your
vehicle.
Towing this vehicle in violation of the above
requirements can cause severe transmission
damage. Damage from improper towing is not
covered under the New Vehicle Limited
Warranty.
WARNING!
Stand clear of vehicles when pulling with tow
eyes.
Do not use a chain with a tow eye. Chains
may break, causing serious injury or death.
Do not use a tow strap with a tow eye. Tow
straps may break or become disengaged,
causing serious injury or death.
Failure to follow proper tow eye usage may
cause components to break resulting in
serious injury or death.
CAUTION!
The tow eye must be used exclusively for
roadside assistance operations. Only use the
tow eye with an appropriate device in
accordance with the highway code (a rigid
bar or rope) to flat tow the vehicle for a short
distance to the nearest service location.
22_GA_OM_EN_USC_t.book Page 180
Page 183 of 248

This vehicle is equipped with an Enhanced
Accident Response System.
This feature is a communication network that
takes effect in the event of an impa")
181
ENHANCED ACCIDENT
RESPONSE SYSTEM (EARS)
This vehicle is equipped with an Enhanced
Accident Response System.
This feature is a communication network that
takes effect in the event of an impact
Ú
page 155.
EVENT DATA RECORDER
(EDR)
This vehicle is equipped with an event data
recorder (EDR). The main purpose of an EDR is to
record data that will assist in understanding how
a vehicle’s systems performed under certain
crash or near crash-like situations, such as an air
bag deployment or hitting a road obstacle
Ú
page 157.
Tow eyes MUST NOT be used to tow vehicles
off the road or where there are obstacles.
In compliance with the above conditions,
towing with a tow eye must take place with
two vehicles (one towing, the other towed)
aligned as much as possible along the same
center line. Damage to your vehicle may
occur if these guidelines are not followed.
When towing, only use a facility that can tow
vehicles with low ground clearances as
extensive damage can result by using a
standard tow truck platform.
CAUTION!
22_GA_OM_EN_USC_t.book Page 181
Page 184 of 248

182
SERVICING AND MAINTENANCE
Correct servicing permits the performance of the
vehicle to be maintained over time, as well as
limited running costs and safeguarding the
efficiency of the safety systems.
This chapter explains how.
SCHEDULED SERVICING
Correct servicing is crucial for guaranteeing a
long life for the vehicle under the best conditions.
For this reason, Alfa Romeo has planned a series
of checks and services for your vehicle at fixed
intervals based on distance and time, as
described in the Scheduled Servicing Plan.
Before each service, it is always necessary to
carefully follow the instructions in the Scheduled
Servicing Plan (e.g. periodically check level of
fluids, tire pressure, etc.).
Scheduled Servicing is offered by an authorized
dealer according to a set time schedule. If, during
each operation, in addition to the ones
scheduled, the need arises for further
replacements or repairs, these may be carried
out with the owner’s explicit consent only.
NOTE:
Scheduled Servicing intervals are required by the
manufacturer. Failure to have them carried out
may invalidate the New Vehicle Limited Warranty.
You are advised to inform an authorized dealer of
any small operating irregularities without waiting
for the next service.
PERIODIC CHECKS
Every month or every 600 miles (1,000 km) or
before long trips check and, if necessary, top off:
Engine coolant level.
Brake fluid level (if insufficient, see an
authorized dealer as soon as possible).
Windshield washer fluid level.
Tire inflation pressure and condition.
Operation of lighting system (headlights,
direction indicators, hazard warning lights,
etc.).
Operation of windshield washing/wiping
system and positioning/wear of wiper blades.
Inspect the CV/Universal joints.
Oil consumption of the engine depends on
conditions and driving style. For this reason, the
engine oil level must be checked every
1,860 miles (3,000 km), and top off if necessary
Ú
page 188.
HEAVY USAGE OF THE VEHICLE
If the vehicle is used under one of the following
conditions:
Dusty roads.
Short, repeated journeys less than 4 miles
(7 km) at sub-zero outside temperatures.
Engine often idling or driving long distances at
low speeds or long periods of inactivity.
In the event of a long period of inactivity. The following checks must be carried out more
often than indicated in the Scheduled Servicing
Plan:
Check cleanliness of hood and trunk locks,
cleanliness and lubrication of linkage.
Visually inspect conditions of: engine,
transmission, pipes and hoses (exhaust/fuel
system/brakes) and rubber elements
(sleeves/bushes, etc.).
Check battery charge and battery fluid level
(electrolyte).
Visually inspect conditions of the accessory
drive belts.
Check and, if necessary, change engine oil and
replace oil filter.
Check and, if necessary, replace cabin air
filter.
Check and, if necessary, replace engine air
cleaner.
Severe Duty All Models
Vehicles that are operated in a dusty and off-road
environment, or predominately at idle or very low
engine RPM are known as Severe Duty vehicles.
It is recommended that you change engine oil at
4,000 miles (6,500 km) or 350 hours of engine
run time.
22_GA_OM_EN_USC_t.book Page 182
 1
1 2
2 3
3 4
4 5
5 6
6 7
7 8
8 9
9 10
10 11
11 12
12 13
13 14
14 15
15 16
16 17
17 18
18 19
19 20
20 21
21 22
22 23
23 24
24 25
25 26
26 27
27 28
28 29
29 30
30 31
31 32
32 33
33 34
34 35
35 36
36 37
37 38
38 39
39 40
40 41
41 42
42 43
43 44
44 45
45 46
46 47
47 48
48 49
49 50
50 51
51 52
52 53
53 54
54 55
55 56
56 57
57 58
58 59
59 60
60 61
61 62
62 63
63 64
64 65
65 66
66 67
67 68
68 69
69 70
70 71
71 72
72 73
73 74
74 75
75 76
76 77
77 78
78 79
79 80
80 81
81 82
82 83
83 84
84 85
85 86
86 87
87 88
88 89
89 90
90 91
91 92
92 93
93 94
94 95
95 96
96 97
97 98
98 99
99 100
100 101
101 102
102 103
103 104
104 105
105 106
106 107
107 108
108 109
109 110
110 111
111 112
112 113
113 114
114 115
115 116
116 117
117 118
118 119
119 120
120 121
121 122
122 123
123 124
124 125
125 126
126 127
127 128
128 129
129 130
130 131
131 132
132 133
133 134
134 135
135 136
136 137
137 138
138 139
139 140
140 141
141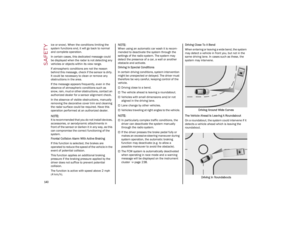 142
142 143
143 144
144 145
145 146
146 147
147 148
148 149
149 150
150 151
151 152
152 153
153 154
154 155
155 156
156 157
157 158
158 159
159 160
160 161
161 162
162 163
163 164
164 165
165 166
166 167
167 168
168 169
169 170
170 171
171 172
172 173
173 174
174 175
175 176
176 177
177 178
178 179
179 180
180 181
181 182
182 183
183 184
184 185
185 186
186 187
187 188
188 189
189 190
190 191
191 192
192 193
193 194
194 195
195 196
196 197
197 198
198 199
199 200
200 201
201 202
202 203
203 204
204 205
205 206
206 207
207 208
208 209
209 210
210 211
211 212
212 213
213 214
214 215
215 216
216 217
217 218
218 219
219 220
220 221
221 222
222 223
223 224
224 225
225 226
226 227
227 228
228 229
229 230
230 231
231 232
232 233
233 234
234 235
235 236
236 237
237 238
238 239
239 240
240 241
241 242
242 243
243 244
244 245
245 246
246 247
247