Page 65 of 114

Periodic maintenance an d a djustment
9-2
9
EAU71021
TIP The annual checks must be performe d every year, except if a distance- based maintenance is performe d in-
stea d.
From 30000 km (17500 mi), repeat the maintenance intervals starting from 6000 km (3500 mi).
Items marked with an asterisk should be performed by a Yamaha dealer as they require special tools, data and tech-
nical skills.
EAU71041
Perio dic maintenance chart for the emission control systemNO. ITEM CHECK OR MAINTENANCE JOB ODOMETER READING
ANNUAL
CHECK
1000 km
(600 mi) 6000 km
(3500 mi) 12000 km
(7000 mi) 18000 km
(10500 mi) 24000 km
(14000 mi)
1 *Fuel line • Check fuel hoses for cracks or
damage.
• Replace if necessary.
2 Spark plu g• Check condition.
• Adjust gap and clean.
•Replace.
3 *Valve clearance • Check and adjust.
4 *Fuel injection • Check engine idle speed.
5 *Exhaust system • Check for leakage.
• Tighten if necessary.
• Replace gasket if necessary.
6 *Evaporative emis-
sion control system • Check control system for dam-
age.
• Replace if necessary.
UBBDE0E0.book Page 2 Wednesday, June 2, 2021 2:57 PM
Page 66 of 114
 6000 km
(3500 mi) 12")
Periodic maintenance an d a djustment
9-3
9
EAU71342
General maintenance an d lu brication chartNO. ITEM CHECK OR MAINTENANCE JOB ODOMETER READING
ANNUAL
CHECK
1000 km
(600 mi) 6000 km
(3500 mi) 12000 km
(7000 mi) 18000 km
(10500 mi) 24000 km
(14000 mi)
1 *Dia
gnostic system
check • Perform dynamic inspection us-
ing Yamaha diagnostic tool.
• Check the error codes.
2 *Air filter element • Replace. Every 18000 km (10500 mi)
3 Air filter case check
hose • Clean.
4 *V-
belt case air filter
element • Clean.
• Replace if necessary.
5 *Battery • Check voltage.
• Charge if necessary.
6 *Front brake • Check operation, fluid level, and
for fluid leakage.
• Replace brake pads if necessary.
7 *Rear brake • Check operation, fluid level, and
for fluid leakage.
• Replace brake pads if necessary.
8 *Brake hose • Check for cracks or damage.
• Replace. Every 4 years
9 *Brake flui d • Change. Every 2 years
10 *Wheels • Check runout and for damage.
• Replace if necessary.
UBBDE0E0.book Page 3 Wednesday, June 2, 2021 2:57 PM
Page 67 of 114

Periodic maintenance an d a djustment
9-4
9
11 *Tires • Check tread depth and for dam-
age.
• Replace if necessary.
• Check air pressure.
• Correct if necessary.
12 *Wheel bearin gs • Check bearing for looseness or
damage.
13 *Steerin g b earin gs • Check bearing assemblies for
looseness.
• Moderately repack with lithium- soap-based grease.
14 *Chassis fasteners • Make sure that all nuts, bolts and
screws are properly tightened.
15 Front an
d rear
b rake lever pivot
shaft • Lubricate with silicone grease.
16 Si
destan d, center-
stan d • Check operation.
• Lubricate with lithium-soap-
based grease.
17 *Sidestan d switch • Check operation and replace if
necessary.
18 *Front fork • Check operation and for oil leak-
age.
• Replace if necessary.
19 *Shock a
bsor ber as-
sem blies • Check operation and for oil leak-
age.
• Replace if necessary.
NO. ITEM CHECK OR MAINTENANCE JOB
ODOMETER READING
ANNUAL
CHECK
1000 km
(600 mi) 6000 km
(3500 mi) 12000 km
(7000 mi) 18000 km
(10500 mi) 2400
0 km
(14000 mi)
UBBDE0E0.book Page 4 Wednesday, June 2, 2021 2:57 PM
Page 68 of 114
.
• Check oil level and vehicle for oil leakage. At the initial interval and when the oil change")
Periodic maintenance an d a djustment
9-5
9
20 En gine oil • Change (warm engine before
draining).
• Check oil level and vehicle for oil leakage. At the initial interval and when the oil change indicator flashes or
comes on.
21 *Engine oil strainer • Clean.
22 *Final transmission
oil • Check vehicle for oil leakage.
• Change.
23 *Coolin g system • Check coolant level and vehicle
for coolant leakage.
• Change. Every 3 years
24 *V-belt • Replace. When the V-belt replacement indicator flashes or comes on
25 *Front an
d rear
b rake switches • Check operation.
26 *Movin
g parts an d
cab les • Lubricate.
27 *Throttle
grip hous-
in g an d cab le • Check operation and free play.
• Adjust the throttle cable free play
if necessary.
• Lubricate the throttle grip housing and cable.
28 *Li
ghts, si gnals an d
switches • Check operation.
• Adjust headlight beam.
NO. ITEM CHECK OR MAINTENANCE JOB
ODOMETER READING
ANNUAL
CHECK
1000 km
(600 mi) 6000 km
(3500 mi) 12000 km
(7000 mi) 1
8000 km
(10500 mi) 24000 km
(14000 mi)
UBBDE0E0.book Page 5 Wednesday, June 2, 2021 2:57 PM
Page 69 of 114
Periodic maintenance an d a djustment
9-6
9
EAU72790
TIP Engine air filter and V-belt air filter
• This model’s engine air filter is equipped with a disposable oil-coated paper element, which must not be cleaned with compressed air to avoid damaging it.
• The engine air filter element needs to be replaced and the V-belt air filter element needs to be serviced more fre-
quently when riding in unusually wet or dusty areas.
Hydraulic brake service
• After disassembling the brake master cylinders and calipers, always change the fluid. Regularly check the brake fluid levels and fill the reservoirs as required.
• Every two years replace the internal components of the brake master cylinders and calipers, and change the brake fluid.
• Replace the brake hoses every four years and if cracked or damaged.
UBBDE0E0.book Page 6 Wednesday, June 2, 2021 2:57 PM
Page 70 of 114
Periodic maintenance an d a djustment
9-7
9
EAU18773
Removin g an d installin g pan-
elsThe panels shown need to be removed
to perform some of the maintenance
jobs described in this chapter. Refer to
this section each time a panel needs to
be removed and installed.
EAUN2600
Panel A
To remove the panel1. Remove the screws. 2. Extend the right passenger foot-
rest, and then pull the panel out-
ward.
To install the panel
1. Place the panel in the original po- sition, and then install the screws. 2. Retract the right passenger foot-
rest to its original position.
Panel B
To remove the panel
1. Remove panel A.
2. Remove the quick fasteners and the bolt.
1. Panel A
2. Panel B
3. Panel C
3
1
2
1. Panel A
2. Screw
1
2
1. Panel B
2. Quick fastener
1
2
UBBDE0E0.book Page 7 Wednesday, June 2, 2021 2:57 PM
Page 71 of 114
Periodic maintenance an d a djustment
9-8
9
3. Remove the right floorboard mats
by pulling them up.
4. Remove the bolts and screw, then pull the panel outward. To install the panel
1. Place the panel in the original po-
sition, and then install the bolts
and screw.
2. Place the right floorboard mats in their original position and push
them downward to secure them.
3. Install the bolt and the quick fas- teners.
4. Install panel A.
Panel C
To remove the panel1. Remove the windshield by remov- ing the screws. 2. Remove the panel by removing
the screws.
To install the panel
1. Place the panel in the original po- sition, and then install the screws.
1. Bolt
2. Quick fastener
1. Floorboard mat1
2
1
1. Bolt
2. Screw
12
1. Windshield
2. Screw
1. Panel C
2. Screw
1
2
1
2
2
UBBDE0E0.book Page 8 Wednesday, June 2, 2021 2:57 PM
Page 72 of 114

Periodic maintenance an d a djustment
9-9
9 2. Install the windshield by installing
the screws.
EAU67161
Checkin g the spark plu gThe spark plug is an important engine
component, which is easy to check.
Since heat and deposits will cause any
spark plug to slowly erode, the spark
plug should be removed and checked
in accordance with the periodic main-
tenance and lubrication chart. In addi-
tion, the condition of the spark plug
can reveal the condition of the engine.
To remove the spark plu g
1. Place the vehicle on the center- stand.
2. Remove panels A and B. (See page 9-7.)
3. Remove the spark plug cap. 4. Remove the spark plug as shown,
with the spark plug wrench includ-
ed in the owner’s tool kit.
To check the spark plu g
1. Check that the porcelain insulator around the center electrode of the
spark plug is a medium-to-light
tan (the ideal color when the vehi-
cle is ridden normally).
TIPIf the spark plug shows a distinctly dif-
ferent color, the engine could be oper-
ating improperly. Do not attempt to
diagnose such problems yourself. In-
stead, have a Yamaha dealer check
the vehicle.
1. Spark plug cap
1
1. Spark plug wrench
1
UBBDE0E0.book Page 9 Wednesday, June 2, 2021 2:57 PM
 1
1 2
2 3
3 4
4 5
5 6
6 7
7 8
8 9
9 10
10 11
11 12
12 13
13 14
14 15
15 16
16 17
17 18
18 19
19 20
20 21
21 22
22 23
23 24
24 25
25 26
26 27
27 28
28 29
29 30
30 31
31 32
32 33
33 34
34 35
35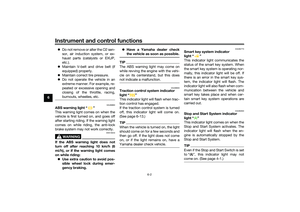 36
36 37
37 38
38 39
39 40
40 41
41 42
42 43
43 44
44 45
45 46
46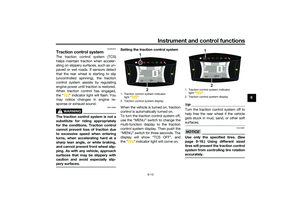 47
47 48
48 49
49 50
50 51
51 52
52 53
53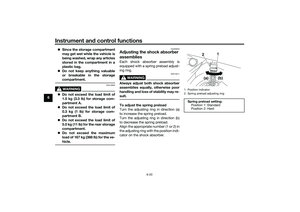 54
54 55
55 56
56 57
57 58
58 59
59 60
60 61
61 62
62 63
63 64
64 65
65 66
66 67
67 68
68 69
69 70
70 71
71 72
72 73
73 74
74 75
75 76
76 77
77 78
78 79
79 80
80 81
81 82
82 83
83 84
84 85
85 86
86 87
87 88
88 89
89 90
90 91
91 92
92 93
93 94
94 95
95 96
96 97
97 98
98 99
99 100
100 101
101 102
102 103
103 104
104 105
105 106
106 107
107 108
108 109
109 110
110 111
111 112
112 113
113

