Page 89 of 116
 Have the first passenger board using thesame procedure as the operator, place
their feet on the floor of the footwell, and
securely hold on to the operator.
(5) Have the second passen")
Operation
82
(4) Have the first passenger board using thesame procedure as the operator, place
their feet on the floor of the footwell, and
securely hold on to the operator.
(5) Have the second passenger follow the same procedure. When the second pas-
senger is boarding, try to balance the
watercraft together with the first passen-
ger.
(6) Make sure that the passenger(s) have their feet on the floor of the footwell and are securely holding on to the person in
front of them or to the handgrip provided.
(7) Attach the engine shut-off cord (lanyard) to your left wrist, and then attach the clip
to the engine shut-off switch.
(8) Look in all directions, start the engine, and then start off slowly.
EJU33084Starting offEWJ00713
To avoid collisions:
Scan constantly for people, objects, and
other watercraft. Be alert for conditions
that limit your visibility or block your vi-
sion of others.
Operate defensively at safe speeds and
keep a safe distance away from people,
objects, and other watercraft.
Do not follow directly behind watercraft
or other boats. Do not go near others to
spray or splash them with water, go too
close to other boats, or go too fast for
the traffic conditions. Avoid sharp turns
or other maneuvers that make it hard for
others to avoid you or understand where
you are going. Avoid areas with sub-
merged objects or shallow water.
Take early action to avoid collisions. Re-
member, watercraft and other boats do
not have brakes. Do not release the
throttle lever when trying to steer away
UF3V72E0.book Page 82 Tuesday, June 16, 2020 2:29 PM
Page 90 of 116
 deep from the bottom of
the watercraft, otherw")
Operation
83
from objects—as with other power-
boats, you need throttle to steer.
ECJ01341
Never run the engine in water that is less
than 60 cm (2 ft) deep from the bottom of
the watercraft, otherwise pebbles or sand
could be sucked into the jet intake, caus-
ing impeller damage and engine overheat-
ing.
EJU45380Starting off from a trailer
(1) Launch the watercraft.
(2) Attach the engine shut-off cord (lanyard)to your left wrist, and then attach the clip
to the engine shut-off switch.
(3) Look in all directions, and then start the engine.
(4) Squeeze the RiDE lever and move the watercraft back slowly. (See page 30 for
RiDE lever operation procedures.)
TIP:
When using the RiDE lever to start off from a
trailer, you can use the reverse assist to tem-
porarily increase the engine speed. (See page
34 for reverse assist operation procedures.)
EJU33114Boarding and starting off from a dock
(1) Board the watercraft from the side. (2) Attach the engine shut-off cord (lanyard)
to your left wrist, and then attach the clip
to the engine shut-off switch.
(3) Push the watercraft away from the dock, grip the handlebars with both hands, and
place both feet on the floor of the foot-
well.
(4) Look in all directions, start the engine, and then start off slowly.
EJU44210Capsized watercraftEWJ00672
Improper uprighting can cause injury.
Be sure to shut the engine off by pulling
on the engine shut-off cord (lanyard) to
remove the clip from the engine shut-off
switch.
Do not put your hands in the intake
grate.
If the watercraft capsizes, turn it over imme-
diately.
To upright the watercraft:
(1) Remove the clip from the engine shut-offswitch.
(2) Swim to the rear of the watercraft. Turn the watercraft over by pulling on the ride
plate with one hand while pushing down
UF3V72E0.book Page 83 Tuesday, June 16, 2020 2:29 PM
Page 91 of 116
 Start the engine and operate the water- craft at planing speed to drain the bilge
water from the engine compartment.
(See page 61 for")
Operation
84
on the gunwale with your other hand or
your foot.
(3) Start the engine and operate the water- craft at planing speed to drain the bilge
water from the engine compartment.
(See page 61 for information on draining
the bilge water. If the engine does not
start, see “Towing the watercraft” on
page 104 or “Submerged watercraft” on
page 104.) NOTICE: Do not run the en-
gine at full throttle for at least 1 minute
after the engine has been restarted.
Bilge water in the engine compart-
ment can splash into the engine,
which can result in severe damage.
[ECJ00554]
EJU43282
Beaching and docking the watercraft
To beach the watercraft:
(1) Make sure that there are no boats, swim- mers, or obstacles near the beach. (2) Release the throttle lever to reduce
speed about 110 m (360 ft) before you
reach the intended beaching area.
(3) Slowly approach the beach using the throttle lever and RiDE lever to control
the watercraft speed. NOTICE: Never
run the engine in water that is less
than 60 cm (2 ft) deep from the bottom
of the watercraft, otherwise pebbles
or sand could be sucked into the jet
intake, causing impeller damage and
engine overheating.
[ECJ00473]
(4) After reaching land, stop the engine, and then get off the watercraft and pull it up
on the beach.
To dock the watercraft:
(1) Make sure that there are no boats, swim- mers, or obstacles near the dock.
(2) Release the throttle lever to reduce speed about 110 m (360 ft) away from
the dock.
(3) Slowly approach the dock using the throttle lever and RiDE lever to control
the watercraft speed.
(4) After coming alongside the dock, stop the engine, and then get off the water-
craft.
EJU37194Operating in weeded areas
Always avoid using your watercraft in areas
where weed growth is thick. If operating in
weeded areas is unavoidable, alternately
squeeze the throttle lever and relax your grip
on the throttle lever to vary the engine speed.
Weeds tend to become clogged more when
operating at a steady speed and at trolling
speed. If weeds may have clogged the intake
area, clean the jet intake. (See page 100 for
information on the jet intake.)
UF3V72E0.book Page 84 Tuesday, June 16, 2020 2:29 PM
Page 92 of 116
Operation
85
EJU40242After removing the watercraft from
the water
ECJ01311
Do not run the engine over 4000 r/min on
land. Also, do not run the engine for more
than 15 seconds without supplying water,
otherwise the engine could overheat.
After operating and removing the watercraft
from the water, promptly discharge the re-
maining water from the cooling water pas-
sages.
To discharge water from the cooling water
passages:
(1) Make sure that the area around the wa- tercraft is clear, and then start the en-
gine.
(2) Discharge the remaining water out of the cooling water passages by alternately
squeezing and releasing the throttle lever
quickly for 10 to 15 seconds.
(3) Stop the engine.
UF3V72E0.book Page 85 Tuesday, June 16, 2020 2:29 PM
Page 93 of 116

Care and storage
86
EJU37146
Post-operation careEWJ00331
Always place the watercraft upright in a
horizontal position when storing it, other-
wise fuel could leak out into the engine or
engine compartment, which could create
a fire hazard.
After using the watercraft, always take it out
of the water, clean it, and store it. Leaving the
watercraft in the water for extended periods
will accelerate the rate of normal deteriora-
tion of the jet pump and hull. Marine organ-
isms and corrosion are some of the
conditions that can shorten the life of many
watercraft components.
EJU42222Flushing the cooling water passagesECJ01311
Do not run the engine over 4000 r/min on
land. Also, do not run the engine for more
than 15 seconds without supplying water,
otherwise the engine could overheat.
Flush the cooling water passages to prevent
them from clogging with salt, sand, or dirt.
(1) Place the watercraft in a horizontal posi-tion.
(2) Remove the seats and removable water- tight storage compartment. (See page 49
for seat removal and installation proce-
dures and page 54 for information on the
removable watertight storage compart-
ment.)
(3) Open the stern storage compartment. (See page 53 for information on the stern
storage compartment.) (4) Connect the garden hose adapter to a
garden hose.
(5) Loosen the flushing hose connector cap and remove it. Insert the garden hose
adapter into the flushing hose connector
by pushing and twisting it until it is se-
curely connected.
(6) Connect the garden hose to a water tap.
(7) Make sure that the area around the wa- tercraft is clear, and then start the en-
gine. Immediately after the engine starts,
fully turn the water supply on so that wa-
1Garden hose adapter
2 Garden hose
1 Flushing hose connector
2 Flushing hose connector cap
3 Garden hose adapter
12
2
1
3
UF3V72E0.book Page 86 Tuesday, June 16, 2020 2:29 PM
Page 94 of 116
 Run the engine at idling speed for about 3 minutes watching the engine condition.
If the engine stops while flushing, turn")
Care and storage
87
ter flows out continually from the jet
thrust nozzle.
(8) Run the engine at idling speed for about 3 minutes watching the engine condition.
If the engine stops while flushing, turn
the water supply off immediately and
perform the procedure again from step 7.
NOTICE: Do not supply water to the
cooling water passages when the en-
gine is not running. The water could
flow back through the muffler into the
engine, causing severe engine dam-
age.
[ECJ00123]
(9) Turn the water supply off.
(10) Discharge the remaining water out of the cooling water passages by alternately
squeezing and releasing the throttle lever
quickly for 10 to 15 seconds.
(11) Stop the engine.
(12) Remove the garden hose adapter, and then securely install the flushing hose
connector cap by tightening it until it
stops.
(13) Securely close the stern storage com- partment.
(14) Securely install the removable watertight storage compartment and seats in their
original positions.
EJU33736Cleaning the watercraft
(1) Remove the seats. (See page 49 for seatremoval and installation procedures.) (2) Rinse the engine and engine compart-
ment with a small amount of water.
NOTICE: Do not use high-pressure
water when rinsing the engine or en-
gine compartment as severe engine
damage could result.
[ECJ00572]
(3) Drain the water from the engine com- partment. (See page 61 for information
on draining the bilge water.)
(4) Wipe the engine and engine compart- ment with a dry cloth.
(5) Wash down the hull, deck, and jet pump with fresh water.
(6) Wipe the hull, deck, and jet pump with a dry cloth.
(7) Wipe all vinyl and rubber components, such as the seats and engine compart-
ment seals, with a vinyl protectant.
(8) To minimize corrosion, spray metallic parts of the hull, deck, and engine with a
rust inhibitor.
(9) Allow the engine compartment to air dry completely before installing the seats.
(10) Securely install the seats in their original positions.
EJU3368ABattery care
If the watercraft will not be used for more than
a month, remove the battery from the water-
craft, check it, and then store it in a cool, dry
place.
EWJ00792
Battery electrolyte is poisonous and dan-
gerous, causing severe burns, etc. Elec-
trolyte contains sulfuric acid. Avoid
contact with skin, eyes, or clothing.
Antidotes
External: Flush with water.
Internal: Drink large quantities of water or
milk. Follow with milk of magnesia, beaten
UF3V72E0.book Page 87 Tuesday, June 16, 2020 2:29 PM
Page 95 of 116

Care and storage
88
egg, or vegetable oil. Call a physician im-
mediately.
Eyes: Flush with water for 15 minutes and
get prompt medical attention.
Batteries produce explosive gases. Keep
sparks, flames, cigarettes, etc., well away.
If using or charging the battery in an en-
closed space, make sure that it is well
ventilated. Always shield your eyes when
working near batteries.
Keep out of the reach of children.
To remove the battery:
(1) Disconnect the negative (–) battery lead.
(2) Disconnect the positive (+) battery lead.
(3) Unhook the battery bands, and then re-move the battery from the watercraft.
Checking the battery
Make sure that the battery case is not dam-
aged.
Make sure that the battery terminals are
not corroded or damaged.
Checking the battery voltage and charging
the battery
It is recommended to have a Yamaha dealer
check the battery voltage and charge the bat-
tery. Have a Yamaha dealer charge the bat-
tery as soon as possible if it seems to have
discharged. Keep in mind that the battery tends to discharge more quickly if the vehicle
is equipped with optional electrical accesso-
ries.
NOTICE: To charge a VRLA (Valve
Regulated Lead Acid) battery, a special
(constant-voltage) battery charger is re-
quired. Using a conventional battery char-
ger will damage the battery.
[ECJ02810]
Checking the battery bands
Make sure that the battery bands are not
damaged.
To store the battery:
(1) Clean the battery case using fresh water.
(2) If the battery terminals are dirty or cor- roded, clean them using a wire brush.
(3) Apply water-resistant grease to the bat- tery terminals.
1Negative (–) battery terminal: Black lead
2 Battery band
3 Positive (+) battery terminal: Red lead
1
231
Battery band
1 Battery terminal
1
1
UF3V72E0.book Page 88 Tuesday, June 16, 2020 2:29 PM
Page 96 of 116
 Store the battery in a cool, dry place.NOTICE: Storing the battery in an un-
charged condition can cause perma-
nent battery damage. Check the
battery periodically.
[ECJ00103")
Care and storage
89
(4) Store the battery in a cool, dry place.NOTICE: Storing the battery in an un-
charged condition can cause perma-
nent battery damage. Check the
battery periodically.
[ECJ00103]
To install the battery:
(1) Place the battery in the battery compart- ment and hook the battery bands onto
the holders.
(2) Connect the positive (+) battery lead (red) to the positive (+) battery terminal.
NOTICE: Reversal of the battery leads
will damage the electrical parts.
[ECJ00262]
(3) Connect the negative (–) battery lead (black) to the negative (–) battery termi-
nal.
(4) Make sure that the battery is securely held in place.
EJU33493
Long-term storageEWJ00331
Always place the watercraft upright in a
horizontal position when storing it, other-
wise fuel could leak out into the engine or
engine compartment, which could create
a fire hazard.
Storage for long periods of time, such as win-
ter storage, requires preventive maintenance
to ensure against deterioration. It is advisable
to have the watercraft serviced by a Yamaha
dealer prior to storage.
However, the following procedures can be
performed easily by the owner.
EJU40763Cleaning
(1) Flush the cooling water passages. (See
page 86 for information on flushing the
cooling water passages.)
TIP:
If you will be storing the watercraft for a pro-
longed period, such as winter storage, top off
the fuel tank with fresh gasoline and add fuel
stabilizer and conditioner to the fuel tank ac-
cording to the manufacturer’s instruction be-
fore starting the engine.
(2) Clean the watercraft. (See page 87 for in-formation on cleaning the watercraft.)
Wax the hull with a non-abrasive wax.
EJU44741Lubrication
To keep moving parts sliding or rotating
smoothly, lubricate them with water-resistant
grease.
Recommended water-resistant grease:
YAMALUBE MARINE
GREASE/Yamaha Grease A
Recommended water-resistant grease:YAMALUBE MARINE GREASE /
Ya m a h a G r e a s e A
UF3V72E0.book Page 89 Tuesday, June 16, 2020 2:29 PM
 1
1 2
2 3
3 4
4 5
5 6
6 7
7 8
8 9
9 10
10 11
11 12
12 13
13 14
14 15
15 16
16 17
17 18
18 19
19 20
20 21
21 22
22 23
23 24
24 25
25 26
26 27
27 28
28 29
29 30
30 31
31 32
32 33
33 34
34 35
35 36
36 37
37 38
38 39
39 40
40 41
41 42
42 43
43 44
44 45
45 46
46 47
47 48
48 49
49 50
50 51
51 52
52 53
53 54
54 55
55 56
56 57
57 58
58 59
59 60
60 61
61 62
62 63
63 64
64 65
65 66
66 67
67 68
68 69
69 70
70 71
71 72
72 73
73 74
74 75
75 76
76 77
77 78
78 79
79 80
80 81
81 82
82 83
83 84
84 85
85 86
86 87
87 88
88 89
89 90
90 91
91 92
92 93
93 94
94 95
95 96
96 97
97 98
98 99
99 100
100 101
101 102
102 103
103 104
104 105
105 106
106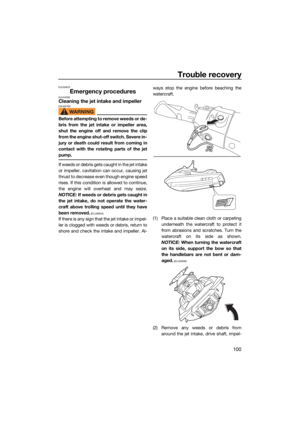 107
107 108
108 109
109 110
110 111
111 112
112 113
113 114
114 115
115