Page 9 of 43
LOCKING/UNLOCKING Remote key
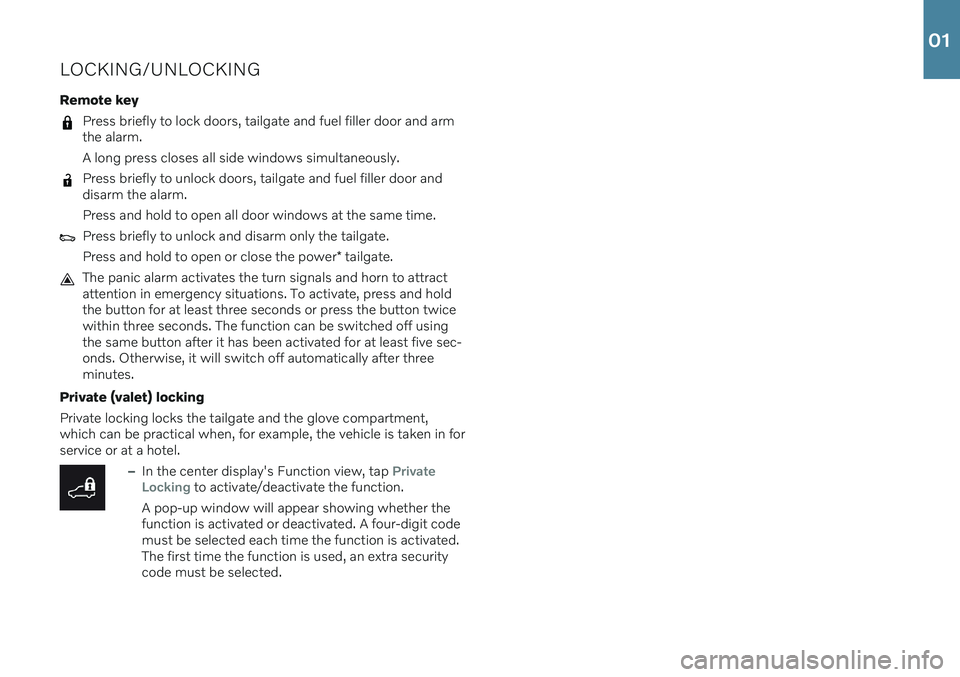
Press briefly to lock doors, tailgate and fuel filler door and arm the alarm. A long press closes all side windows simultaneously.
Press briefly to unlock doors, tailgate and fuel filler door and disarm the alarm. Press and hold to open all door windows at the same time.
Press briefly to unlock and disarm only the tailgate. Press and hold to open or close the power* tailgate.
The panic alarm activates the turn signals and horn to attract attention in emergency situations. To activate, press and holdthe button for at least three seconds or press the button twicewithin three seconds. The function can be switched off usingthe same button after it has been activated for at least five sec-onds. Otherwise, it will switch off automatically after threeminutes.
Private (valet) locking Private locking locks the tailgate and the glove compartment, which can be practical when, for example, the vehicle is taken in forservice or at a hotel.
–In the center display's Function view, tap Private
Locking to activate/deactivate the function.
A pop-up window will appear showing whether the function is activated or deactivated. A four-digit codemust be selected each time the function is activated.The first time the function is used, an extra securitycode must be selected.
01
Page 10 of 43
Page 11 of 43
INTERIOR OVERVIEW
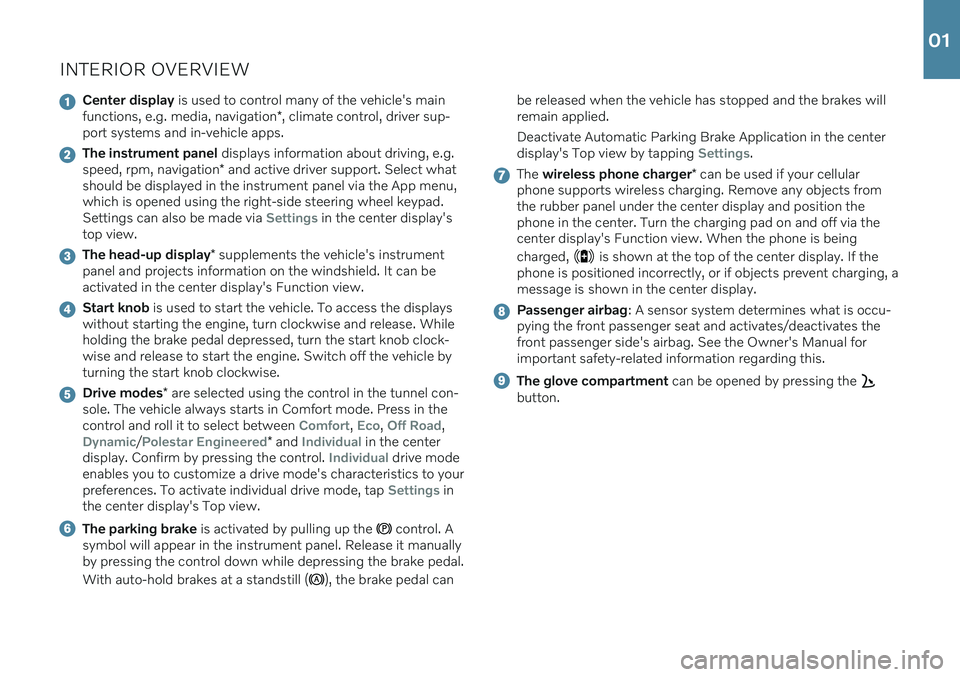
Center display is used to control many of the vehicle's main
functions, e.g. media, navigation *, climate control, driver sup-
port systems and in-vehicle apps.
The instrument panel displays information about driving, e.g.
speed, rpm, navigation * and active driver support. Select what
should be displayed in the instrument panel via the App menu, which is opened using the right-side steering wheel keypad.Settings can also be made via
Settings in the center display's
top view.
The head-up display * supplements the vehicle's instrument
panel and projects information on the windshield. It can be activated in the center display's Function view.
Start knob is used to start the vehicle. To access the displays
without starting the engine, turn clockwise and release. While holding the brake pedal depressed, turn the start knob clock-wise and release to start the engine. Switch off the vehicle byturning the start knob clockwise.
Drive modes * are selected using the control in the tunnel con-
sole. The vehicle always starts in Comfort mode. Press in the control and roll it to select between
Comfort, Eco, Off Road,
Dynamic/Polestar Engineered* and Individual in the center
display. Confirm by pressing the control. Individual drive mode
enables you to customize a drive mode's characteristics to your preferences. To activate individual drive mode, tap
Settings in
the center display's Top view.
The parking brake is activated by pulling up the control. A
symbol will appear in the instrument panel. Release it manually by pressing the control down while depressing the brake pedal. With auto-hold brakes at a standstill (
), the brake pedal can be released when the vehicle has stopped and the brakes will remain applied. Deactivate Automatic Parking Brake Application in the center display's Top view by tapping
Settings.
The
wireless phone charger * can be used if your cellular
phone supports wireless charging. Remove any objects from the rubber panel under the center display and position thephone in the center. Turn the charging pad on and off via thecenter display's Function view. When the phone is being charged,
is shown at the top of the center display. If the
phone is positioned incorrectly, or if objects prevent charging, a message is shown in the center display.
Passenger airbag : A sensor system determines what is occu-
pying the front passenger seat and activates/deactivates the front passenger side's airbag. See the Owner's Manual forimportant safety-related information regarding this.
The glove compartment can be opened by pressing the
button.
01
Page 12 of 43
Page 13 of 43
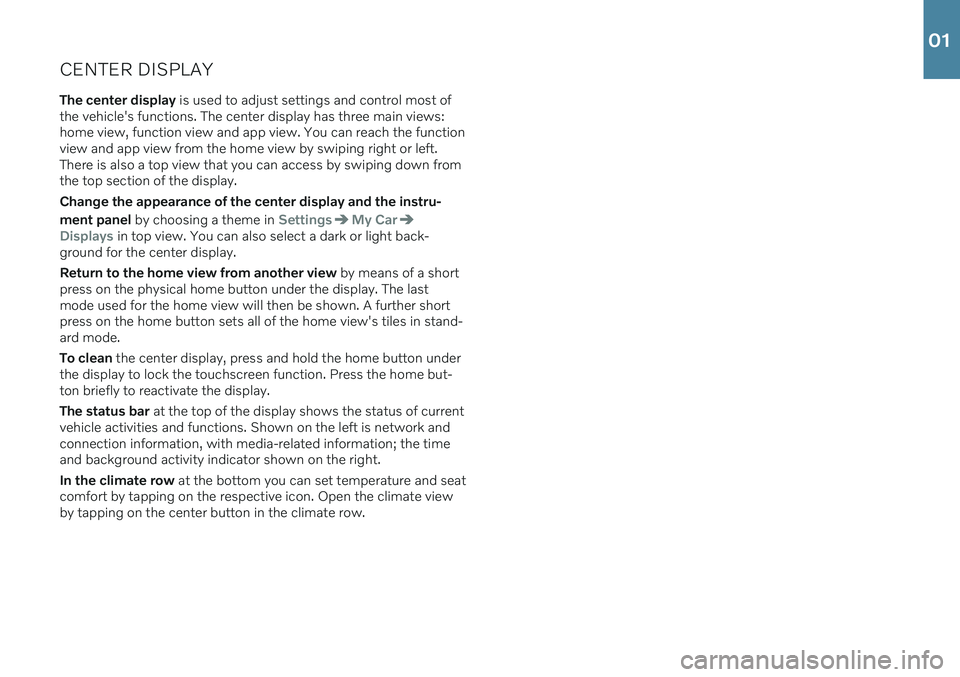
CENTER DISPLAYThe center display is used to adjust settings and control most of
the vehicle's functions. The center display has three main views: home view, function view and app view. You can reach the functionview and app view from the home view by swiping right or left.There is also a top view that you can access by swiping down fromthe top section of the display. Change the appearance of the center display and the instru- ment panel by choosing a theme in
SettingsMy Car
Displays in top view. You can also select a dark or light back-
ground for the center display. Return to the home view from another view by means of a short
press on the physical home button under the display. The last mode used for the home view will then be shown. A further shortpress on the home button sets all of the home view's tiles in stand-ard mode. To clean the center display, press and hold the home button under
the display to lock the touchscreen function. Press the home but- ton briefly to reactivate the display. The status bar at the top of the display shows the status of current
vehicle activities and functions. Shown on the left is network and connection information, with media-related information; the timeand background activity indicator shown on the right. In the climate row at the bottom you can set temperature and seat
comfort by tapping on the respective icon. Open the climate view by tapping on the center button in the climate row.
01
Page 14 of 43
POWER* FRONT SEATS
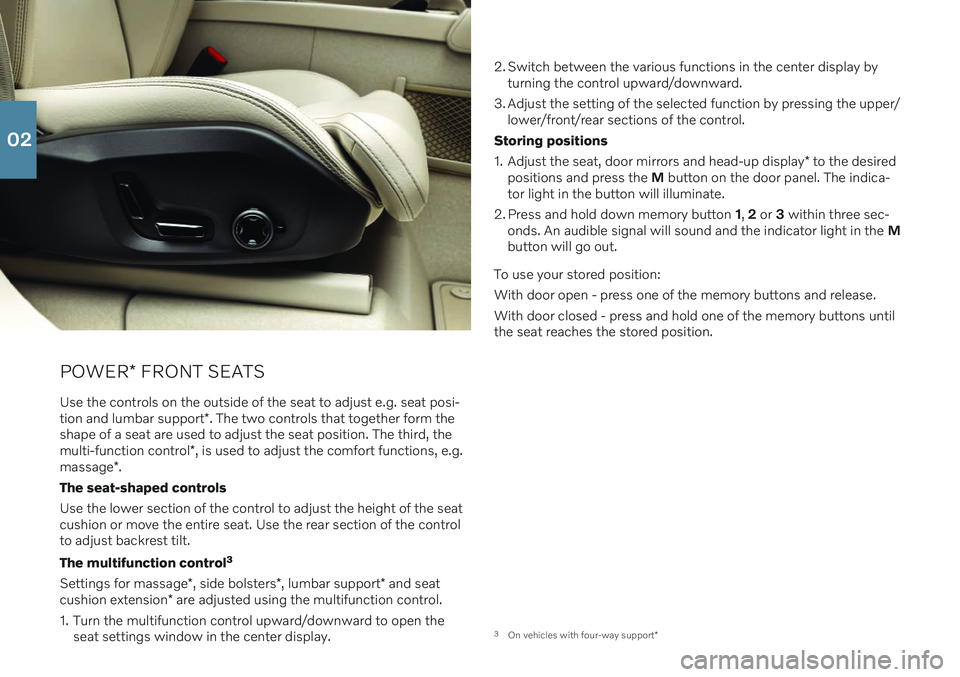
Use the controls on the outside of the seat to adjust e.g. seat posi- tion and lumbar support *. The two controls that together form the
shape of a seat are used to adjust the seat position. The third, themulti-function control *, is used to adjust the comfort functions, e.g.
massage *.
The seat-shaped controls Use the lower section of the control to adjust the height of the seat cushion or move the entire seat. Use the rear section of the controlto adjust backrest tilt. The multifunction control 3
Settings for massage *, side bolsters *, lumbar support * and seat
cushion extension * are adjusted using the multifunction control.
1. Turn the multifunction control upward/downward to open the seat settings window in the center display. 2. Switch between the various functions in the center display by
turning the control upward/downward.
3. Adjust the setting of the selected function by pressing the upper/ lower/front/rear sections of the control.
Storing positions 1. Adjust the seat, door mirrors and head-up display * to the desired
positions and press the M button on the door panel. The indica-
tor light in the button will illuminate.
2. Press and hold down memory button 1, 2 or 3 within three sec-
onds. An audible signal will sound and the indicator light in the M
button will go out.
To use your stored position:With door open - press one of the memory buttons and release. With door closed - press and hold one of the memory buttons until the seat reaches the stored position.
3 On vehicles with four-way support *
02
Page 15 of 43
4Vehicles with six * seats do not have a center seat.
FOLDING DOWN THE REAR SEAT BACKRESTS
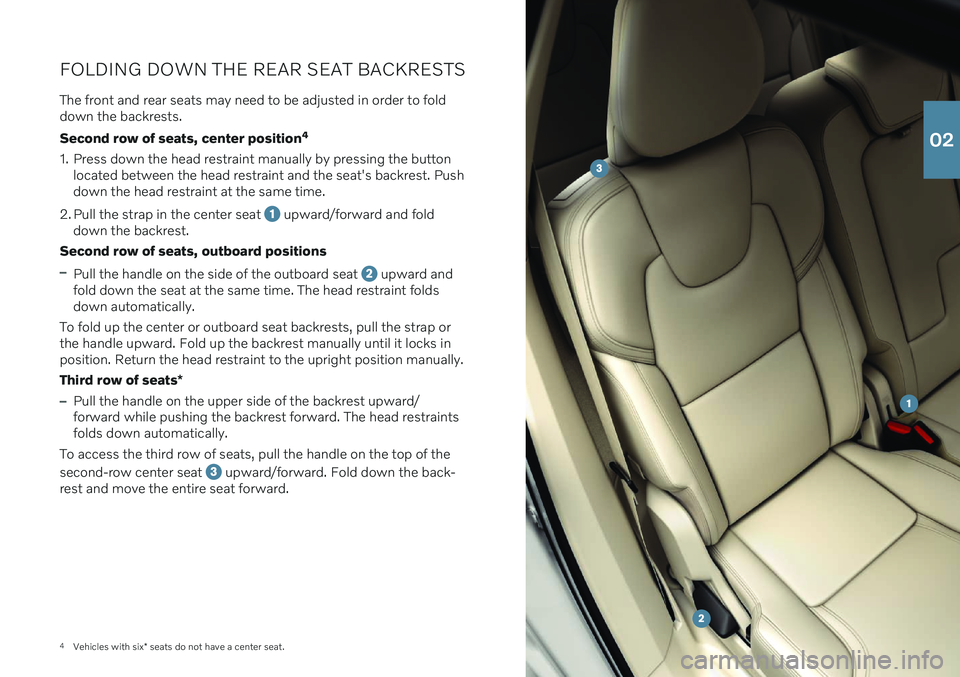
The front and rear seats may need to be adjusted in order to fold down the backrests. Second row of seats, center position 4
1. Press down the head restraint manually by pressing the button located between the head restraint and the seat's backrest. Push down the head restraint at the same time.
2. Pull the strap in the center seat
upward/forward and fold
down the backrest.
Second row of seats, outboard positions
–Pull the handle on the side of the outboard seat upward and
fold down the seat at the same time. The head restraint folds down automatically.
To fold up the center or outboard seat backrests, pull the strap orthe handle upward. Fold up the backrest manually until it locks inposition. Return the head restraint to the upright position manually. Third row of seats *
–Pull the handle on the upper side of the backrest upward/ forward while pushing the backrest forward. The head restraintsfolds down automatically.
To access the third row of seats, pull the handle on the top of the second-row center seat
upward/forward. Fold down the back-
rest and move the entire seat forward.
02
Page 16 of 43
STEERING WHEELAdjusting the steering wheel You can adjust the position of the steering wheel for both height and depth.
1. Push the lever under the steering wheel forward and adjust the steering wheel to the desired position.
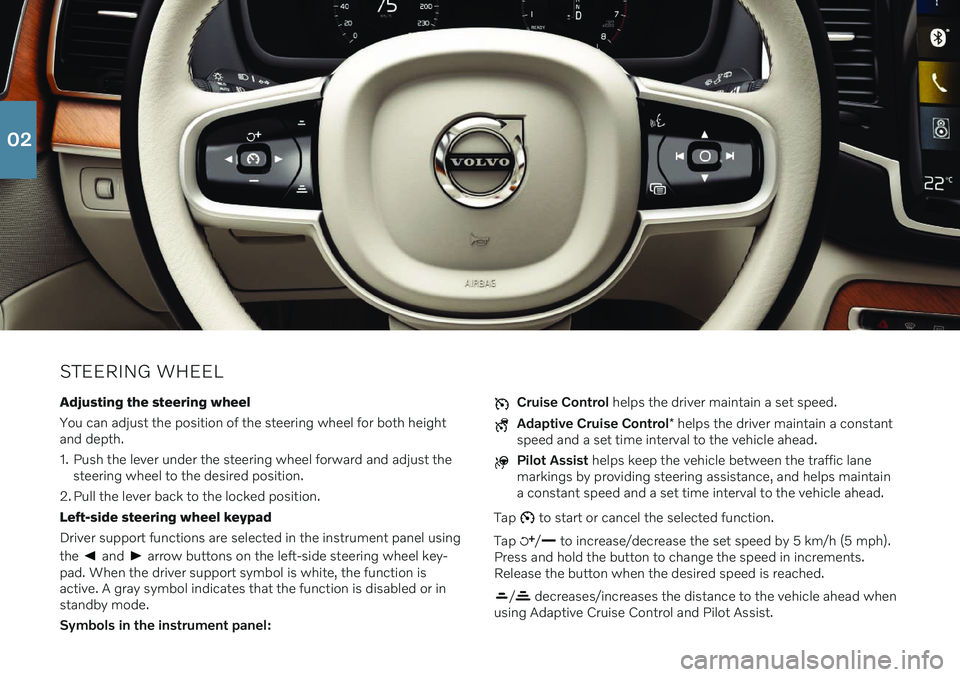
2. Pull the lever back to the locked position.Left-side steering wheel keypadDriver support functions are selected in the instrument panel using the
and arrow buttons on the left-side steering wheel key-
pad. When the driver support symbol is white, the function is active. A gray symbol indicates that the function is disabled or instandby mode. Symbols in the instrument panel:
Cruise Control helps the driver maintain a set speed.
Adaptive Cruise Control * helps the driver maintain a constant
speed and a set time interval to the vehicle ahead.
Pilot Assist helps keep the vehicle between the traffic lane
markings by providing steering assistance, and helps maintain a constant speed and a set time interval to the vehicle ahead.
Tap
to start or cancel the selected function.
Tap
/ to increase/decrease the set speed by 5 km/h (5 mph).
Press and hold the button to change the speed in increments. Release the button when the desired speed is reached.
/ decreases/increases the distance to the vehicle ahead when
using Adaptive Cruise Control and Pilot Assist.
02