Page 65 of 308

652-4. Other settings
2
Basic function
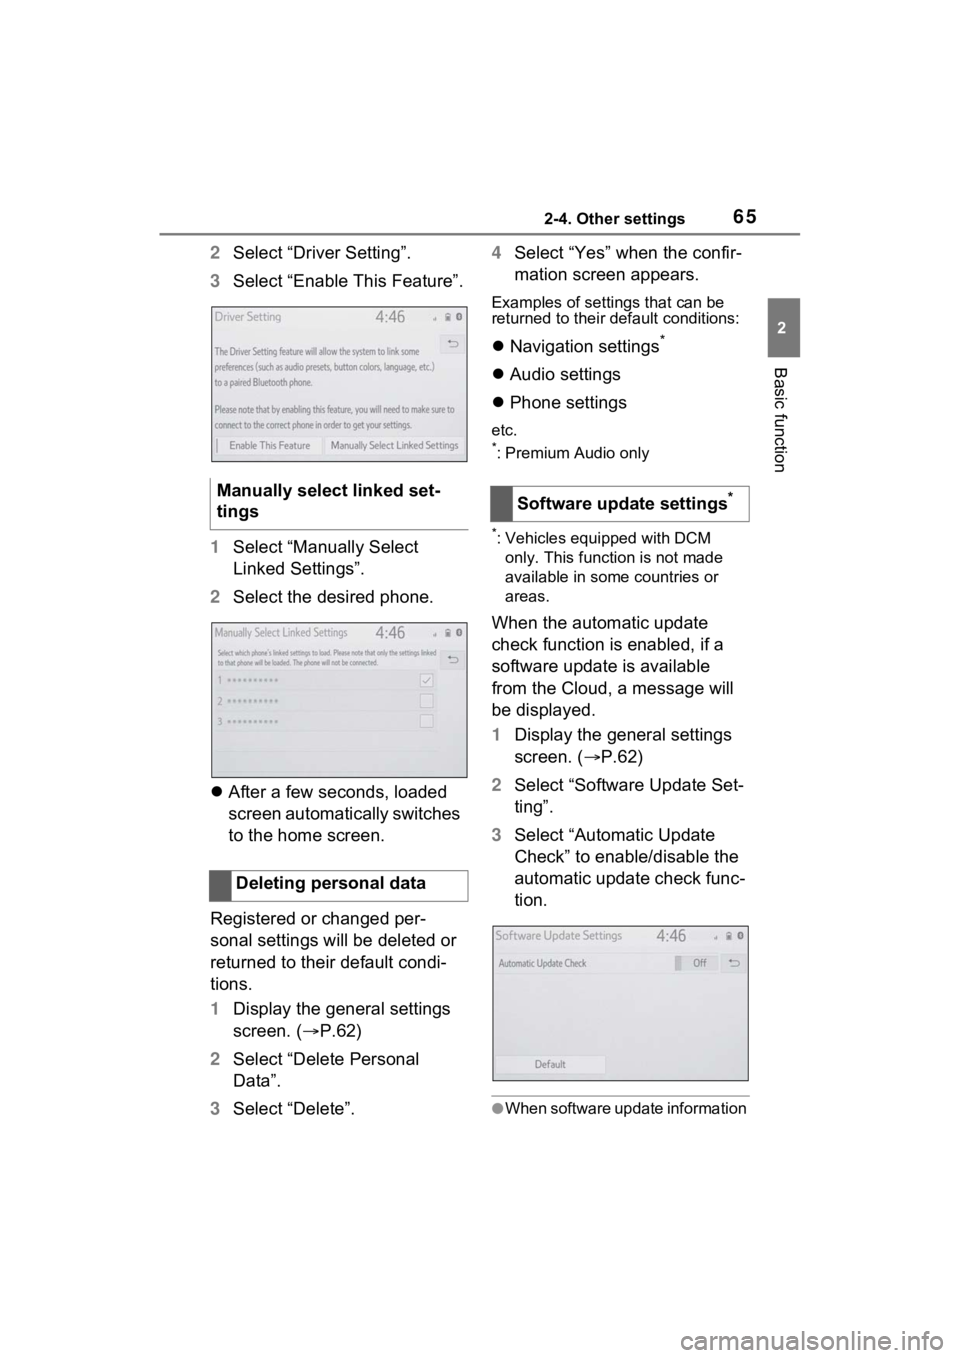
2Select “Driver Setting”.
3 Select “Enable This Feature”.
1 Select “Manually Select
Linked Settings”.
2 Select the desired phone.
After a few seconds, loaded
screen automatically switches
to the home screen.
Registered or changed per-
sonal settings will be deleted or
returned to their default condi-
tions.
1 Display the general settings
screen. ( P.62)
2 Select “Delete Personal
Data”.
3 Select “Delete”. 4
Select “Yes” when the confir-
mation screen appears.
Examples of settings that can be
returned to their default conditions:
Navigation settings*
Audio settings
Phone settings
etc.
*: Premium Audio only
*: Vehicles equipped with DCM
only. This function is not made
available in some countries or
areas.
When the automatic update
check function is enabled, if a
software update is available
from the Cloud, a message will
be displayed.
1 Display the general settings
screen. ( P.62)
2 Select “Software Update Set-
ting”.
3 Select “Automatic Update
Check” to enable/disable the
automatic update check func-
tion.
●When software update information
Manually select linked set-
tings
Deleting personal dataSoftware update settings*
Page 67 of 308
672-4. Other settings
2
Basic function
Select to adjust the volume of
voice guidance.
*1
Select to set the voice guid-
ance during route guidance
on/off.
*2
Select to set the voice guid-
ance during audio/visual sys-
tem use on/off.
*2
Select to set the voice recog-
nition prompts.
Select to train voice recogni-
tion.
The voice command system
adapts the user accent.
Select to start the voice rec-
ognition tutorial.
Select to set the beep sound
of navigation guidance.
*2
Select to set the voice
prompt interrupt on/off.
Select to set the web search
engine. The search engines
are Toyota Apps. This item is
displayed when two or more
POI search applications are
installed.
*2 ( P.276)
Select to reset all setup items.
*1: When an Apple CarPlay/Android
Auto connection is established,
voice command system
(Siri/Google Assistant) and map
application voice guidance vol-
ume can be changed.
*2: Premium Audio only
A
B
C
D
E
F
G
H
I
J
Page 68 of 308

682-4. Other settings
1Press the “MENU” button.
2 Select “Setup”.
3 Select “Vehicle”.
4 Select the desired items to
be set.
Select to set maintenance.
*1
( P.68)
Select to set vehicle customi-
zation.
*2
Select to set valet mode.
( P.70)
Select to set dealer informa-
tion.
*3, 4
*1: Premium Audio only
*2: Refer to the “OWNER’S MAN- UAL”
*3: Audio/Audio Plus with DCM only
*4: This function is not made avail-able in some countries or areas.
*: Premium Audio only
When the system is turned on,
the maintenance reminder
screen displays when it is time
to replace a part or certain com-
ponents. ( P.28)
1 Display the vehicle settings
screen. ( P.68)
2 Select “Maintenance”.
3 Select the desired item.
The system is set to give
maintenance information with
the maintenance reminder
screen. ( P.28)
Select to set a reminder for a
part or component. ( P.69)
Vehicle settings
Settings are available for
maintenance, vehicle cus-
tomization, etc.
Displaying the vehicle
settings screen
Vehicle settings screen
A
B
�0�D�L�Q�W�H�Q�D�Q�F�H�
C
D
A
B
Page 71 of 308
712-4. Other settings
2
Basic function
*: Audio Plus with DCM only. This function is not made available in
some countries or areas.
Dealer information can be regis-
tered in the system. If the vehi-
cle alert screen is displayed,
selecting the call dealer button
on the screen will call the phone
number registered in the dealer
information.
1 Display the vehicle settings
screen. ( P.68)
2 Select “Dealer Info”.
3 Select the desired items to
be edited.
Select to enter the name of a
dealer. ( P.71)
Select to enter the name of a
dealer member. ( P.71)
Select to enter the phone
number. ( P.71)
Select to delete the dealer
information displayed on the
screen. 1
Select “Edit” next to “Dealer”
or “Contact”.
2 Enter the name and select
“OK”.
1 Select “Edit” next to “Phone
#”.
2 Enter the phone number and
select “OK”.
Setting dealer informa-
tion*
A
B
C
D
�(�G�L�W�L�Q�J���G�H�D�O�H�U���R�U���F�R�Q�W�D�F�W��
�Q�D�P�H
�(�G�L�W�L�Q�J���S�K�R�Q�H���Q�X�P�E�H�U
Page 74 of 308
743-1. Basic operation
3-1.Basic operation
*: Premium Audio only
2D north up, 2D heading up or 3D heading up symbol (P.77)
Indicates whether the map orientation is set to north-up or hea d-
ing-up. The letter(s) under this s ymbol indicate the vehicle’s
heading direction (e.g. N for north). In 3D map, only a heading-up
view is available.
Destination button ( P.86)
Select to display the destination screen.
Map options button ( P.78)
Select to display the map options screen.
Route options button ( P.101)
Select to display the route options screen.
Mute button
Navigation*
The navigation system indicates your present position and
assists in locating a desired destination. To display the map
screen, press the “MAP” button.
Map screen overview
A
B
C
D
E
Page 121 of 308
121
4
4
Audio/visual system
Audio/visual system
4-1. Basic operationQuick reference........... 122
Some basics ............... 123
4-2. Radio operation AM/FM/SiriusXM (SXM) radio .......................... 127
4-3. Media operation USB memory............... 136
iPod/iPhone (Apple Car- Play) .......................... 138
Android Auto ............... 141
Bluetooth
® audio ......... 142
4-4. Audio/visual remote con- trols
Steering switches ........ 146
4-5. Setup Audio settings ............. 148
4-6. Tips for operating the audio/visual system
Operating information . 150
Page 122 of 308
1224-1. Basic operation
4-1.Basic operation
The audio control screen can be reached by the following methods:
From the “AUDIO” button
1 Press the “AUDIO” button.
From the “MENU” button
1 Press the “MENU” button, then select “Audio”.
Using the radio ( P.127)
Playing a USB memory ( P.136)
Playing an iPod/iPhone (Apple CarPlay
*) ( P.138)
Using the Android Auto
* ( P.141)
Playing a Bluetooth
® device ( P.142)
Using the steering wheel audio switches ( P.146)
Audio system settings ( P.148)
*: This function is not made availa ble in some countries or areas.
Quick reference
Functional overview
Page 123 of 308

1234-1. Basic operation
4
Audio/visual system
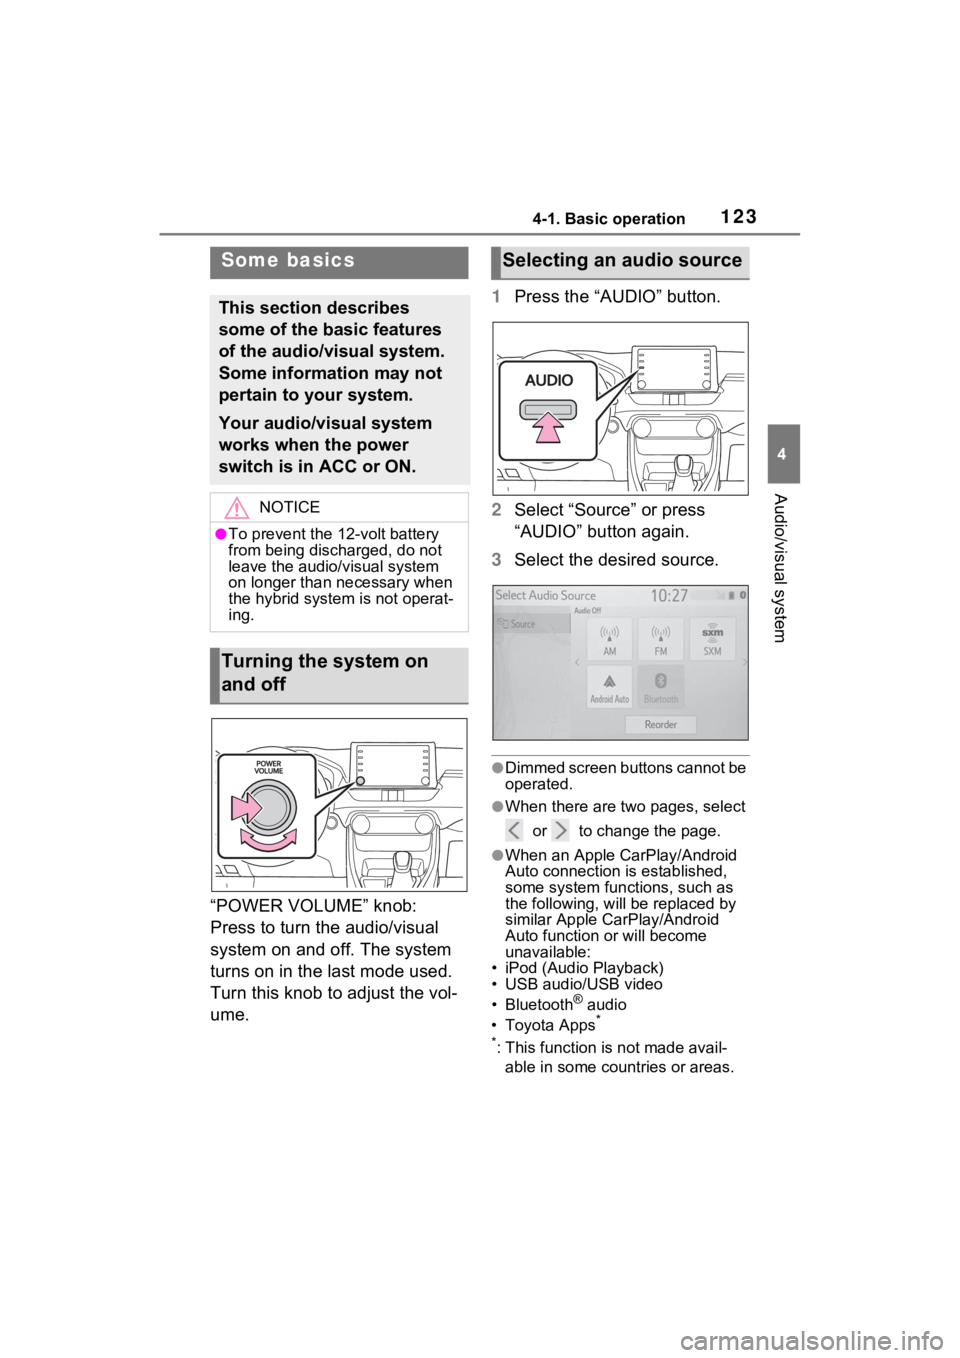
“POWER VOLUME” knob:
Press to turn the audio/visual
system on and off. The system
turns on in the last mode used.
Turn this knob to adjust the vol-
ume.1
Press the “AUDIO” button.
2 Select “Source” or press
“AUDIO” button again.
3 Select the desired source.
●Dimmed screen buttons cannot be
operated.
●When there are tw o pages, select
or to change the page.
●When an Apple CarPlay/Android
Auto connection is established,
some system functions, such as
the following, will be replaced by
similar Apple CarPlay/Android
Auto function or will become
unavailable:
• iPod (Audio Playback)
• USB audio/USB video
• Bluetooth
® audio
• Toyota Apps*
*
: This function is not made avail- able in some countries or areas.
Some basics
This section describes
some of the basic features
of the audio/visual system.
Some information may not
pertain to your system.
Your audio/visual system
works when the power
switch is in ACC or ON.
NOTICE
●To prevent the 12-volt battery
from being discharged, do not
leave the audio/visual system
on longer than necessary when
the hybrid system is not operat-
ing.
Turning the system on
and off
Selecting an audio source