2021 TOYOTA PROACE EV shift
[x] Cancel search: shiftPage 8 of 360

8
Eco-driving
Eco-driving refers to a range of everyday practices that allow the motorist to optimise the vehicle's energy consumption (fuel and/or electricity) and CO2 emissions.
Optimise your use of the gearbox
With a manual gearbox, move off gently and change up promptly. While accelerating, change up early.With an automatic gearbox, favour automatic mode. Do not depress the accelerator pedal heavily or suddenly.The gear shift indicator prompts you to engage the most suitable gear. Whenever this indication is displayed on the instrument panel, follow it straight away.With an automatic gearbox, this indicator appears only in manual mode.
Drive smoothly
Maintain a safe distance between vehicles, use engine braking rather than the brake pedal and
press the accelerator gradually. These practices help to save on energy consumption, reduce CO2 emissions and decrease general traffic noise.When the traffic is flowing smoothly, select the cruise control.
Control the use of electrical equipment
Before moving off, if the passenger compartment is too warm, ventilate it by opening the windows and air vents before using the air conditioning.At speeds above 31 mph (50 km/h), close the windows and leave the air vents open.Consider using equipment that can help keep the temperature in the passenger compartment down (e.g. sunroof blind, window blinds).Unless automatically regulated, switch off the air conditioning as soon as the desired temperature has been reached.Switch off the demisting and defrosting functions, if they are not managed automatically.Switch off the heated seat as soon as possible.Adapt the use of headlamps and/or foglamps depending on visibility conditions.Avoid running the engine before moving off, particularly in winter (other than in severe wintry conditions: temperature below -23°C). The vehicle will warm up much faster while driving.As a passenger, avoid connecting your multimedia devices (e.g. film, music, video
game) to help reduce the consumption of energy.Disconnect all portable devices before leaving the vehicle.
Limit the causes of excess consumption
Spread loads throughout the vehicle. Place the heaviest items in the boot as close as possible to the rear seats.Limit the loads carried in the vehicle and minimise wind resistance (e.g. roof bars, roof
rack, bicycle carrier, trailer). Preferably, use a roof box.Remove roof bars and roof racks after use.At the end of winter, remove snow tyres and refit summer tyres.
Comply with the servicing instructions
Check tyre pressures regularly, with the tyres cold, referring to the label in the door aperture on the driver's side.Carry out this check in particular:– before a long journey.– at each change of season.– after a long period out of use.Do not forget the spare wheel and, where applicable, the tyres on your trailer or caravan.Have your vehicle serviced regularly (e.g. engine oil, oil filter, air filter, passenger compartment filter, etc.). Observe the schedule of operations in the manufacturer's service schedule.With a Diesel engine, if the SCR system is faulty, your vehicle will emit pollution. Check with any authorized Toyota retailer or Toyota authorized
repairer, or any reliable repairer as soon as possible to restore your vehicle's nitrogen oxide emissions to legal levels.When filling the fuel tank, do not continue after the third cut-out of the nozzle, to avoid overflow.You will only see the fuel consumption of your new vehicle settle down to a consistent average after the first 1,900 miles (3,000 kilometres).
Page 11 of 360

11
Instruments
1
1.Cruise control or speed limiter settingsDisplay of speed limit signs
2.Gear shift indicator (Diesel)Gear with an automatic gearbox (Diesel) or Drive selector position (Electric)
3.Digital speedometer (mph or km/h) with LCD and LCD text instrument panel (Diesel)Display area with matrix instrument panel: alert or function status message, trip computer, digital speedometer (mph or km/h), power flow/vehicle charge state (Electric), etc.
4.Service indicator, then total distance recorder (miles or km)Trip distance recorder (miles or km) (Diesel)Remaining range/Driving mode selected (Electric)Display area with LCD text instrument panel: alert or function status message, trip computer, etc.
5.Engine coolant temperature indicator
6.Engine oil level indicator
7.Fuel gauge
Control buttons
With LCD display
With LCD text display
With matrix display
With matrix display (Electric)
A.Resetting the service indicator.Temporary reminder of servicing information.Reminder of driving range with the AdBlue® system.Depending on version: go back up a level or cancel the current operation.
B.General lighting dimmer.Depending on version: browse a menu or list, or change a value.
C.Resetting the trip distance recorder.Depending on version: enter the configuration menu (long press), confirm a choice (short press).
D.Reminder of servicing information or driving range with the SCR system and the AdBlue®.Resetting the selected function (service indicator or trip distance recorder).Depending on version: enter the configuration menu (long press), confirm a choice (short press).
With the touch screen, it is also possible to adjust the lighting dimmer.
Rev counter
Rev counter (x 1000 rpm).
Power indicator (Electric)
Power indicator CHARGE, ECO, POWER or NEUTRAL.
Page 160 of 360

160
NOTIC E
As a safety precaution and to facilitate engine starting:– always select neutral,– depress the clutch pedal.
Gear efficiency indicator
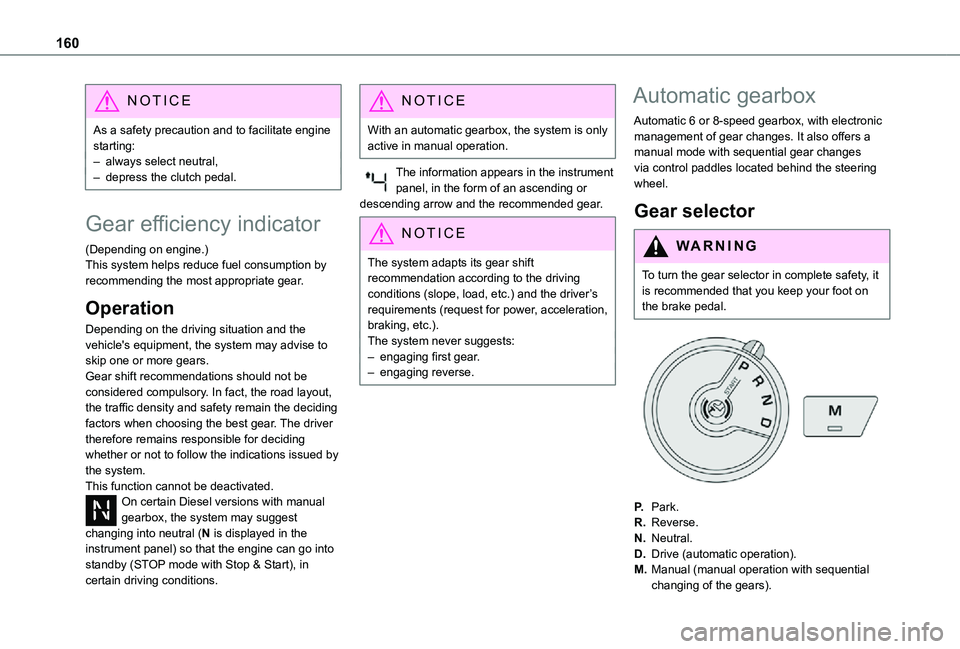
(Depending on engine.)This system helps reduce fuel consumption by recommending the most appropriate gear.
Operation
Depending on the driving situation and the vehicle's equipment, the system may advise to skip one or more gears.Gear shift recommendations should not be considered compulsory. In fact, the road layout, the traffic density and safety remain the deciding factors when choosing the best gear. The driver therefore remains responsible for deciding
whether or not to follow the indications issued by the system.This function cannot be deactivated.On certain Diesel versions with manual gearbox, the system may suggest changing into neutral (N is displayed in the instrument panel) so that the engine can go into standby (STOP mode with Stop & Start), in certain driving conditions.
NOTIC E
With an automatic gearbox, the system is only active in manual operation.
The information appears in the instrument panel, in the form of an ascending or descending arrow and the recommended gear.
NOTIC E
The system adapts its gear shift recommendation according to the driving conditions (slope, load, etc.) and the driver’s requirements (request for power, acceleration, braking, etc.).The system never suggests:– engaging first gear.– engaging reverse.
Automatic gearbox
Automatic 6 or 8-speed gearbox, with electronic management of gear changes. It also offers a manual mode with sequential gear changes via control paddles located behind the steering wheel.
Gear selector
WARNI NG
To turn the gear selector in complete safety, it is recommended that you keep your foot on the brake pedal.
P.Park.
R.Reverse.
N.Neutral.
D.Drive (automatic operation).
M.Manual (manual operation with sequential changing of the gears).
Page 162 of 360

162
WARNI NG
When the engine is running at idle with the brakes released, if position R, D or M is selected, the vehicle moves even without the accelerator being pressed.Never leave children inside the vehicle unsupervised.As a safety measure, never leave the vehicle without taking your key or remote control with you, even for a short time.When carrying out maintenance with the engine running, apply the parking brake and select position P.
WARNI NG
With an automatic gearbox, never try to start the engine by pushing the vehicle.
Automatic operation
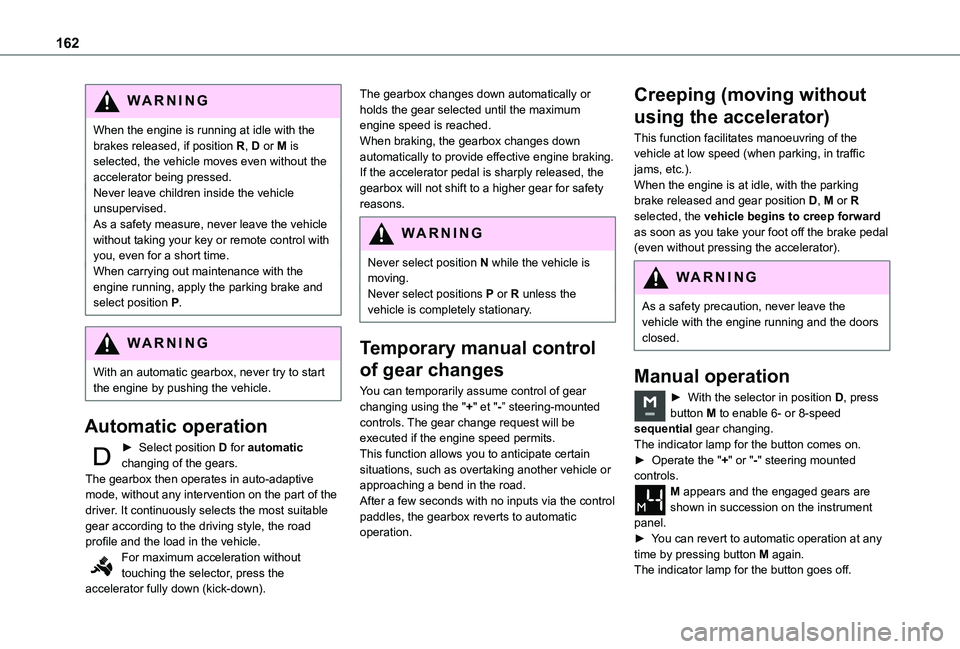
► Select position D for automatic changing of the gears.The gearbox then operates in auto-adaptive mode, without any intervention on the part of the driver. It continuously selects the most suitable gear according to the driving style, the road profile and the load in the vehicle.For maximum acceleration without touching the selector, press the accelerator fully down (kick-down).
The gearbox changes down automatically or holds the gear selected until the maximum engine speed is reached.When braking, the gearbox changes down automatically to provide effective engine braking.If the accelerator pedal is sharply released, the gearbox will not shift to a higher gear for safety reasons.
WARNI NG
Never select position N while the vehicle is moving.Never select positions P or R unless the vehicle is completely stationary.
Temporary manual control
of gear changes
You can temporarily assume control of gear changing using the "+" et "-” steering-mounted controls. The gear change request will be executed if the engine speed permits. This function allows you to anticipate certain situations, such as overtaking another vehicle or approaching a bend in the road. After a few seconds with no inputs via the control paddles, the gearbox reverts to automatic operation.
Creeping (moving without
using the accelerator)
This function facilitates manoeuvring of the vehicle at low speed (when parking, in traffic jams, etc.).When the engine is at idle, with the parking brake released and gear position D, M or R selected, the vehicle begins to creep forward as soon as you take your foot off the brake pedal (even without pressing the accelerator).
WARNI NG
As a safety precaution, never leave the vehicle with the engine running and the doors closed.
Manual operation
► With the selector in position D, press button M to enable 6- or 8-speed sequential gear changing.The indicator lamp for the button comes on.► Operate the "+" or "-" steering mounted controls. M appears and the engaged gears are shown in succession on the instrument panel.► You can revert to automatic operation at any time by pressing button M again.The indicator lamp for the button goes off.
Page 182 of 360

182
NOTIC E
If the driver operates a direction indicator to overtake a slower vehicle, the cruise control allows the vehicle to temporarily approach the vehicle in front to assist the overtaking manoeuvre, without ever exceeding the speed setting.
WARNI NG
Some vehicles present on the road may not be properly seen or may be misinterpreted by the radar (e.g. a lorry), which may lead to a poor assessment of distance and lead to the vehicle accelerating or braking inappropriately.
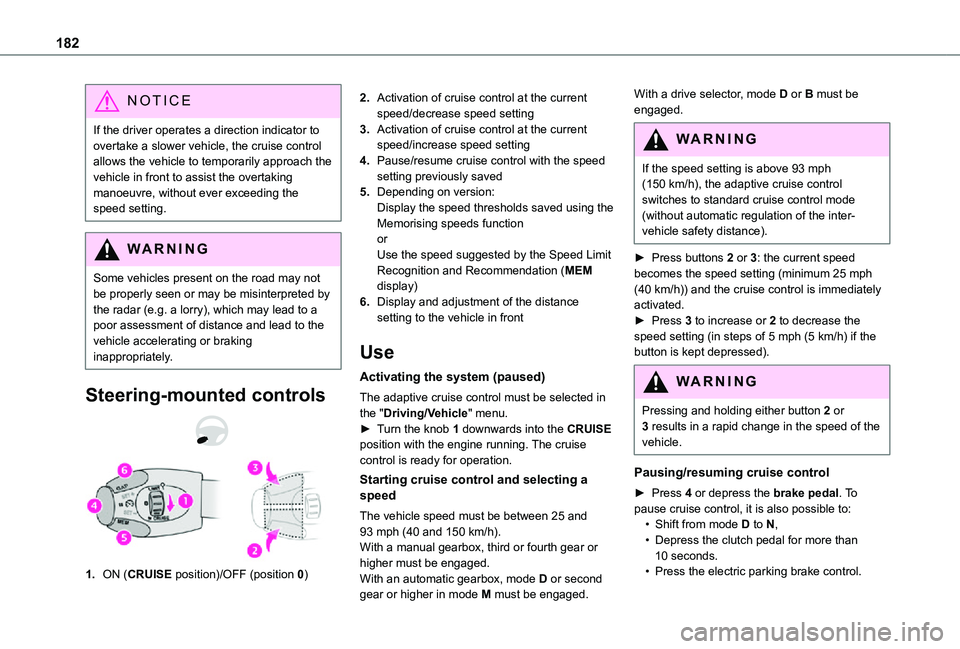
Steering-mounted controls
1.ON (CRUISE position)/OFF (position 0)
2.Activation of cruise control at the current speed/decrease speed setting
3.Activation of cruise control at the current speed/increase speed setting
4.Pause/resume cruise control with the speed setting previously saved
5.Depending on version:Display the speed thresholds saved using the Memorising speeds functionorUse the speed suggested by the Speed Limit Recognition and Recommendation (MEM display)
6.Display and adjustment of the distance setting to the vehicle in front
Use
Activating the system (paused)
The adaptive cruise control must be selected in the "Driving/Vehicle" menu.► Turn the knob 1 downwards into the CRUISE position with the engine running. The cruise control is ready for operation.
Starting cruise control and selecting a speed
The vehicle speed must be between 25 and 93 mph (40 and 150 km/h).
With a manual gearbox, third or fourth gear or higher must be engaged.With an automatic gearbox, mode D or second gear or higher in mode M must be engaged.
With a drive selector, mode D or B must be engaged.
WARNI NG
If the speed setting is above 93 mph (150 km/h), the adaptive cruise control switches to standard cruise control mode (without automatic regulation of the inter-vehicle safety distance).
► Press buttons 2 or 3: the current speed becomes the speed setting (minimum 25 mph (40 km/h)) and the cruise control is immediately activated.► Press 3 to increase or 2 to decrease the speed setting (in steps of 5 mph (5 km/h) if the button is kept depressed).
WARNI NG
Pressing and holding either button 2 or 3 results in a rapid change in the speed of the vehicle.
Pausing/resuming cruise control
► Press 4 or depress the brake pedal. To pause cruise control, it is also possible to:• Shift from mode D to N,• Depress the clutch pedal for more than
10 seconds.• Press the electric parking brake control.
Page 320 of 360

320
Driving modes 165Driving modes (Electric) 165Dynamic stability control (DSC) 11 2, 11 5–11 6
E
EBFD 11 2Eco-driving (advice) 8ECO mode 165Economy mode 2 11Electric motor 5, 9, 27, 199, 212, 215, 246, 250, 257Electric windows 51Electronic brake force distribution (EBFD) 11 2Emergency braking assistance (EBA) 11 2Emergency call 11 0–111Emergency warning lamps 11 0, 227Emissions control system, SCR 21, 221Energy economy mode 2 11Energy flows 27Energy recovery 21, 165
Engine 220Engine compartment 215Engine, Diesel 197, 215, 227, 253Engines 252Environment 8, 39, 95, 149
F
Fatigue detection 188–189
Filling the AdBlue® tank 218, 222Filling the fuel tank 197, 199Filter, air 219Filter, oil 219Filter, particle 218–219Filter, passenger compartment 87, 218Finisher 237Fitting a wheel 235–237Fitting roof bars 213Fittings, interior 75–76, 81Fittings, rear 81Flap, charging 209Flap, fuel filler 197, 199Flap, removable 59–61Flashing indicators 100Floor cab 243Fluid, brake 217Fluid, engine coolant 217Fluid, power steering 217Foglamp, rear 99, 241, 243Foglamps, front 99, 102, 240Foglamps, rear 99
Frequency (radio) 307Fuel 8, 197Fuel consumption 8Fuel tank 197, 199Fusebox, dashboard 243Fusebox, engine compartment 243, 245Fuses 243–245
G
Gauge, fuel 197, 199Gearbox, automatic 159–164, 167, 219, 247Gearbox, manual 159, 167, 219Gear lever, automatic gearbox 160–163Gear lever, manual gearbox 159Gear shift indicator ~ Gear efficiency indicator 160Glove box 75–76G.P.S. 300
H
Hazard warning lamps 11 0, 227headlamp adjustment 104Headlamp adjustment 104Headlamps, automatic dipping 102–103Headlamps, automatic illumination 101Headlamps, dipped beam 99, 238–239Headlamps, halogen 238–239
Headlamps, main beam 99, 238–239Headlamps, Xenon 238Head restraints, front 54Head-up display 172–173Heated bench seat 55Heating 87–88, 91–95Heating, additional 49, 93–95Heating, programmable 28, 49, 93–96High voltage 199Hill start assist 158–159