2021 TOYOTA PROACE EV lock
[x] Cancel search: lockPage 96 of 360

96
NOTIC E
To avoid the risks of poisoning or suffocation, the additional heating must not be used, even for short periods, in a closed environment such as a garage or workshop which is not equipped with an exhaust gas extraction system.
WARNI NG
Do not park the vehicle on a flammable surface (for example: dry grass, fallen leaves, paper, etc.) - risk of fire!
NOTIC E
Have the additional heating checked at least once a year, at the beginning of winter.For maintenance and repairs, you must only contact any authorized Toyota retailer or Toyota authorized repairer, or any reliable repairer.
A/C preconditioning
(Electric)
This function allows you to programme the temperature in the passenger compartment to reach a pre-defined, non-modifiable temperature (approx. 21°C) before you enter the vehicle, on the days and at the times of your choice.This function is available when the vehicle is connected or not connected.
Programming
With Bluetooth® audio system
Temperature pre-conditioning is not available with the Bluetooth® audio system.
With TOYOTA Pro Touch or TOYOTA Pro Touch with navigation system
Programming can be carried out from a smartphone using the MyToyota application (Available soon).For more information on the Remotely-operable
functions, refer to the corresponding section.
With TOYOTA Pro Touch with navigation system
In the Applications menu:
Press "Car Apps" to display the applications home page.Select Temperature conditioning.
► Press + to add a programme.
► Select the time of entry into the vehicle and the desired days. Press OK.► Press ON to activate this programme.The temperature pre-conditioning sequence begins approximately 45 minutes before the programmed time when the vehicle is connected (20 minutes when it is not connected) and is maintained for 10 minutes after.
NOTIC E
You can set multiple programmes.Each one is saved in the system.To optimise the driving range, we recommend starting a programme while the vehicle is connected.
NOTIC E
The fan noise that occurs during temperature pre-conditioning is perfectly normal.
Operating conditions
– The function is only activated when the ignition is switched off and the vehicle locked.– When the vehicle is not connected, the function is only activated if the battery charge
level is greater than 50%.– When the vehicle is not connected and a recurring programme is active (e.g. from Monday to Friday), if two temperature pre-conditioning
Page 98 of 360
98
Automatic switching on/off
The front courtesy lamp comes on when the key is removed from the ignition switch.All courtesy lamps come on when the vehicle is unlocked, when one of the corresponding doors is opened and when locating the vehicle using the remote control. They fade to off after the ignition is switched on and when the vehicle is locked.
WARNI NG
Take care not to allow objects to come into contact with the courtesy lamp.
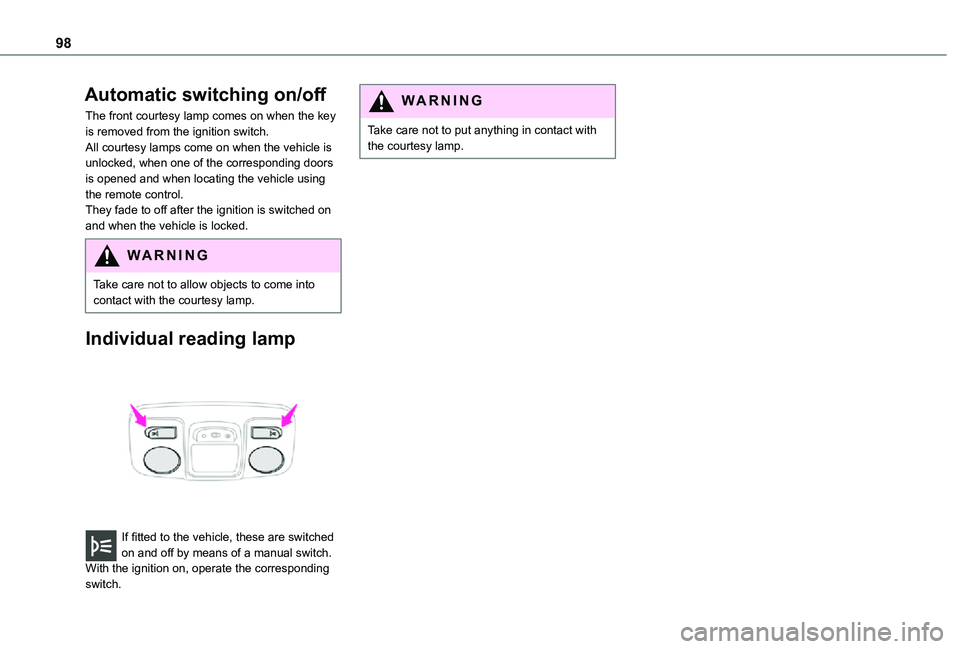
Individual reading lamp
If fitted to the vehicle, these are switched
on and off by means of a manual switch.With the ignition on, operate the corresponding switch.
WARNI NG
Take care not to put anything in contact with the courtesy lamp.
Page 102 of 360

102
Exterior welcome lighting
The remote operation of the lighting makes your approach to the vehicle easier in poor light. It is activated when the lighting control is in the "AUTO" position and the level of light detected by the sunshine sensor is low.
Switching on
Press this button on the remote control or on one of the front door handles with the "Smart Entry & Start" system.The dipped beam headlamps and sidelamps come on; your vehicle is also unlocked.
Switching off
The exterior welcome lighting switches off automatically after a set time, when the ignition is switched on or on locking the vehicle.
Programming
With audio system or touch screen
The activation, deactivation and
duration of the welcome lighting can be set via the vehicle configuration menu.
Cornering lighting
This system makes use of the beam from a front foglamp to illuminate the inside of a bend, when the main or dipped beam headlamps are on and the vehicle speed is below 25 mph (40 km/h) (urban driving, winding road, junctions, parking manoeuvres).
Without/With cornering lighting
Switching on / off
This system starts:– when the corresponding direction indicator is switched on.or– from a certain angle of rotation of the steering wheel.It becomes inactive:– below a certain angle of rotation of the steering wheel.– above 25 mph (40 km/h).– when reverse gear is engaged.
Programming
With audio system or touch screen
The system's settings are adjusted via the vehicle configuration menu.
Automatic headlamp
dipping
When the ring is in the "AUTO” position, this system automatically switches between dipped and main beam headlamps according to the lighting and traffic conditions, using a camera located at the top of the windscreen.
Page 112 of 360

11 2
Vehicle stability control
(VSC)
The electronic stability control programme includes the following systems:– Anti-lock braking system (ABS) and Electronic brake force distribution (EBFD).– Emergency braking assistance (EBA).– Anti-slip regulation (ASR).– Dynamic stability control (DSC).– Intelligent traction control.– Trailer stability assist (TSA).
Anti-lock braking system
(ABS)/Electronic brake force
distribution (EBFD)
These systems enhance the vehicle’s stability and handling during braking, and enable greater control while cornering, particularly on poor or slippery road surfaces.ABS prevents wheel locking in the event of emergency braking.
Electronic brake force distribution (EBFD) manages overall braking pressure on each individual wheel.► When braking in an emergency, depress the pedal very firmly and maintain this pressure.
NOTIC E
The normal operation of the ABS may result in slight vibrations in the brake pedal.
This warning lamp comes on fixed in the event of an ABS malfunction.The vehicle retains conventional braking. Drive carefully at a moderate speed.Have it checked by any authorized Toyota retailer or Toyota authorized repairer, or any reliable repairer.This warning lamp, when lit together with the STOP and ABS warning lamps, accompanied by a message and an audible signal, indicates an EBFD malfunction.You must stop the vehicle.Stop as soon as it is safe to do so and switch off the ignition.Contact any authorized Toyota retailer or Toyota authorized repairer, or any reliable repairer.
WARNI NG
When changing wheels (tyres and rims), ensure that these are approved for your vehicle.
WARNI NG
After an impactHave it checked by any authorized Toyota retailer or Toyota authorized repairer, or any reliable repairer.
Emergency braking
assistance (EBA)
In an emergency, this system enables you to reach the optimum braking pressure more quickly and therefore reduce the stopping distance.It is triggered in relation to the speed at which the brake pedal is pressed. This is felt by a reduction in the resistance of the pedal and an increase in braking efficiency.
Anti-slip regulation (ASR) /
Dynamic stability control
(DSC)
Anti-slip regulation (or traction control) optimises traction by using engine braking and by applying the brakes on the driving wheels to avoid one or more wheels spinning. It also enhances the vehicle's directional stability.If there is a difference between the vehicle’s trajectory and the path desired by the driver, the dynamic stability control system automatically uses engine braking and the brakes on one or
Page 116 of 360
11 6
NOTIC E
The ASR and DSC systems will no longer act on the operation of the engine or of the brakes in the event of a change of trajectory.These systems are reactivated automatically from 31 mph (50 km/h) and whenever the ignition is switched on.
WARNI NG
RecommendationsYour vehicle is designed principally to drive on tarmac roads but it allows you to occasionally drive on other less passable terrain.However, it does not permit off-road driving such as:– crossing and driving on terrain which could damage the underbody or strip away components (fuel pipe, fuel cooler, etc.) due to obstacles or stones in particular,– driving on terrain with steep gradients and
poor grip,– crossing a stream.
Seat belts
Inertia reelThe seat belts are equipped with an inertia reel which allows the strap length to automatically adjust to your shape. The seat belt returns to its storage automatically when it is not used.The inertia reels are fitted with a device which automatically locks the strap in the event of a collision, emergency braking or if the vehicle rolls over. It can be released by pulling the strap firmly and then releasing it so that it reels in slightly.Pyrotechnic pretensioningThis system improves safety in the event of a frontal or side impact.Depending on the severity of the impact, the pyrotechnic pretensioning system instantly tightens the seat belts against the body of the occupants.The pyrotechnic pretensioning seat belts are enabled when the ignition is on.Force limiterThis system reduces the pressure of the seat
belt on the chest of the occupant, thus improving their protection.
WARNI NG
In the event of an impactDepending on the nature and seriousness of the impacts, the pyrotechnic device may trigger before and independently of airbag deployment. Deployment of the pretensioners is accompanied by a slight discharge of harmless smoke and a noise, due to the activation of the pyrotechnic cartridge incorporated in the system.In all cases, the airbag warning lamp comes on.Following an impact, have the seat belt system checked, and if necessary replaced, by any authorized Toyota retailer or Toyota authorized repairer, or any reliable repairer.
Page 117 of 360
11 7
Safety
5
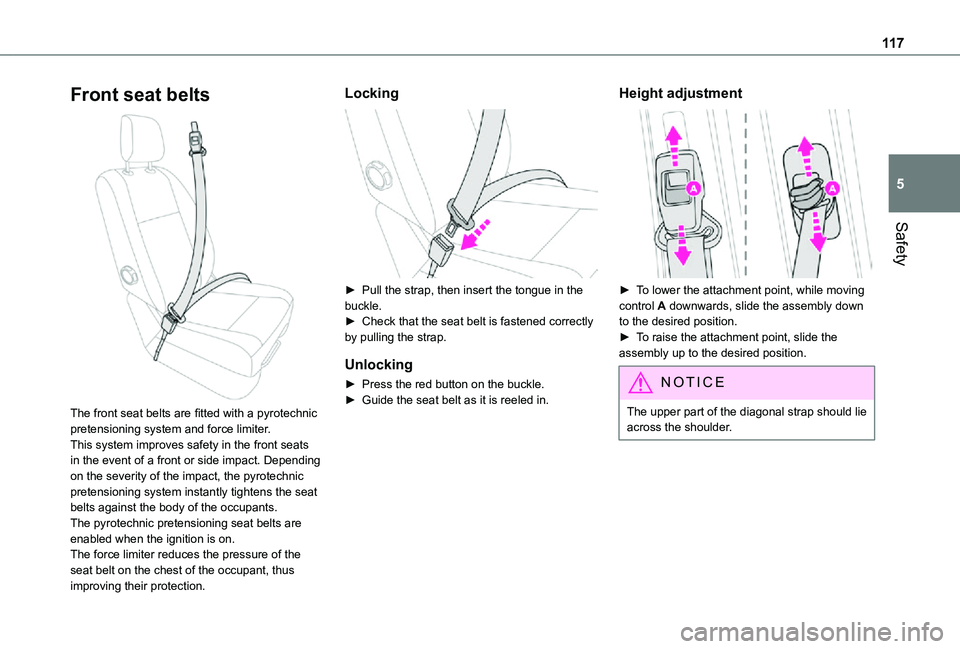
Front seat belts
The front seat belts are fitted with a pyrotechnic pretensioning system and force limiter.This system improves safety in the front seats in the event of a front or side impact. Depending on the severity of the impact, the pyrotechnic pretensioning system instantly tightens the seat belts against the body of the occupants.The pyrotechnic pretensioning seat belts are enabled when the ignition is on.
The force limiter reduces the pressure of the seat belt on the chest of the occupant, thus improving their protection.
Locking
► Pull the strap, then insert the tongue in the buckle.► Check that the seat belt is fastened correctly by pulling the strap.
Unlocking
► Press the red button on the buckle.► Guide the seat belt as it is reeled in.
Height adjustment
► To lower the attachment point, while moving control A downwards, slide the assembly down to the desired position.► To raise the attachment point, slide the assembly up to the desired position.
NOTIC E
The upper part of the diagonal strap should lie across the shoulder.
Page 125 of 360
125
Safety
5
WARNI NG
Installing a booster seatThe chest part of the seat belt must be positioned on the child's shoulder without touching the neck.Ensure that the lap part of the seat belt passes correctly over the child's thighs.Use a booster seat with backrest, equipped with a belt guide at shoulder level.
WARNI NG
Additional protectionsTo prevent accidental opening of the doors and rear windows, use the "Child lock".Take care not to open the rear windows by more than one third.To protect young children from the rays of the sun, fit side blinds on the rear windows.As a safety precaution, do not leave:– a child alone and unattended in a vehicle,– a child or an animal in a vehicle which is exposed to the sun, with the windows closed,– the keys within reach of children inside the vehicle.
Child seat at the rear
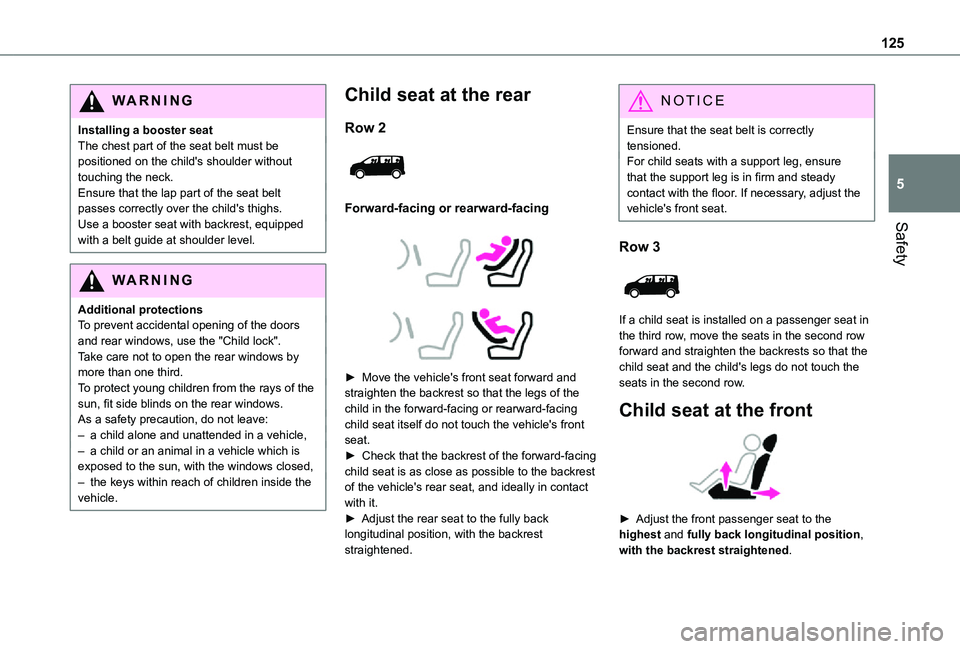
Row 2
Forward-facing or rearward-facing
► Move the vehicle's front seat forward and straighten the backrest so that the legs of the child in the forward-facing or rearward-facing child seat itself do not touch the vehicle's front seat.► Check that the backrest of the forward-facing child seat is as close as possible to the backrest of the vehicle's rear seat, and ideally in contact with it.► Adjust the rear seat to the fully back longitudinal position, with the backrest straightened.
NOTIC E
Ensure that the seat belt is correctly tensioned.For child seats with a support leg, ensure that the support leg is in firm and steady contact with the floor. If necessary, adjust the vehicle's front seat.
Row 3
If a child seat is installed on a passenger seat in the third row, move the seats in the second row forward and straighten the backrests so that the child seat and the child's legs do not touch the seats in the second row.
Child seat at the front
► Adjust the front passenger seat to the highest and fully back longitudinal position, with the backrest straightened.
Page 146 of 360
146
Seati-Size restraint system
PROACE VERSO
Row 2 and 3
Rear seats with seat and bench seati-U (c)
Rear seats with 2 individual seatsNot i-Size
Rear seats with 1 individual seatNot i-Size
i-U:Suitable for forward facing and rearward facing "Universal" i-Size restr\
aint systems.
i-UF:Only suitable for forward facing "Universal" i-Size restraint systems.
(a)Refer to the current legislation in the country in which you are driving\
before placing a child in this seat position.
(b)The seat can be installed centrally in the vehicle; it then prevents the use of the outer seats.
(c)The seat in row 2 cannot be used when an i-Size child seat is installed \
immediately behind.
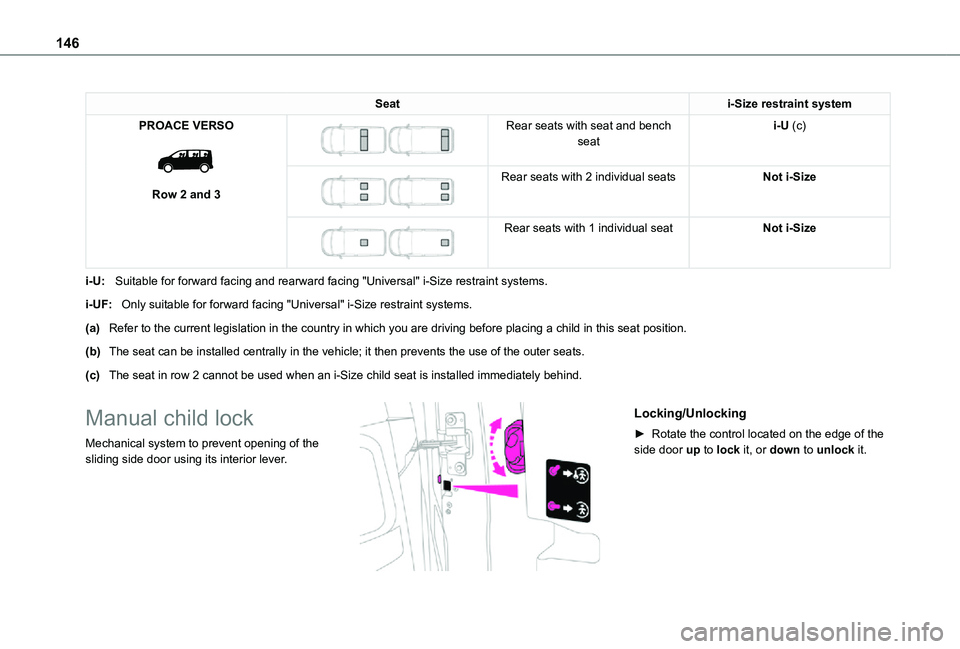
Manual child lock
Mechanical system to prevent opening of the sliding side door using its interior lever.
Locking/Unlocking
► Rotate the control located on the edge of the side door up to lock it, or down to unlock it.