2021 TOYOTA PROACE CITY VERSO automatic
[x] Cancel search: automaticPage 36 of 272
36
Only the exterior perimeter monitoring is activated; the red indicator lamp in the button flashes every second.
NOTIC E
To be taken into account, the deactivation must be carried out every time the ignition is switched off.
Reactivating the interior volumetric
and anti-tilt monitoring
► Deactivate the perimeter monitoring by unlocking the vehicle with the remote control or the Keyless Entry and Starting system.The indicator lamp in the button goes off.► Reactivate all monitoring by locking the vehicle with the remote control or the Keyless Entry and Starting system.The red indicator lamp in the button once again flashes every second.
Triggering of the alarm
This is indicated by sounding of the siren and flashing of the direction indicators for 30 seconds.Depending on the country of sale, certain monitoring functions remain active until the alarm has been triggered eleven times consecutively.When the vehicle is unlocked using the remote control or the "Keyless Entry and Starting" system, rapid flashing of the red indicator lamp
in the button informs you that the alarm was triggered during your absence. When the ignition is switched on, the flashing stops immediately.
Failure of the remote control
To deactivate the monitoring functions:► unlock the vehicle using the key (integral to the remote control) in the driver's door lock,► open the door; the alarm is triggered,► switch on the ignition; the alarm stops; the indicator lamp in the button goes off.
Locking the vehicle without
activating the alarm
► Lock or deadlock the vehicle using the key (integral to the remote control) in the driver's door lock.
Malfunction
When the ignition is switched on, fixed illumination of the red indicator lamp in the button indicates a malfunction of the system.
Have it checked by a TOYOTA dealer or a qualified workshop.
Automatic activation
(Depending on the country of sale)The system is activated automatically 2 minutes after the last door or the boot is closed.► To avoid triggering the alarm on entering the vehicle, first press the unlocking button on the
remote control or unlock the vehicle using the “Keyless Entry and Starting” system.
Electric windows
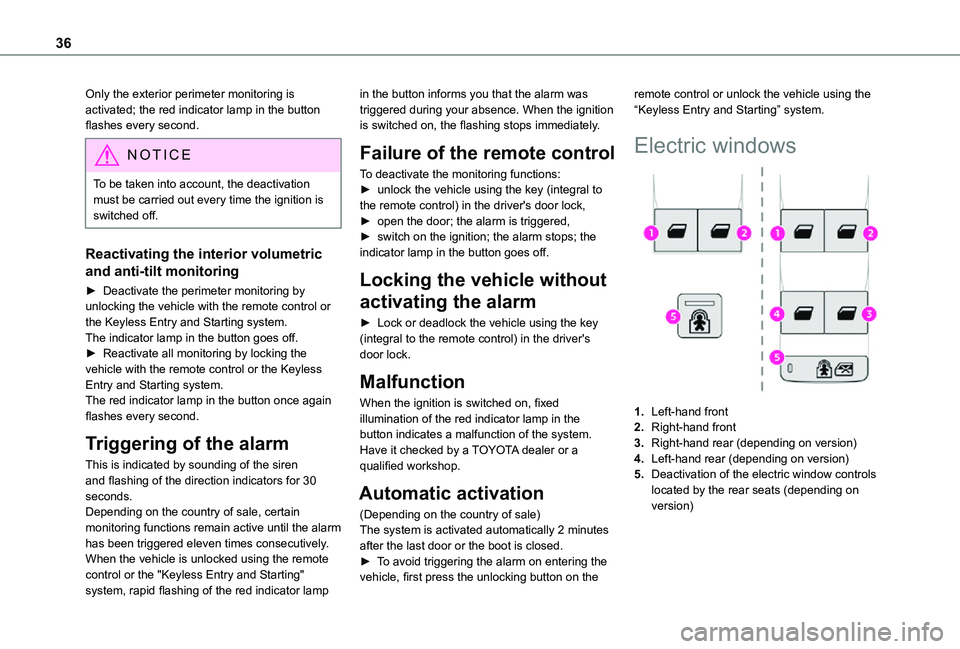
1.Left-hand front
2.Right-hand front
3.Right-hand rear (depending on version)
4.Left-hand rear (depending on version)
5.Deactivation of the electric window controls located by the rear seats (depending on version)
Page 37 of 272
37
Access
2
Manual operation
► To open/close the window, press/pull the switch without passing the point of resistance; the window stops as soon as the switch is released.
Automatic operation
(Depending on version)► To open/close the window, press/pull the switch past its resistance point: the window opens/closes completely when the switch is released.Operating the switch again stops the movement of the window.
NOTIC E
Window controls remain operational for approximately 45 seconds after switching off the ignition or after locking the vehicle.After that time, the controls are disabled. To reactivate them, switch on the ignition or unlock the vehicle.
Anti-pinch
(Depending on version)If the window meets an obstacle while rising, it stops and immediately partially lowers again.
Deactivating the rear
controls for the rear electric
windows
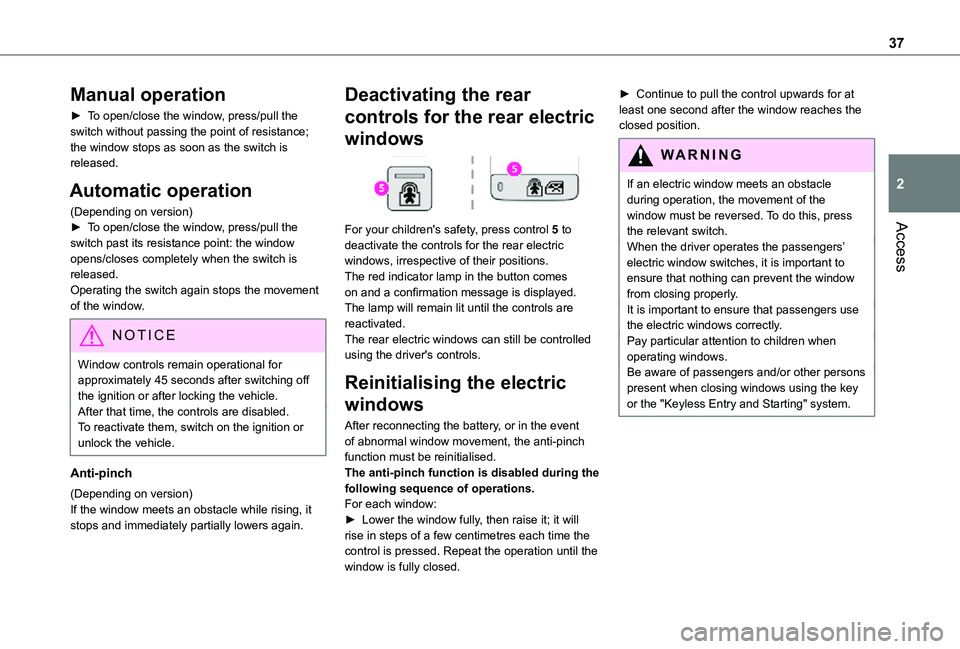
For your children's safety, press control 5 to
deactivate the controls for the rear electric windows, irrespective of their positions.The red indicator lamp in the button comes on and a confirmation message is displayed. The lamp will remain lit until the controls are reactivated.The rear electric windows can still be controlled using the driver's controls.
Reinitialising the electric
windows
After reconnecting the battery, or in the event of abnormal window movement, the anti-pinch function must be reinitialised.The anti-pinch function is disabled during the following sequence of operations.For each window:► Lower the window fully, then raise it; it will rise in steps of a few centimetres each time the control is pressed. Repeat the operation until the window is fully closed.
► Continue to pull the control upwards for at least one second after the window reaches the closed position.
WARNI NG
If an electric window meets an obstacle during operation, the movement of the window must be reversed. To do this, press the relevant switch.
When the driver operates the passengers’ electric window switches, it is important to ensure that nothing can prevent the window from closing properly.It is important to ensure that passengers use the electric windows correctly.Pay particular attention to children when operating windows.Be aware of passengers and/or other persons present when closing windows using the key or the "Keyless Entry and Starting" system.
Page 41 of 272
41
Ease of use and comfort
3
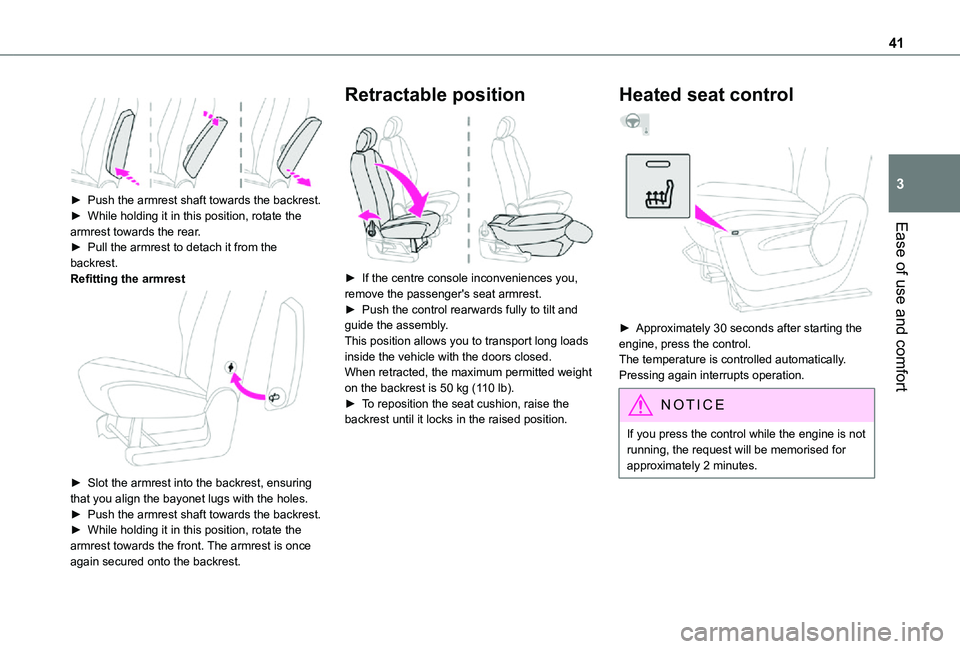
► Push the armrest shaft towards the backrest.► While holding it in this position, rotate the armrest towards the rear.
► Pull the armrest to detach it from the backrest.Refitting the armrest
► Slot the armrest into the backrest, ensuring that you align the bayonet lugs with the holes.► Push the armrest shaft towards the backrest.► While holding it in this position, rotate the armrest towards the front. The armrest is once again secured onto the backrest.
Retractable position
► If the centre console inconveniences you, remove the passenger's seat armrest.► Push the control rearwards fully to tilt and guide the assembly.This position allows you to transport long loads inside the vehicle with the doors closed.When retracted, the maximum permitted weight on the backrest is 50 kg (110 lb).► To reposition the seat cushion, raise the backrest until it locks in the raised position.
Heated seat control
► Approximately 30 seconds after starting the engine, press the control.The temperature is controlled automatically.Pressing again interrupts operation.
NOTIC E
If you press the control while the engine is not running, the request will be memorised for approximately 2 minutes.
Page 43 of 272
43
Ease of use and comfort
3
WARNI NG
As a safety measure, the mirrors should be adjusted to reduce the blind spots.The objects observed are, in reality, closer than they appear.Take this into account when assessing the distance of vehicles approaching from behind.
Manual folding
You can manually fold the mirrors (parking obstruction, narrow garage, etc.)► Turn the mirror towards the vehicle.
Electric folding
If the vehicle is so equipped, the mirrors can be folded electrically from the inside, with the vehicle parked and the ignition on:
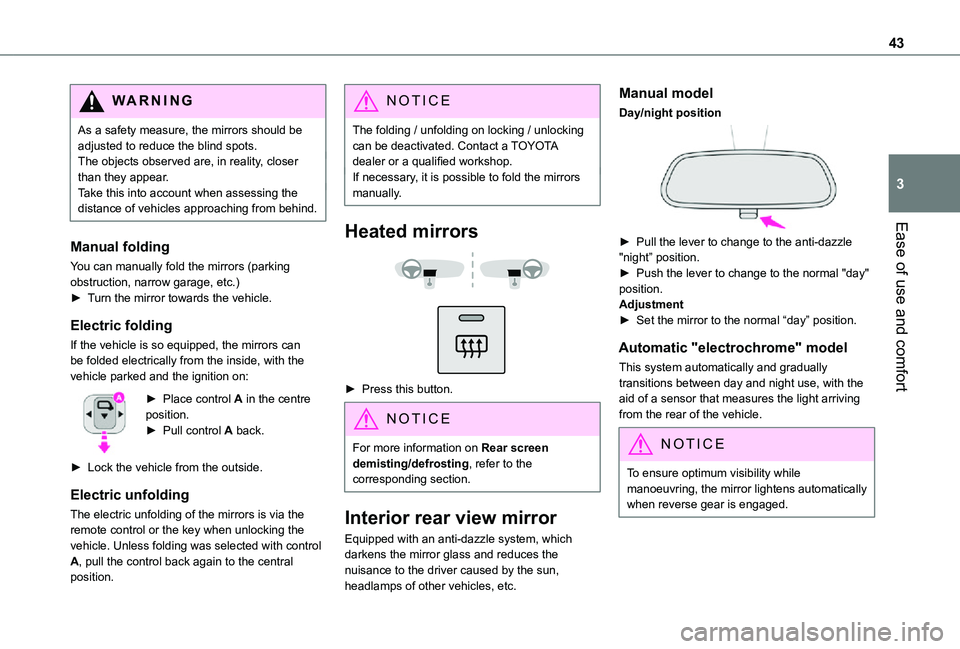
► Place control A in the centre position.► Pull control A back.
► Lock the vehicle from the outside.
Electric unfolding
The electric unfolding of the mirrors is via the remote control or the key when unlocking the vehicle. Unless folding was selected with control A, pull the control back again to the central position.
NOTIC E
The folding / unfolding on locking / unlocking can be deactivated. Contact a TOYOTA dealer or a qualified workshop.If necessary, it is possible to fold the mirrors manually.
Heated mirrors
► Press this button.
NOTIC E
For more information on Rear screen demisting/defrosting, refer to the corresponding section.
Interior rear view mirror
Equipped with an anti-dazzle system, which
darkens the mirror glass and reduces the nuisance to the driver caused by the sun, headlamps of other vehicles, etc.
Manual model
Day/night position
► Pull the lever to change to the anti-dazzle
"night” position.► Push the lever to change to the normal "day" position.Adjustment► Set the mirror to the normal “day” position.
Automatic "electrochrome" model
This system automatically and gradually transitions between day and night use, with the aid of a sensor that measures the light arriving from the rear of the vehicle.
NOTIC E
To ensure optimum visibility while manoeuvring, the mirror lightens automatically when reverse gear is engaged.
Page 50 of 272
50
WARNI NG
The connection of an electrical device not approved by TOYOTA, such as a USB charger, may adversely affect the operation of vehicle electrical systems, causing faults such as poor radio reception or interference with displays in the screens.
USB port(s)
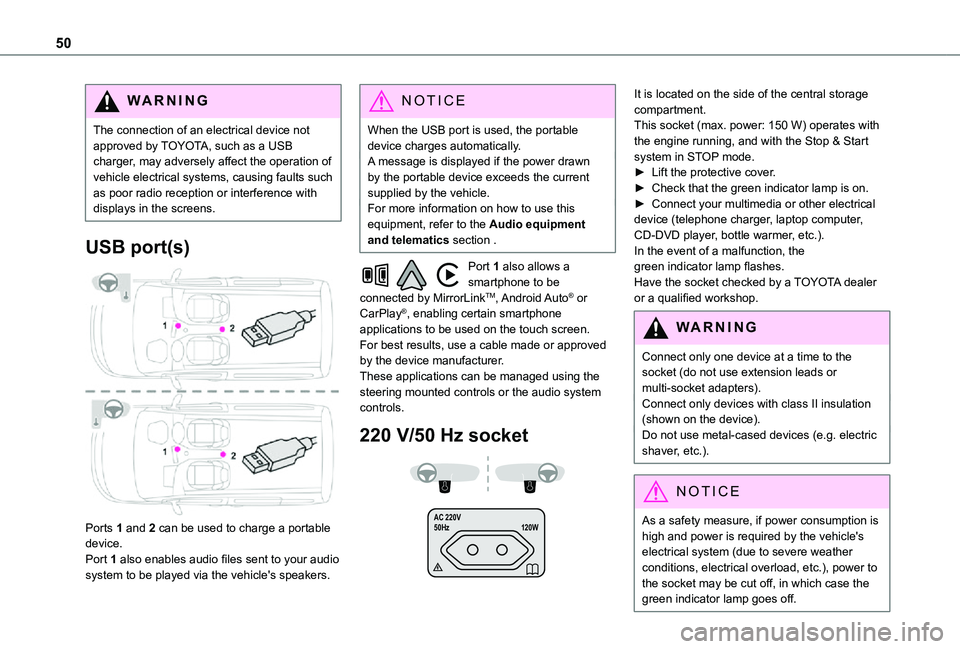
Ports 1 and 2 can be used to charge a portable device.
Port 1 also enables audio files sent to your audio system to be played via the vehicle's speakers.
NOTIC E
When the USB port is used, the portable device charges automatically.A message is displayed if the power drawn by the portable device exceeds the current supplied by the vehicle.For more information on how to use this equipment, refer to the Audio equipment and telematics section .
Port 1 also allows a smartphone to be connected by MirrorLinkTM, Android Auto® or CarPlay®, enabling certain smartphone applications to be used on the touch screen.For best results, use a cable made or approved by the device manufacturer.These applications can be managed using the steering mounted controls or the audio system controls.
220 V/50 Hz socket
AC 220 V
50Hz 120W
It is located on the side of the central storage compartment.This socket (max. power: 150 W) operates with the engine running, and with the Stop & Start system in STOP mode.► Lift the protective cover.► Check that the green indicator lamp is on.► Connect your multimedia or other electrical device (telephone charger, laptop computer, CD-DVD player, bottle warmer, etc.).In the event of a malfunction, the green indicator lamp flashes.Have the socket checked by a TOYOTA dealer or a qualified workshop.
WARNI NG
Connect only one device at a time to the socket (do not use extension leads or multi-socket adapters).Connect only devices with class II insulation (shown on the device).Do not use metal-cased devices (e.g. electric shaver, etc.).
NOTIC E
As a safety measure, if power consumption is high and power is required by the vehicle's
electrical system (due to severe weather conditions, electrical overload, etc.), power to the socket may be cut off, in which case the green indicator lamp goes off.
Page 55 of 272
55
Ease of use and comfort
3
As a safety precaution in case of sharp braking, we recommend placing heavy objects as far forwards as possible (i.e. near the cab).We recommend using the stowing rings on the floor to firmly secure the load.
WARNI NG
When washing your vehicle, never clean the inside directly using a water jet.
Warning triangle
As a safety precaution, before leaving your vehicle to set up and install the triangle, always switch on the hazard warning lamps and put on your high visibility vest.
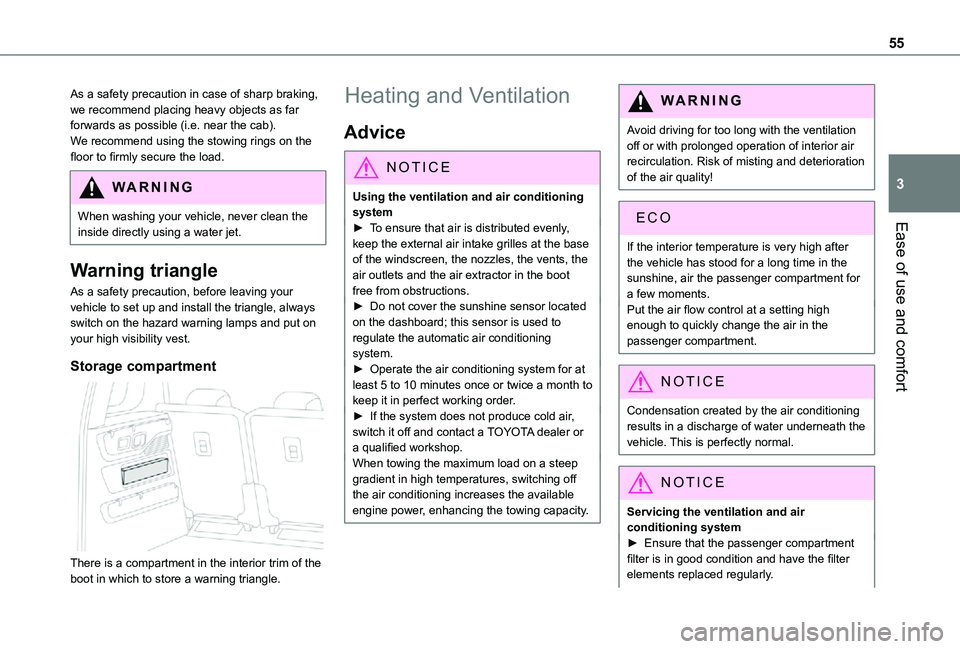
Storage compartment
There is a compartment in the interior trim of the boot in which to store a warning triangle.
Heating and Ventilation
Advice
NOTIC E
Using the ventilation and air conditioning system► To ensure that air is distributed evenly,
keep the external air intake grilles at the base of the windscreen, the nozzles, the vents, the air outlets and the air extractor in the boot free from obstructions.► Do not cover the sunshine sensor located on the dashboard; this sensor is used to regulate the automatic air conditioning system.► Operate the air conditioning system for at least 5 to 10 minutes once or twice a month to keep it in perfect working order.► If the system does not produce cold air, switch it off and contact a TOYOTA dealer or a qualified workshop.When towing the maximum load on a steep gradient in high temperatures, switching off the air conditioning increases the available engine power, enhancing the towing capacity.
WARNI NG
Avoid driving for too long with the ventilation off or with prolonged operation of interior air recirculation. Risk of misting and deterioration of the air quality!
If the interior temperature is very high after the vehicle has stood for a long time in the sunshine, air the passenger compartment for a few moments.Put the air flow control at a setting high enough to quickly change the air in the passenger compartment.
NOTIC E
Condensation created by the air conditioning results in a discharge of water underneath the vehicle. This is perfectly normal.
NOTIC E
Servicing the ventilation and air conditioning system► Ensure that the passenger compartment filter is in good condition and have the filter elements replaced regularly.
Page 57 of 272
57
Ease of use and comfort
3
NOTIC E
On entering the vehicle, if the interior temperature is significantly colder or warmer than the comfort value setting, there is no need to alter the value displayed in order to reach the required level of comfort. The system compensates automatically and corrects the temperature difference as quickly as possible.
NOTIC E
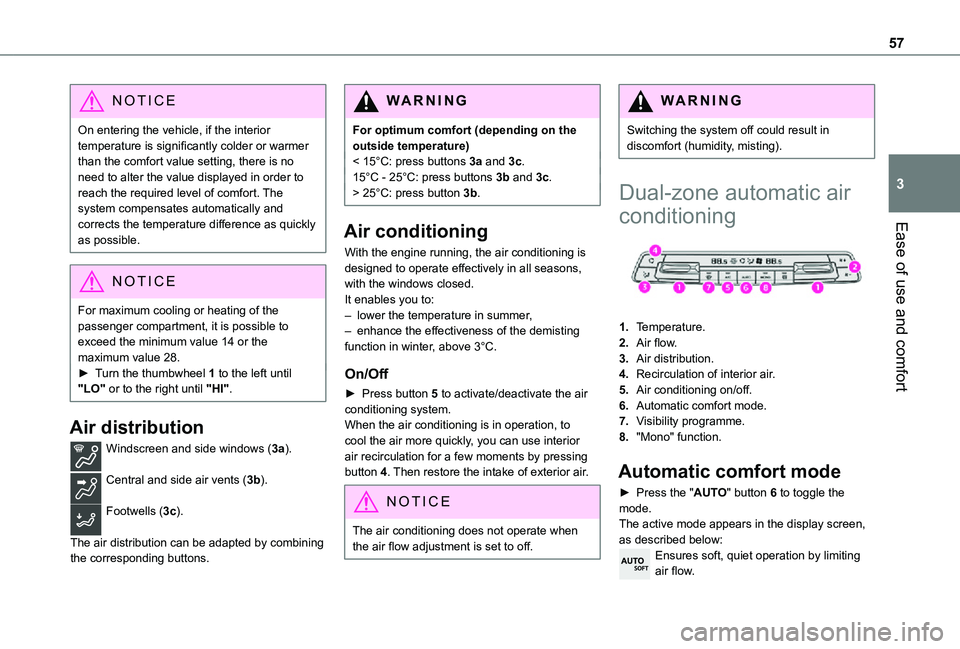
For maximum cooling or heating of the passenger compartment, it is possible to exceed the minimum value 14 or the maximum value 28.► Turn the thumbwheel 1 to the left until "LO" or to the right until "HI".
Air distribution
Windscreen and side windows (3a).
Central and side air vents (3b).
Footwells (3c).
The air distribution can be adapted by combining the corresponding buttons.
WARNI NG
For optimum comfort (depending on the outside temperature)< 15°C: press buttons 3a and 3c.15°C - 25°C: press buttons 3b and 3c.> 25°C: press button 3b.
Air conditioning
With the engine running, the air conditioning is designed to operate effectively in all seasons, with the windows closed.It enables you to:– lower the temperature in summer,– enhance the effectiveness of the demisting function in winter, above 3°C.
On/Off
► Press button 5 to activate/deactivate the air conditioning system.When the air conditioning is in operation, to cool the air more quickly, you can use interior
air recirculation for a few moments by pressing button 4. Then restore the intake of exterior air.
NOTIC E
The air conditioning does not operate when the air flow adjustment is set to off.
WARNI NG
Switching the system off could result in discomfort (humidity, misting).
Dual-zone automatic air
conditioning
1.Temperature.
2.Air flow.
3.Air distribution.
4.Recirculation of interior air.
5.Air conditioning on/off.
6.Automatic comfort mode.
7.Visibility programme.
8."Mono" function.
Automatic comfort mode
► Press the "AUTO" button 6 to toggle the mode.The active mode appears in the display screen, as described below:
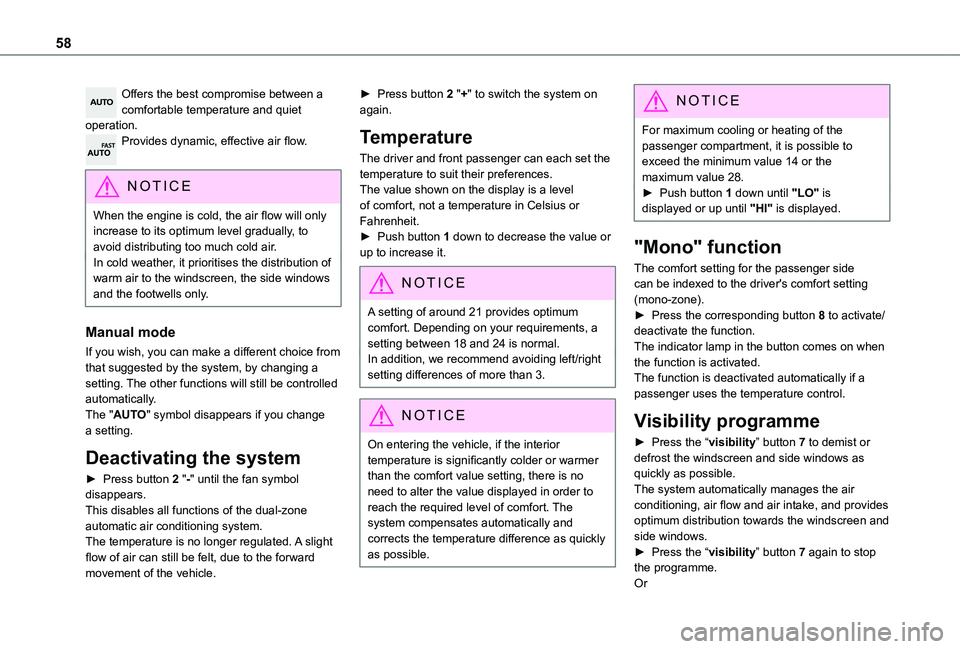
Ensures soft, quiet operation by limiting air flow.
Page 58 of 272
58
Offers the best compromise between a comfortable temperature and quiet operation.Provides dynamic, effective air flow.
NOTIC E
When the engine is cold, the air flow will only increase to its optimum level gradually, to
avoid distributing too much cold air.In cold weather, it prioritises the distribution of warm air to the windscreen, the side windows and the footwells only.
Manual mode
If you wish, you can make a different choice from that suggested by the system, by changing a setting. The other functions will still be controlled automatically. The "AUTO" symbol disappears if you change a setting.
Deactivating the system
► Press button 2 "-" until the fan symbol disappears.This disables all functions of the dual-zone automatic air conditioning system.The temperature is no longer regulated. A slight flow of air can still be felt, due to the forward movement of the vehicle.
► Press button 2 "+" to switch the system on again.
Temperature
The driver and front passenger can each set the temperature to suit their preferences.The value shown on the display is a level of comfort, not a temperature in Celsius or Fahrenheit.► Push button 1 down to decrease the value or up to increase it.
NOTIC E
A setting of around 21 provides optimum comfort. Depending on your requirements, a setting between 18 and 24 is normal.In addition, we recommend avoiding left/right setting differences of more than 3.
NOTIC E
On entering the vehicle, if the interior temperature is significantly colder or warmer than the comfort value setting, there is no need to alter the value displayed in order to reach the required level of comfort. The system compensates automatically and corrects the temperature difference as quickly as possible.
NOTIC E
For maximum cooling or heating of the passenger compartment, it is possible to exceed the minimum value 14 or the maximum value 28.► Push button 1 down until "LO" is displayed or up until "HI" is displayed.
"Mono" function
The comfort setting for the passenger side can be indexed to the driver's comfort setting (mono-zone).► Press the corresponding button 8 to activate/deactivate the function.The indicator lamp in the button comes on when the function is activated.The function is deactivated automatically if a passenger uses the temperature control.
Visibility programme
► Press the “visibility” button 7 to demist or
defrost the windscreen and side windows as quickly as possible. The system automatically manages the air conditioning, air flow and air intake, and provides optimum distribution towards the windscreen and side windows.► Press the “visibility” button 7 again to stop the programme.Or