2021 TOYOTA PROACE CITY VERSO automatic
[x] Cancel search: automaticPage 147 of 272
147
Driving
6
NOTIC E
Obstacles may appear further away than they actually are in reality.It is important to check the sides of the vehicle during the manoeuvre, using the mirrors.The rear parking sensors also provide information on the vehicle's surroundings.
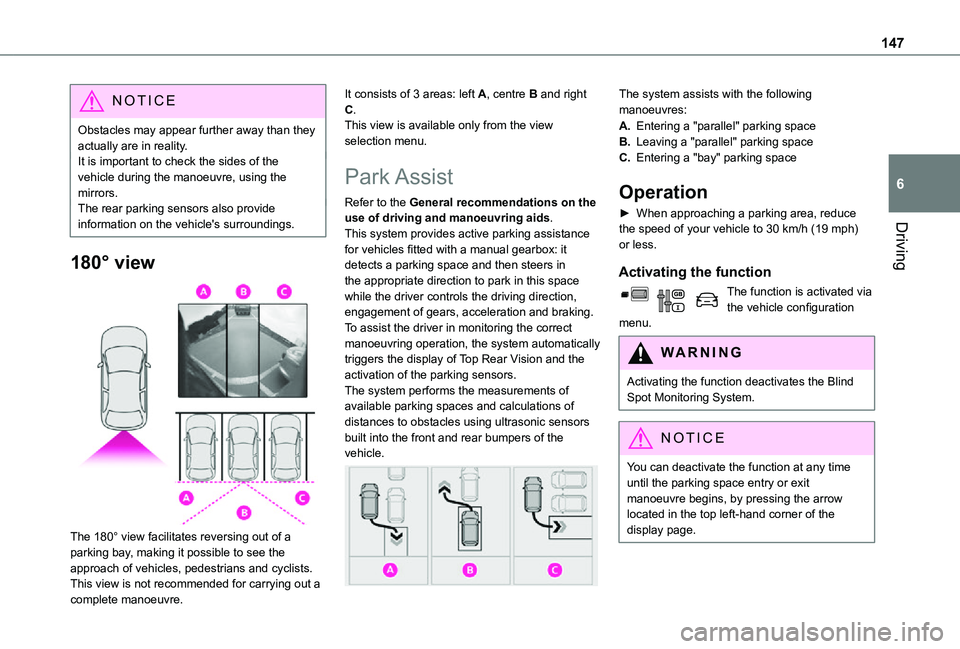
180° view
The 180° view facilitates reversing out of a parking bay, making it possible to see the approach of vehicles, pedestrians and cyclists.This view is not recommended for carrying out a
complete manoeuvre.
It consists of 3 areas: left A, centre B and right C.This view is available only from the view selection menu.
Park Assist
Refer to the General recommendations on the use of driving and manoeuvring aids.This system provides active parking assistance for vehicles fitted with a manual gearbox: it detects a parking space and then steers in the appropriate direction to park in this space while the driver controls the driving direction, engagement of gears, acceleration and braking.To assist the driver in monitoring the correct manoeuvring operation, the system automatically triggers the display of Top Rear Vision and the activation of the parking sensors.The system performs the measurements of available parking spaces and calculations of distances to obstacles using ultrasonic sensors built into the front and rear bumpers of the
vehicle.
The system assists with the following manoeuvres:
A.Entering a "parallel" parking space
B.Leaving a "parallel" parking space
C.Entering a "bay" parking space
Operation
► When approaching a parking area, reduce the speed of your vehicle to 30 km/h (19 mph) or less.
Activating the function
The function is activated via the vehicle configuration menu.
WARNI NG
Activating the function deactivates the Blind Spot Monitoring System.
NOTIC E
You can deactivate the function at any time until the parking space entry or exit manoeuvre begins, by pressing the arrow located in the top left-hand corner of the display page.
Page 148 of 272
148
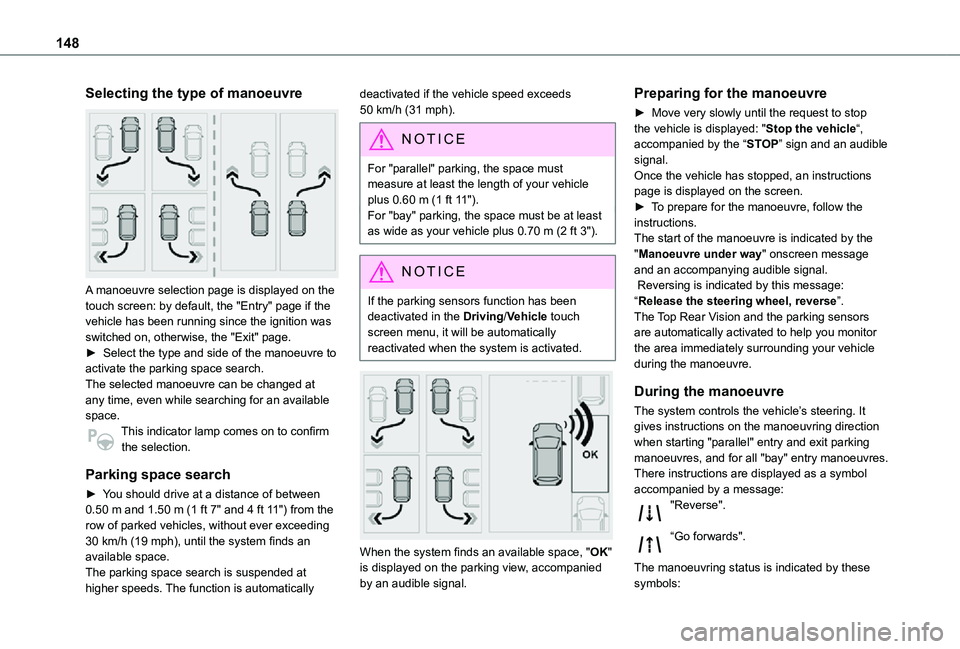
Selecting the type of manoeuvre
A manoeuvre selection page is displayed on the touch screen: by default, the "Entry" page if the vehicle has been running since the ignition was switched on, otherwise, the "Exit" page.► Select the type and side of the manoeuvre to activate the parking space search.The selected manoeuvre can be changed at any time, even while searching for an available space.This indicator lamp comes on to confirm
the selection.
Parking space search
► You should drive at a distance of between 0.50 m and 1.50 m (1 ft 7" and 4 ft 11") from the row of parked vehicles, without ever exceeding 30 km/h (19 mph), until the system finds an available space.The parking space search is suspended at higher speeds. The function is automatically
deactivated if the vehicle speed exceeds 50 km/h (31 mph).
NOTIC E
For "parallel" parking, the space must measure at least the length of your vehicle plus 0.60 m (1 ft 11").For "bay" parking, the space must be at least as wide as your vehicle plus 0.70 m (2 ft 3").
NOTIC E
If the parking sensors function has been deactivated in the Driving/Vehicle touch screen menu, it will be automatically reactivated when the system is activated.
When the system finds an available space, "OK" is displayed on the parking view, accompanied by an audible signal.
Preparing for the manoeuvre
► Move very slowly until the request to stop the vehicle is displayed: "Stop the vehicle“, accompanied by the “STOP” sign and an audible signal.Once the vehicle has stopped, an instructions page is displayed on the screen.► To prepare for the manoeuvre, follow the instructions. The start of the manoeuvre is indicated by the "Manoeuvre under way" onscreen message and an accompanying audible signal. Reversing is indicated by this message: “Release the steering wheel, reverse”.The Top Rear Vision and the parking sensors are automatically activated to help you monitor the area immediately surrounding your vehicle during the manoeuvre.
During the manoeuvre
The system controls the vehicle’s steering. It gives instructions on the manoeuvring direction when starting "parallel" entry and exit parking
manoeuvres, and for all "bay" entry manoeuvres.There instructions are displayed as a symbol accompanied by a message:"Reverse".
“Go forwards".
The manoeuvring status is indicated by these symbols:
Page 149 of 272
149
Driving
6
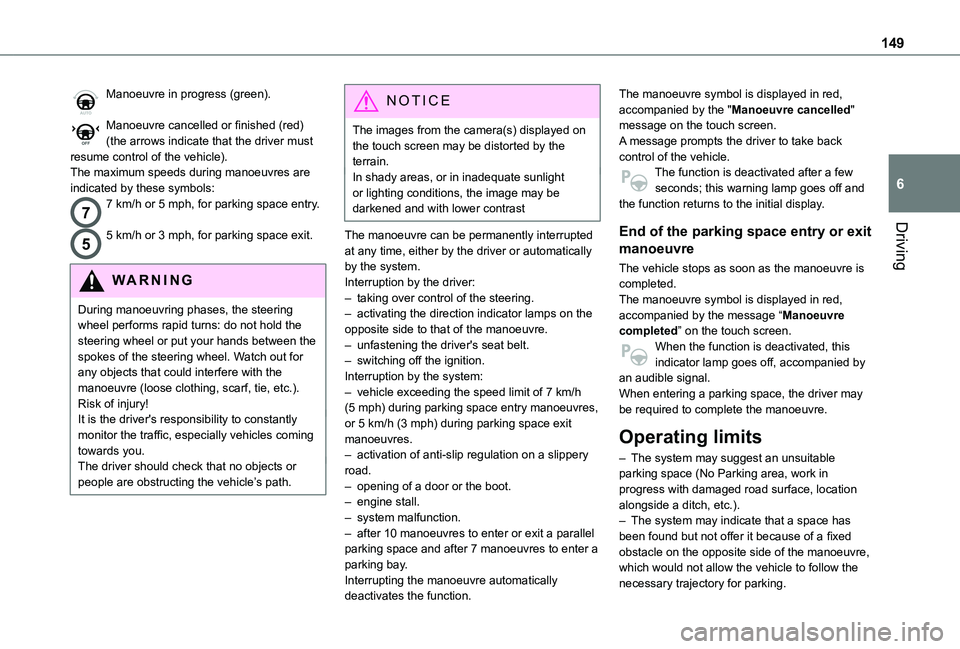
Manoeuvre in progress (green).
Manoeuvre cancelled or finished (red) (the arrows indicate that the driver must resume control of the vehicle).The maximum speeds during manoeuvres are indicated by these symbols:
77 km/h or 5 mph, for parking space entry.
55 km/h or 3 mph, for parking space exit.
WARNI NG
During manoeuvring phases, the steering wheel performs rapid turns: do not hold the steering wheel or put your hands between the spokes of the steering wheel. Watch out for any objects that could interfere with the manoeuvre (loose clothing, scarf, tie, etc.). Risk of injury!It is the driver's responsibility to constantly monitor the traffic, especially vehicles coming towards you.The driver should check that no objects or people are obstructing the vehicle’s path.
NOTIC E
The images from the camera(s) displayed on the touch screen may be distorted by the terrain.In shady areas, or in inadequate sunlight or lighting conditions, the image may be darkened and with lower contrast
The manoeuvre can be permanently interrupted at any time, either by the driver or automatically by the system.Interruption by the driver:– taking over control of the steering.– activating the direction indicator lamps on the opposite side to that of the manoeuvre.– unfastening the driver's seat belt.– switching off the ignition.Interruption by the system:– vehicle exceeding the speed limit of 7 km/h (5 mph) during parking space entry manoeuvres, or 5 km/h (3 mph) during parking space exit manoeuvres.
– activation of anti-slip regulation on a slippery road.– opening of a door or the boot.– engine stall.– system malfunction.– after 10 manoeuvres to enter or exit a parallel parking space and after 7 manoeuvres to enter a parking bay.Interrupting the manoeuvre automatically
deactivates the function.
The manoeuvre symbol is displayed in red, accompanied by the "Manoeuvre cancelled" message on the touch screen.A message prompts the driver to take back control of the vehicle.The function is deactivated after a few seconds; this warning lamp goes off and the function returns to the initial display.
End of the parking space entry or exit
manoeuvre
The vehicle stops as soon as the manoeuvre is completed.The manoeuvre symbol is displayed in red, accompanied by the message “Manoeuvre completed” on the touch screen.When the function is deactivated, this indicator lamp goes off, accompanied by an audible signal.When entering a parking space, the driver may be required to complete the manoeuvre.
Operating limits
– The system may suggest an unsuitable parking space (No Parking area, work in progress with damaged road surface, location alongside a ditch, etc.).– The system may indicate that a space has been found but not offer it because of a fixed obstacle on the opposite side of the manoeuvre, which would not allow the vehicle to follow the necessary trajectory for parking.
Page 154 of 272
154
NOTIC E
It is strongly recommended that before you leave, you practise fitting the snow chains on a level and dry surface.
WARNI NG
Avoid driving with snow chains on roads that
have been cleared of snow to avoid damaging your vehicle's tyres and the road surface. If your vehicle is fitted with alloy wheels, check that no part of the chain or its fixings is in contact with the wheel rim.
Use only the chains designed to be fitted to the type of wheel fitted to your vehicle:
Original tyre sizeMaximum link size (mm)
195/65 R159
205/60 R16
205/55 R17
215/65 R16
215/60 R17cannot be fitted with chains
You can also use snow socks.For more information, contact a TOYOTA dealer or a qualified workshop.
Towing device
Load distribution► Distribute the load in the trailer so that the heaviest items are as close as possible to the axle and the nose weight approaches the maximum permitted without exceeding it.Air density decreases with altitude, thus reducing engine performance. The maximum towed load must be reduced by 10 % for every 1,000 metres (3,280 ft) of altitude.
NOTIC E
Use towing devices and their unmodified harnesses approved by TOYOTA. It is recommended that the installation be performed by a TOYOTA dealer or a qualified workshop.If the towing device is not fitted by a TOYOTA dealer, it must still be fitted in accordance with the vehicle manufacturer's instructions.Certain driving assistance or manoeuvring assistance functions are automatically disabled if an approved towbar is used.
WARNI NG
Observe the maximum authorised towable weight, indicated on your vehicle's registration certificate, the manufacturer's label as well as in the Technical data section of this guide.Complying with the maximum authorised nose weight (towball) also includes the use of accessories (bicycle carriers, tow boxes, etc.).
WARNI NG
Observe the legislation in force in the country in which you are driving.
Page 157 of 272
157
Practical information
7
Energy economy mode
System which manages the duration of use of certain functions to conserve a sufficient level of charge in the battery.After switching off the engine and for a maximum cumulative period of around 40 minutes, you can continue to use functions such as the audio and telematics system, the wipers, the dipped beam headlamps, the courtesy lamps, etc.
Switching to the mode
A message indicating that the vehicle has switched to economy mode is displayed on the instrument panel screen and the active functions are put on standby.
NOTIC E
If a telephone call is in progress at the time, it will be maintained for around 10 minutes using your audio system’s hands-free system.
Exiting the mode
These functions will be automatically reactivated the next time the vehicle is used.In order to restore the use of these functions immediately, start the engine and let it run:– for less than 10 minutes, to use the equipment for approximately 5 minutes,– for more than 10 minutes, to use the equipment for approximately 30 minutes.
Let the engine run for the duration specified to ensure that the battery charge is sufficient.Do not repeatedly and continuously restart the engine in order to charge the battery.
WARNI NG
A flat battery prevents the engine from starting.For more information on the 12 V battery,
refer to the corresponding section.
Load reduction mode
System that manages the use of certain functions according to the level of charge remaining in the battery.When the vehicle is being driven, the load reduction function temporarily deactivates certain functions, such as the air conditioning and the heated rear screen.The deactivated functions are reactivated automatically as soon as conditions permit.
Roof bars / Roof rack
WARNI NG
RecommendationsDistribute the load uniformly, taking care to avoid overloading one of the sides.Arrange the heaviest part of the load as close as possible to the roof.Secure the load firmly.Drive gently: the vehicle will be more susceptible to the effects of side winds and its stability may be affected.Regularly check the security and tight fastening of the roof bars and racks, at least before each trip.Remove the roof bars once they are no longer needed.
WARNI NG
In the event of loading (not exceeding 40 cm
(1 ft 3") in height) on the roof, do not exceed the following loads:– Transverse bars on longitudinal bars: 80 kg (176 lb).– Two transverse bars bolted to the roof: 100 kg (220 lb).– Three transverse bars bolted to the roof: 150 kg (330 lb).– An aluminium rack: 120 kg (264 lb).
– A steel rack: 115 kg (253 lb).
Page 158 of 272

158
If the height exceeds 40 cm (1 ft 3"), adapt the speed of the vehicle to the profile of the road to avoid damaging the roof bars or the roof rack and the fixings on the vehicle.Refer to national legislation in order to comply with the regulations for transporting objects that are longer than the vehicle.
WARNI NG
In the event of loading a 7-seat model (not exceeding 40 cm (1 ft 3") in height) on the roof, do not exceed the following loads:– Three transverse bars bolted to the roof: 100 kg (220 lb).– An aluminium rack: 70 kg (154 lb).– A steel rack: 65 kg (143 lb).
W ARNI NG
As a safety measure and to avoid damaging the roof, it is essential to use the roof bars and racks approved for your vehicle.Observe the instructions on fitting and use contained in the guide supplied with the roof bars and racks.
To fit the transverse roof bars or a roof rack, use the fixing points provided for this purpose:► Remove the fixing covers installed on the vehicle.► Put each fixing in place and lock them on the roof one by one.► Ensure that the roof bars or the roof rack are correctly fitted (by shaking them).The bars are adaptable for each fixing point.
Bonnet
WARNI NG
Stop & StartBefore doing anything under the bonnet, you must switch off the ignition to avoid any risk of injury resulting from an automatic change to START mode.
NOTIC E
The location of the interior bonnet release lever prevents opening the bonnet when the left-hand front door is closed.
WARNI NG
When the engine is hot, handle the exterior safety catch and the bonnet stay with care (risk of burns), using the protected area.When the bonnet is open, take care not to damage the safety catch.Do not open the bonnet under very windy conditions.
Page 163 of 272

163
Practical information
7
NOTIC E
A clogged passenger compartment filter can adversely affect air conditioning system performance and generate undesirable odours.
Air filter
Depending on the environment and the use of the vehicle (e.g. dusty atmosphere, city driving), change it twice as often, if necessary.
Oil filter
Change the oil filter each time the engine oil is changed.
Particle filter (Diesel)
When the particle filter is approaching saturation, this warning lamp comes on temporarily, accompanied by a message warning of the risk
of filter clogging.As soon as the traffic conditions permit, regenerate the filter by driving at a speed of at least 60 km/h (37 mph) until the warning lamp goes off.
NOTIC E
If the warning lamp stays on, this indicates a low Diesel additive level.For more information on Checking levels, refer to the corresponding section.
NOTIC E
Following prolonged operation of the vehicle at very low speed or at idle, you may, in exceptional circumstances, notice the emission of water vapour at the exhaust while accelerating. This has no impact on the vehicle’s behaviour or the environment.
NOTIC E
New vehicleDuring the first few particle filter regeneration operations, you may notice a "burning" smell. This is perfectly normal.
Manual gearbox
The gearbox does not require any maintenance (no oil change).
Automatic gearbox
The gearbox does not require any maintenance (no oil change).
Brake pads
Brake wear depends on the style of driving, particularly in the case of vehicles used in town, over short distances. It may be necessary to have the condition of the brakes checked, even between vehicle services.Unless there is a leak in the circuit, a drop in the brake fluid level indicates that the brake pads are worn.
NOTIC E
After washing the vehicle, moisture, or in wintry conditions, ice can form on the brake discs and pads: braking efficiency may be reduced. Gently dab the brakes to dry and defrost them.
Brake disc wear
For information on checking brake disc wear, contact a TOYOTA dealer or a qualified workshop.
Page 164 of 272
164
Manual parking brake
If you notice excessive brake lever travel or decreased effectiveness, the parking brake must be adjusted, even between two services.This system must be checked by a TOYOTA dealer or a qualified workshop.
Electric parking brake
This system does not require any routine servicing. However, in the event of a problem, do not hesitate to have the system checked by a TOYOTA dealer or a qualified workshop.
NOTIC E
For more information on the Electric parking brake, refer to the corresponding section.
Wheels and tyres
The inflation pressure of all tyres, including the spare wheel, must be checked on "cold” tyres.The pressures indicated on the tyre pressure label are valid for "cold" tyres. If you have driven for more than 10 minutes or more than 10 km (6 miles) at over 50 km/h (31 mph), add 0.3 bar (30 kPa) to the values indicated on the label.
WARNI NG
Under-inflation increases fuel consumption. Non-compliant tyre pressure causes premature wear on tyres and has an adverse effect on the vehicle's road holding - risk of an accident!
Driving with worn or damaged tyres reduces the braking and road holding performance of the vehicle. It is recommended to regularly check the condition of the tyres (tread and sidewalls) and wheel rims as well as the presence of the valves.When the wear indicators no longer appear set back from the tread, the depth of the grooves is less than 1.6 mm; it is imperative to replace the tyres.Using different size wheels and tyres from those specified can affect the lifetime of tyres, wheel rotation, ground clearance, the speedometer reading and have an adverse effect on road holding.Fitting different tyres on the front and rear axles
can cause the ESC to mistime.
AdBlue® (Diesel engines)
To respect the environment and ensure compliance with the Euro 6 standard, without adversely affecting the performance or fuel consumption of its Diesel engines, TOYOTA has taken the decision to equip its vehicles with a system that associates SCR (Selective Catalytic Reduction) with a Diesel particle filter (DPF) for the treatment of exhaust gases.
SCR System SCR
Using a liquid called AdBlue® that contains urea, a catalytic converter turns up to 85% of the nitrogen oxides (NOx) into nitrogen and water, which are harmless to health and the environment.The AdBlue® is contained in a special tank holding about 17 litres. Its capacity allows a driving range of approximately 6,000 km (3,700 miles), (which may vary considerably depending on your driving style and the vehicle). An alert system
is automatically triggered when the remaining range reaches 2,400 km (1,500 miles), i.e. once the reserve level has been reached.Several alerts are triggered successively during the remaining 2,400 km (1,500 miles) before the tank is empty and the vehicle blocked.