2021 TOYOTA PROACE CITY VERSO EV maintenance
[x] Cancel search: maintenancePage 192 of 320
192
Compatibility of fuels
Petrol fuels conforming to the EN228 standard containing up to 5% and 10% ethanol respectively.
Diesel fuels conforming to the EN590, EN16734 and EN16709 standards and containing up to 7%, 10%, 20% and 30% fatty acid methyl ester respectively. The use of B20 or B30 fuels, even occasionally, imposes special maintenance conditions referred to as "Arduous conditions".
Paraffinic Diesel fuel conforming to the EN15940 standard.
WARNI NG
The use of any other type of (bio) fuel (vegetable or animal oils, pure or diluted, domestic fuel, etc.) is strictly prohibited (risk of damage to the engine and fuel system).
NOTIC E
The only fuel additives authorised for use are those that meet the B715001 (petrol) or B715000 (Diesel) standards.
Diesel at low temperature
At temperatures below 0 °C (+32 °F), the formation of paraffins in summer-type Diesel fuels could prevent the engine from operating correctly. In these temperature conditions, use winter-type Diesel fuel and keep the fuel tank more than 50 % full.At temperatures below -15 °C (+5 °F) to avoid problems starting, it is best to park the vehicle under shelter (heated garage).
Travelling abroad
Certain fuels could damage your vehicle’s engine.In certain countries, the use of a particular fuel may be required (specific octane rating, specific trade name, etc.) to ensure correct operation of the engine.For all additional information, consult a dealer.
Refuelling
Fuel tank capacity: approximately 61 litres (petrol) or 50 litres (Diesel).Reserve level: approximately 6 litres.
Low fuel level
/2
1 1When the low fuel level is reached, this warning lamp comes on on the instrument panel, accompanied by an onscreen message and an audible signal. When it first comes on, about 6 litres of fuel remain in the tank.Until sufficient fuel is added, this warning lamp appears every time the ignition is switched on, accompanied by an onscreen message and an audible signal. When driving, this message and audible signal are repeated with increasing frequency as the fuel level drops towards 0.You must refuel as soon as possible to avoid running out of fuel.For more information on Running out of fuel (Diesel), refer to the corresponding section.
N
OTIC E
A small arrow by the warning lamp indicates which side of the vehicle the fuel filler flap is located on.
Page 195 of 320
195
Practical information
7
Charging system
(Electric)
400 V electrical system
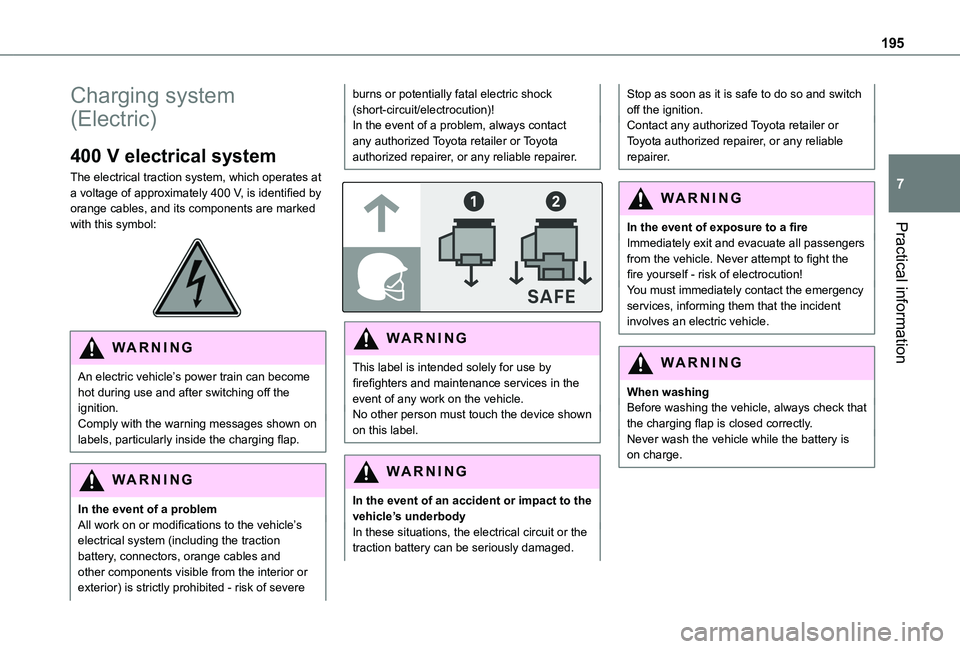
The electrical traction system, which operates at a voltage of approximately 400 V, is identified by orange cables, and its components are marked with this symbol:
WARNI NG
An electric vehicle’s power train can become hot during use and after switching off the ignition.Comply with the warning messages shown on labels, particularly inside the charging flap.
WARNI NG
In the event of a problemAll work on or modifications to the vehicle’s electrical system (including the traction
battery, connectors, orange cables and other components visible from the interior or exterior) is strictly prohibited - risk of severe
burns or potentially fatal electric shock (short-circuit/electrocution)!In the event of a problem, always contact any authorized Toyota retailer or Toyota authorized repairer, or any reliable repairer.
WARNI NG
This label is intended solely for use by firefighters and maintenance services in the event of any work on the vehicle.No other person must touch the device shown on this label.
WARNI NG
In the event of an accident or impact to the vehicle’s underbodyIn these situations, the electrical circuit or the traction battery can be seriously damaged.
Stop as soon as it is safe to do so and switch off the ignition.Contact any authorized Toyota retailer or Toyota authorized repairer, or any reliable repairer.
WARNI NG
In the event of exposure to a fireImmediately exit and evacuate all passengers from the vehicle. Never attempt to fight the fire yourself - risk of electrocution!You must immediately contact the emergency services, informing them that the incident involves an electric vehicle.
WARNI NG
When washingBefore washing the vehicle, always check that the charging flap is closed correctly.Never wash the vehicle while the battery is
on charge.
Page 212 of 320
212
► Unclip the stay from its housing and place it in the support slot to hold the bonnet open.
Closing
► Hold the bonnet and pull out the stay from the support slot.► Clip the stay in its housing.► Lower the bonnet and release it near the end of its travel.► Pull on the bonnet to check that it is locked correctly.
WARNI NG
Because of the presence of electrical equipment under the bonnet, it is recommended that exposure to water (rain, washing, etc.) be limited.
Engine compartment
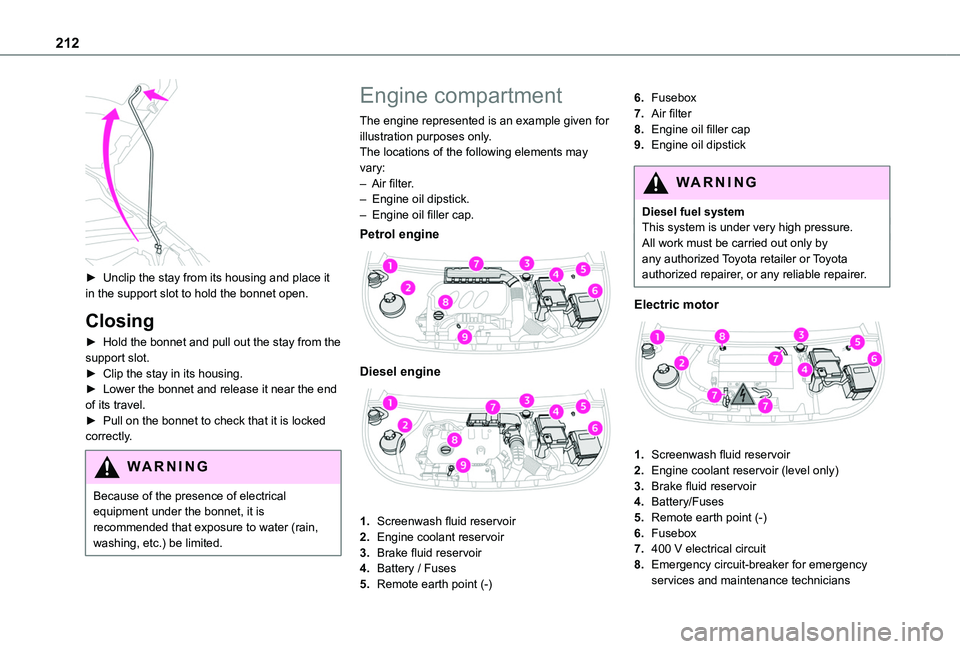
The engine represented is an example given for illustration purposes only.The locations of the following elements may vary:– Air filter.– Engine oil dipstick.– Engine oil filler cap.
Petrol engine
Diesel engine
1.Screenwash fluid reservoir
2.Engine coolant reservoir
3.Brake fluid reservoir
4.Battery / Fuses
5.Remote earth point (-)
6.Fusebox
7.Air filter
8.Engine oil filler cap
9.Engine oil dipstick
WARNI NG
Diesel fuel systemThis system is under very high pressure.All work must be carried out only by any authorized Toyota retailer or Toyota authorized repairer, or any reliable repairer.
Electric motor
1.Screenwash fluid reservoir
2.Engine coolant reservoir (level only)
3.Brake fluid reservoir
4.Battery/Fuses
5.Remote earth point (-)
6.Fusebox
7.400 V electrical circuit
8.Emergency circuit-breaker for emergency services and maintenance technicians
Page 215 of 320
215
Practical information
7
be used which is appropriate for the prevailing conditions, in order to protect the elements of the system (pump, tank, ducts, jets, etc.).
WARNI NG
Filling with pure water is prohibited under all circumstances (risk of freezing, limestone deposits, etc.).
Diesel fuel additive (Diesel
with particle filter)
/ On reaching the minimum level in the particle filter additive tank, this warning lamp comes on fixed, accompanied by an audible signal and a warning message.
Topping up
The topping up of this additive must be carried out quickly.Go to any authorized Toyota retailer or Toyota authorized repairer, or any reliable repairer.
AdBlue® (Diesel engines)
An alert is triggered when the reserve level is reached.For more information on the Indicators and in particular the AdBlue® range indicators, refer to the corresponding section.To avoid the vehicle being immobilised in accordance with regulations, you must top up the AdBlue® tank.
For more information on AdBlue®, and in particular the supply of AdBlue®, refer to the corresponding section.
Checks
Unless otherwise indicated, check these components in accordance with the manufacturer's service schedule and according to your engine.Otherwise, have them checked by any authorized Toyota retailer or Toyota authorized repairer, or any reliable repairer.
WARNI NG
Only use products recommended by TOYOTA or products of equivalent quality and specification.In order to optimise the operation of components as important as those in the braking system, TOYOTA selects and offers very specific products.
12 V battery
The battery does not require any maintenance.However, check regularly that the terminals are correctly tightened (versions without quick release terminals) and that the connections are clean.
NOTIC E
For more information on the precautions to take before any work on the 12 V battery, refer to the corresponding section.
WARNI NG
Versions equipped with Stop & Start are fitted with a 12 V lead-acid battery of specific technology and specification.Its replacement should be carried out only by a TOYOTA dealer or a qualified workshop.
Passenger compartment
filter
Depending on the environment and the use of the vehicle (e.g. dusty atmosphere, city driving), change it twice as often, if necessary.
NOTIC E
A clogged passenger compartment filter can adversely affect air conditioning system performance and generate undesirable odours.
Page 216 of 320
216
Air filter
Depending on the environment and the use of the vehicle (e.g. dusty atmosphere, city driving), change it twice as often, if necessary.
Oil filter
Change the oil filter each time the engine oil is changed.
Particle filter (Diesel)
The start of clogging of the particle filter is indicated by the temporary lighting of this warning lamp, accompanied by an alert message.As soon as the traffic conditions permit, regenerate the filter by driving at a speed of at least 37 mph (60 km/h), with an engine speed above 2,500 rpm, for about 15 minutes (until the warning lamp goes off).If it is not possible to reach 37 mph (60 km/h), leave the engine running at idle for about
15 minutes, then drive with an engine speed above 2,500 rpm for 15 minutes.
NOTIC E
Do not switch off the engine until the filter is fully regenerated; repeated intervals can degrade the engine oil prematurely.Regenerating the filter while the vehicle is stationary is not recommended.
NOTIC E
If the warning lamp stays on, this indicates a low Diesel additive level.For more information on Checking levels, refer to the corresponding section.
NOTIC E
Following prolonged operation of the vehicle at very low speed or at idle, you may, in exceptional circumstances, notice water vapour coming from the exhaust while accelerating. These emissions have no impact on the vehicle’s behaviour and the environment.
NOTIC E
New vehicleDuring the first few particle filter regeneration operations, you may notice a "burning" smell. This is perfectly normal.
Manual gearbox
The gearbox does not require any maintenance (no oil change).
Automatic gearbox
The gearbox does not require any maintenance (no oil change).
Drive selector
The drive selector does not require any maintenance.
Brake pads
Brake wear depends on the style of driving, particularly in the case of vehicles used in town, over short distances. It may be necessary to have the condition of the brakes checked, even between vehicle services.Unless there is a leak in the circuit, a drop in the brake fluid level indicates that the brake pads are worn.
NOTIC E
After washing the vehicle, moisture, or in wintry conditions, ice can form on the brake discs and pads: braking efficiency may be reduced. Gently dab the brakes to dry and defrost them.
Page 221 of 320
221
Practical information
7
With drive selector and
electric parking brake /
Release procedure
► With the vehicle stationary and the engine running, depress the brake pedal and select mode N.Within 5 seconds:► Depress and hold the brake pedal, then observe this order: switch off the ignition (if start with START/STOP, press and hold the button for 2 seconds) and move the push selector forwards or backwards.► Release the brake pedal, then switch on the ignition again.► Place your foot on the brake and press the electric parking brake control to release it.► Release the brake pedal, then switch off the ignition.
NOTIC E
Keyless Entry and StartingYou must not depress the brake pedal while switching the ignition on again, then switching it off. If you do, the engine will start, requiring you to restart the procedure.
WARNI NG
A message is displayed on the instrument panel to confirm the unlocking of the wheels for 15 minutes.When the vehicle is free-wheeling, the audio system cannot be updated (message displayed on the instrument panel).
Reverting to normal operation
► While depressing the brake pedal, restart the engine, then set the gear selector to P.
Advice on care and
maintenance
General recommendations
Observe the following recommendations to avoid damaging the vehicle.
Exterior
WARNI NG
Never use a high-pressure jet wash in the engine compartment - risk of damaging the electrical components!Do not wash the vehicle in bright sunshine or extremely cold conditions.
NOTIC E
When washing the vehicle at an automatic roller-brush car wash, be sure to lock the doors and, depending on version, remove the electronic key.When using a pressure washer, hold the lance at least 30 cm from the vehicle (particularly when cleaning areas containing chipped paint, sensors or seals).Promptly clean up any stains containing chemicals liable to damage the vehicle's paint (including tree resin, bird droppings, insect secretions, pollen and tar).If justified by the environment, clean the vehicle frequently to remove salty deposits (in coastal areas), soot (in industrial areas) and mud/salts (in wet or cold areas). These substances can be highly corrosive.Contact any authorized Toyota retailer or Toyota authorized repairer, or any reliable repairer for advice on removing stubborn stains requiring special products (such as tar
or insect removers).Preferably, have paint touch-ups performed by any authorized Toyota retailer or Toyota authorized repairer, or any reliable repairer.
Page 224 of 320
224
WARNI NG
Storing the tools (vehicle with electric motor)
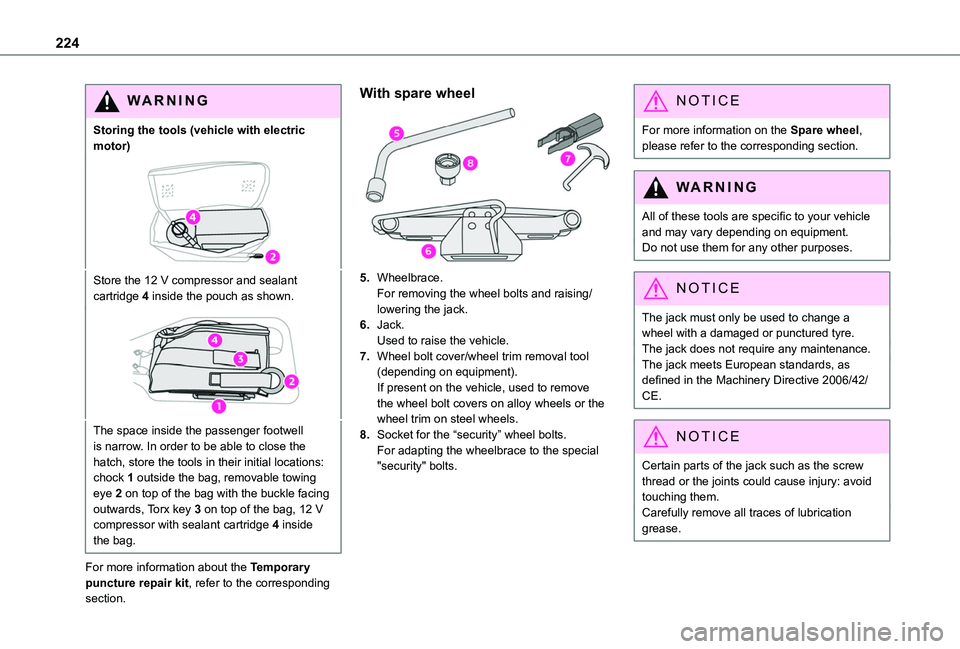
Store the 12 V compressor and sealant cartridge 4 inside the pouch as shown.
The space inside the passenger footwell is narrow. In order to be able to close the hatch, store the tools in their initial locations: chock 1 outside the bag, removable towing eye 2 on top of the bag with the buckle facing outwards, Torx key 3 on top of the bag, 12 V compressor with sealant cartridge 4 inside the bag.
For more information about the Temporary puncture repair kit, refer to the corresponding section.
With spare wheel
5.Wheelbrace.For removing the wheel bolts and raising/lowering the jack.
6.Jack.Used to raise the vehicle.
7.Wheel bolt cover/wheel trim removal tool (depending on equipment).If present on the vehicle, used to remove the wheel bolt covers on alloy wheels or the wheel trim on steel wheels.
8.Socket for the “security” wheel bolts.For adapting the wheelbrace to the special "security" bolts.
NOTIC E
For more information on the Spare wheel, please refer to the corresponding section.
WARNI NG
All of these tools are specific to your vehicle and may vary depending on equipment.Do not use them for any other purposes.
NOTIC E
The jack must only be used to change a wheel with a damaged or punctured tyre.The jack does not require any maintenance.The jack meets European standards, as defined in the Machinery Directive 2006/42/CE.
NOTIC E
Certain parts of the jack such as the screw thread or the joints could cause injury: avoid touching them.Carefully remove all traces of lubrication grease.
Page 306 of 320
306
A
ABS 103Accelerated charging unit (Wallbox) 195Accessories 99Access to the 3rd row 61Access to the spare wheel 225Active Safety Brake 167–170AdBlue® 215AdBlue® tank 217Additive, Diesel 213–214Adjusting headlamps 95Adjusting head restraints 62Adjusting seat 53, 61Adjusting the air distribution 81Adjusting the air flow 81Adjusting the date 275, 300Adjusting the height and reach of the steering wheel 55Adjusting the lumbar support 53Adjusting the temperature 81Adjusting the time 261, 274, 300
Advice on care and maintenance 193, 219Advice on driving 6, 127–128Airbags 11 2, 11 4–11 5, 11 7Airbags, curtain 11 3–11 5Airbags, front 11 2–11 4, 11 8Airbags, lateral 11 3–11 4Air conditioning 78, 82, 85Air conditioning, digital 83Air conditioning, dual-zone automatic 81
Air conditioning, electronic (with display screen) 85Air conditioning, manual 79–80Air intake 81Air vents 78Alarm 47–48Alarm, volumetric 47Android Auto connection 271, 289Anti-lock braking system (ABS) 103Antitheft / Immobiliser 33Apple CarPlay connection 270, 289Applications 290Area, loading 33–34, 43, 71Armrest 53Armrest, front 63Assistance call 100Assistance, emergency braking 169Audible warning 102Audio streaming (Bluetooth) 257–258, 269, 294
B
Battery 235Battery, 12 V 204, 213, 235–238Battery, ancillaries 235Battery, charging 237Battery, remote control 40–41, 87Bench seat, one-piece, fixed 61Blind spot sensors 174
Bluetooth (hands-free) 259, 271–272, 295–296Bluetooth (telephone) 259–260, 271–272, 295–296Bodywork 220Bonnet 209–210Boot lid 37–38, 40Bottle holder 63Brake discs 214–215Brake lamps 233Brakes 214–215Braking 146Braking assistance system 103Braking, automatic emergency 167–170Braking, dynamic emergency 135–137Brightness 260, 273Bulbs 229Bulbs (changing) 228–229Bulbs (changing, type) 229
C
Cable, audio 294Cable, Jack 294Capacity, fuel tank 190–192Cap, fuel filler 191–192Care of the bodywork 220CD 257CD, MP3 257Central locking 31, 37–38Changing a bulb 228–229