2021 TOYOTA PROACE CITY steering lock
[x] Cancel search: steering lockPage 2 of 272
2
■Overview
Labels 4
■Eco-driving
Eco-coaching 8
1Instruments
Instrument Panel 9Warning and indicator lamps 11Indicators 16Trip computer 21Setting the date and time 22
2Access
Electronic key with remote control function and built-in key, 23Back-up procedures 30Central locking / unlocking 33Doors 35General recommendations for
the sliding side doors 36Rear roof flap 37Alarm 38Electric windows 40Tilting rear door windows 41
3Ease of use and comfort
General recommendations for the seats 42Front seats 42
Steering wheel adjustment 45
Mirrors 452-seat front bench seat 46Rear bench seat 48Interior fittings 49Extenso cabin 54Crew cab 56Heating and Ventilation 60Heating 61Manual air conditioning 61Dual-zone automatic air conditioning 62Front demisting - defrosting 64Rear screen and/or door mirrors demisting - defrosting 66Additional heating/ventilation system 66
4Lighting and visibility
Lighting control lever 70Direction indicators 71Automatic illumination of headlamps 71Daytime running lamps / Sidelamps 72Parking lamps 72Automatic headlamp dipping 73
Headlamp beam height adjustment 74Wiper control lever 75Changing a wiper blade 77Automatic wiping 77
5Safety
General safety recommendations 79Emergency or assistance call 80Hazard warning lamps 82
Horn 82Electronic stability control (ESC) 82Advanced Grip Control 85Hill Assist Descent Control 86Seat belts 87Airbags 90Child seats 93Deactivating the front passenger airbag 95Manual child lock 98Electric child lock 98
6Driving
Driving recommendations 99Starting/switching off the engine 101Manual parking brake 105Electric parking brake 105Hill start assist 1085-speed manual gearbox 1096-speed manual gearbox 109Automatic gearbox 11 0Gear efficiency indicator 11 4Stop & Start 11 4
Under-inflation detection 11 6Head-up display 11 8Driving and manoeuvring aids - General recommendations 11 9Speed Limit Recognition and Recommendation 121Speed limiter 124Cruise control - particular recommendations 126Programmable cruise control 127
Adaptive Cruise Control 129
Page 17 of 272
17
Instruments
1
NOTIC E
The distance indicated (in miles or kilometres) is calculated according to the distance covered and the time elapsed since the last service.The alert may be triggered close to a due date.
Resetting the service indicator
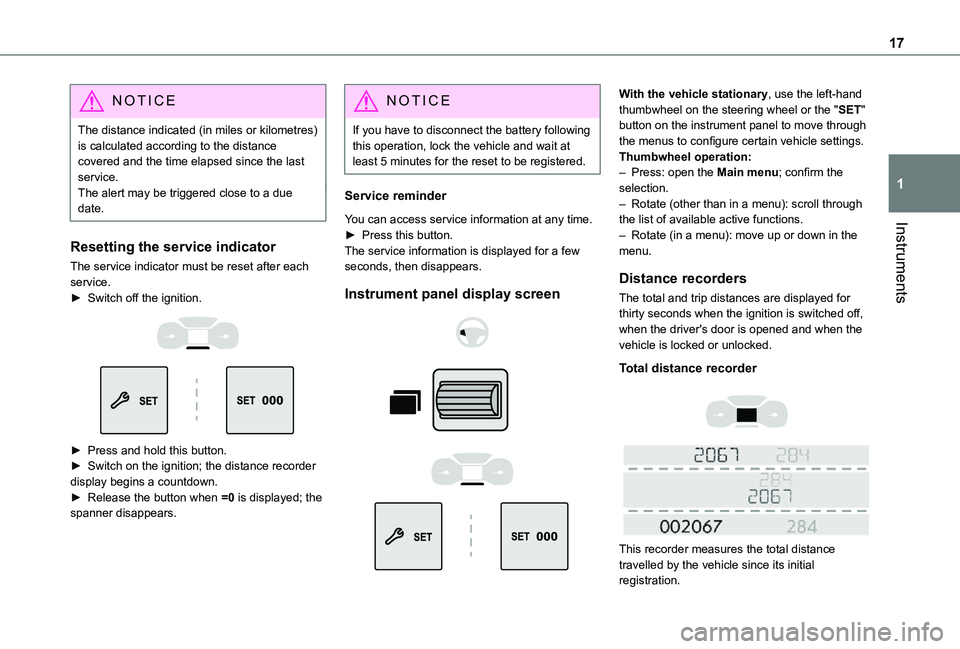
The service indicator must be reset after each service.► Switch off the ignition.
► Press and hold this button.► Switch on the ignition; the distance recorder display begins a countdown.► Release the button when =0 is displayed; the spanner disappears.
NOTIC E
If you have to disconnect the battery following this operation, lock the vehicle and wait at least 5 minutes for the reset to be registered.
Service reminder
You can access service information at any time.► Press this button.The service information is displayed for a few seconds, then disappears.
Instrument panel display screen
With the vehicle stationary, use the left-hand thumbwheel on the steering wheel or the "SET" button on the instrument panel to move through the menus to configure certain vehicle settings.Thumbwheel operation:– Press: open the Main menu; confirm the selection.– Rotate (other than in a menu): scroll through the list of available active functions.– Rotate (in a menu): move up or down in the menu.
Distance recorders
The total and trip distances are displayed for thirty seconds when the ignition is switched off, when the driver's door is opened and when the vehicle is locked or unlocked.
Total distance recorder
This recorder measures the total distance travelled by the vehicle since its initial registration.
Page 25 of 272
25
Access
2
inoperative. It would then be necessary to reset it.The remote control does not work when the key is in the ignition switch, even when the ignition is switched off.
WARNI NG
Anti-theft protectionDo not modify the electronic vehicle
immobiliser, as this might result in malfunctions.For vehicles with a key ignition switch, remember to remove the key and turn the steering wheel to engage the steering lock.
WARNI NG
Locking the vehicleDriving with the doors locked could make it more difficult for the emergency services to enter the vehicle in an emergency.As a safety precaution, remove the key from the ignition or take the electronic key with you when leaving the vehicle, even for a short time.
NOTIC E
Purchasing a second-hand vehicleHave the key codes memorised by a TOYOTA dealer, to ensure that the keys in your possession are the only ones able to start the vehicle.
WARNI NG
Accumulations (water, dust, grime, salt, etc.) on the inner surface of the door handle may affect detection.If cleaning the inner surface of the door handle using a cloth does not restore detection, contact a TOYOTA dealer or a qualified workshop.A sudden splash of water (stream of water, high pressure jet washer, etc.) may be identified by the system as the desire to open the vehicle.
Total or selective
unlocking
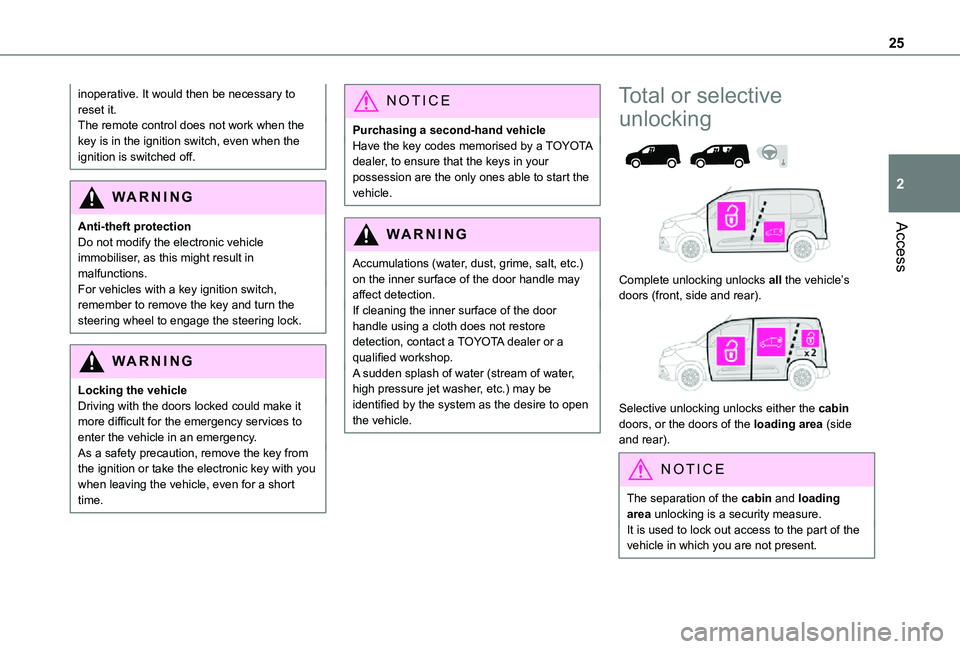
Complete unlocking unlocks all the vehicle’s doors (front, side and rear).
Selective unlocking unlocks either the cabin doors, or the doors of the loading area (side and rear).
NOTIC E
The separation of the cabin and loading area unlocking is a security measure.It is used to lock out access to the part of the vehicle in which you are not present.
Page 33 of 272
33
Access
2
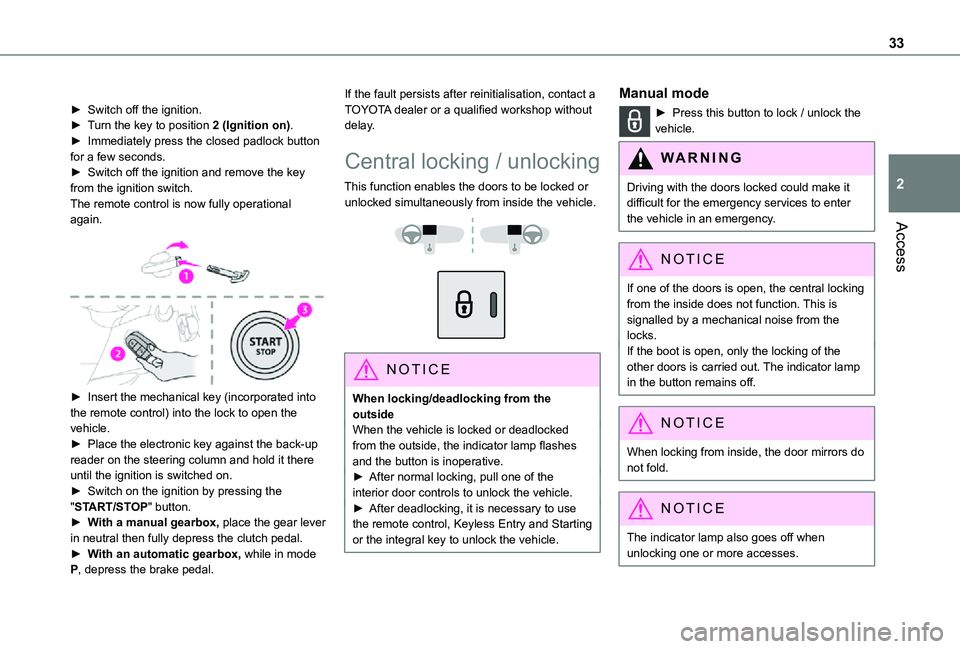
► Switch off the ignition.► Turn the key to position 2 (Ignition on).► Immediately press the closed padlock button for a few seconds.► Switch off the ignition and remove the key from the ignition switch.The remote control is now fully operational again.
► Insert the mechanical key (incorporated into the remote control) into the lock to open the vehicle.► Place the electronic key against the back-up
reader on the steering column and hold it there until the ignition is switched on.► Switch on the ignition by pressing the "START/STOP" button.► With a manual gearbox, place the gear lever in neutral then fully depress the clutch pedal.► With an automatic gearbox, while in mode P, depress the brake pedal.
If the fault persists after reinitialisation, contact a TOYOTA dealer or a qualified workshop without delay.
Central locking / unlocking
This function enables the doors to be locked or unlocked simultaneously from inside the vehicle.
NOTIC E
When locking/deadlocking from the outsideWhen the vehicle is locked or deadlocked from the outside, the indicator lamp flashes and the button is inoperative.► After normal locking, pull one of the interior door controls to unlock the vehicle.► After deadlocking, it is necessary to use the remote control, Keyless Entry and Starting or the integral key to unlock the vehicle.
Manual mode
► Press this button to lock / unlock the vehicle.
WARNI NG
Driving with the doors locked could make it difficult for the emergency services to enter the vehicle in an emergency.
NOTIC E
If one of the doors is open, the central locking from the inside does not function. This is signalled by a mechanical noise from the locks.If the boot is open, only the locking of the other doors is carried out. The indicator lamp in the button remains off.
NOTIC E
When locking from inside, the door mirrors do not fold.
NOTIC E
The indicator lamp also goes off when unlocking one or more accesses.
Page 42 of 272
42
General
recommendations for the
seats
WARNI NG
For safety reasons, seat adjustments must only be made when the vehicle is stationary.
WARNI NG
Folding or unfolding the seat backrests must only be done with the vehicle stationary.
WARNI NG
Before moving the seat backwards, ensure that there is no person or object that might prevent the full travel of the seat.There is a risk of trapping or pinching
passengers if present in the rear seats or of jamming the seat if large objects are placed on the floor behind the seat.
WARNI NG
Do not place hard or heavy objects on the backrests forming a table. They could become
dangerous projectiles in the event of sudden braking or a collision.– Do not remove a head restraint without stowing it; secure it to a support inside the vehicle.– Check that the seat belts remain accessible to the passenger and easy to fasten.– Passengers must never take their seat without adjusting and fastening their seat belt.
WARNI NG
Before carrying out the manoeuvres, check that nothing and no one is obstructing the moving elements and their locking.To avoid sudden folding, take care to hold the backrest and support it until it is horizontal.Never put your hand underneath the seat cushion to guide the seat downwards or upwards, you could get your fingers trapped. Place your hand on the grip/strap (depending on equipment) at the top of the seat cushion.
WARNI NG
Please note: an incorrectly latched backrest compromises the safety of passengers in the event of sudden braking or an impact.The contents of the boot may be thrown forward - risk of severe injury!
Front seats
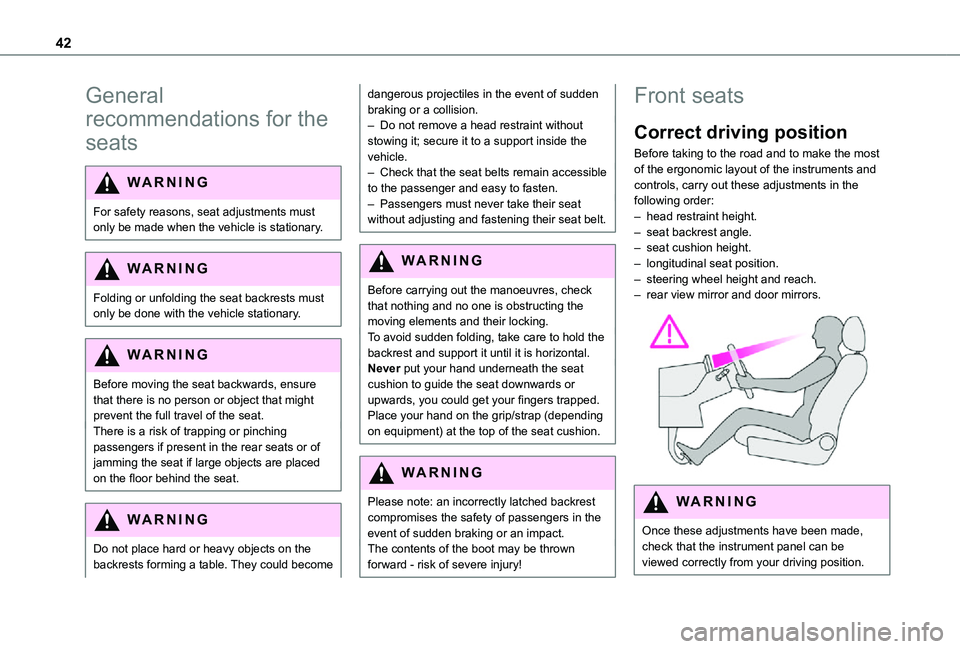
Correct driving position
Before taking to the road and to make the most of the ergonomic layout of the instruments and controls, carry out these adjustments in the following order:– head restraint height.– seat backrest angle.– seat cushion height.– longitudinal seat position.– steering wheel height and reach.– rear view mirror and door mirrors.
WARNI NG
Once these adjustments have been made,
check that the instrument panel can be viewed correctly from your driving position.
Page 45 of 272
45
Ease of use and comfort
3
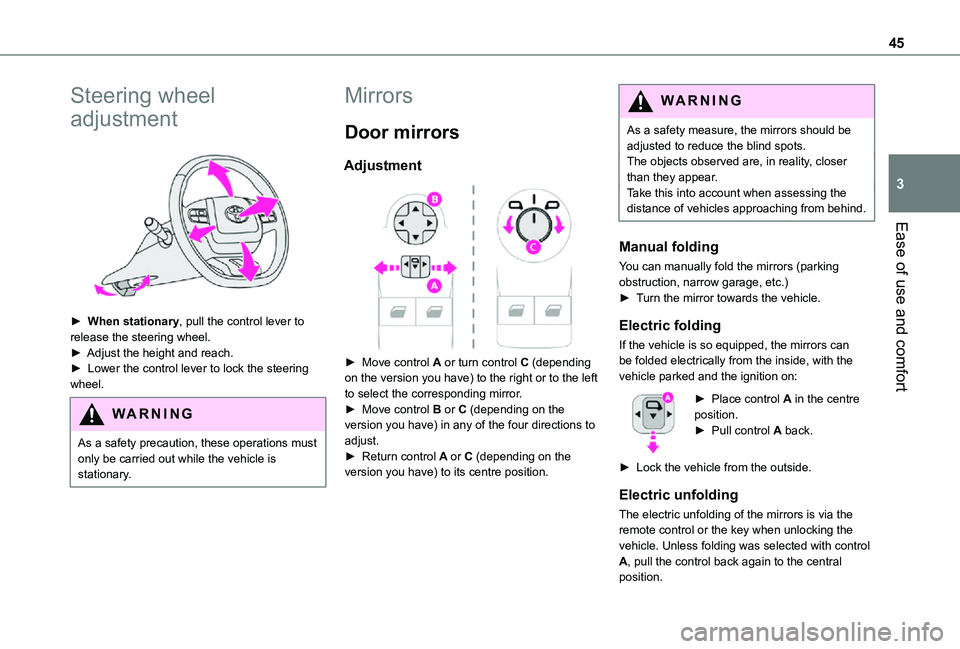
Steering wheel
adjustment
► When stationary, pull the control lever to release the steering wheel.► Adjust the height and reach.► Lower the control lever to lock the steering wheel.
WARNI NG
As a safety precaution, these operations must only be carried out while the vehicle is stationary.
Mirrors
Door mirrors
Adjustment
► Move control A or turn control C (depending on the version you have) to the right or to the left to select the corresponding mirror.► Move control B or C (depending on the version you have) in any of the four directions to adjust.
► Return control A or C (depending on the version you have) to its centre position.
WARNI NG
As a safety measure, the mirrors should be adjusted to reduce the blind spots.The objects observed are, in reality, closer than they appear.Take this into account when assessing the distance of vehicles approaching from behind.
Manual folding
You can manually fold the mirrors (parking obstruction, narrow garage, etc.)► Turn the mirror towards the vehicle.
Electric folding
If the vehicle is so equipped, the mirrors can be folded electrically from the inside, with the vehicle parked and the ignition on:
► Place control A in the centre position.► Pull control A back.
► Lock the vehicle from the outside.
Electric unfolding
The electric unfolding of the mirrors is via the remote control or the key when unlocking the vehicle. Unless folding was selected with control A, pull the control back again to the central position.
Page 82 of 272
82
NOTIC E
Access to dataYou have the right to access the data and, if necessary, submit a request to rectify, erase or restrict the processing of any personal information not processed in accordance with the provisions of Regulation 2016/679 (GDPR). Third parties to which data has been communicated shall be notified of any rectification, erasure or restriction carried out in accordance with the aforementioned Directive, unless doing so would be impossible or require a disproportionate effort. You also have the right to lodge a complaint with the relevant data protection authority.
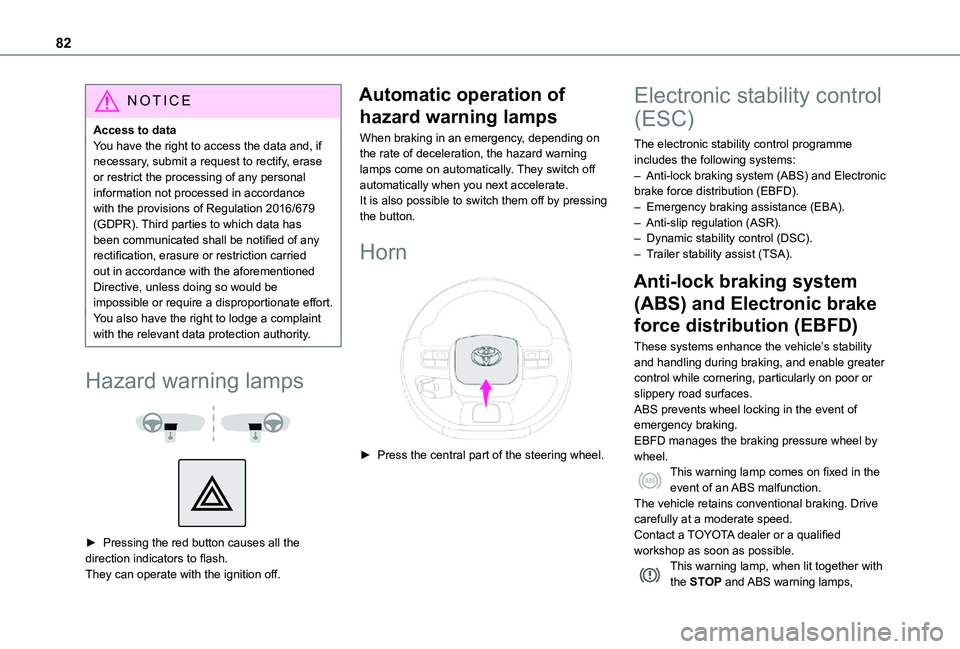
Hazard warning lamps
► Pressing the red button causes all the direction indicators to flash.They can operate with the ignition off.
Automatic operation of
hazard warning lamps
When braking in an emergency, depending on the rate of deceleration, the hazard warning lamps come on automatically. They switch off automatically when you next accelerate.It is also possible to switch them off by pressing the button.
Horn
► Press the central part of the steering wheel.
Electronic stability control
(ESC)
The electronic stability control programme includes the following systems:– Anti-lock braking system (ABS) and Electronic brake force distribution (EBFD).– Emergency braking assistance (EBA).– Anti-slip regulation (ASR).– Dynamic stability control (DSC).– Trailer stability assist (TSA).
Anti-lock braking system
(ABS) and Electronic brake
force distribution (EBFD)
These systems enhance the vehicle’s stability and handling during braking, and enable greater control while cornering, particularly on poor or slippery road surfaces.ABS prevents wheel locking in the event of emergency braking.EBFD manages the braking pressure wheel by
wheel.This warning lamp comes on fixed in the event of an ABS malfunction.The vehicle retains conventional braking. Drive carefully at a moderate speed.Contact a TOYOTA dealer or a qualified workshop as soon as possible.This warning lamp, when lit together with the STOP and ABS warning lamps,
Page 101 of 272
101
Driving
6
Anti-theft protection
Electronic immobiliser
The remote control contains an electronic chip which has a special code. When the ignition is switched on, this code must be recognised in order for starting to be possible.A few seconds after switching off the ignition, this system locks the engine control system, therefore preventing the engine from being started in the event of a break-in.In the event of a fault, you are informed by illumination of this warning lamp, an audible signal and a message on the screen.The vehicle will not start; contact a TOYOTA dealer as soon as possible.
Starting/switching off the
engine
Starting
The parking brake must be applied.
► With a manual gearbox, shift the gear lever into neutral, press the clutch pedal to the floor and keep the pedal down until the engine runs.► With an automatic gearbox, place the selector in position P then depress the brake pedal.
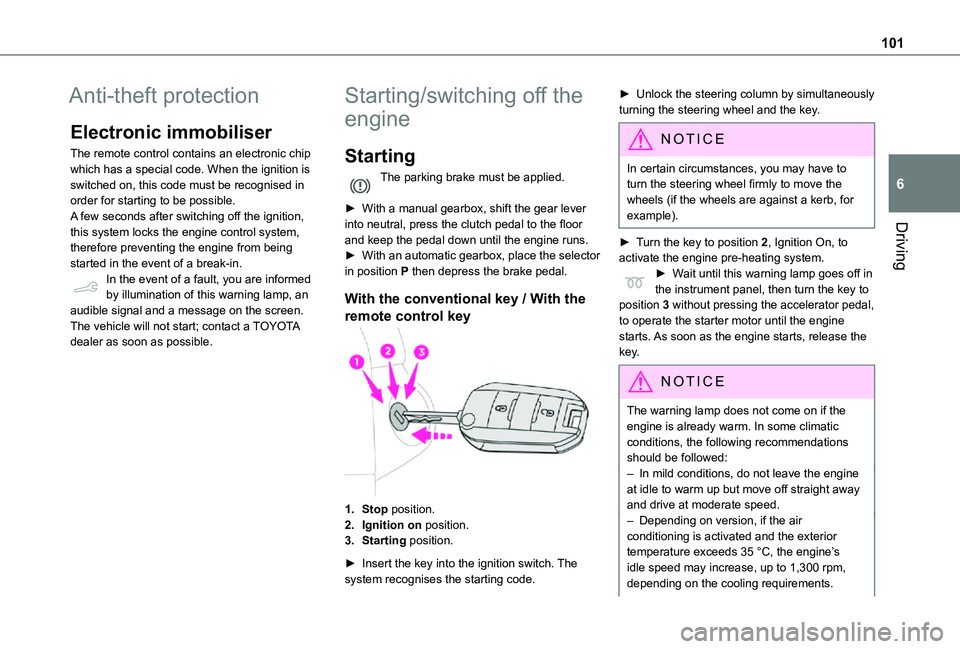
With the conventional key / With the
remote control key
1.Stop position.
2.Ignition on position.
3.Starting position.
► Insert the key into the ignition switch. The system recognises the starting code.
► Unlock the steering column by simultaneously turning the steering wheel and the key.
NOTIC E
In certain circumstances, you may have to turn the steering wheel firmly to move the wheels (if the wheels are against a kerb, for example).
► Turn the key to position 2, Ignition On, to
activate the engine pre-heating system.► Wait until this warning lamp goes off in the instrument panel, then turn the key to position 3 without pressing the accelerator pedal, to operate the starter motor until the engine starts. As soon as the engine starts, release the key.
NOTIC E
The warning lamp does not come on if the engine is already warm. In some climatic conditions, the following recommendations should be followed:– In mild conditions, do not leave the engine at idle to warm up but move off straight away and drive at moderate speed.– Depending on version, if the air conditioning is activated and the exterior
temperature exceeds 35 °C, the engine’s idle speed may increase, up to 1,300 rpm, depending on the cooling requirements.