2021 TOYOTA 4RUNNER ignition
[x] Cancel search: ignitionPage 115 of 592

1153-1. Key information
3
Operation of each component
4RUNNER (U)
The following functions can be set or canceled:
For instructions on customizing, refer to P. 545.
■
Setting and cance ling the functions
To switch between setting and canceling, follow the procedure
below: Vehicles without a smart key system: Close all the doors and tu rn
the engine switch to the “ON” position. (Perform step 2 within 20
seconds.)
Vehicles with a smart key system : Close all the doors and turn
the engine switch to IGNITION O N mode. (Perform step 2 within
20 seconds.)
Automatic door locking and unlocking systems
FunctionOperation
Speed linked door locking function
All doors are automatically locked
when vehicle speed is approxi-
mately 12 mph (20 km/h) or higher.
Shift position linked door locking
functionAll doors are automatically locked
when shifting the shift lever to posi-
tion other than P.
Shift position linked door unlocking
functionAll doors are automatically unlocked
when shifting the shift lever to P.
Driver's door linked door unlocking
function
(
vehicles without a smart key sys-
tem
)
All doors are automatically unlocked
when driver's door is opened within
10 seconds after turning the engine
switch to “ACC” or “LOCK”.
Driver's door linked door unlocking
function
(vehicles with a smart key system)All doors are automatically unlocked
when driver's door is opened within
10 seconds after turning the engine
switch off.
1
Page 149 of 592

1493-3. Adjusting the seats
3
Operation of each component
4RUNNER (U)
Your preferred driving position (the position of the driver’s seat) can
be recorded and recalled by pressing a button.
Two different driving positions can be recorded into memory.
■Recording procedure
Check that the shift lever is in P.
Turn the engine switch to IGNITION ON mode.
Adjust the driver’s seat t o the desired positions.
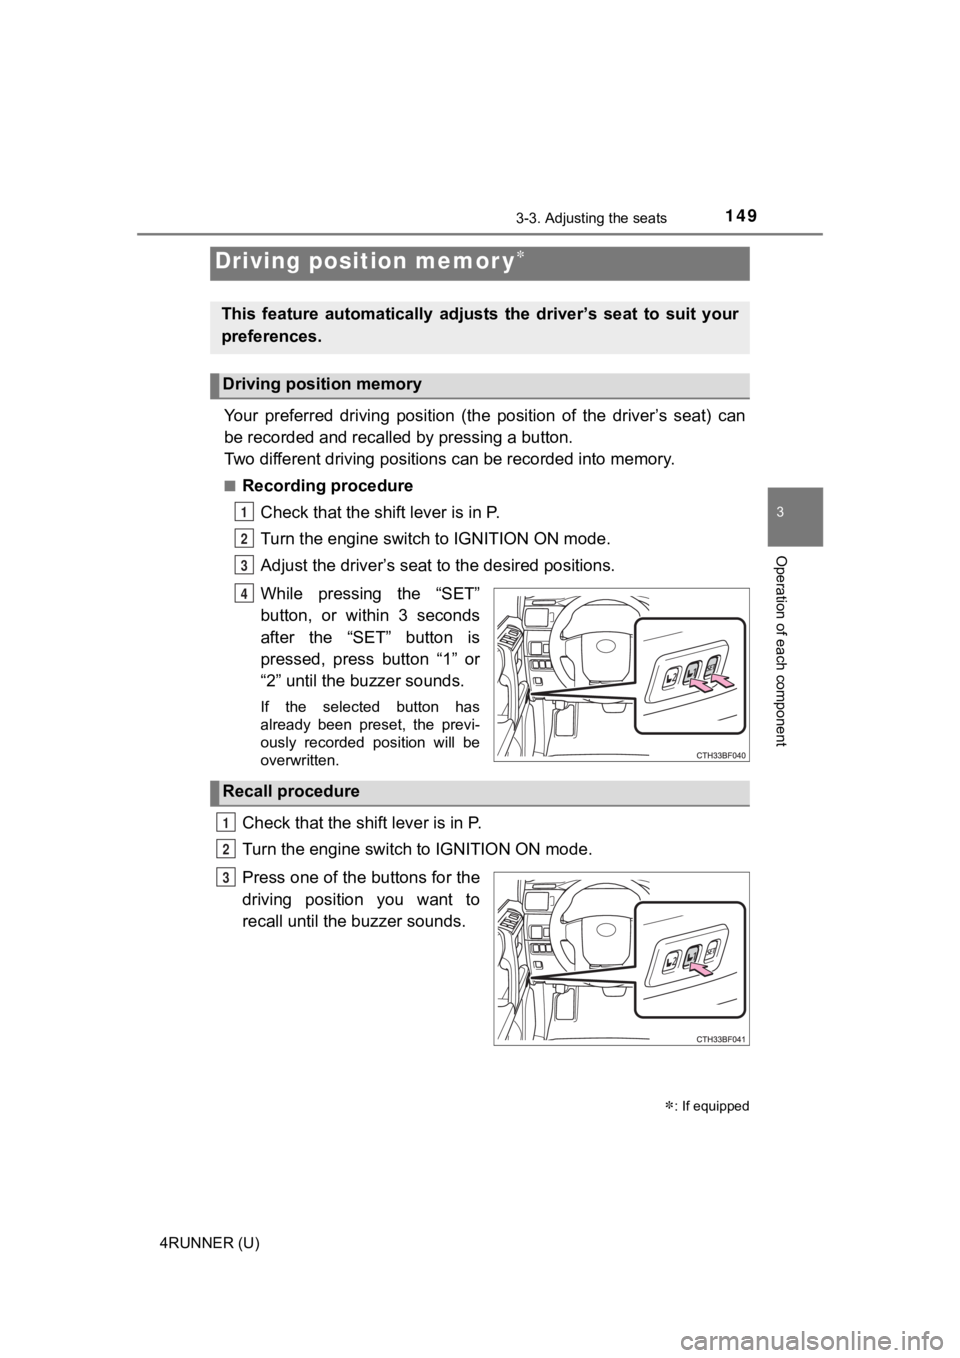
While pressing the “SET”
button, or within 3 seconds
after the “SET” button is
pressed, press button “1” or
“2” until the buzzer sounds.
If the selected button has
already been preset, the previ-
ously recorded position will be
overwritten.
Check that the shift lever is in P.
Turn the engine switch to IGNITION ON mode.
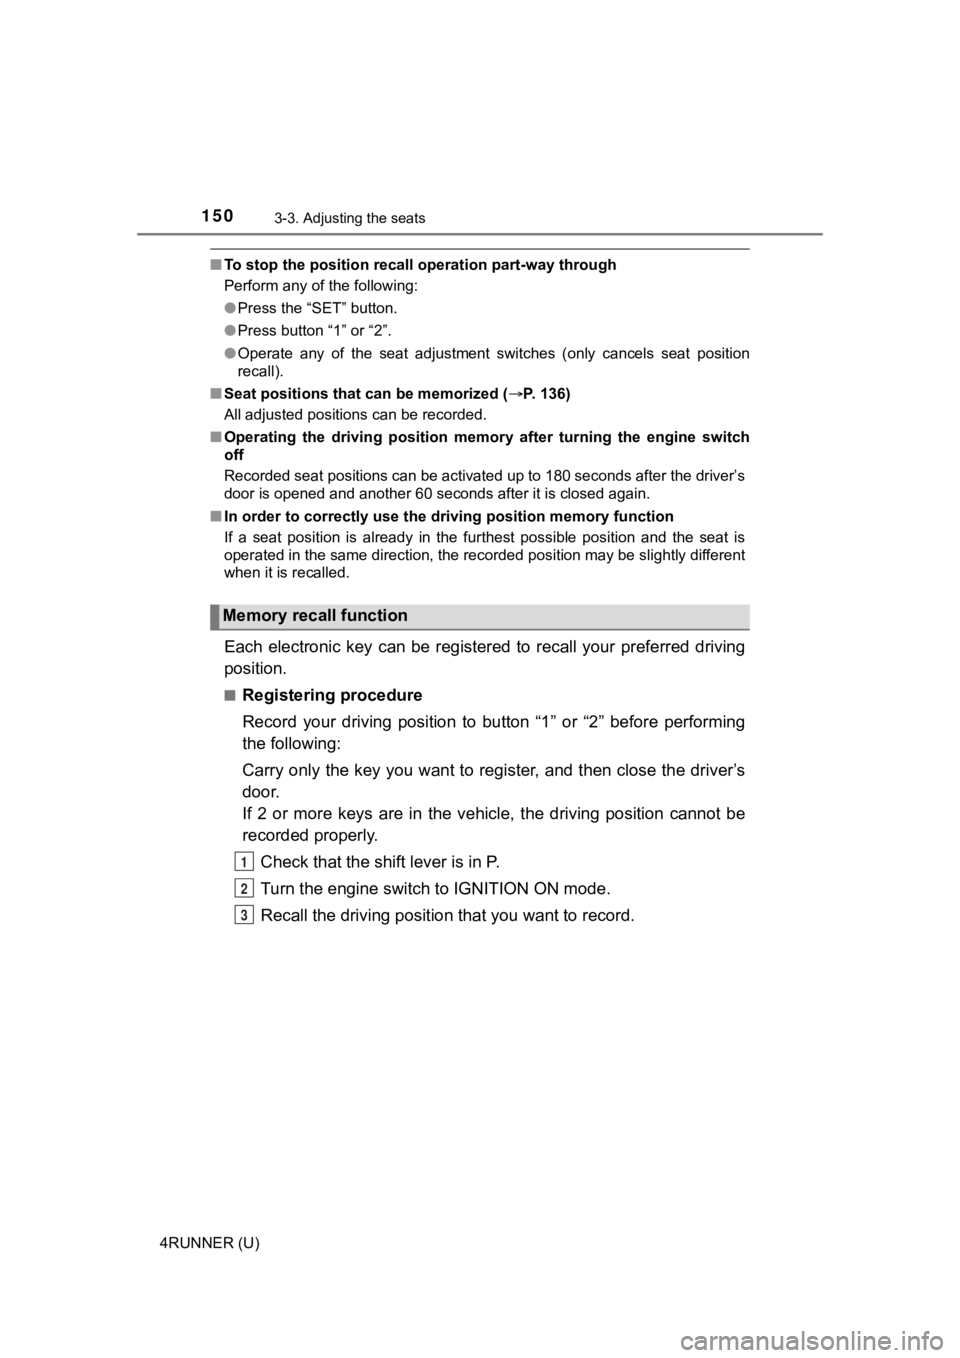
Press one of the buttons for the
driving position you want to
recall until the buzzer sounds.
Driving position memor y
: If equipped
This feature automatically adjusts the driver’s seat to suit yo ur
preferences.
Driving position memory
1
2
3
4
Recall procedure
1
2
3
Page 150 of 592

1503-3. Adjusting the seats
4RUNNER (U)
■To stop the position recall operation part-way through
Perform any of the following:
●Press the “SET” button.
● Press button “1” or “2”.
● Operate any of the seat adjustment switches (only cancels seat position
recall).
■ Seat positions that can be memorized ( P. 136)
All adjusted positions can be recorded.
■ Operating the driving position m emory after turning the engine switch
off
Recorded seat positions can be activated up to 180 seconds after the driver’s
door is opened and another 60 seconds after it is closed again.
■ In order to correctly use the dr iving position memory function
If a seat position is already in the furthest possible position and the seat is
operated in the same direction, the recorded position may be sl ightly different
when it is recalled.
Each electronic key can be registered to recall your preferred driving
position.
■Registering procedure
Record your driving position to button “1” or “2” before perfor ming
the following:
Carry only the key you want to register, and then close the dri ver’s
door.
If 2 or more keys are in the vehicle, the driving position cann ot be
recorded properly.
Check that the shift lever is in P.
Turn the engine switch to IGNITION ON mode.
Recall the driving position that you want to record.
Memory recall function
1
2
3
Page 151 of 592

1513-3. Adjusting the seats
3
Operation of each component
4RUNNER (U)
While pressing the recalled
button, press and hold the
door lock switch (either lock
or unlock) until the buzzer
sounds.
If the button could not be regis-
tered, the buzzer sounds contin-
uously for approximately 3
seconds.
■
Recall procedure
Make sure that the doors are locked before recalling the drivin g
position. Carry the electronic k ey that has been registered to the
driving position, and then unlock and open the driver’s door us ing
the smart system or wi reless remote control.
The driving position will move to the recorded position.
If the driving position is in a position that has already been recorded, the
seat will not move.
■
Cancelation procedure
Carry only the key you want to cancel and then close the driver ’s
door.
If 2 or more keys are in the vehicle, the driving position cann ot be
canceled properly.
Turn the engine switch to IGNITION ON mode.
While pressing the “SET” button, press and hold the door lock
switch (either lock or unlock) until the buzzer sounds twice.
If the button could not be canceled, the buzzer sounds continuo usly for
approximately 3 seconds.
■ Recalling the driving position u sing the memory recall function
● Different driving positions can be registered for each electronic key. There-
fore, the driving position that is recalled may be different de pending on the
key being carried.
● If a door other than the driver’s door is unlocked with the sma rt system, the
driving position cannot be recalled. In this case, press the dr iving position
button which has been set.
■ Customization
The unlock door settings of the memory recall function can be customized.
(Customizable features: P. 545)
4
1
2
Page 158 of 592

1583-4. Adjusting the steering wheel and mirrors
4RUNNER (U)
The height of the rear view mirror can be adjusted to suit your driving
posture.
Adjust the height of the rear view
mirror by moving it up and down.
Responding to the level of brightness of the headlights of vehi cles
behind, the reflected light is automatically reduced.
Changing automatic anti-glare
function mode
ON/OFF
When the automatic anti-glare
function is in on mode, the indica-
tor illuminates.
Vehicles without a smart key sys-
tem:
The function will set to on mode
each time the engine switch is
turned to the “ON” position.
Pressing the button turns the func-
tion to off mode. (The indicator also
turns off.)
Vehicles with a smart key system:
The function will set to on mode
each time the engine switch is
turned to IGNITION ON mode.
Pressing the button turns the func-
tion to off mode. (The indicator also
turns off.)
Inside rear view mirror
The rear view mirror’s position ca n be adjusted to enable suffi-
cient confirmation of the rear view.
Adjusting the height of rear view mirror
Anti-glare function
Indicator
Page 161 of 592

1613-4. Adjusting the steering wheel and mirrors
3
Operation of each component
4RUNNER (U)
■Mirror angle can be adjusted when
Vehicles without a smart key system
The engine switch is in the “ACC” or “ON” position.
Vehicles with a smart key system
The engine switch is in ACCESSORY or IGNITION ON mode.
■ When the mirrors are fogged up
The outside rear view mirrors can be cleared using the mirror d efoggers. Turn
on the rear window defogger to turn on the outside rear view mi rror defog-
gers. ( P. 342, 349)
WARNING
■Important points while driving
Observe the following precautions while driving.
Failure to do so may result in loss of control of the vehicle and cause an
accident, resulting in death or serious injury.
● Do not adjust the mirrors while driving.
● Do not drive with the mirrors folded.
● Both the driver and passenger side mirrors must be extended and properly
adjusted before driving.
■ When a mirror is moving
To avoid personal injury and mirror malfunction, be careful not to get your
hand caught by the moving mirror.
■ When the mirror defoggers are operating
Do not touch the rear view mirror surfaces, as they can become very hot
and burn you.
Page 163 of 592

1633-5. Opening, closing the windows and moon roof
3
Operation of each component
4RUNNER (U)
■The power windows can be operated when
Vehicles without a smart key system
The engine switch is in the “ACC” or “ON” position.
Vehicles with a smart key system
The engine switch is in IGNITION ON mode.
■ Operating the power windows after turning the engine off
Vehicles without a smart key system
The power windows can be operated for approximately 45 seconds even
after the engine switch is turned to the “ACC” or “LOCK” positi on. They can-
not, however, be operated once either front door is opened.
Vehicles with a smart key system
The power windows can be operated for approximately 45 seconds even
after the engine switch is turned to ACCESSORY mode or turned o ff. They
cannot, however, be operated once either front door is opened.
■ Jam protection function
If an object becomes jammed between the window and the window f rame
while the window is closing, window movement is stopped and the window is
opened slightly.
■ Catch protection function
If an object becomes caught between the door and window while the window
is opening, window movement is stopped.
Page 164 of 592

1643-5. Opening, closing the windows and moon roof
4RUNNER (U)■
When the window cannot be opened or closed
When the jam protection function or catch protection function o perates
unusually and the door window cannot be opened or closed, perfo rm the fol-
lowing operations with the power window switch of that door.
● Stop the vehicle. With the engine switch in the “ON” position
*1 or in IGNI-
TION ON mode
*2, within 4 seconds of the jam protection function or catch
protection function activating, continuously operate the power window
switch in the one-touch closing direction or one-touch opening direction so
that the door window can be opened and closed.
● If the door window cannot be opened and closed even when perfor ming the
above operations, perform the following procedure for function initialization.
Turn the engine switch to the “ON” position
*1 or to IGNITION ON
mode
*2.
Pull and hold the power window switch in the one-touch closing direction
and completely close the door window.
Release the power window switch for a moment, resume pulling the
switch in the one-touch closing direction, and hold it there for approxi-
mately 6 seconds or more.
Press and hold the power window switch in the one-touch opening direc-
tion. After the door window is completely opened, continue hold ing the
switch for an additional 1 second or more.
Release the power window switch for a moment, resume pushing th e
switch in the one-touch opening direction, and hold it there fo r approxi-
mately 4 seconds or more.
Pull and hold the power window switch in the one-touch closing direction
again. After the door window is completely closed, continue holding the
switch for a further 1 second or more.
If you release the switch while the window is moving, start aga in from the
beginning.
If the window reverses and cannot be fully closed or opened, have the vehicle
inspected by your Toyota dealer.
*1: Vehicles without a smart key system
*2: Vehicles with a smart key system
■ Door lock linked window operation
●The power windows can be opened and closed using the key or mechanical
key.
* ( P. 111, 507)
● The power windows can be opened using the wireless remote control.
*
(P. 110)
*: These settings must be customized at your Toyota dealer.
■ Customization
Settings (e.g. key linked operation) can be changed.
(Customizable features P. 545)
1
2
3
4
5
6