Page 411 of 592

4116-3. Do-it-yourself maintenance
6
Maintenance and care
4RUNNER (U)■
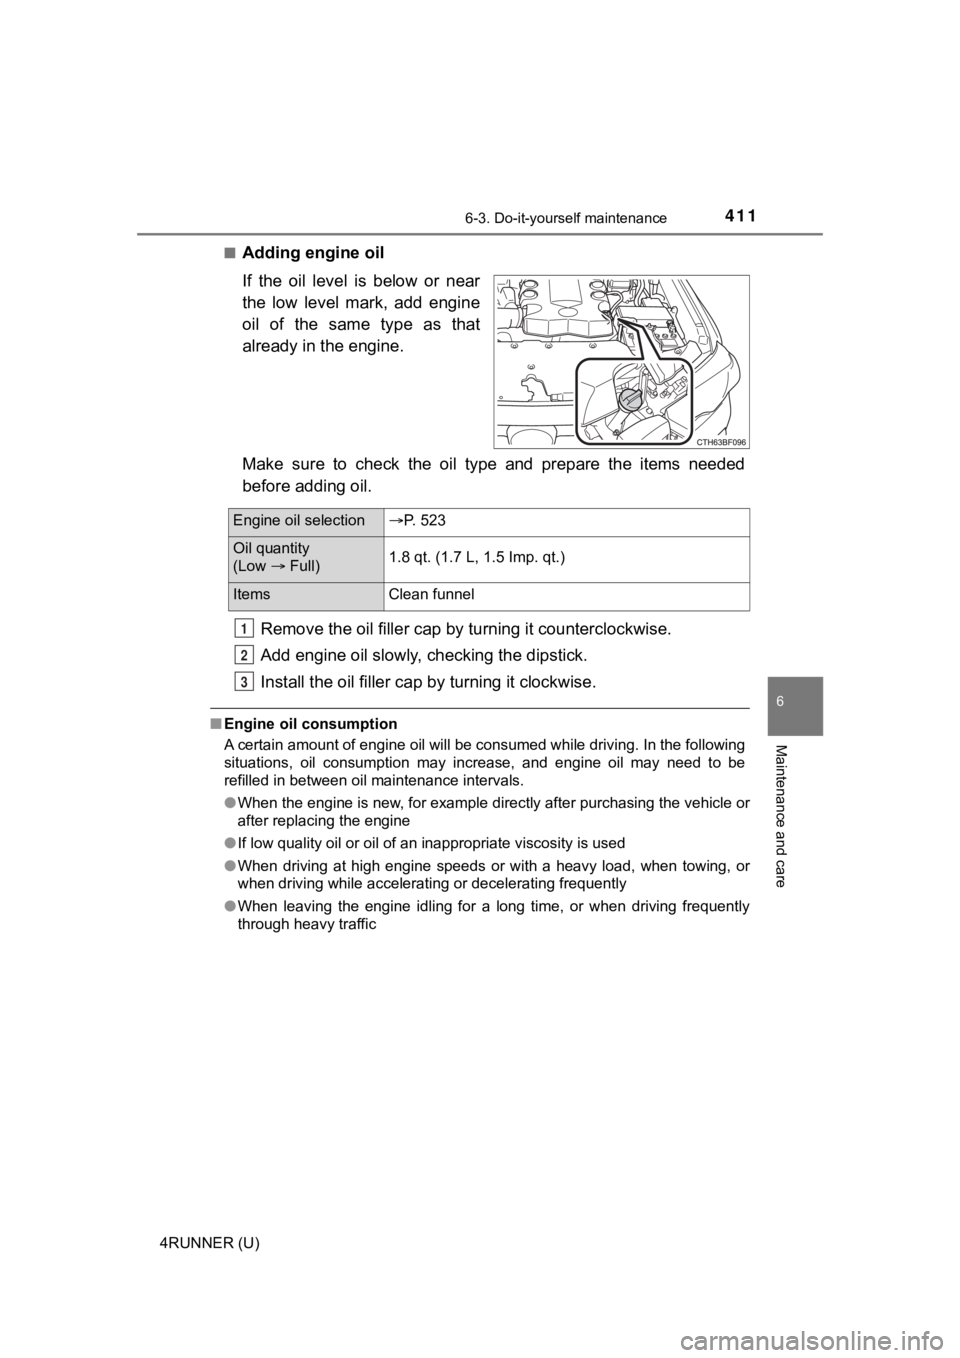
Adding engine oil
If the oil level is below or near
the low level mark, add engine
oil of the same type as that
already in the engine.
Make sure to check the oil type and prepare the items needed
before adding oil.
Remove the oil fille r cap by turning it counterclockwise.
Add engine oil slowly, checking the dipstick.
Install the oil filler cap by turning it clockwise.
■Engine oil consumption
A certain amount of engine oil will be consumed while driving. In the following
situations, oil consumption may increase, and engine oil may ne ed to be
refilled in between oil maintenance intervals.
● When the engine is new, for example directly after purchasing t he vehicle or
after replacing the engine
● If low quality oil or oil of an inappropriate viscosity is used
● When driving at high engine speeds or with a heavy load, when t owing, or
when driving while accelerating or decelerating frequently
● When leaving the engine idling for a long time, or when driving frequently
through heavy traffic
Engine oil selection P. 523
Oil quantity
(Low Full) 1.8 qt. (1.7 L, 1.5 Imp. qt.)
Items
Clean funnel
1
2
3
Page 416 of 592
4166-3. Do-it-yourself maintenance
4RUNNER (U)■
Fluid level
The fluid level should be within the appropriate range.
Full (when cold)
Add fluid (when cold)
Full (when hot)
Add fluid (when hot)
Hot: Vehicle has been driven around 50 mph (80 km/h) for 20 min- utes, or slightly longer in frigid temperatures. (Fluid tempera-
ture, 140°F - 175°F [60°C - 80°C]).
Cold: Engine has not been run for about 5 hours. (Room tempera- ture, 50°F - 85°F [10°C - 30°C]).
■Checking the fluid level
Make sure to check the fluid type and prepare the necessary items.
Clean all dirt off the reservoir.
Remove the cap by turni ng it counterclockwise.
Wipe the dipstick clean.
Reinstall the cap and remove it again.
Check the fluid level.
Power steering fluid
1
2
3
4
Fluid typeAutomatic transmission fluid DEXRON® II or III
ItemsRag or paper, clean funnel (only for adding fluid)
1
2
3
4
5
Page 451 of 592
4516-3. Do-it-yourself maintenance
6
Maintenance and care
4RUNNER (U)■
Headlight high beam (if equi
pped)/daytime running lights
Turn the bulb base counter-
clockwise.
Pull the bulb out while press-
ing the lock release of the
connector.
Replace the light bulb, and
install the bulb base.
Align the 3 tabs on the light bulb
with the mounting and insert.
Turn and secure the bulb
base.
Shake the bulb base gently to
check that it is not loose, turn
the headlights on once and visu-
ally confirm that no light is leak-
ing through the mounting.
Replacing light bulbs
1
2
3
4
Page 453 of 592
4536-3. Do-it-yourself maintenance
6
Maintenance and care
4RUNNER (U)
Turn the bulb base counter-
clockwise.
Remove the light bulb.
When installing, reverse the steps listed.4
5
6
Page 455 of 592
4556-3. Do-it-yourself maintenance
6
Maintenance and care
4RUNNER (U)
Turn the bulb base counter-
clockwise.
Remove the light bulb.
When installing, reverse the steps listed.4
5
6
Page 456 of 592
4566-3. Do-it-yourself maintenance
4RUNNER (U)■
Rear turn signal lights
Open the back door and
remove the cover.
To prevent damage to the vehi-
cle, cover the tip of the screw-
driver with a rag.
Turn the bulb base counter-
clockwise.
Remove the light bulb.
When installing, reverse the steps listed.
1
2
3
4
Page 457 of 592
4576-3. Do-it-yourself maintenance
6
Maintenance and care
4RUNNER (U)■
Back-up lights
Open the back door and
remove the cover.
To prevent damage to the vehi-
cle, cover the tip of the screw-
driver with a rag.
Turn the bulb base counter-
clockwise.
Remove the light bulb.
When installing, reverse the steps listed.
1
2
3
4
Page 494 of 592
4947-2. Steps to take in an emergency
4RUNNER (U)
Insert the end of the jack han-
dle extension into the lowering
screw and turn it counterclock-
wise.
Lower the spare tire completely
to the ground.
Pull out the spare tire and
remove the holding bracket.
2
3