2021 TOYOTA 4RUNNER change time
[x] Cancel search: change timePage 257 of 592

2574-5. Using the driving support systems
4
Driving
4RUNNER (U)■
Enabling/disabling th
e pre-collision system
The pre-collision sy stem can be enabled/disabled on ( P. 9 6 )
of the multi-information display.
The system is automatically enabled each time the engine switch is
turned to the “ON” position (vehicles without a smart key syste m) or the
engine switch is turned to IGNITION ON mode (vehicles with a sm art
key system).
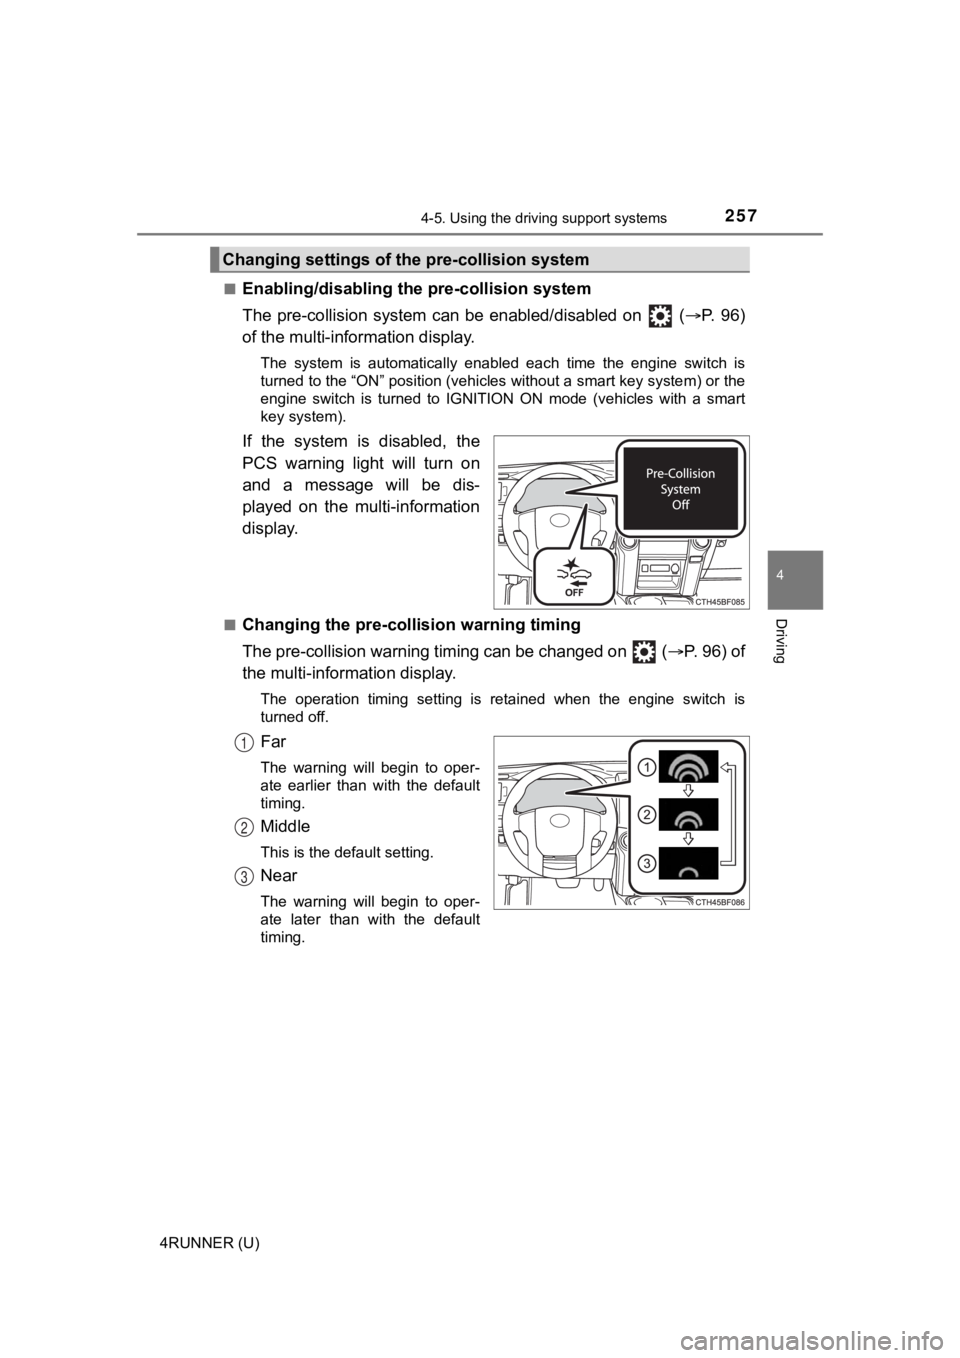
If the system is disabled, the
PCS warning light will turn on
and a message will be dis-
played on the multi-information
display.
■Changing the pre-colli sion warning timing
The pre-collision warning timing can be changed on ( P. 96) of
the multi-inform ation display.
The operation timing setting is retained when the engine switch is
turned off.
Far
The warning will begin to oper-
ate earlier than with the default
timing.
Middle
This is the default setting.
Near
The warning will begin to oper-
ate later than with the default
timing.
Changing settings of the pre-collision system
1
2
3
Page 262 of 592

2624-5. Using the driving support systems
4RUNNER (U)• If a vehicle ahead makes an abrupt maneuver (such as sudden sw
erving,
acceleration or deceleration)
• When suddenly cutting behind a preceding vehicle
• When driving in inclement weather such as heavy rain, fog, snow or a
sandstorm
• When the vehicle is hit by water, snow, dust, etc. from a vehicle ahead
• When driving through steam or smoke
• When driving in a place where the surrounding brightness changes sud- denly, such as at the entrance or exit of a tunnel
• When a very bright light, such as the sun or the headlights of oncoming
traffic, shines directly into the front camera
• When the surrounding area is dim, such as at dawn or dusk, or while at
night or in a tunnel
• After the engine has started the vehicle has not been driven for a certain amount of time
• While making a left/right turn and for a few seconds after mak ing a left/
right turn
• While driving on a curve and for a few seconds after driving o n a curve
• If your vehicle is skidding
• If the wheels are misaligned
• If a wiper blade is blocking the front camera
• The vehicle is wobbling.
• The vehicle is being driven at extremely high speeds.
• When driving on a hill
• If the radar sensor or front camera is misaligned • When a vehicle ahead is not directly in front of your vehicle
• If the front of the vehicle is raised or lowered
Page 276 of 592

2764-5. Using the driving support systems
4RUNNER (U)
This mode employs a radar sensor to detect the presence of vehi cles
up to approximately 320 ft. (100 m) ahead, determines the curre nt
vehicle-to-vehicle following distance, and operates to maintain a suit-
able following distance from the vehicle ahead.
Note that vehicle-to-vehicle distance will close in when traveling on long
downhill slopes.
Example of constant speed cruising
When there are no vehicles ahead
The vehicle travels at the speed set by the driver. The desired vehicle-to-
vehicle distance can also be set by operating the vehicle-to-ve hicle dis-
tance switch.
Example of deceleration crui sing and follow-up cruising
When a preceding vehicle driving slower than the set speed
appears
When a vehicle is detected running ahead of you, the system automatically
decelerates your vehicle. When a greater reduction in vehicle s peed is
necessary, the system applies the brakes (the stop lights will come on at
this time). The system will respond to changes in the speed of the vehicle
ahead in order to maintain the vehicle-to-vehicle distance set by the driver.
Approach warning warns you when the system cannot decelerate su ffi-
ciently to prevent your vehicle fr om closing in on the vehicle ahead.
Example of acceleration
When there are no longer any preceding vehicles driving slower
than the set speed
The system accelerates until the set speed is reached. The syst em then
returns to constant speed cruising.
Driving in vehicle-to-vehi cle distance control mode
1
2
3
Page 278 of 592

2784-5. Using the driving support systems
4RUNNER (U)
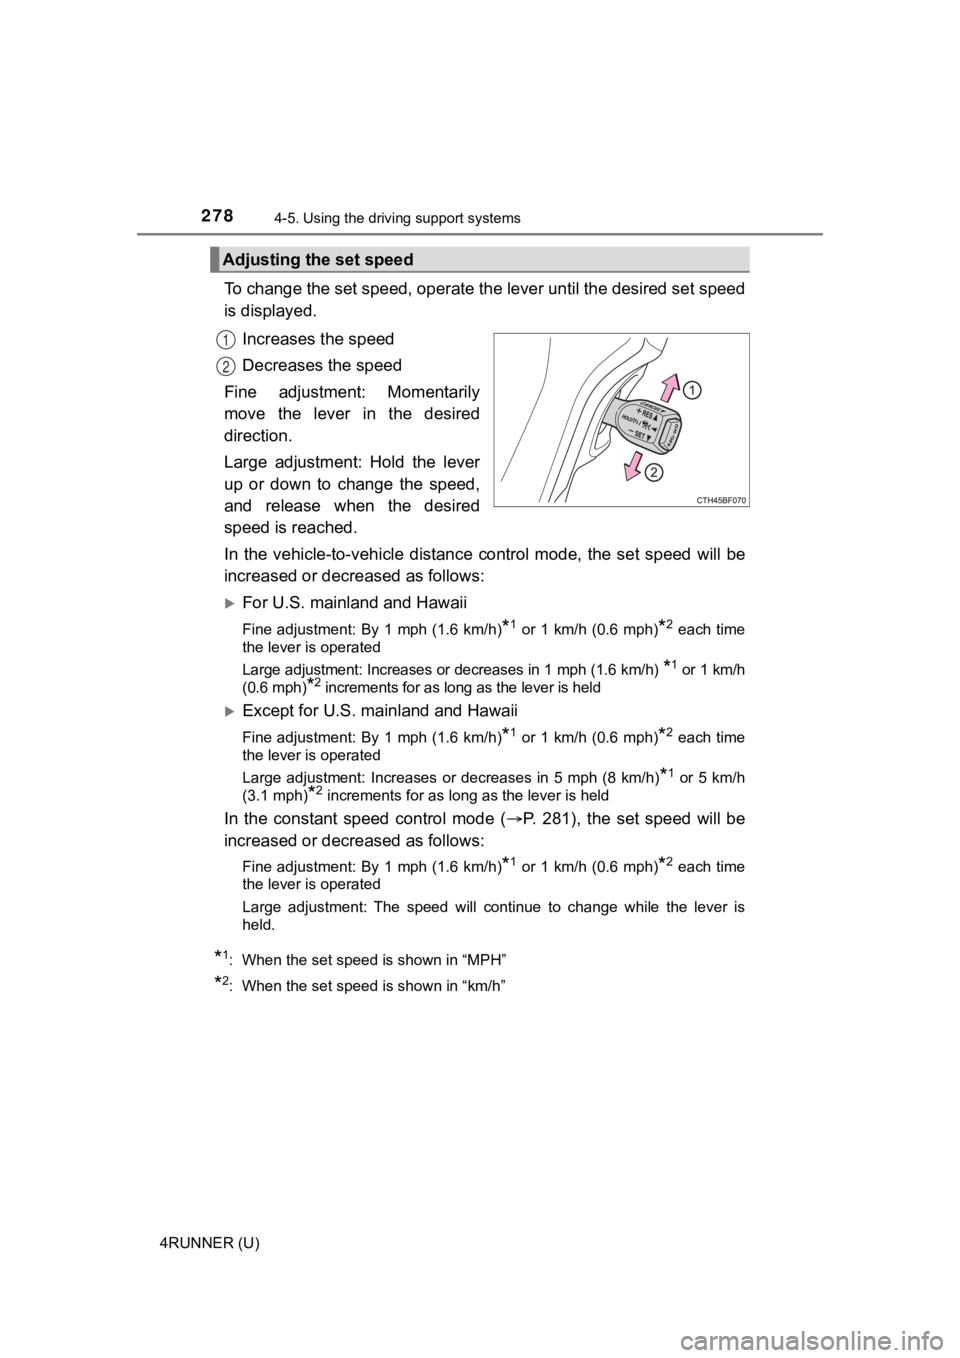
To change the set speed, operate the lever until the desired se t speed
is displayed.
Increases the speed
Decreases the speed
Fine adjustment: Momentarily
move the lever in the desired
direction.
Large adjustment: Hold the lever
up or down to change the speed,
and release when the desired
speed is reached.
In the vehicle-to-vehicle distance control mode, the set speed will be
increased or decreased as follows:
For U.S. mainland and Hawaii
Fine adjustment: By 1 mph (1.6 km/h)*1 or 1 km/h (0.6 mph)*2 each time
the lever is operated
Large adjustment: Increases or decreases in 1 mph (1.6 km/h)
*1 or 1 km/h
(0.6 mph)
*2 increments for as long as the lever is held
Except for U.S. mainland and Hawaii
Fine adjustment: By 1 mph (1.6 km/h)*1 or 1 km/h (0.6 mph)*2 each time
the lever is operated
Large adjustment: Increases or decreases in 5 mph (8 km/h)
*1 or 5 km/h
(3.1 mph)
*2 increments for as long as the lever is held
In the constant speed control mode ( P. 281), the set speed will be
increased or decreased as follows:
Fine adjustment: By 1 mph (1.6 km/h)*1 or 1 km/h (0.6 mph)*2 each time
the lever is operated
Large adjustment: The speed will continue to change while the l ever is
held.
*1: When the set speed is shown in “MPH”
*2: When the set speed is shown in “km/h”
Adjusting the set speed
1
2
Page 285 of 592

2854-5. Using the driving support systems
4
Driving
4RUNNER (U)
Front corner sensors
Rear corner sensors
Rear center sensors
Press
/ of the meter con-
trol switches, select .
Press
/ of the meter con-
trol switches, select .
Press of the meter control
switch.
Each time is pressed, the function changes on/off.
When on, the indicator light comes on to inform the driver that the sys-
tem is operational.
Intuitive parking assist
: If equipped
The distance from your vehicle to nearby obstacles when paral-
lel parking or maneuvering into a garage is measured by the
sensors and communicated via t he multi-information display
and a buzzer. Always check the surrounding area when using
this system.
Types of sensors
Turning the intuitive parking assist on/off
1
2
3
1
2
3
Page 341 of 592

3415-1. Using the air conditioning system and defogger
5
Interior features
4RUNNER (U)■
Fan speed setting
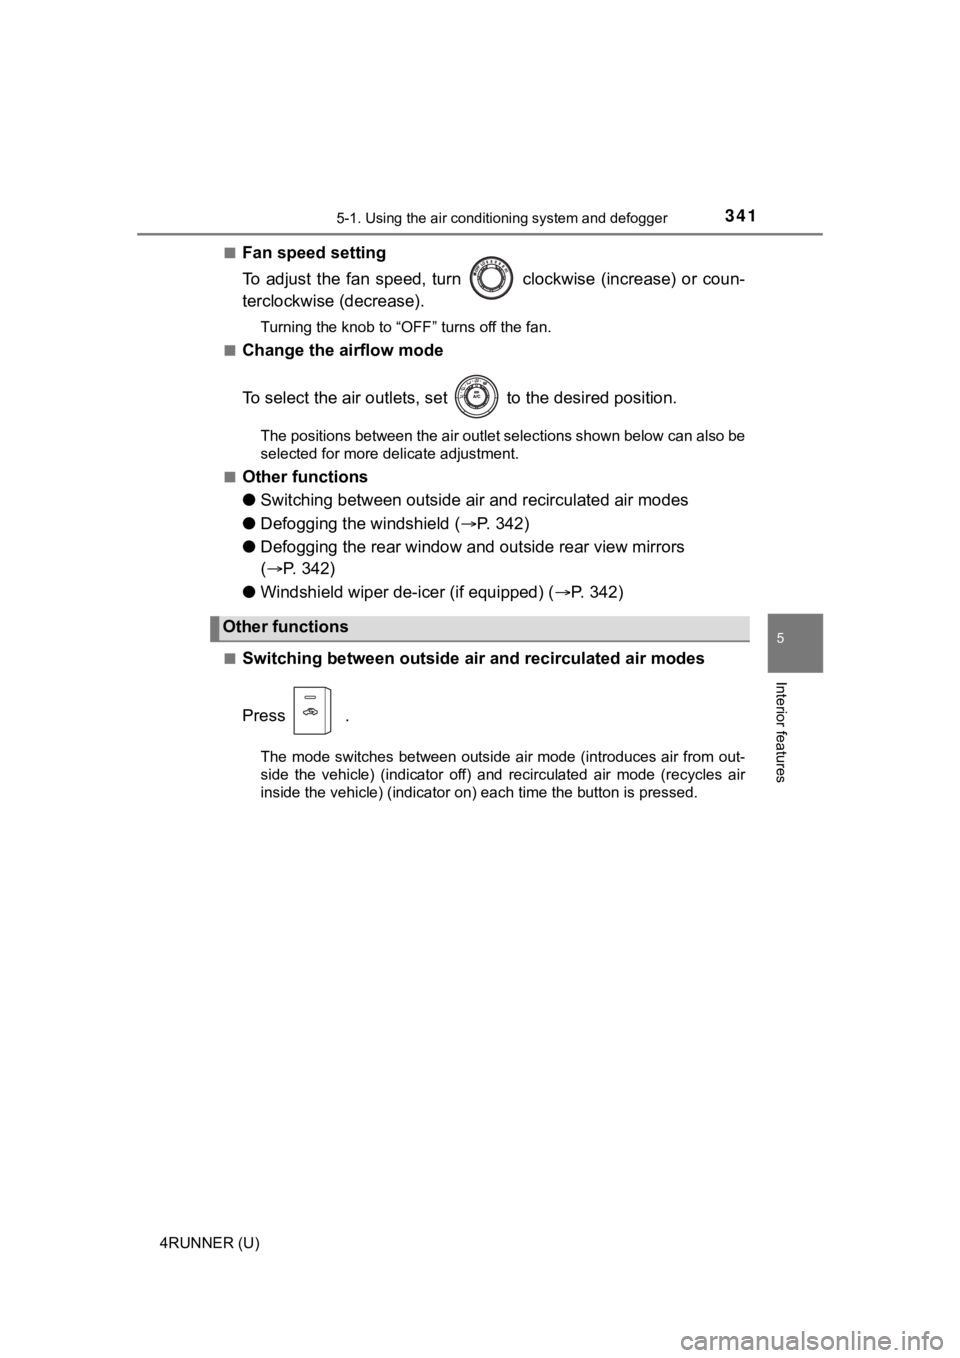
To adjust the fan speed, turn clockwise (increase) or coun-
terclockwise (decrease).
Turning the knob to “OFF” turns off the fan.
■
Change the airflow mode
To select the air outlets, set to the desired position.
The positions between the air outlet selections shown below can also be
selected for more delicate adjustment.
■
Other functions
● Switching between outside a ir and recirculated air modes
● Defogging the windshield ( P. 3 4 2 )
● Defogging the rear window and outside rear view mirrors
( P. 342)
● Windshield wiper de-icer (if equipped) ( P. 3 4 2 )
■Switching between outside air and recirculated air modes
Press .
The mode switches between outside air mode (introduces air from out-
side the vehicle) (indicator off) and recirculated air mode (re cycles air
inside the vehicle) (indicator on) each time the button is pressed.
Other functions
Page 375 of 592

3755-4. Other interior features
5
Interior features
4RUNNER (U)
■The power outlet can be used when
The engine is running.
■ The indicator light changes acco rding to the maximum available capac-
ity as follows:
■ When the power outle t is in operation
The sound of the cooling fan may be heard from the right side o f the luggage
compartment. This is normal and does not indicate a malfunction .
■ If the engine is started with th e power outlet main switch on
The maximum capacity of the power supply may decrease to below the stan-
dard, or may be cut off completely, even when the vehicle is st ationary.
■ The protection circuit may be act ivated to cut the power supply if any of
the following conditions apply:
● The engine is started with the power outlet main switch on.
● Use of electrical appliances exceeding the maximum capacity is attempted.
A sound may be heard when the protection circuit is activated. This is nor-
mal and does not indicate a malfunction.
● Electrical appliances, which consume power exceeding 100 W, have been
used continuously for a long time period.
● The total power usage by all electrical features (headlights, a ir conditioning,
etc.) has exceeded the total vehicle maximum for an extended period of
time.
■ If the protection circuit is act ivated and the power supply is cut, conduct
the following procedure:
Park the vehicle in a safe place, and then securely apply the p arking brake.
Check and ensure that the shift lever is in P or N.
Make sure that the power consumption of the electric appliance is within
the maximum capacity of the power outlet and the appliance is n ot broken.
Press the power outlet main switch again.
When the cabin temperature is high, open the windows to cool th e tempera-
ture down. Once it reaches the normal temperature, turn the pow er outlet
main switch on again.
If the power supply does not resume even after the above procedure has
been performed, have the vehicle inspected by your Toyota deale r.
120 V AC/400 W
120 V AC/100 W
1
2
1
2
3
4
Page 427 of 592

4276-3. Do-it-yourself maintenance
6
Maintenance and care
4RUNNER (U)■
How to register the ID codes
Select on the multi-information display using the meter con-
trol switches on the steering wheel. ( P. 9 6 )
Select “Vehicle Settings” and then press and hold .
Select “TPWS” and then press .
Select “Change Wheel Set”
then press and hold until
the tire pressure warning
light blinks slowly 3 times.
Then a message will be dis-
played on the multi-information
display.
When registration is being per-
formed, the tire pressure warn-
ing light will blink for
approximately 1 minute then
illuminate and “---” will be dis-
played for the inflation pres-
sure of each tire on the multi-
information display.
Drive straight (with occasional left and right turns) at approxi-
mately 25 mph (40 km/h) or more for approximately 10 to 30 min-
utes.
Registration is complete when the tire pressure warning light t urns
off and the inflation pressure of each tire is displayed on the multi-
information display.
Registration may take longer than approximately 1 hour in certain
situations, such as when the veh icle is stopped for a long time at
traffic lights, etc. ( P. 432)
After registering the ID codes, make sure to initialize the tir e pres-
sure warning system. ( P. 425)
1
2
3
4
5