Page 13 of 281

Key Fob
You can quickly familiarize yourself with the
key fob by thinking of it as a miniature version
of
Model S, with the Tesla badge representing
the front. The key has buttons that feel like
softer areas on the surface.
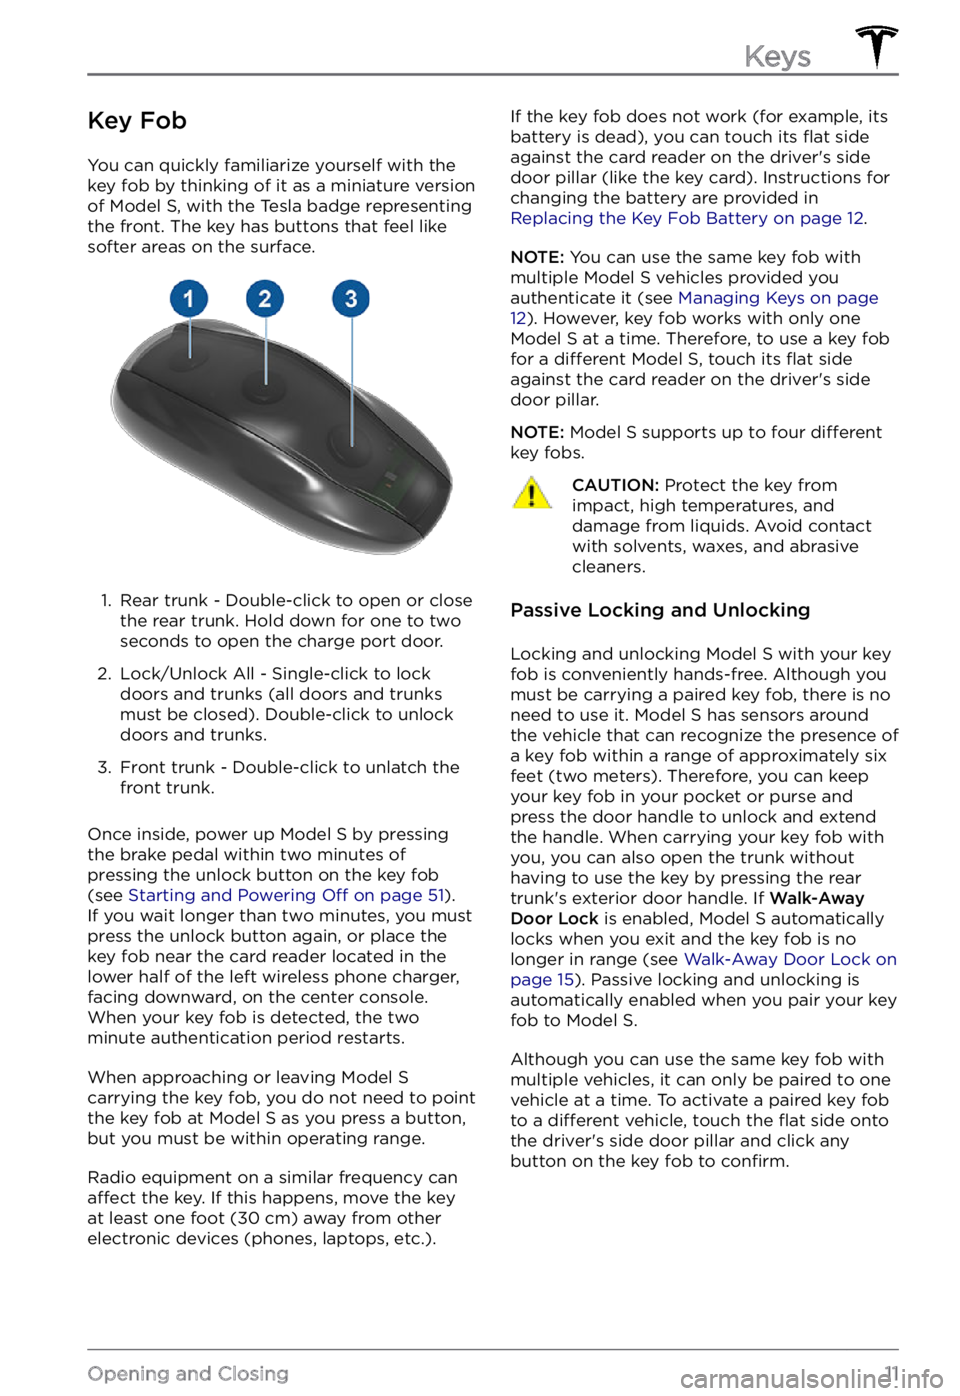
1.
Rear trunk - Double-click to open or close
the rear trunk. Hold down for one to two
seconds to open the charge port door.
2.
Lock/Unlock All - Single-click to lock
doors and trunks (all doors and trunks
must be closed). Double-click to unlock
doors and trunks.
3.
Front trunk - Double-click to unlatch the
front trunk.
Once inside, power up Model S by pressing
the brake pedal within two minutes of
pressing the unlock button on the key fob
(see
Starting and Powering Off on page 51).
If you wait longer than two minutes, you must
press the unlock button again, or place the key fob near the card reader located
in the lower half of the left wireless phone charger, facing downward, on the center console.
When your key fob is detected, the two
minute authentication period restarts.
When approaching or leaving Model S carrying the key fob, you do not need to point the key fob at Model S as you press a button,
but you must be within operating range.
Radio equipment on a similar frequency can affect the key. If this happens, move the key
at least one foot (30 cm) away from other
electronic devices (phones, laptops, etc.).
If the key fob does not work (for example, its
battery is dead), you can touch its flat side
against the card reader on the driver
Page 15 of 281

Adding and Removing Keys
To add a new key card or key fob:
NOTE: When adding a key fob, ensure it is at
room temperature. Pairing a key fob that is
very cold can be unsuccessful.
1.
On the touchscreen, touch Controls > Locks then touch + in the Keys section.
2.
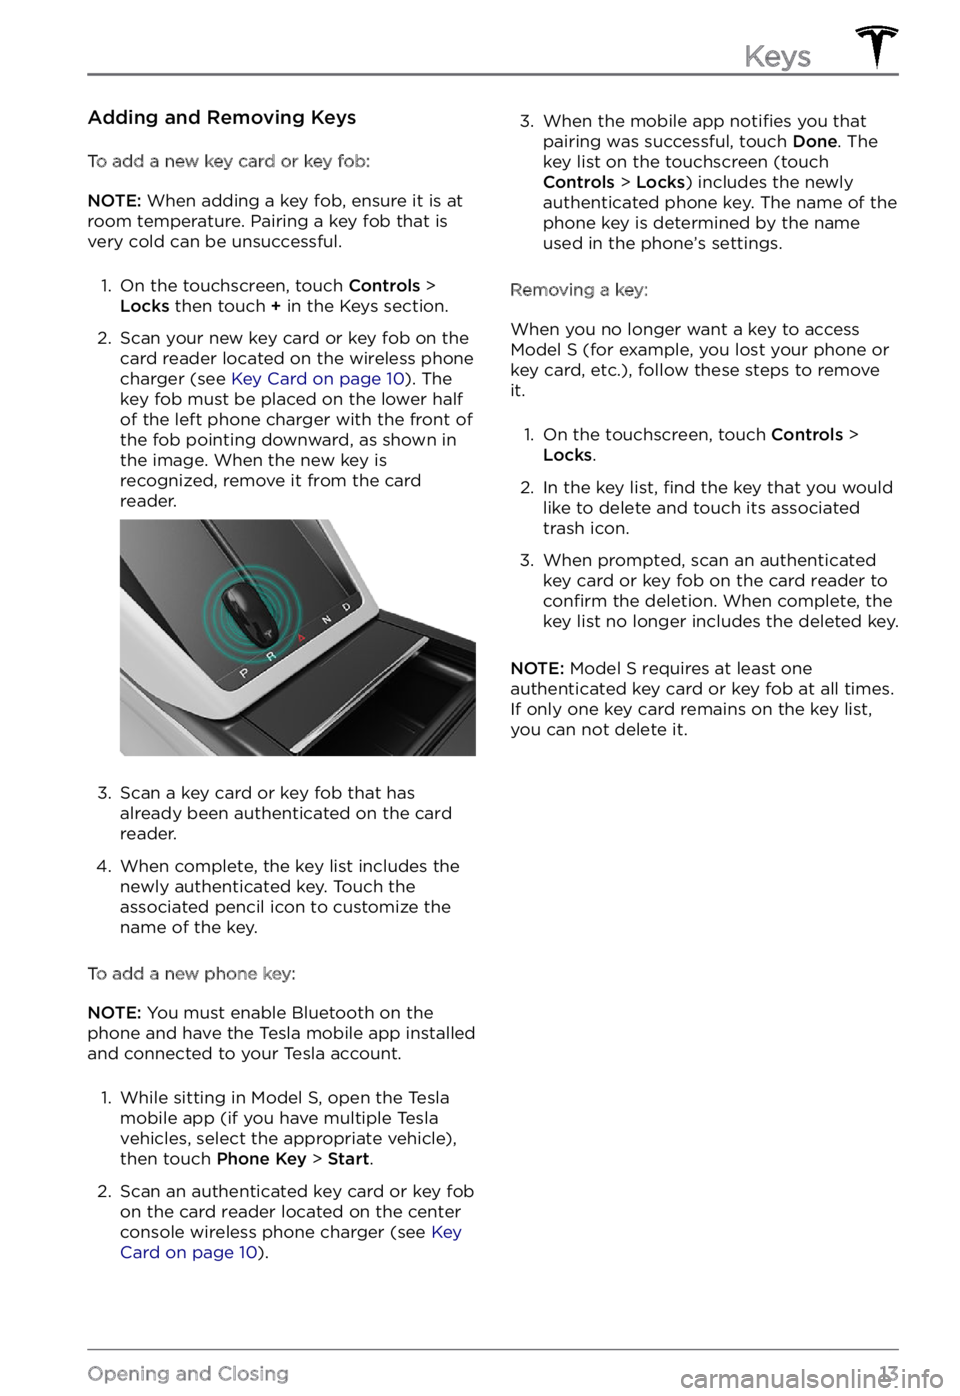
Scan your new key card or key fob on the
card reader located on the wireless phone
charger (see
Key Card on page 10). The
key fob must be placed on the lower half
of the left phone charger with the front of the fob pointing downward, as shown in
the image. When the new key is
recognized, remove it from the card
reader.
3.
Scan a key card or key fob that has
already been authenticated on the card
reader.
4.
When complete, the key list includes the
newly authenticated key. Touch the
associated pencil icon to customize the name of the key.
To add a new phone key:
NOTE: You must enable Bluetooth on the
phone and have the Tesla mobile app installed
and connected to your Tesla account.
1.
While sitting in Model S, open the Tesla
mobile app (if you have multiple Tesla
vehicles, select the appropriate vehicle),
then touch
Phone Key > Start.
2.
Scan an authenticated key card or key fob
on the card reader located on the center console wireless phone charger (see
Key Card on page 10).
3. When the mobile app notifies you that
pairing was successful, touch Done. The
key list on the touchscreen (touch
Controls > Locks) includes the newly
authenticated phone key. The name of the
phone key is determined by the name
used in the phone
Page 24 of 281
Center Console
In addition to housing an RFID transmitter
that reads key fobs and key cards (see Key Card on page 10), the center console includes
cup holders, two storage compartments, wireless phone chargers, and a rear
touchscreen.
To open the main storage compartment, pull its cover upward. Open the front storage
compartment by sliding its cover forward.
Second Row Console
Your Model S has a rear console integrated in
the center of the second row. This console
can serve as an arm rest for rear passengers.
To lower the console, press the button on the
back of the center seat
Page 54 of 281

Restarting the Touchscreen
If your touchscreen is unresponsive or demonstrates unusual behavior, you can restart it to potentially resolve the issue.
NOTE: To ensure the safety of vehicle
occupants as well as other road users,
restarting the touchscreen should be done
only when the vehicle is in Park.
1.
Shift into Park.
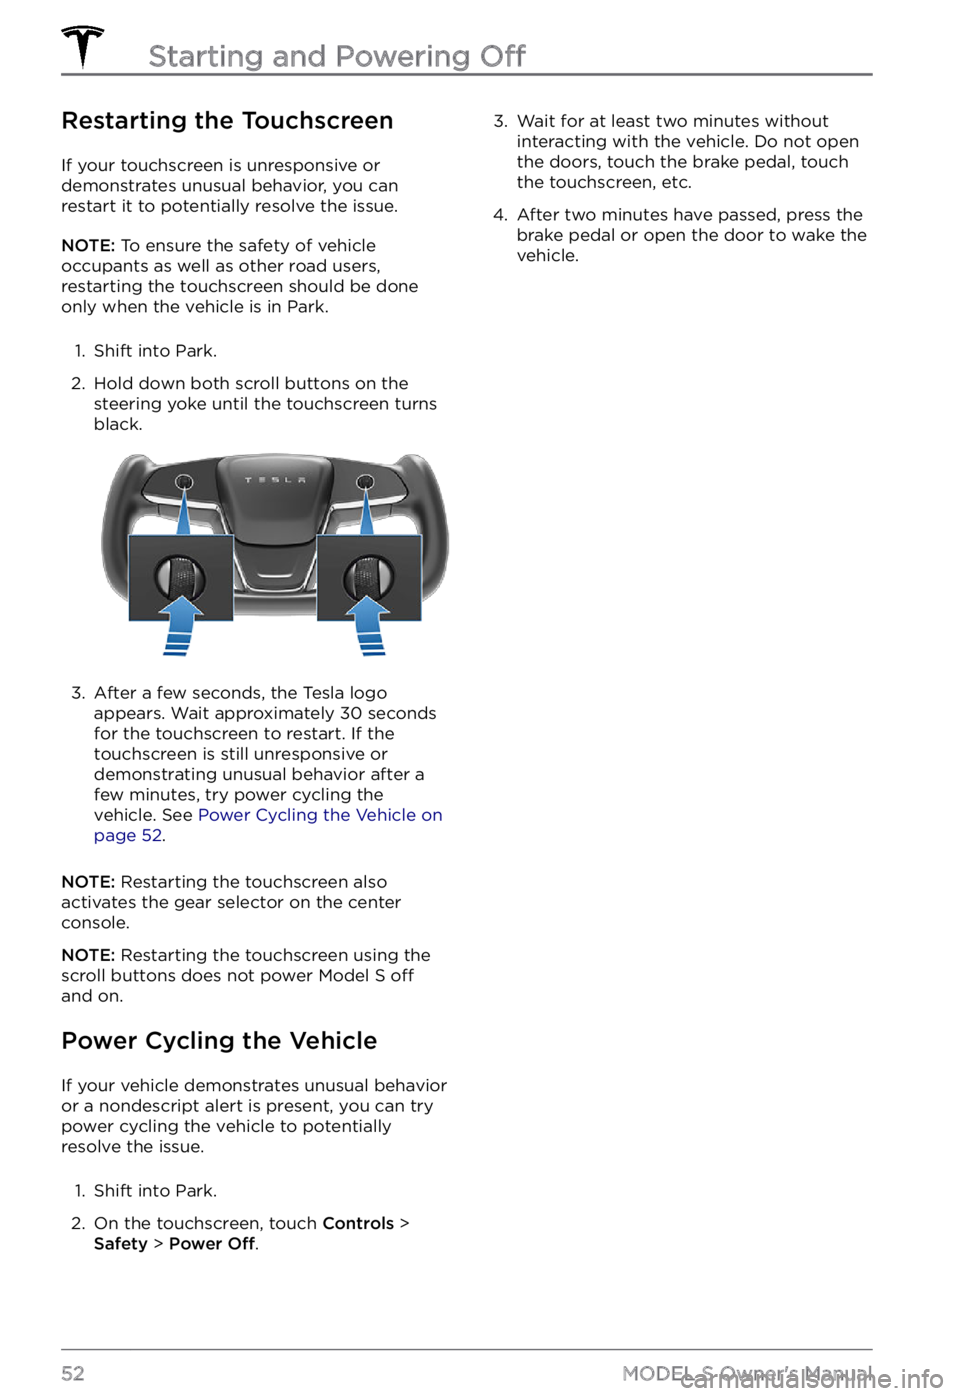
2.
Hold down both scroll buttons on the steering yoke until the touchscreen turns
black.
3.
After a few seconds, the Tesla logo
appears. Wait approximately 30 seconds
for the touchscreen to restart. If the
touchscreen is still unresponsive or demonstrating unusual behavior after a
few minutes, try power cycling the
vehicle. See
Power Cycling the Vehicle on page 52.
NOTE: Restarting the touchscreen also
activates the gear selector on the center console.
NOTE: Restarting the touchscreen using the
scroll buttons does not power Model S off
and on.
Power Cycling the Vehicle
If your vehicle demonstrates unusual behavior
or a nondescript alert is present, you can try
power cycling the vehicle to potentially
resolve the issue.
1.
Shift into Park.
2.
On the touchscreen, touch Controls > Safety > Power Off.
3. Wait for at least two minutes without
interacting with the vehicle. Do not open
the doors, touch the brake pedal, touch
the touchscreen, etc.4.
After two minutes have passed, press the
brake pedal or open the door to wake the vehicle.
Starting and Powering Off
52MODEL S Owner
Page 140 of 281
Adjusting the Front and Rear Vents
Model S has a unique horizontal face-level vent that spans the width of the dashboard. It also
has vents at the top and bottom of the rear console.
1.
Driver vents
2.
Driver controls
3.
Passenger controls
4.
Passenger vents
5.
Rear vents
6.
Rear controls
Using the touchscreens, you can pinpoint exactly where you want to direct the air flowing from
this vent when heating or cooling the cabin. When the face-level vent is on you can adjust the
direction of the air
flow from each vent. To adjust the direction of the air flow, touch the
radiating air waves from the corresponding vent on the touchscreen. The air flows in a single
stream when centered or splits into mirrored air streams when air is directed outward or inward
from the center of the vent.
Climate Controls
138MODEL S Owner