Page 109 of 172
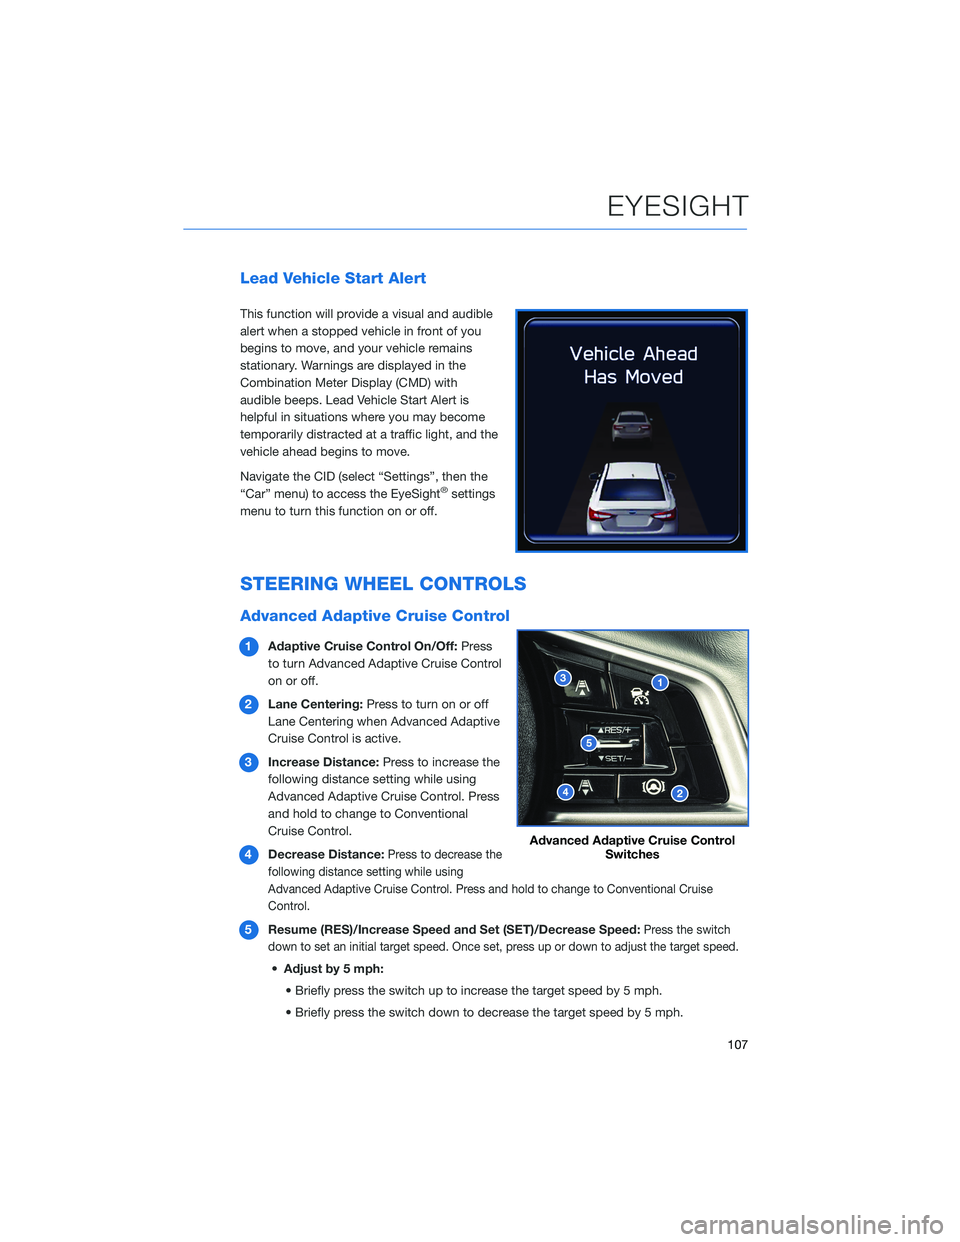
Lead Vehicle Start Alert
This function will provide a visual and audible
alert when a stopped vehicle in front of you
begins to move, and your vehicle remains
stationary. Warnings are displayed in the
Combination Meter Display (CMD) with
audible beeps. Lead Vehicle Start Alert is
helpful in situations where you may become
temporarily distracted at a traffic light, and the
vehicle ahead begins to move.
Navigate the CID (select “Settings”, then the
“Car” menu) to access the EyeSight
®settings
menu to turn this function on or off.
STEERING WHEEL CONTROLS
Advanced Adaptive Cruise Control
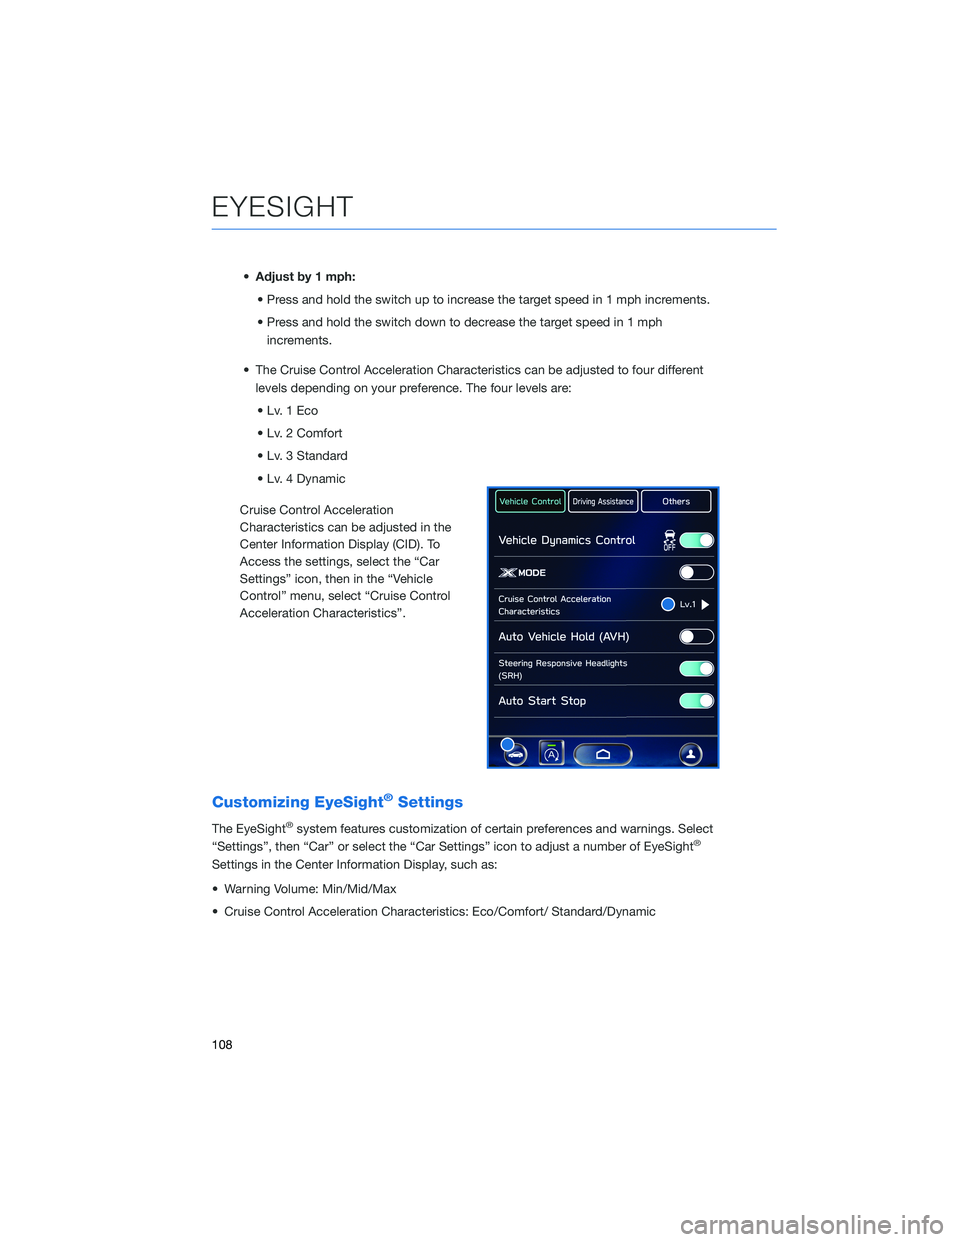
1Adaptive Cruise Control On/Off:Press
to turn Advanced Adaptive Cruise Control
on or off.
2Lane Centering:Press to turn on or off
Lane Centering when Advanced Adaptive
Cruise Control is active.
3Increase Distance:Press to increase the
following distance setting while using
Advanced Adaptive Cruise Control. Press
and hold to change to Conventional
Cruise Control.
4Decrease Distance:
Press to decrease the
following distance setting while using
Advanced Adaptive Cruise Control. Press and hold to change to Conventional Cruise
Control.
5Resume (RES)/Increase Speed and Set (SET)/Decrease Speed:Press the switch
down to set an initial target speed. Once set, press up or down to adjust the target speed.
•Adjust by 5 mph:
• Briefly press the switch up to increase the target speed by 5 mph.
• Briefly press the switch down to decrease the target speed by 5 mph.
Advanced Adaptive Cruise Control
Switches
EYESIGHT
107
Page 110 of 172
•Adjust by 1 mph:
• Press and hold the switch up to increase the target speed in 1 mph increments.
• Press and hold the switch down to decrease the target speed in 1 mph
increments.
• The Cruise Control Acceleration Characteristics can be adjusted to four different
levels depending on your preference. The four levels are:
•Lv.1Eco
• Lv. 2 Comfort
• Lv. 3 Standard
• Lv. 4 Dynamic
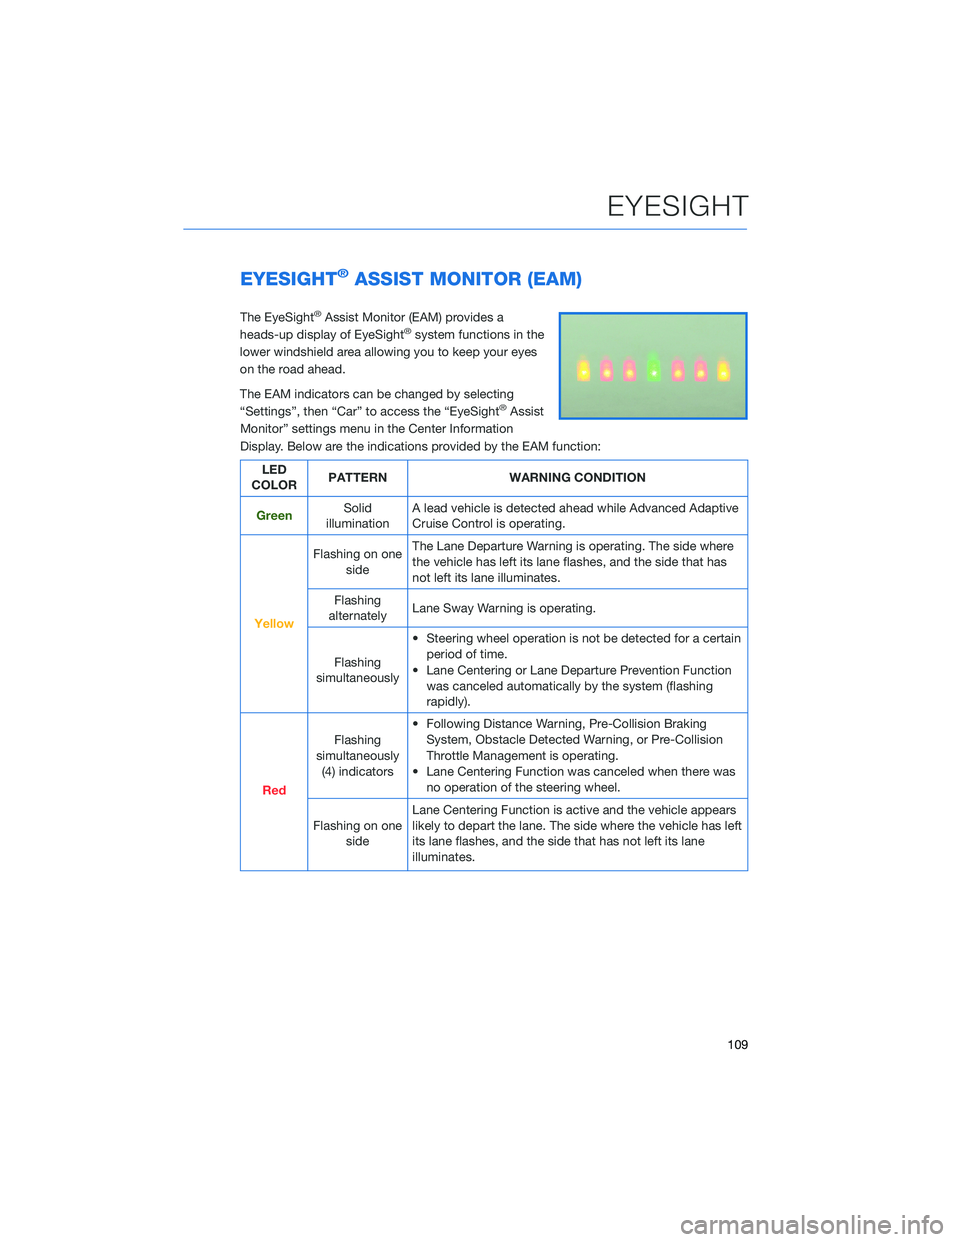
Cruise Control Acceleration
Characteristics can be adjusted in the
Center Information Display (CID). To
Access the settings, select the “Car
Settings” icon, then in the “Vehicle
Control” menu, select “Cruise Control
Acceleration Characteristics”.
Customizing EyeSight®Settings
The EyeSight®system features customization of certain preferences and warnings. Select
“Settings”, then “Car” or select the “Car Settings” icon to adjust a number of EyeSight®
Settings in the Center Information Display, such as:
• Warning Volume: Min/Mid/Max
• Cruise Control Acceleration Characteristics: Eco/Comfort/ Standard/Dynamic
EYESIGHT
108
Page 111 of 172
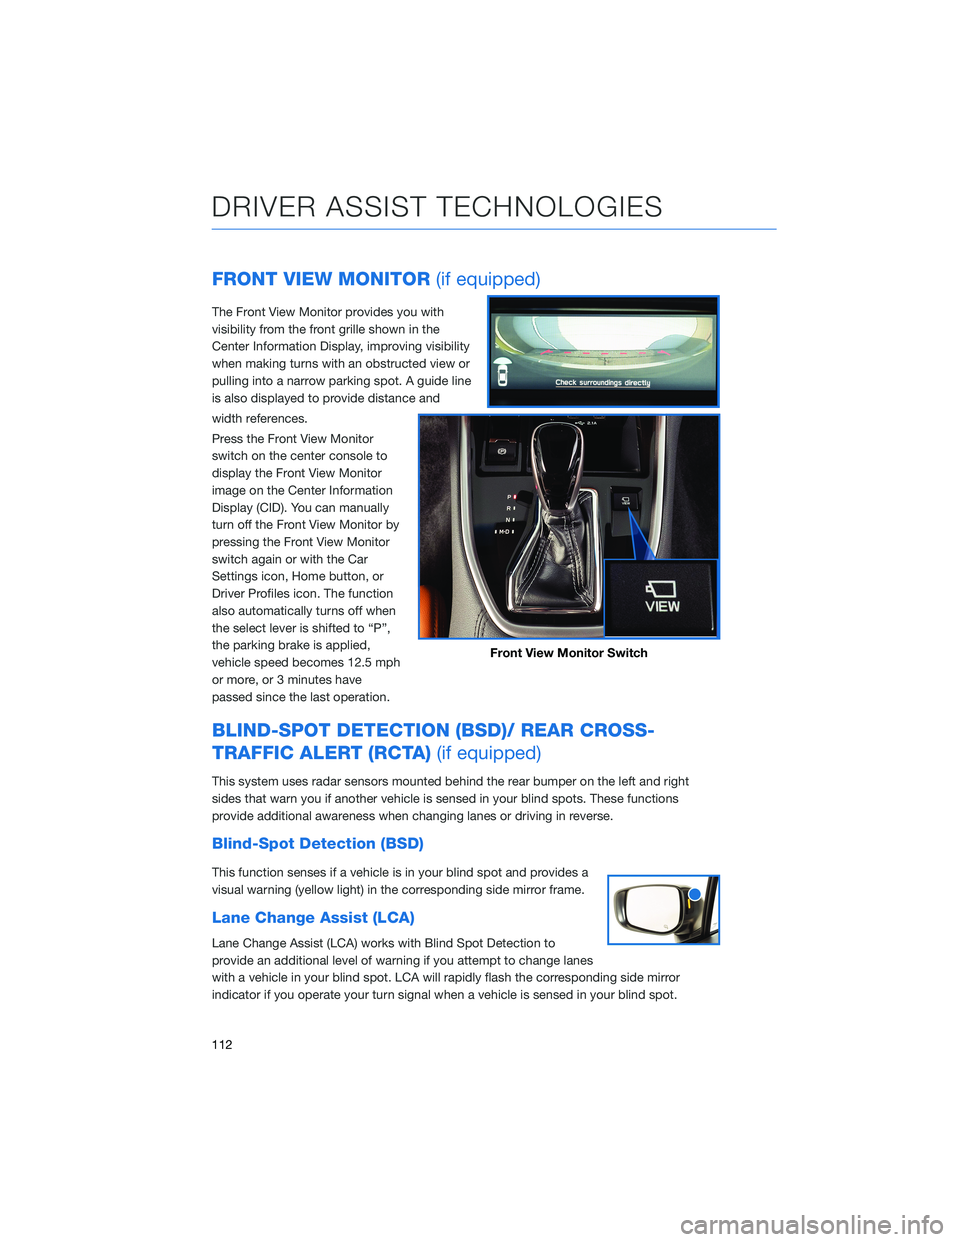
EYESIGHT®ASSIST MONITOR (EAM)
The EyeSight®Assist Monitor (EAM) provides a
heads-up display of EyeSight®system functions in the
lower windshield area allowing you to keep your eyes
on the road ahead.
The EAM indicators can be changed by selecting
“Settings”, then “Car” to access the “EyeSight
®Assist
Monitor” settings menu in the Center Information
Display. Below are the indications provided by the EAM function:
LED
COLORPATTERN WARNING CONDITION
GreenSolid
illuminationA lead vehicle is detected ahead while Advanced Adaptive
Cruise Control is operating.
Yellow
Flashing on one
sideThe Lane Departure Warning is operating. The side where
the vehicle has left its lane flashes, and the side that has
not left its lane illuminates.
Flashing
alternatelyLane Sway Warning is operating.
Flashing
simultaneously• Steering wheel operation is not be detected for a certain
period of time.
• Lane Centering or Lane Departure Prevention Function
was canceled automatically by the system (flashing
rapidly).
Red
Flashing
simultaneously
(4) indicators• Following Distance Warning, Pre-Collision Braking
System, Obstacle Detected Warning, or Pre-Collision
Throttle Management is operating.
• Lane Centering Function was canceled when there was
no operation of the steering wheel.
Flashing on one
sideLane Centering Function is active and the vehicle appears
likely to depart the lane. The side where the vehicle has left
its lane flashes, and the side that has not left its lane
illuminates.
EYESIGHT
109
Page 112 of 172
LANE DEPARTURE WARNING AND PRE-COLLISION
BRAKING SYSTEM OFF
Lane Departure Warning OFF
Select the “Car Settings” icon, then in the
“Driving Assistance” menu, select “Lane
Departure Prevention Function” to choose
your desired operation setting for Lane
Departure Warning and Lane Sway Warning.
When these functions are off, a yellow Lane
Departure Warning OFF indicator will be
illuminated in the Combination Meter. It may
be helpful to turn these functions off when lane
markings on the road are inconsistent.
Pre-Collision Braking OFF
Select the “Car Settings” icon, then in the
“Driving Assistance” menu, select
“Pre-Collision Braking” to choose your desired
setting for the Pre-Collision Braking functions.
When these functions are off, a yellow
Pre-Collision Braking OFF indicator illuminates
in the Combination Meter. It may be helpful to
turn these functions off when using a
drive-through carwash.
EYESIGHT
110
Page 114 of 172
FRONT VIEW MONITOR(if equipped)
The Front View Monitor provides you with
visibility from the front grille shown in the
Center Information Display, improving visibility
when making turns with an obstructed view or
pulling into a narrow parking spot. A guide line
is also displayed to provide distance and
width references.
Press the Front View Monitor
switch on the center console to
display the Front View Monitor
image on the Center Information
Display (CID). You can manually
turn off the Front View Monitor by
pressing the Front View Monitor
switch again or with the Car
Settings icon, Home button, or
Driver Profiles icon. The function
also automatically turns off when
the select lever is shifted to “P”,
the parking brake is applied,
vehicle speed becomes 12.5 mph
or more, or 3 minutes have
passed since the last operation.
BLIND-SPOT DETECTION (BSD)/ REAR CROSS-
TRAFFIC ALERT (RCTA)(if equipped)
This system uses radar sensors mounted behind the rear bumper on the left and right
sides that warn you if another vehicle is sensed in your blind spots. These functions
provide additional awareness when changing lanes or driving in reverse.
Blind-Spot Detection (BSD)
This function senses if a vehicle is in your blind spot and provides a
visual warning (yellow light) in the corresponding side mirror frame.
Lane Change Assist (LCA)
Lane Change Assist (LCA) works with Blind Spot Detection to
provide an additional level of warning if you attempt to change lanes
with a vehicle in your blind spot. LCA will rapidly flash the corresponding side mirror
indicator if you operate your turn signal when a vehicle is sensed in your blind spot.
Front View Monitor Switch
DRIVER ASSIST TECHNOLOGIES
112
Page 115 of 172
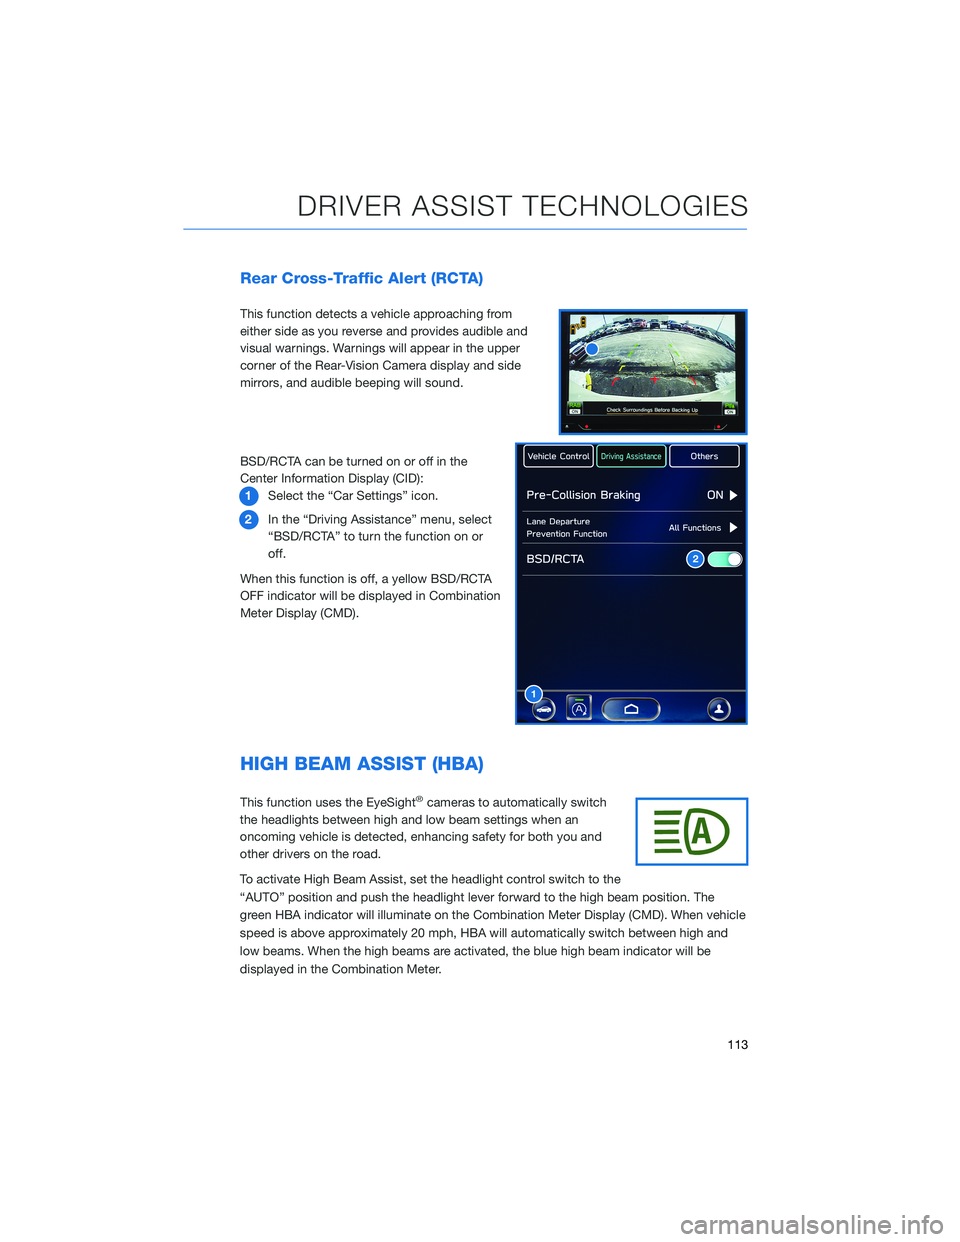
Rear Cross-Traffic Alert (RCTA)
This function detects a vehicle approaching from
either side as you reverse and provides audible and
visual warnings. Warnings will appear in the upper
corner of the Rear-Vision Camera display and side
mirrors, and audible beeping will sound.
BSD/RCTA can be turned on or off in the
Center Information Display (CID):
1Select the “Car Settings” icon.
2In the “Driving Assistance” menu, select
“BSD/RCTA” to turn the function on or
off.
When this function is off, a yellow BSD/RCTA
OFF indicator will be displayed in Combination
Meter Display (CMD).
HIGH BEAM ASSIST (HBA)
This function uses the EyeSight®cameras to automatically switch
the headlights between high and low beam settings when an
oncoming vehicle is detected, enhancing safety for both you and
other drivers on the road.
To activate High Beam Assist, set the headlight control switch to the
“AUTO” position and push the headlight lever forward to the high beam position. The
green HBA indicator will illuminate on the Combination Meter Display (CMD). When vehicle
speed is above approximately 20 mph, HBA will automatically switch between high and
low beams. When the high beams are activated, the blue high beam indicator will be
displayed in the Combination Meter.
1
2
DRIVER ASSIST TECHNOLOGIES
113
Page 119 of 172
DROWSY/INATTENTIVE WARNINGS
DriverFocus®detects when the driver is possibly not paying
attention or is becoming drowsy while driving. It works whether you
are a registered user or not. The system does not provide alerts
when the turn signals are operating or when the select lever is in the
“R” position.
When the system perceives the driver is not paying attention, the
“Keep Eyes on Road” warning will appear in the CMD along with
three rapid beeps.
When the system perceives drowsy driving, various warnings will
appear in the CMD along with beeps.
DRIVER PROFILE/CONVENIENCE SETTINGS
You can take advantage of convenience settings by becoming a registered driver.
Preferences such as seat and side mirror memory settings, as well as some features in the
Center Information Display (CID) and climate control, are uniquely linked to you.
Registering a Driver
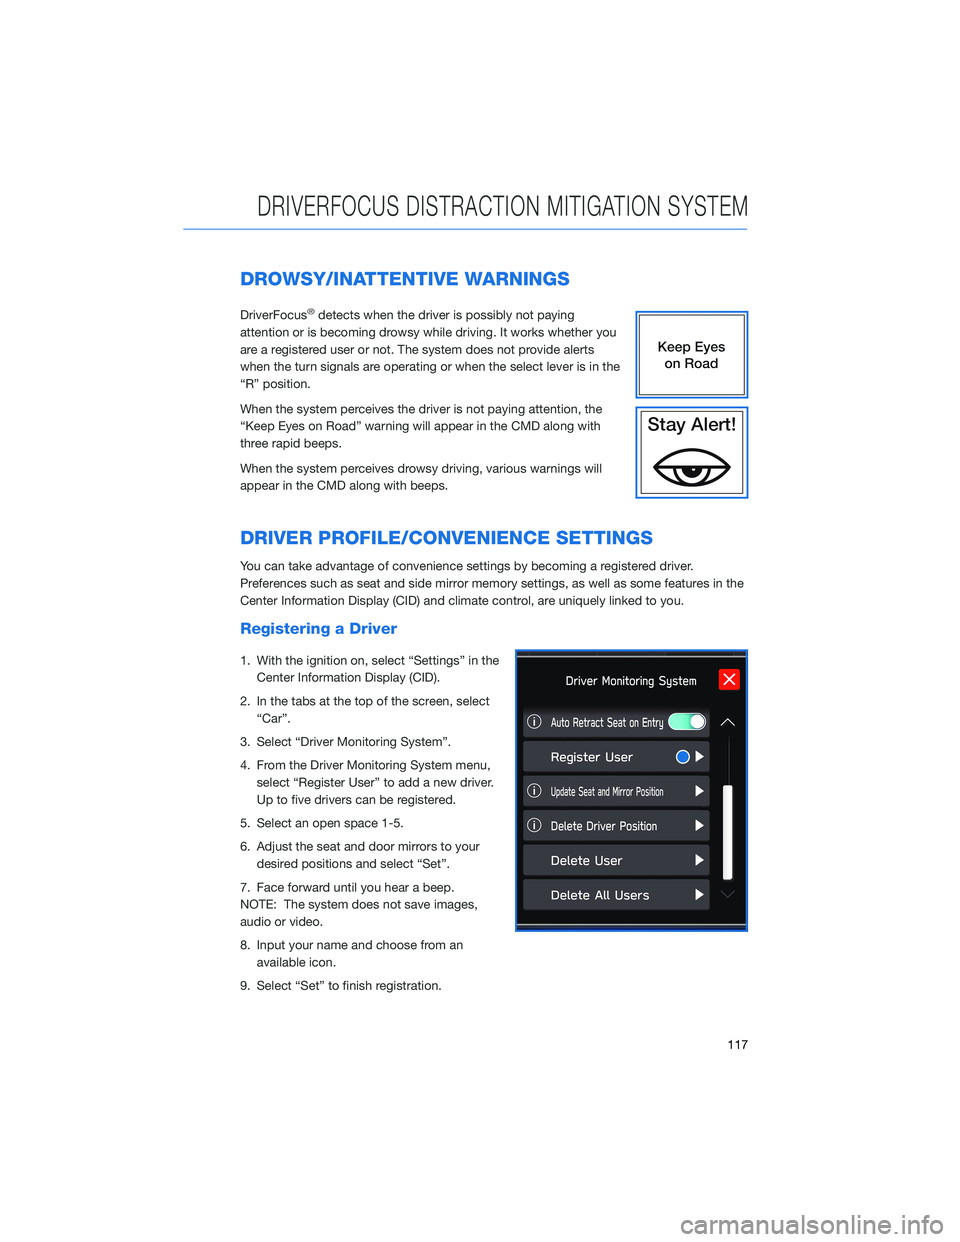
1. With the ignition on, select “Settings” in the
Center Information Display (CID).
2. In the tabs at the top of the screen, select
“Car”.
3. Select “Driver Monitoring System”.
4. From the Driver Monitoring System menu,
select “Register User” to add a new driver.
Up to five drivers can be registered.
5. Select an open space 1-5.
6. Adjust the seat and door mirrors to your
desired positions and select “Set”.
7. Face forward until you hear a beep.
NOTE: The system does not save images,
audio or video.
8. Input your name and choose from an
available icon.
9. Select “Set” to finish registration.
DRIVERFOCUS DISTRACTION MITIGATION SYSTEM
117
Page 131 of 172
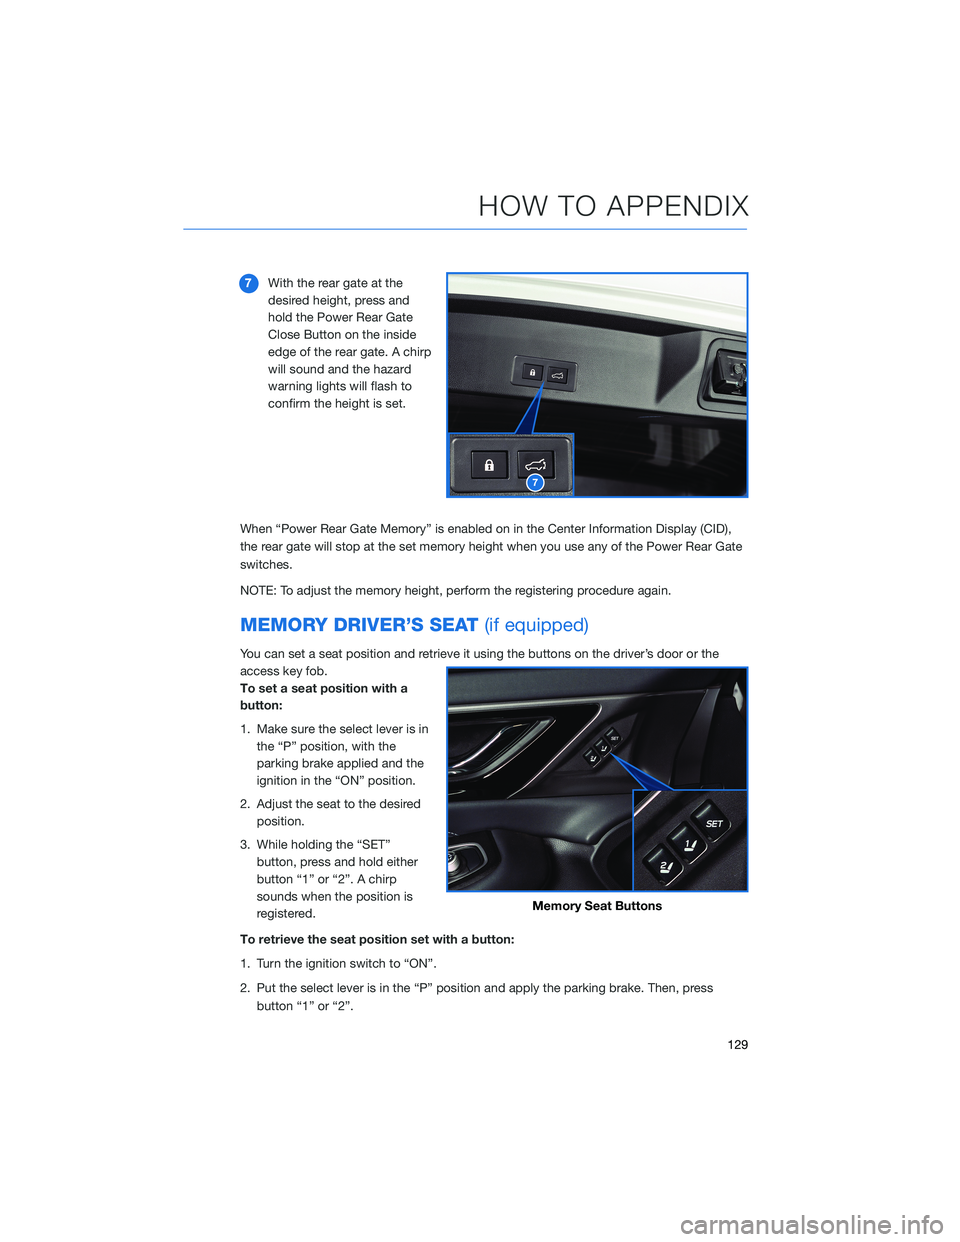
7With the rear gate at the
desired height, press and
hold the Power Rear Gate
Close Button on the inside
edge of the rear gate. A chirp
will sound and the hazard
warning lights will flash to
confirm the height is set.
When “Power Rear Gate Memory” is enabled on in the Center Information Display (CID),
the rear gate will stop at the set memory height when you use any of the Power Rear Gate
switches.
NOTE: To adjust the memory height, perform the registering procedure again.
MEMORY DRIVER’S SEAT(if equipped)
You can set a seat position and retrieve it using the buttons on the driver’s door or the
access key fob.
To set a seat position with a
button:
1. Make sure the select lever is in
the “P” position, with the
parking brake applied and the
ignition in the “ON” position.
2. Adjust the seat to the desired
position.
3. While holding the “SET”
button, press and hold either
button “1” or “2”. A chirp
sounds when the position is
registered.
To retrieve the seat position set with a button:
1. Turn the ignition switch to “ON”.
2. Put the select lever is in the “P” position and apply the parking brake. Then, press
button “1” or “2”.
7
Memory Seat Buttons
HOW TO APPENDIX
129