Page 61 of 164
BUTTONS
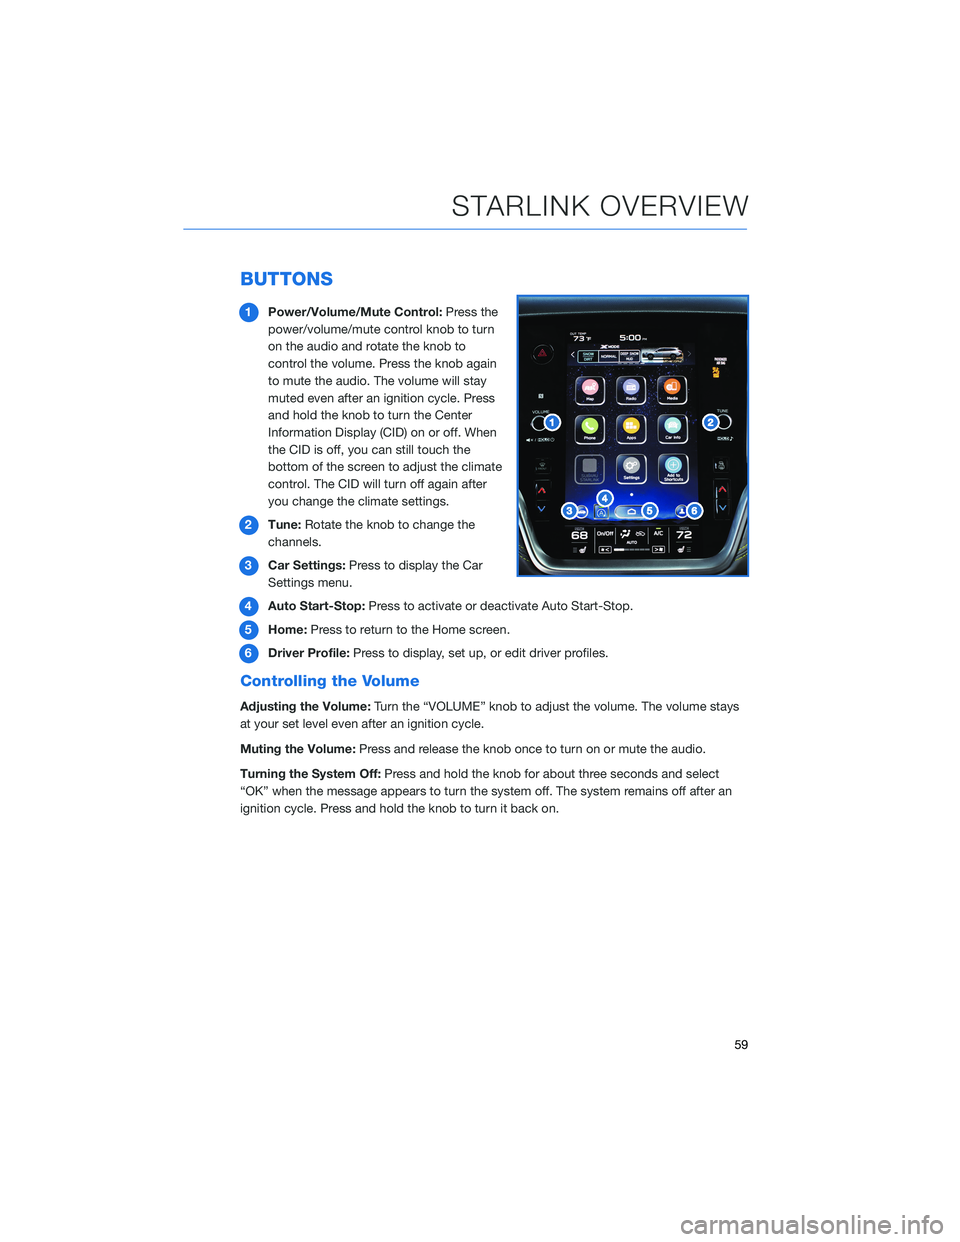
1Power/Volume/Mute Control:Press the
power/volume/mute control knob to turn
on the audio and rotate the knob to
control the volume. Press the knob again
to mute the audio. The volume will stay
muted even after an ignition cycle. Press
and hold the knob to turn the Center
Information Display (CID) on or off. When
the CID is off, you can still touch the
bottom of the screen to adjust the climate
control. The CID will turn off again after
you change the climate settings.
2Tune:Rotate the knob to change the
channels.
3Car Settings:Press to display the Car
Settings menu.
4Auto Start-Stop:Press to activate or deactivate Auto Start-Stop.
5Home:Press to return to the Home screen.
6Driver Profile:Press to display, set up, or edit driver profiles.
Controlling the Volume
Adjusting the Volume:Turn the “VOLUME” knob to adjust the volume. The volume stays
at your set level even after an ignition cycle.
Muting the Volume:Press and release the knob once to turn on or mute the audio.
Turning the System Off:Press and hold the knob for about three seconds and select
“OK” when the message appears to turn the system off. The system remains off after an
ignition cycle. Press and hold the knob to turn it back on.
STARLINK OVERVIEW
59
Page 75 of 164
Satellite Radio
A SiriusXM®Satellite Radio is a tuner
designed exclusively to receive broadcasts
provided under a separate subscription. After
a free trial period, a subscription is necessary
to continue service.
For more information or to subscribe, visit
www.siriusxm.com.
Setting Presets
You can preset 18 stations. Presets can be set
for SiriusXM®, FM, or AM stations, allowing
you to switch among the three with the press
of a single button. To preset a radio station:
1. Tune to the desired channel.
2. Press and hold one of the desired preset
station buttons.
MULTIMEDIA
73
Page 86 of 164
SAFETY AND SECURITY OVERVIEW
STARLINK®Safety and Security services* are designed to help in your time of need. These
include Advanced Automatic Collision Notification, SOS Emergency Assistance, Enhanced
Roadside Assistance, Stolen Vehicle Recovery, the added convenience of Remote Engine
Start with Climate Control, and so much more.
With the SUBARU STARLINK
®system integrated into your vehicle, advanced safety and
security technology is just a button press away. The SUBARU STARLINK®experience
includes in-vehicle call center support, maintenance and diagnostic alerts as well as
remote services that keep you connected to your Subaru vehicle.
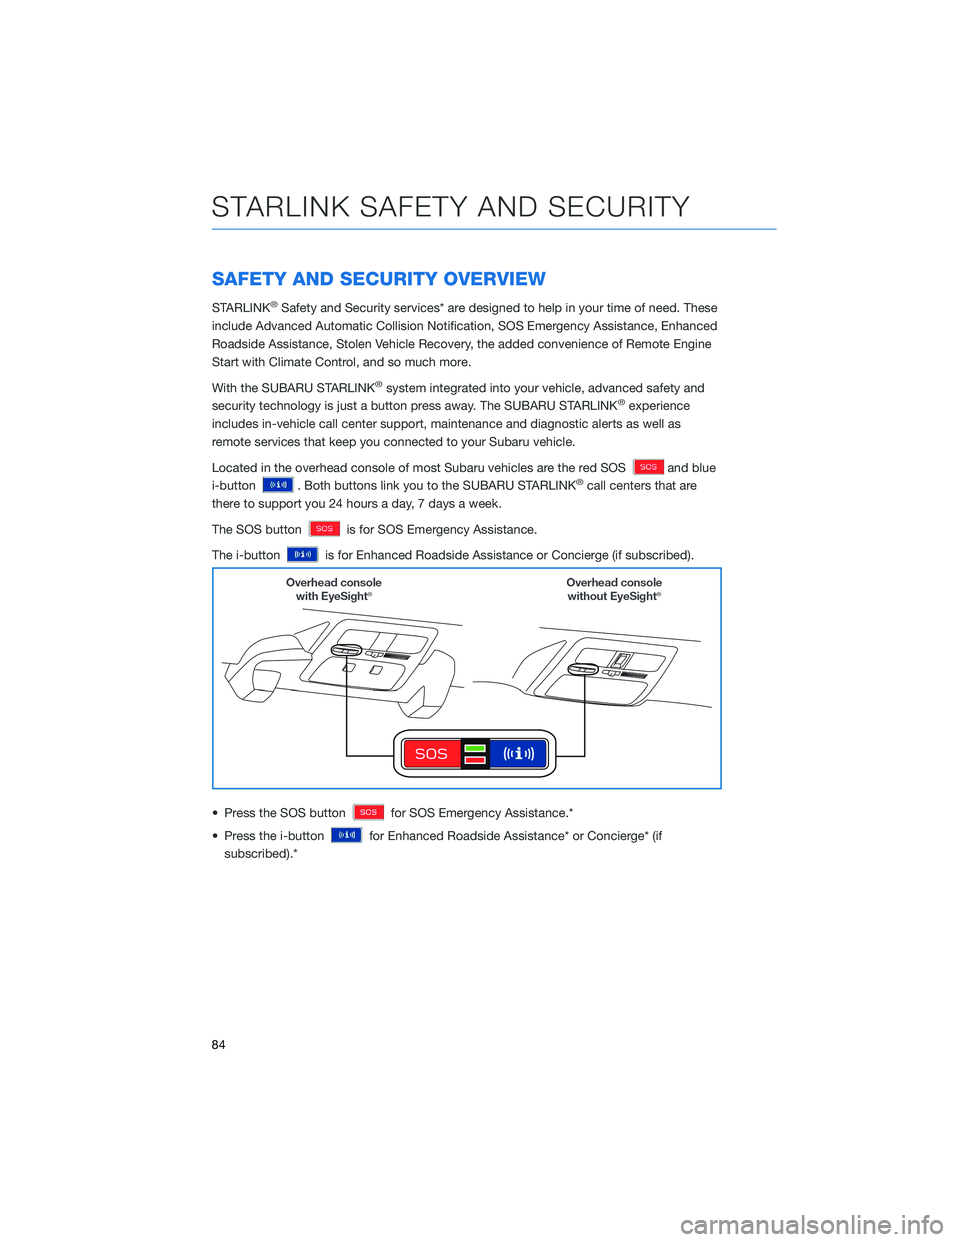
Located in the overhead console of most Subaru vehicles are the red SOS
and blue
i-button
. Both buttons link you to the SUBARU STARLINK®call centers that are
there to support you 24 hours a day, 7 days a week.
The SOS button
is for SOS Emergency Assistance.
The i-button
is for Enhanced Roadside Assistance or Concierge (if subscribed).
• Press the SOS button
for SOS Emergency Assistance.*
• Press the i-button
for Enhanced Roadside Assistance* or Concierge* (if
subscribed).*
STARLINK SAFETY AND SECURITY
84
Page 99 of 164
Advanced Adaptive Cruise Control
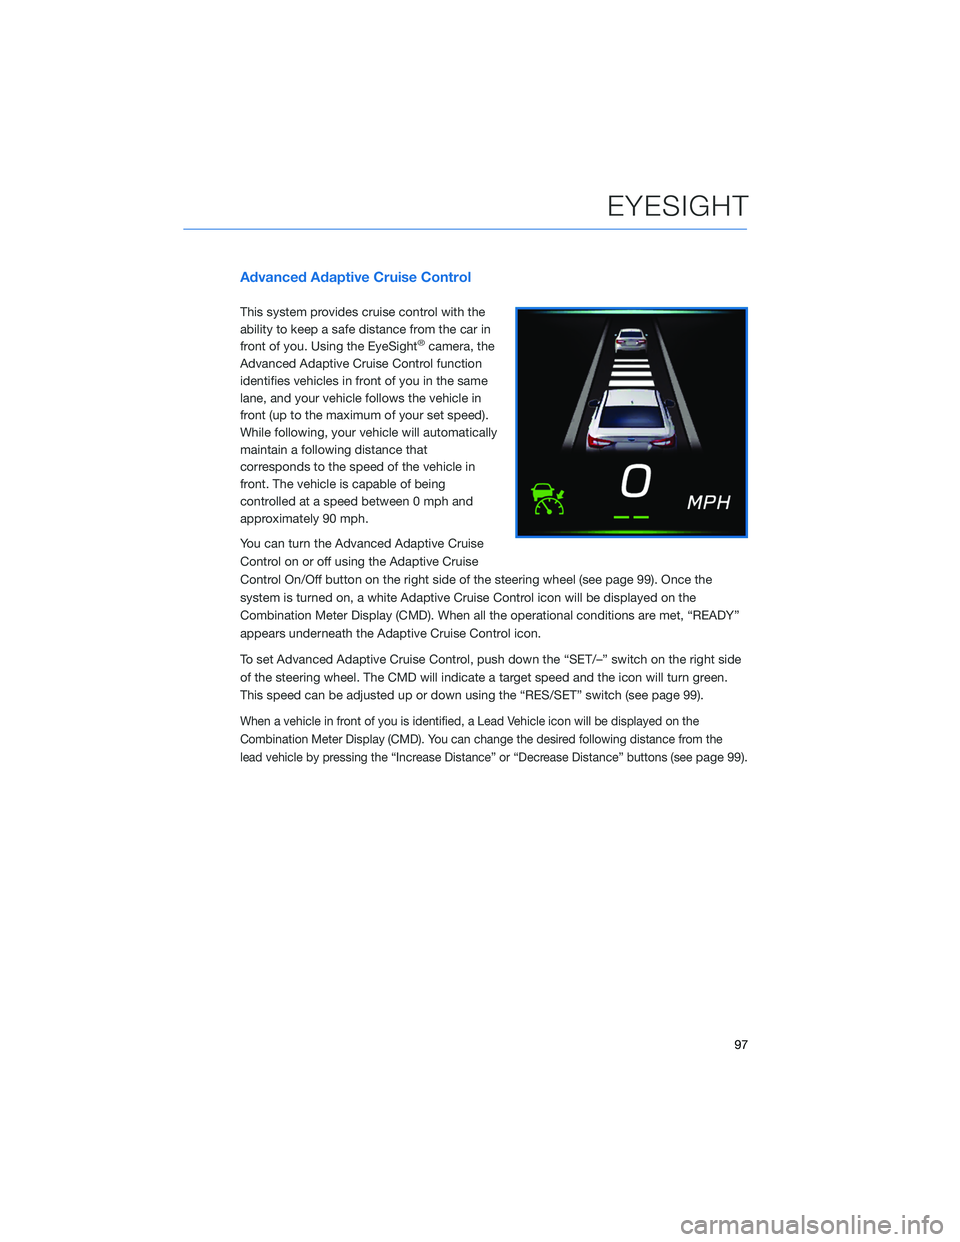
This system provides cruise control with the
ability to keep a safe distance from the car in
front of you. Using the EyeSight
®camera, the
Advanced Adaptive Cruise Control function
identifies vehicles in front of you in the same
lane, and your vehicle follows the vehicle in
front (up to the maximum of your set speed).
While following, your vehicle will automatically
maintain a following distance that
corresponds to the speed of the vehicle in
front. The vehicle is capable of being
controlled at a speed between 0 mph and
approximately 90 mph.
You can turn the Advanced Adaptive Cruise
Control on or off using the Adaptive Cruise
Control On/Off button on the right side of the steering wheel (see page 99). Once the
system is turned on, a white Adaptive Cruise Control icon will be displayed on the
Combination Meter Display (CMD). When all the operational conditions are met, “READY”
appears underneath the Adaptive Cruise Control icon.
To set Advanced Adaptive Cruise Control, push down the “SET/–” switch on the right side
of the steering wheel. The CMD will indicate a target speed and the icon will turn green.
This speed can be adjusted up or down using the “RES/SET” switch (see page 99).
When a vehicle in front of you is identified, a Lead Vehicle icon will be displayed on the
Combination Meter Display (CMD). You can change the desired following distance from the
lead vehicle by pressing the “Increase Distance” or “Decrease Distance” buttons (see
page 99).
EYESIGHT
97
Page 108 of 164
REVERSE AUTOMATIC BRAKING (RAB)(if equipped)
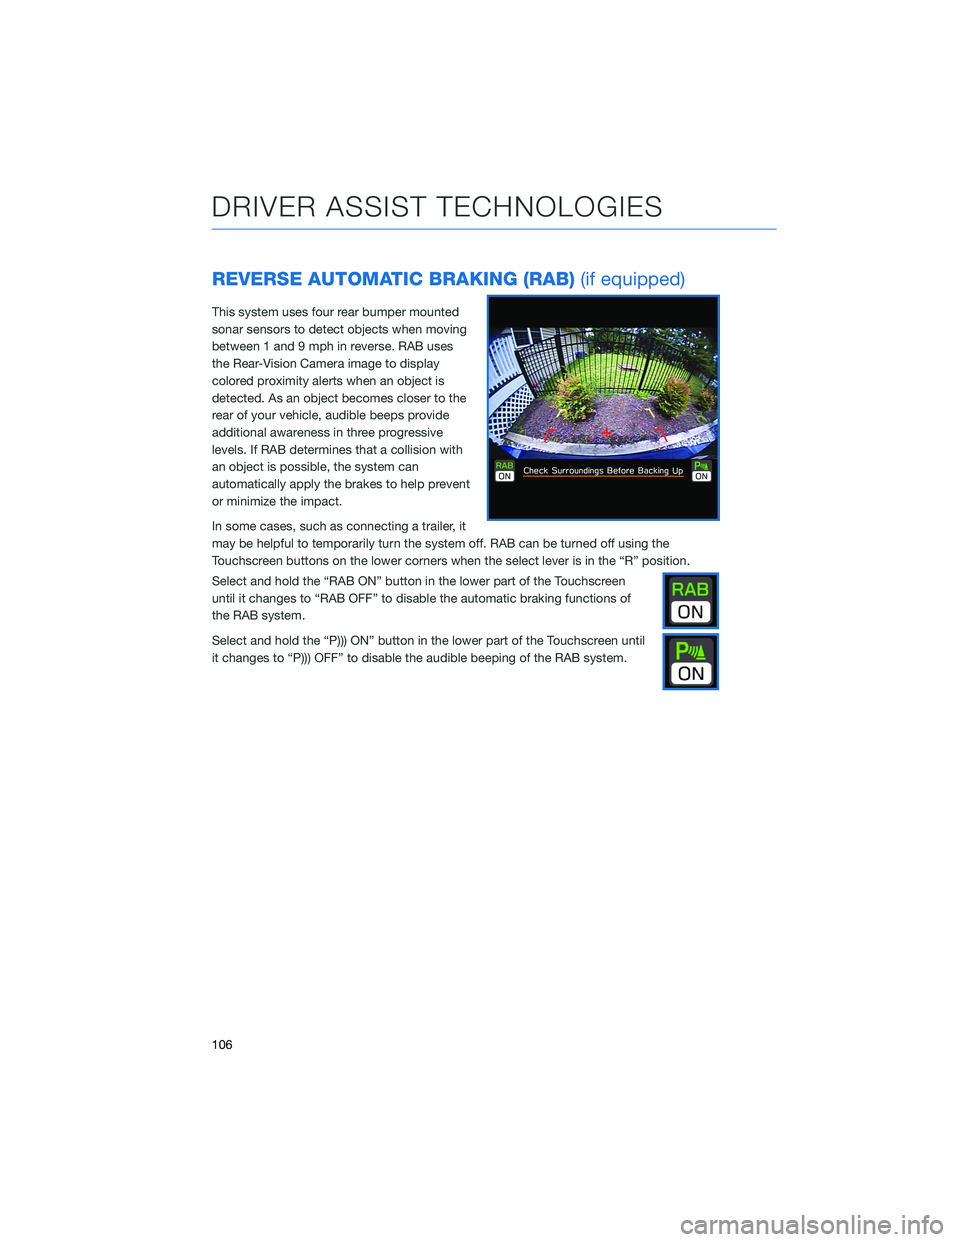
This system uses four rear bumper mounted
sonar sensors to detect objects when moving
between 1 and 9 mph in reverse. RAB uses
the Rear-Vision Camera image to display
colored proximity alerts when an object is
detected. As an object becomes closer to the
rear of your vehicle, audible beeps provide
additional awareness in three progressive
levels. If RAB determines that a collision with
an object is possible, the system can
automatically apply the brakes to help prevent
or minimize the impact.
In some cases, such as connecting a trailer, it
may be helpful to temporarily turn the system off. RAB can be turned off using the
Touchscreen buttons on the lower corners when the select lever is in the “R” position.
Select and hold the “RAB ON” button in the lower part of the Touchscreen
until it changes to “RAB OFF” to disable the automatic braking functions of
the RAB system.
Select and hold the “P))) ON” button in the lower part of the Touchscreen until
it changes to “P))) OFF” to disable the audible beeping of the RAB system.
DRIVER ASSIST TECHNOLOGIES
106
Page 119 of 164
3Select “Manual”.
4Adjust the time and date using the
“Arrow Up” and “Arrow Down” buttons.
5Once you are finished, select “OK”.
3
5
HOW TO APPENDIX
117
Page 122 of 164
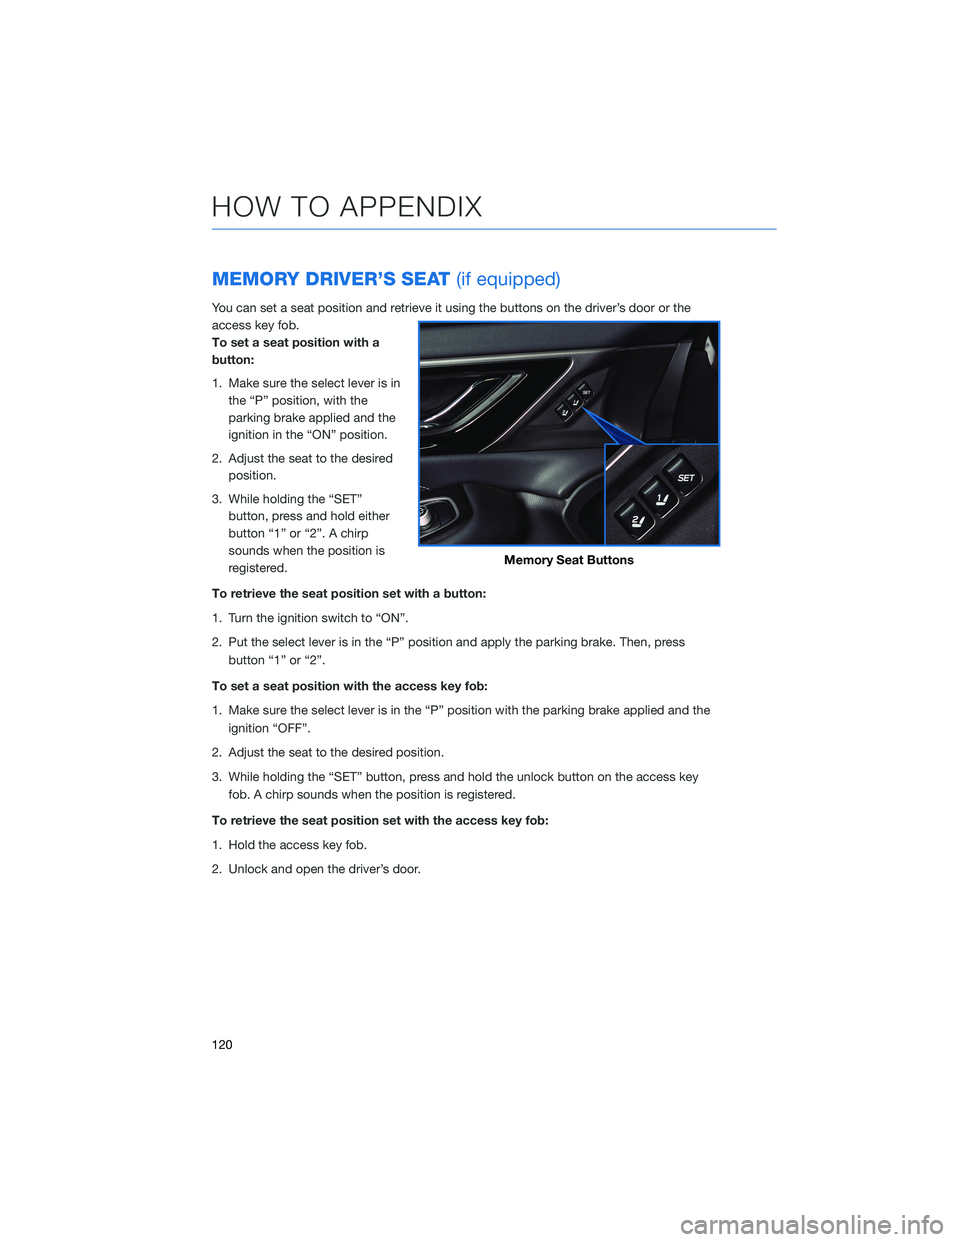
MEMORY DRIVER’S SEAT(if equipped)
You can set a seat position and retrieve it using the buttons on the driver’s door or the
access key fob.
To set a seat position with a
button:
1. Make sure the select lever is in
the “P” position, with the
parking brake applied and the
ignition in the “ON” position.
2. Adjust the seat to the desired
position.
3. While holding the “SET”
button, press and hold either
button “1” or “2”. A chirp
sounds when the position is
registered.
To retrieve the seat position set with a button:
1. Turn the ignition switch to “ON”.
2. Put the select lever is in the “P” position and apply the parking brake. Then, press
button “1” or “2”.
To set a seat position with the access key fob:
1. Make sure the select lever is in the “P” position with the parking brake applied and the
ignition “OFF”.
2. Adjust the seat to the desired position.
3. While holding the “SET” button, press and hold the unlock button on the access key
fob. A chirp sounds when the position is registered.
To retrieve the seat position set with the access key fob:
1. Hold the access key fob.
2. Unlock and open the driver’s door.
Memory Seat Buttons
HOW TO APPENDIX
120
Page 150 of 164
Guidance Screen Icons
These are the common icons used for the navigation guidance.
ICON EXPLANATION ICON EXPLANATION
Turn left/right.Go straight ahead at
the intersection.
U-turn.Exit at the junction.
Keep left/right at the
fork in the road.Roundabout.
Turn left/right &
sharp curve.You have arrived at
your destination.
Stay in the left/right
lane.You have arrived at
your waypoint.
Map Zoom
Once on the map screen, you can zoom in or
out by touching the “+” or “-” buttons on the
screen. You can also use two fingers on the
screen and move them apart to zoom in or
together to zoom out.
HOW TO APPENDIX
148