Page 100 of 124
Pairing an iOS/Apple Device
1. Start by selecting “Settings” on the Home
screen.
2. Go to the “Phone” screen and select “Add
Device” / “Add Phone”.
3. This screen will be displayed when pairing
mode is in progress. The device name will
most likely be Subaru BT, but be sure to
make note of what name it is, so you can
find it on your phone.
4. On your iOS/Apple device, select “Settings”. The
location on the Home screen will vary.
HOW TO APPENDIX
98
Page 105 of 124
2. On the vehicle display screen, Android Auto
should auto launch the first time. If not,
select the Android Auto Icon on the display.
Select “Show Me How” for a quick guide
on using Android Auto, or select “Skip” if
you want to start using the app right away.
3. You will then be taken to the Home screen
of the Android Auto app for your phone.
4. If Android Auto won’t launch, open the
Android Auto app on the phone, then select
the top left menu button. Select “Settings”,
then “Connected Cars”, and finally select
the top right menu icon and choose “Forget
all cars”.
If this does not work, uninstall the Android
Auto app from the phone and reinstall from
the Play Store.
HOW TO APPENDIX
103
Page 108 of 124
Compatible Models
For a list of all the Apple phones that are compatible with Apple
CarPlay, visit:www.apple.com/ios/carplay/
WI-FI
Connecting to a Wi-Fi Network
1. Display the General Settings screen by
pressing the “Home” button, then select
“Settings”. Make sure Wi-Fi is on.
2. Under the “General” tab, select “Wi-Fi
Settings”.
3. Select the desired network. If the network is
a secure network, a lock symbol appears
on the right side of the screen. If you are
connecting to a secure network, enter the
password and select “Join”.
HOW TO APPENDIX
106
Page 111 of 124
MAPS(if equipped)
Finding a Destination by Address
To search by address:
1. Start by pushing the “Map” button to
display the map screen. Then, select
“Menu”. Next select “Search by Destination
Enter Address”.
2. The keypad screen displays. As you type
the address or name of the destination,
suggestions will display. Select the desired
destination.
3. The route calculation screen displays three
recommended routes at the bottom left of
the screen. Select the desired route, then
select “GO”. You can also press and hold
the route on the map to begin navigation.
HOW TO APPENDIX
109
Page 112 of 124
Finding a Destination by POI
To search by Points Of Interest (POI):
1. Push the “Map” button to display the map screen.
Then, select “Menu”, followed by “Nearby Places
List of POI”.
2. Categories are listed alphabetically. Use the scroll
bar on the right, if needed, to display more
categories, then make your selection.
3. Select the desired item from the list, then select
“GO”.
4. The route calculation screen displays three
recommended routes at the bottom left of
the screen. Select the desired route, then
select “GO”. You can also press and hold
the route on the map to begin navigation.
HOW TO APPENDIX
110
Page 115 of 124

Traffic Information
Road sections affected by traffic conditions are displayed in a different color on the map,
and a small icon representing the type of traffic condition is displayed above the road.
A subscription to the SiriusXM
®Satellite Radio Service is necessary to receive the data
service in the vehicle (3 years included).
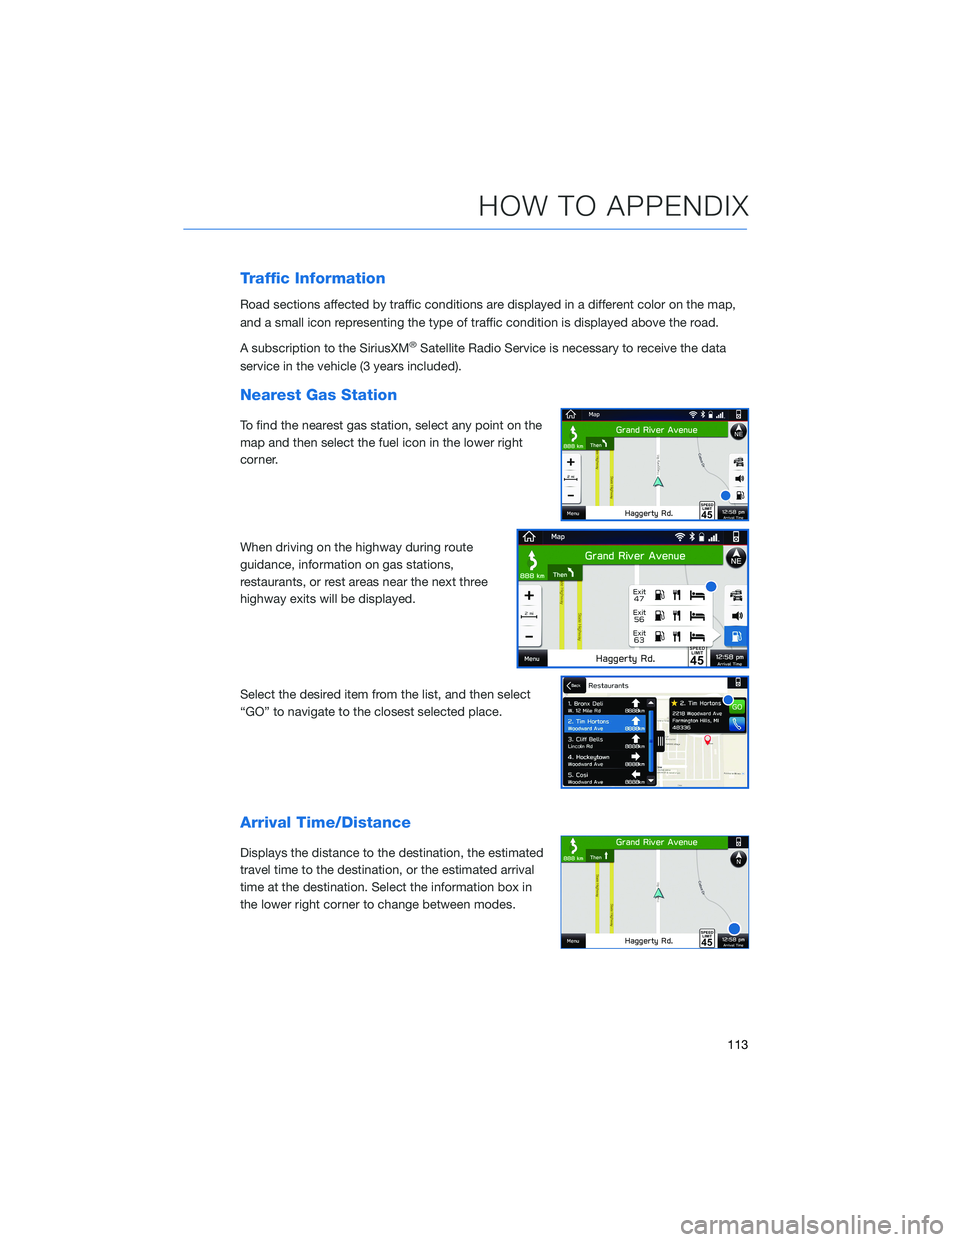
Nearest Gas Station
To find the nearest gas station, select any point on the
map and then select the fuel icon in the lower right
corner.
When driving on the highway during route
guidance, information on gas stations,
restaurants, or rest areas near the next three
highway exits will be displayed.
Select the desired item from the list, and then select
“GO” to navigate to the closest selected place.
Arrival Time/Distance
Displays the distance to the destination, the estimated
travel time to the destination, or the estimated arrival
time at the destination. Select the information box in
the lower right corner to change between modes.
HOW TO APPENDIX
113
Page 117 of 124
5Select “Back”.
6Select “Check for Updates”.
7Check the confirmation message, then
select “Yes”.
8This screen is displayed simultaneously
with the start of the download and
installation. Select the “X” in the upper
right corner if you need to stop the
download and installation.
HOW TO APPENDIX
115
Page 118 of 124

FIRMWARE AND SOFTWARE UPDATES
For 8.0–inch Multimedia Plus and 8.0–inch Multimedia Navigation systems, you can
update the system software via a Wi-Fi connection or the aha™ application on your
smartphone (depending on your smartphone communication and transfer speed).
To accurately check for updates, make sure the clock is set to “Auto” with a GPS signal
available (system with navigation) or a phone paired via Bluetooth
®(system without
navigation). See page 76 for step by step directions on setting the clock. System
functionality will be restricted during installation.
1. Connect to a Wi-Fi network or start the aha application on your smartphone
(see page 106).
2. Return to the general settings screen (if needed, press the “Home” button, select
“Settings”, and then select “General”).
3. Select “Check for Updates”.
• If “Automatically Check for Updates” is turned on at the general settings screen, an
update check will be performed automatically before proceeding to the next step.
• If “Automatically Download Updates” is turned on at the general settings screen, the
software update will be downloaded automatically before proceeding to “Update
Installation”.
4. If the “Software Update Ready to Download” pop-up is displayed, select “Download
Now” to begin the download. The download status progress is displayed in the upper
right of the screen.
5. Select “Install Now” to start the installation process. The installation process will take
several minutes to complete. If you need to stop the installation process, press
“Cancel”.
6. When the installation is complete, select “I Agree” on the confirmation message to
complete the update process. By selecting “I Agree”, the system will restart
automatically.
HOW TO APPENDIX
116