2021 PEUGEOT PARTNER start stop button
[x] Cancel search: start stop buttonPage 40 of 260

38
Access
The monitoring system is deactivated: the
indicator lamp in the button goes off and the
direction indicators flash for about 2 seconds.
When the vehicle automatically locks
itself again (as happens if a door or the
boot is not opened within 30 seconds of
unlocking), the monitoring system is also
reactivated automatically.
Locking the vehicle
with exterior perimeter
monitoring only
Disable volumetric and anti-tilt monitoring to
avoid unwanted alarm triggering in certain cases,
such as:
–
Slightly open window or sunroof.
–
W
ashing the vehicle.
–
Changing a wheel.
–
T
owing your vehicle.
–
T
ransport on a ship or ferry.
Deactivating the interior volumetric
and anti-tilt monitoring
► Switch off the ignition and within 10 seconds
press the alarm button until its red indicator lamp
is on fixed.
►
Get out of the vehicle.
►
Immediately lock the vehicle using the remote
control or the "Keyless Entry and Starting"
system.
Only the exterior perimeter monitoring is
activated; the red indicator lamp in the button
flashes every second.
To be taken into account, the deactivation must be carried out every time the
ignition is switched off.
Reactivating the interior volumetric
and anti-tilt monitoring
► Deactivate the perimeter monitoring by
unlocking the vehicle with the remote control or
the Keyless Entry and Starting system.
The indicator lamp in the button goes off.
►
Reactivate all monitoring by locking the
vehicle with the remote control or the Keyless
Entry and Starting system.
The red indicator lamp in the button once again
flashes every second.
Triggering of the alarm
This is indicated by sounding of the siren
and flashing of the direction indicators for 30
seconds.
Depending on the country of sale, certain
monitoring functions remain active until the alarm
has been triggered eleven times consecutively.
When the vehicle is unlocked using the remote
control or the "Keyless Entry and Starting"
system, rapid flashing of the red indicator lamp
in the button informs you that the alarm was triggered during your absence. When the ignition
is switched on, the flashing stops immediately.
Failure of the remote control
To deactivate the monitoring functions:
►
unlock the vehicle using the key (integral to
the remote control) in the driver's door lock,
►
open the door; the alarm is triggered,
►
switch on the ignition; the alarm stops; the
indicator lamp in the button goes off.
Locking the vehicle without
activating the alarm
► Lock or deadlock the vehicle using the key
(integral to the remote control) in the driver's
door lock.
Malfunction
When the ignition is switched on, fixed
illumination of the red indicator lamp in the
button indicates a malfunction of the system.
Have it checked by a PEUGEOT dealer or a
qualified workshop.
Automatic activation
(Depending on the country of sale)
The system is activated automatically 2 minutes
after the last door or the boot is closed.
►
T
o avoid triggering the alarm on entering the
vehicle, first press the unlocking button on the
remote control or unlock the vehicle using the
“Keyless Entry and Starting” system.
Page 60 of 260
58
Ease of use and comfort
– enhance the effectiveness of the demisting
function in winter , above 3°C.
On/Off
► Press button 5 to activate/deactivate the air
conditioning system.
When the air conditioning is in operation, to
cool the air more quickly, you can use interior
air recirculation for a few moments by pressing
button 4. Then restore the intake of exterior air.
The air conditioning does not operate when the air flow adjustment is set to off.
Switching the system off could result in
discomfort (humidity, misting).
Air distribution
► Pressing button 3 successively directs the air
flow towards:
–
windscreen, side windows and footwells,
–
footwells,
–
central vents, side vents and footwells,
–
windscreen, side windows, central vents, side
vents and footwells,
–
central and side vents,
–
windscreen and side windows (demisting or
defrosting).
Air flow
► Press the buttons 2 to increase/decrease the
air flow.
The air flow symbol (a fan) appears. It is filled in
or emptied gradually, according to the value set.
Recirculation of interior air
The intake of exterior air helps avoid and
eliminate misting of the windscreen and side
windows.
Recirculating the interior air isolates the
passenger compartment from exterior odours
and fumes.
When required, this function also allows
faster heating or cooling of the air in the
passenger compartment.
►
Press button
4 to recirculate the interior air or
allow the intake of exterior air.
Avoid prolonged use of interior air recirculation (due to the risk of misting
and deteriorating air quality).
Front demisting
- defrosting
These markings on the control panel indicate the positioning of the controls for
rapid demisting or defrosting of the windscreen
and side windows.
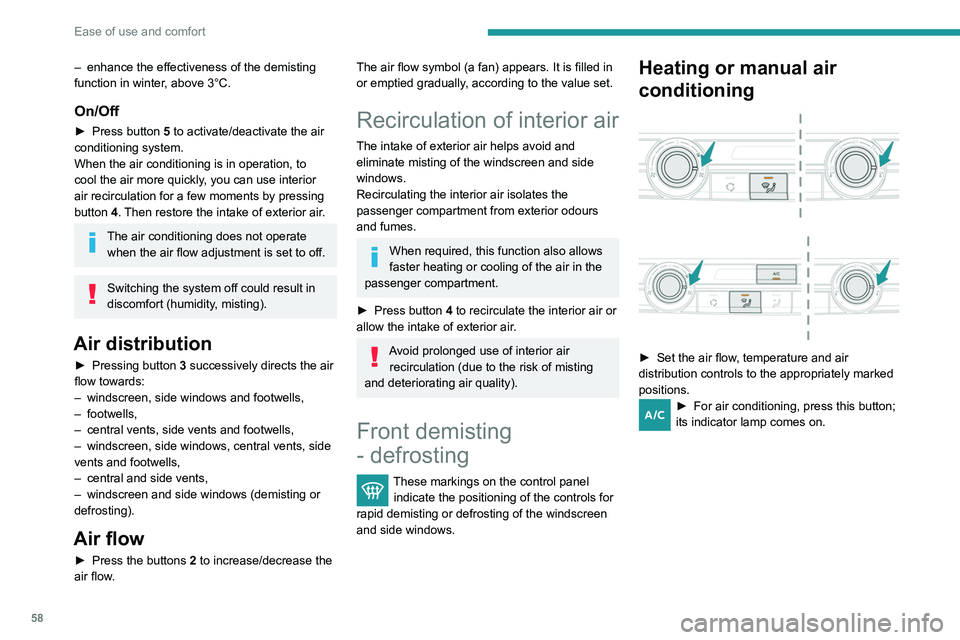
Heating or manual air
conditioning
► Set the air flow , temperature and air
distribution controls to the appropriately marked
positions.
► For air conditioning, press this button;
its indicator lamp comes on.
Dual-zone automatic air
conditioning
► Press this button to demist or defrost
the windscreen and side windows more
quickly.
The system automatically manages the air
conditioning, air flow and air intake, and provides
optimum distribution towards the windscreen and
side windows.
► To turn it off, press this button
again or press " AUTO".
The system restarts with the values in use before
it was deactivated.
Heated windscreen and washer jets
For more information on the Wiper
control stalk and in particular the heated
windscreen and washer jets, refer to the
corresponding section.
With Stop & Start, when demisting
- defrosting has been activated, STOP
mode is not available.
Page 61 of 260
59
Ease of use and comfort
3Dual-zone automatic air
conditioning
► Press this button to demist or defrost
the windscreen and side windows more
quickly
.
The system automatically manages the air
conditioning, air flow and air intake, and provides
optimum distribution towards the windscreen and
side windows.
► To turn it off, press this button
again or press " AUTO".
The system restarts with the values in use before
it was deactivated.
Heated windscreen and washer jets
For more information on the Wiper
control stalk and in particular the heated
windscreen and washer jets, refer to the
corresponding section.
With Stop & Start, when demisting
- defrosting has been activated, STOP
mode is not available.
Heated windscreen
Depending on country of sale.
This function heats the windscreen in cold
weather.
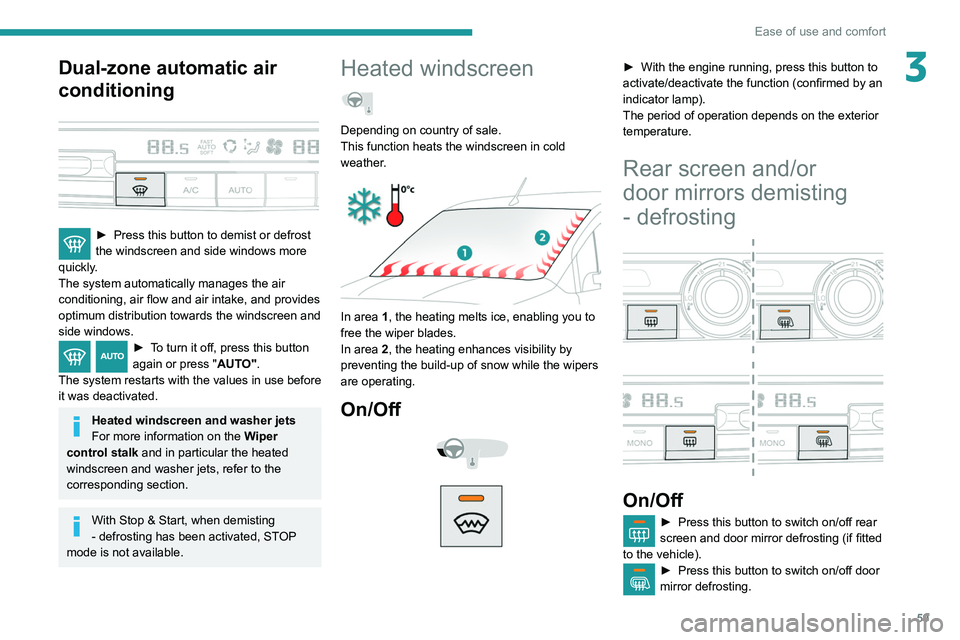
In area 1, the heating melts ice, enabling you to
free the wiper blades.
In area 2, the heating enhances visibility by
preventing the build-up of snow while the wipers
are operating.
On/Off
► With the engine running, press this button to
activate/deactivate the function (confirmed by an
indicator lamp).
The period of operation depends on the exterior
temperature.
Rear screen and/or
door mirrors demisting
- defrosting
On/Off
► Press this button to switch on/off rear
screen and door mirror defrosting (if fitted
to the vehicle).
► Press this button to switch on/off door
mirror defrosting.
Page 62 of 260

60
Ease of use and comfort
Switch off the rear screen and door
mirror defrosting function as soon as
possible, as decreasing electrical
consumption in turn reduces fuel
consumption.
Rear screen demisting/defrosting can
only operate with the engine is running.
Additional heating/ ventilation system
Heating
This is an additional and separate system which
heats the passenger compartment and improves
defrosting performance.
This indicator lamp is lit while the system is programmed or set in operation
remotely via the remote control.
It flashes during the whole duration of the
heating and goes off at the end of the heating
cycle or when stopped using the remote control.
Ventilation
This system allows ventilation of the passenger
compartment with exterior air to improve the
temperature experienced on entering the vehicle
in summer.
Programming
With Bluetooth® audio system
► Press the MENU button to access the
main menu.
►
Select "
Pre-heat. / Pre-ventil.".
►
Select "
Activation" and, if necessary, for
programming, “Parameters".
►
Select "
Heating" to heat the engine and
passenger compartment or " Ventilation" to
ventilate the passenger compartment.
► Select:
• the first clock to set/save the time at which
the pre-heating temperature will be reached,
•
the second clock to set/save a second time
at which the pre-heating temperature will be
reached,
Using these two clocks and depending
on the season you can, for example,
select one or the other start time.
A message on the screen confirms your
choice.
With PEUGEOT Connect Radio
Press Connect-App to display the main
page.
Then press "Programmable heating/ ventilation ".
►
Select the "
Status" tab to activate/deactivate
the system.
►
Select the "
Other settings" tab to choose
the "Heating" mode, to heat the engine and
passenger compartment, or " Ventilation" to
ventilate the passenger compartment.
►
Then set/save the time at which the
preheating temperature will be reached for each
selection.
Press this button to save.
With PEUGEOT Connect Nav
► Press the " Applications" menu.
►
Press the "
Vehicle Apps" tab.
► Press " Temperature programming".
►
Press the "
Status" tab to activate/deactivate
the system.
► Press the "Parameters " tab to select
"Heating" mode to heat the engine and
passenger compartment or " Ventilation" mode
to ventilate the passenger compartment.
► Then set/save the activation time for each
selection.
► Press "OK" to confirm.
You must allow at least 60 minutes
between programming operations.
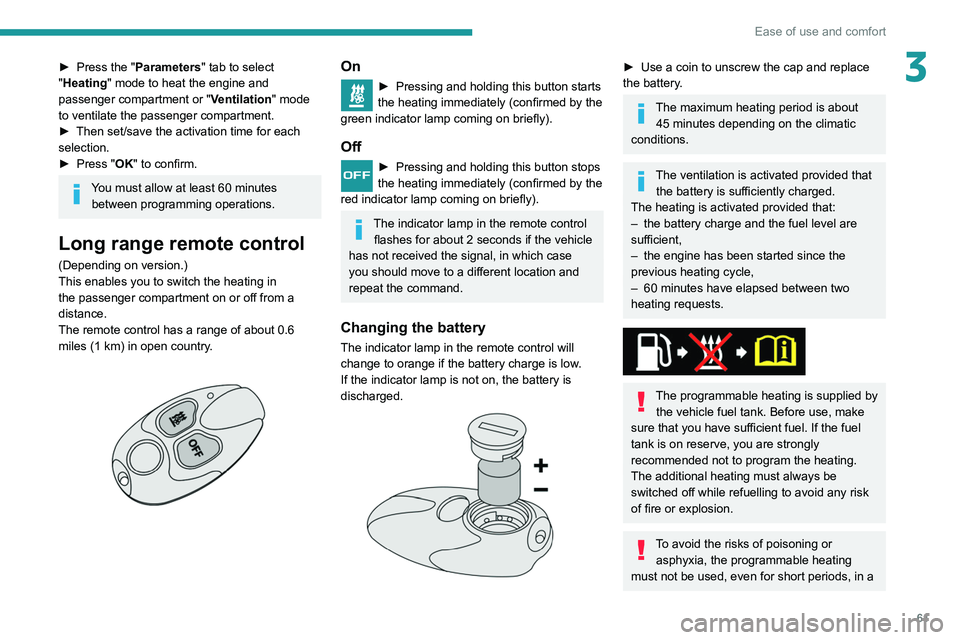
Long range remote control
(Depending on version.)
This enables you to switch the heating in
the passenger compartment on or off from a
distance.
The remote control has a range of about 0.6
miles (1 km) in open country.
Page 63 of 260
61
Ease of use and comfort
3► Press the "Parameters" tab to select
"Heating" mode to heat the engine and
passenger compartment or " Ventilation" mode
to ventilate the passenger compartment.
►
Then set/save the activation time for each
selection.
►
Press "
OK" to confirm.
You must allow at least 60 minutes between programming operations.
Long range remote control
(Depending on version.)
This enables you to switch the heating in
the passenger compartment on or off from a
distance.
The remote control has a range of about 0.6
miles (1
km) in open country.
On
► Pressing and holding this button starts
the heating immediately (confirmed by the
green indicator lamp coming on briefly).
Off
► Pressing and holding this button stops
the heating immediately (confirmed by the
red indicator lamp coming on briefly).
The indicator lamp in the remote control flashes for about 2 seconds if the vehicle
has not received the signal, in which case
you should move to a different location and
repeat the command.
Changing the battery
The indicator lamp in the remote control will
change to orange if the battery charge is low.
If the indicator lamp is not on, the battery is
discharged.
► Use a coin to unscrew the cap and replace
the battery .
The maximum heating period is about 45 minutes depending on the climatic
conditions.
The ventilation is activated provided that the battery is sufficiently charged.
The heating is activated provided that:
–
the battery charge and the fuel level are
sufficient,
–
the engine has been started since the
previous heating cycle,
–
60
minutes have elapsed between two
heating requests.
The programmable heating is supplied by the vehicle fuel tank. Before use, make
sure that you have sufficient fuel. If the fuel
tank is on reserve, you are strongly
recommended not to program the heating.
The additional heating must always be
switched off while refuelling to avoid any risk
of fire or explosion.
To avoid the risks of poisoning or asphyxia, the programmable heating
must not be used, even for short periods, in a
Page 94 of 260

92
Driving
► Unlock the steering column by simultaneously
turning the steering wheel and the key.
In certain circumstances, you may have
to turn the steering wheel firmly to move
the wheels (if the wheels are against a kerb,
for example).
►
T
urn the key to position 2, Ignition On, to
activate the engine pre-heating system.
► Wait until this warning lamp goes off in
the instrument panel, then turn the key to
position 3 without pressing the accelerator pedal,
to operate the starter motor until the engine
starts. As soon as the engine starts, release the
key.
The warning lamp does not come on if the engine is already warm. In some
climatic conditions, the following
recommendations should be followed:
–
In mild conditions, do not leave the engine
at idle to warm up but move off straight away
and drive at moderate speed.
–
Depending on version, if the air
conditioning is activated and the exterior
temperature exceeds 35 °C, the engine’
s
idle speed may increase, up to 1,300 rpm,
depending on the cooling requirements.
–
In wintry conditions, the pre-heater warning
lamp will stay on for a longer period after
switching on the ignition; wait until it goes off
before starting.
– In very severe wintry
conditions (temperature below -23 °C), to
ensure correct operation and durability of your
vehicle’s mechanical components (engine
and gearbox), leave the engine running for
4 minutes before moving off.
Never leave the engine running in an
enclosed area without adequate ventilation:
internal combustion engines emit toxic
exhaust gases, such as carbon monoxide.
Danger of poisoning and death!
With petrol engines , after a cold start,
pre-heating the catalytic converter can
cause clearly-felt engine vibrations when
stationary, with the engine running, for
anything up to 2 minutes (accelerated idle
speed).
If the engine does not start straight away,
switch off the ignition.
Wait a few seconds before operating the
starter motor again. If the engine does not
start after several attempts, do not keep
trying: you risk damaging the starter motor
and the engine.
Contact a PEUGEOT dealer or a qualified
workshop.
To avoid any risk of jamming the pedals: – only use mats which are suited to the
fixings already present in the vehicle; these
fixings must be used,
–
never place one mat on top of another
.
The use of mats not approved by PEUGEOT
may interfere with access to the pedals and
hinder the operation of the cruise control /
speed limiter.
The mats approved by PEUGEOT have two
fixings located below the seat.
With the Keyless Entry and Starting
► Place the remote control inside the vehicle, in
the recognition zone.
► Press the “ START/STOP” button.
With a manual gearbox, the steering column
unlocks and the engine starts more or less
instantly.
With the EAT8 automatic gearbox, the engine
starts more or less instantly.
The warning lamp does not come on if the engine is already warm. In some
Page 95 of 260
93
Driving
6climatic conditions, it is advised to follow the
recommendations below:
–
In mild conditions, do not leave the engine
at idle to warm up but move off straight away
and drive at moderate speed.
–
Depending on version, if the air
conditioning is activated and when the
exterior temperature exceeds 35°C, the idle
engine speed can accelerate up to 1,300
rpm depending on the air conditioning
requirements.
–
In wintry conditions, when the ignition is
switched on, the duration of lighting of the
preheating indicator lamp is extended. W
ait
until it goes off before starting the engine.
–
In very severe wintry
conditions
(temperature below -23°C), to
ensure correct operation and durability of
the mechanical components of the vehicle,
engine and gearbox, leave the engine
running for 4 minutes before moving off.
Never leave the engine running in an
enclosed area without adequate ventilation:
internal combustion engines emit toxic
exhaust gases, such as carbon monoxide.
Danger of poisoning and death!
With petrol engines , after a cold start,
preheating the catalytic converter can
cause noticeable engine vibrations for
anything up to 2 minutes while stationary with
the engine running (accelerated idle speed).
For Diesel vehicles, when the
temperature is below zero,
starting will only occur once the preheating
warning lamp is off.
If this warning lamp comes on after pressing
the "START/STOP" button, press down on the
brake or clutch pedal until the warning lamp
goes off, without pressing the "START/STOP"
button again, until the engine starts and runs.
The presence of the “Keyless Entry and Starting” system remote control is
imperative in the recognition zone.
Never leave the vehicle with the engine
running and with the remote control on your
person.
If the remote control leaves the recognition
zone, a message is displayed.
Move the remote control into the zone in
order to be able to start the engine.
If one of the starting conditions is not
met, a message is displayed in the
instrument panel. In some circumstances, it is
necessary to turn the steering wheel while
pressing the "START/STOP" button to assist
unlocking of the steering column. A message
is displayed.
Switching off
► Immobilise the vehicle, with the engine at
idle.
► With a manual gearbox, ideally put the gear
lever into neutral.
►
With an automatic gearbox, ideally select
position
P
.
With the conventional key/With the
remote control key
► Turn the key all the way to position 1 (Stop)
and remove it from the ignition.
►
T
o lock the steering column, turn the steering
wheel until it locks.
To facilitate unlocking of the steering column, it is recommended that the
wheels be returned to the straight ahead
position before switching off the engine.
►
Check that the parking brake is correctly
applied, particularly on sloping ground.
Never switch off the ignition before the
complete immobilisation of the vehicle.
With the engine off, the braking and steering
assistance systems are also turned off: risk of
loss of control of the vehicle.
As a safety measure, never leave the vehicle without taking the remote control
with you, even for a short time.
Avoid attaching heavy objects to the key or the remote control, which would weigh
down on its blade in the ignition switch and
could cause a malfunction.
Page 96 of 260
94
Driving
Key left in the ignition
When opening the driver's door, an alert
message is displayed, accompanied by
an audible signal, to remind you that the key
is still in the ignition switch at position 1
(Stop).
If the key has been left in the ignition switch
at position 2 (Ignition on) , the ignition will be
switched off automatically after one hour.
To switch the ignition back on, turn the key
to position 1 (Stop), then back to position 2
(Ignition on) .
With Keyless Entry and Starting
► With the remote control in the recognition
zone, press the " START/STOP" button.
With a manual gearbox, the engine switches off
and the steering column locks.
With the EAT8 automatic gearbox, the engine
switches off.
If the vehicle is not immobilised, the
engine will not stop.
Switching on the ignition
with Keyless Entry and
Starting
With the Keyless Entry and Starting
system’s electronic key inside the vehicle,
pressing the " START/STOP" button, with no action on the pedals
, allows the ignition to be
switched on.
►
Pressing this button
again switches off the
ignition and allows the vehicle to be locked.
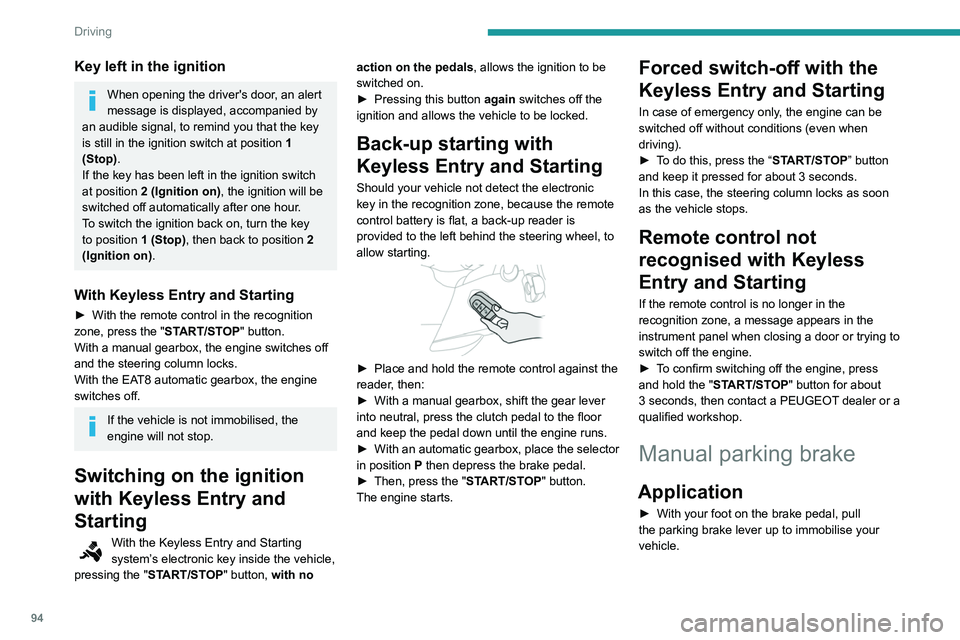
Back-up starting with
Keyless Entry and Starting
Should your vehicle not detect the electronic
key in the recognition zone, because the remote
control battery is flat, a back-up reader is
provided to the left behind the steering wheel, to
allow starting.
► Place and hold the remote control against the
reader , then:
►
With a manual gearbox, shift the gear lever
into neutral, press the clutch pedal to the floor
and keep the pedal down until the engine runs.
►
With
an automatic gearbox, place the selector
in position P then depress the brake pedal.
►
Then, press the "
START/STOP" button.
The engine starts.
Forced switch-off with the
Keyless Entry and Starting
In case of emergency only, the engine can be
switched off without conditions (even when
driving).
►
T
o do this, press the “START/STOP” button
and keep it pressed for about 3 seconds.
In this case, the steering column locks as soon
as the vehicle stops.
Remote control not
recognised with Keyless
Entry and Starting
If the remote control is no longer in the
recognition zone, a message appears in the
instrument panel when closing a door or trying to
switch off the engine.
►
T
o confirm switching off the engine, press
and hold the " START/STOP" button for about
3
seconds, then contact a PEUGEOT dealer or a
qualified workshop.
Manual parking brake
Application
► With your foot on the brake pedal, pull
the parking brake lever up to immobilise your
vehicle.
Release on level ground
► With your foot on the brake pedal, pull the
parking brake lever up gently, press the release
button, then lower the lever fully.
When the vehicle is being driven, this
warning lamp coming on, accompanied by
an audible signal and a message, indicates that
the parking brake is still applied or has not been
fully released.
When parking on a slope or on a steep
slope with a loaded vehicle, turn the
wheels against the kerb then apply the
parking brake.
Pressing the brake pedal facilitates the
application and release of the manual
parking brake.
With a manual gearbox, engage a gear
and then switch off the ignition.
With an automatic gearbox, place the
gear selector in position P, then switch
off the ignition.
Electric parking brake
In automatic mode, this system applies the
parking brake when the engine is switched off
and releases it when the vehicle moves off.