2021 Peugeot Landtrek change time
[x] Cancel search: change timePage 8 of 176

6
Eco-driving
Eco-driving
Eco-driving refers to a range of everyday
practices that allow the motorist to optimise their
energy consumption (fuel and/or electricity) and
CO
2 emissions.
Optimise your use of the gearbox
With a manual gearbox, move off gently and
change up promptly. While accelerating, change
up early.
With an automatic gearbox, favour automatic
mode and avoid pressing the accelerator pedal
heavily or suddenly.
With a 4-wheel drive vehicle, favour 2H
transmission (standard) mode over 4H mode.
With a manual gearbox, the gear shift indicator
prompts you to engage the most suitable gear:
whenever this indication is displayed on the
instrument panel, follow it straight away.
Drive smoothly
Maintain a safe distance between vehicles, use
engine braking rather than the brake pedal and
press the accelerator gradually. These practices
help to save on energy consumption, reduce
CO
2 emissions and decrease general traffic
noise.
If the vehicle has the steering-mounted
"CRUISE" control, use cruise control at speeds
above 25
mph (40 km/h) when traffic is flowing
smoothly.
Control the use of electrical equipment
Before moving off, if the passenger compartment
is too warm, ventilate it by opening the windows
and air vents before using the air conditioning.
At speeds above 31
mph (50 km/h), close the
windows and leave the air vents open.
Consider using equipment that can help keep
the temperature in the passenger compartment
down.
Unless automatically regulated, switch off the air
conditioning as soon as the desired temperature
has been reached.
Switch off the demisting and defrosting functions,
if they are not managed automatically.
Switch off the heated seat as soon as possible.
Switch off the headlamps and foglamps when
the visibility conditions do not require their use.
Avoid running the engine before moving off,
particularly in winter (other than in severe wintry
conditions: temperature below -23°C); your
vehicle will warm up much faster while driving.
As a passenger, avoid connecting your
multimedia devices (film, music, video game,
etc.) to help reduce consumption of energy.
Disconnect all portable devices before leaving
the vehicle.
Limit the causes of excess consumption
Spread loads throughout the vehicle.
Limit the loads carried in the vehicle and
minimise wind resistance (roof bars, roof rack,
bicycle carrier, trailer, etc.). Preferably, use a
roof box. Remove roof bars and roof racks after use.
At the end of winter, remove snow tyres and refit
summer tyres.
Comply with the servicing instructions
Check tyre pressures regularly, with the tyres
cold, referring to the label in the door aperture on
the driver's side.
Carry out this check in particular:
–
before a long journey
.
–
at each change of season.
–
after a long period out of use.
Do not forget the spare wheel and, where
applicable, the tyres on your trailer or caravan.
Have your vehicle serviced regularly (engine oil,
oil filter
, air filter, passenger compartment filter,
etc.)and observe the schedule of operations in
the manufacturer's service schedule.
With an HDi Diesel engine, if the particle filter
is faulty, your vehicle will emit pollution. Visit
a PEUGEOT dealer or a qualified workshop
as soon as possible to restore your vehicle's
particulate emissions to legal levels.
When filling the fuel tank, do not continue after
the third cut-out of the nozzle, to avoid overflow.
You will only see the fuel consumption of your
new vehicle settle down to a consistent average
after the first 1,900 miles (3,000 kilometres).
Page 14 of 176
12
Instruments
Total distance recorder
The total distance recorder measures the total
distance travelled by the vehicle since its initial
registration.
With the ignition on, the total distance is
displayed at all times. It remains displayed for
30 seconds after switching off the ignition. It is
displayed when the driver's door is opened, and
when the vehicle is locked or unlocked.
When travelling abroad, you may have to
change the distance units (km or miles):
the road speed must be displayed in the local
country’s official unit (km/h or mph).
The unit is changed via the screen
configuration menu, with the vehicle
stationary.
Instrument panel lighting
dimmer
Instrument panel lighting
dimmer
► In the Settings tab, select
“Brightness”.
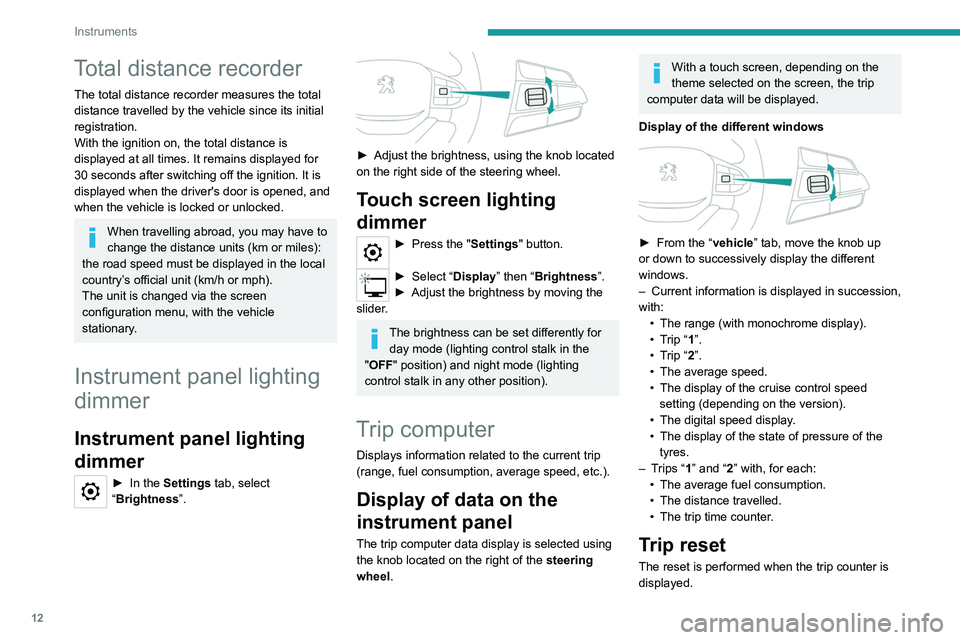
► Adjust the brightness, using the knob located
on the right side of the steering wheel.
Touch screen lighting
dimmer
► Press the " Settings" button.
► Select “Display” then “Brightness”.
► Adjust the brightness by moving the
slider
.
The brightness can be set differently for day mode (lighting control stalk in the
"OFF " position) and night mode (lighting
control stalk in any other position).
Trip computer
Displays information related to the current trip
(range, fuel consumption, average speed, etc.).
Display of data on the
instrument panel
The trip computer data display is selected using
the knob located on the right of the steering
wheel.
With a touch screen, depending on the
theme selected on the screen, the trip
computer data will be displayed.
Display of the different windows
► From the “ vehicle” tab, move the knob up
or down to successively display the different
windows.
–
Current information is displayed in succession,
with: •
The range (with monochrome display).
•
T
rip “1”.
•
T
rip “2”.
•
The average speed.
•
The display of the cruise control speed
setting (depending on the version).
•
The digital speed display
.
•
The display of the state of pressure of the
tyres.
–
T
rips “1” and “2” with, for each:
•
The average fuel consumption.
•
The distance travelled.
•
The trip time counter
.
Trip reset
The reset is performed when the trip counter is
displayed.
Page 15 of 176
13
Instruments
1
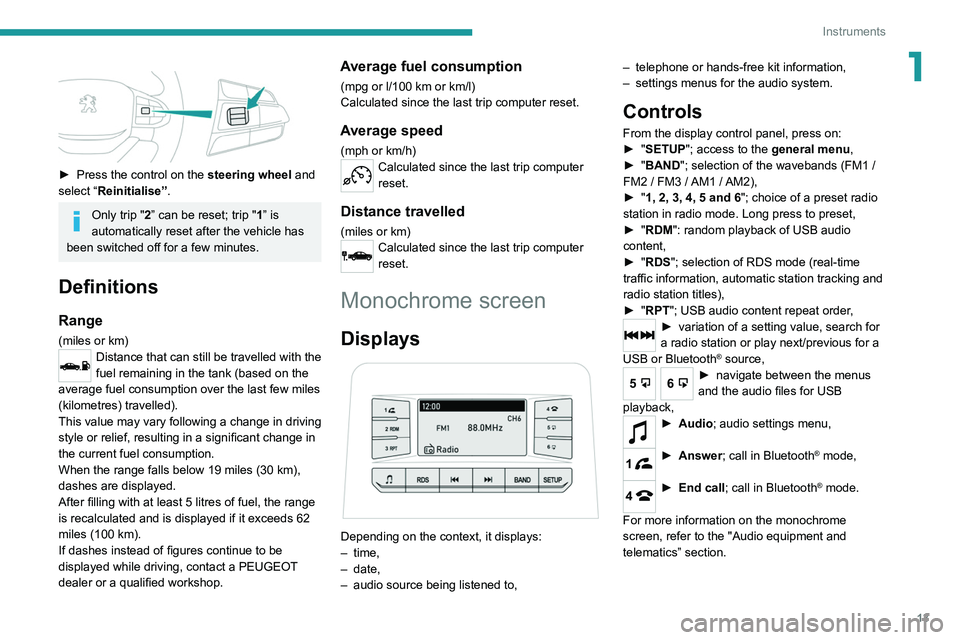
► Press the control on the steering wheel and
select “Reinitialise”.
Only trip "2” can be reset; trip "1” is
automatically reset after the vehicle has
been switched off for a few minutes.
Definitions
Range
(miles or km)Distance that can still be travelled with the
fuel remaining in the tank (based on the
average fuel consumption over the last few miles
(kilometres) travelled).
This value may vary following a change in driving
style or relief, resulting in a significant change in
the current fuel consumption.
When the range falls below 19 miles (30
km),
dashes are displayed.
After filling with at least 5 litres of fuel, the range
is recalculated and is displayed if it exceeds 62
miles (100
km).
If dashes instead of figures continue to be
displayed while driving, contact a PEUGEOT
dealer or a qualified workshop.
Average fuel consumption
(mpg or l/100 km or km/l)
Calculated since the last trip computer reset.
Average speed
(mph or km/h)Calculated since the last trip computer
reset.
Distance travelled
(miles or km)Calculated since the last trip computer
reset.
Monochrome screen
Displays
Depending on the context, it displays:
– time,
–
date,
–
audio source being listened to, –
telephone or hands-free kit information,
–
settings menus for the audio system.
Controls
From the display control panel, press on:
►
" SETUP"; access to the general menu,
►
"
BAND "; selection of the wavebands (FM1
/
FM2
/ FM3 / AM1 / AM2),
►
"
1, 2, 3, 4, 5 and 6"; choice of a preset radio
station in radio mode. Long press to preset,
►
"
RDM": random playback of USB audio
content,
►
"
RDS"; selection of RDS mode (real-time
traffic information, automatic station tracking and
radio station titles),
►
"
RPT"; USB audio content repeat order,
► variation of a setting value, search for
a radio station or play next/previous for a
USB or Bluetooth
® source,
56► navigate between the menus
and the audio files for USB
playback,
► Audio; audio settings men u,
1► Answer; call in Bluetooth® mode,
4► End call; call in Bluetooth® mode.
For more information on the monochrome
screen, refer to the "Audio equipment and
telematics” section.
Page 16 of 176

14
Instruments
Touch screen
This system gives access to the following elements:
–
Permanent
display of the time.
–
Display and reminder of air conditioning
system settings.
–
V
ehicle functions and equipment setting
menus.
–
Audio system and telephone controls and
display of related information.
–
Display of visual manoeuvring aid functions
–
Navigation system controls and
display
of related information (depending on
version).
For safety reasons, always stop the
vehicle before performing operations
that require sustained attention.
Some functions are not accessible while
driving.
Recommendations
This screen is of the capacitive type.
Do not use pointed objects on the touch screen.
Do not touch the touch screen with wet hands.
Use a soft, clean cloth to clean the touch screen.
Principles
Use the buttons indicated on the touch screen to
access the various menus.
* Depending on equipment.
After a few moments with no action on the second page, the first page is
displayed automatically.
To deactivate/activate a function, press the slider
that appears opposite the function. The slider
changes to orange to indicate that the function
is activated.
Return to the menu page.
Menus
It is possible to modify the appearance of
the touch screen by selecting a different
background and display mode ( Classic,
Sport or Technology ). Depending on the
selected mode, the menus can be displayed
in various locations and in different ways.
For more information on changing the
appearance of the touch screen, refer to the
Audio equipment and telematics section.
Example with the " Classic” display mode.
Media
Refer to the “Audio equipment and
telematics” section.
Radio
Refer to the “Audio equipment and
telematics” section.
Navigation*
Refer to the “Audio equipment and
telematics” section.
Telephone
Refer to the “Audio equipment and
telematics” section.
Settings
Main system settings.
Vehicle settings
Activation, deactivation and settings for
certain functions.
File
Direct access to system content or USB
content.
Help
Page 34 of 176

32
Ease of use and comfort
Air conditioning does not operate when the air flow is disabled.
To obtain cool air more quickly, enable interior
air recirculation for a brief period. Then return
to the intake of exterior air.
Switching off the air conditioning may result in
some discomfort (humidity or misting).
Maximum air conditioning
The system automatically adjusts the
temperature setting to the lowest possible, the
air distribution towards the central and side air
vents, the air flow to maximum and activates
recirculation of interior air.
► Press button 9 to activate/deactivate the
function (confirmed by the indicator lamp coming
on/switching off).
Once the function is deactivated, the system
returns to the previous settings.
Dual-zone automatic air
conditioning
1. Temperature.
2. Air flow.
3. Air distribution.
4. Recirculation of interior air.
of interior air recirculation. Risk of misting and
deterioration of the air quality!
If the interior temperature is very high
after the vehicle has stood for a long
time in the sunshine, air the passenger
compartment for a few moments.
Put the air flow control at a setting high
enough to quickly change the air in the
passenger compartment.
Condensation created by the air
conditioning results in a discharge of
water underneath the vehicle. This is perfectly
normal.
Servicing the ventilation and air
conditioning system
►
Ensure that the passenger compartment
filter is in good condition and have the filter
elements replaced regularly
.
We recommend using a composite passenger
compartment filter. Thanks to its special active
additive, this type of filter helps to purify the
air breathed by the occupants and keep the
passenger compartment clean (by reducing
allergic symptoms, unpleasant odours and
greasy deposits).
►
T
o ensure correct operation of the
air conditioning system, have it checked
according to the recommendations in the
Maintenance and Warranty Guide.
Heating
Manual air conditioning
1. Temperature.
2. Air flow/System switch-off.
3. Air distribution.
4. Recirculation of interior air.
5. System switch-off.
6. Front demisting/defrosting on/off.
7. Rear screen demisting/defrosting on/off.
8. Air conditioning on/off.
9. Maximum air conditioning.
The air conditioning system only operates with
the engine running.
Temperature
► Turn the thumbwheel 1 from "Blue" (cold)
to "Red" (hot) to adjust the temperature to your
requirements.
Air flow
► Turn the thumbwheel 2 to obtain a sufficient
air flow to ensure your comfort.
If the air flow control is in
the minimum position (system
deactivated), the temperature in the vehicle
will no longer be controlled. A slight flow of air
can still be felt, due to the forward movement
of the vehicle.
Air distribution
► Press one of the buttons 3 to direct the air
flow in turn towards:
–
windscreen, side windows and footwells,
–
central and side vents,
–
footwells,
–
central vents, side vents and footwells.
The air distribution can be adapted by combining
the corresponding buttons.
Air conditioning on/off
The air conditioning system is designed to
operate effectively in all seasons, with the
windows closed.
It is used to:
–
lower the temperature in summer
,
–
increase the effectiveness of the demisting in
winter
, above 3°C.
►
Press button
8 to activate/deactivate the air
conditioning system.
Page 56 of 176
54
Safety
1 minute, the warning lamp remains on as long
as the driver’s or front passenger’s (depending
on version) seat belt remains unfastened.
Advice
The driver must ensure that passengers use the seat belts correctly and that they
are all fastened before setting off.
Wherever seated in the vehicle, you must
always fasten the seat belt, even for short
journeys.
Do not invert the seat belt buckles, as they
will not fulfil their role properly.
To ensure the proper functioning of the belt
buckles, make sure that there are no foreign
bodies present (e.g.
a coin) before fastening.
Before and after use, ensure that the seat belt
is reeled in correctly.
After folding or moving a seat or rear bench
seat, ensure that the seat belt is positioned
and reeled in correctly.
Installation
The lower part of the strap must be
positioned as low as possible over the pelvis.
The upper part must be positioned in the
hollow of the shoulder.
In order to be effective, a seat belt must:
–
be tightened as close to the body as
possible.
–
be pulled in front of you with a smooth
movement, ensuring that it is not twisted.
– only be used to secure one person.
– not show signs of tearing or fraying.
–
not be changed or modified, in order to
avoid affecting its performance.
Recommendations for children
Use a suitable child seat if the passenger
is less than 12 years old or shorter than 1.5
metres.
Never use the same seat belt to secure more
than one child.
Never carry a child on your lap.
For more information on Child seats, refer to
the corresponding section.
Maintenance
In accordance with current safety
regulations, for all work on your vehicle's
seat belts, contact a qualified workshop with
the skills and equipment needed, which a
PEUGEOT dealer is able to provide.
Have the seat belts checked regularly by a
PEUGEOT dealer or a qualified workshop,
particularly if the straps show signs of
damage.
Clean the seat belt straps with soapy water or
a textile cleaning product, sold by PEUGEOT
dealers.
Airbags
General information
The airbags have been designed to optimise the
safety of the occupants in the event of a violent
collision; they supplement the action of the seat
belts equipped with a force limiting system.
Electronic detectors record and analyse the
front and side impacts sustained in the impact
detection zones:
–
In the event of violent impact, the airbags
deploy instantly and help better protect the
occupants of the vehicle; immediately after the
impact, the airbags deflate rapidly in order not
to hinder the visibility or the possible exit of the
occupants.
–
In the event of a slight impact, a rear impact
and under certain rollover conditions, the airbags
may not deploy; only the seat belt helps to
protect you in these situations.
The seriousness of the impact depends on the
nature of the obstacle and the speed of the
vehicle at the moment of collision.
The airbags do not operate when the
ignition is switched off.
This equipment will only deploy once. If a
second impact occurs (during the same or a
subsequent accident), the airbag will not be
deployed again.
Impact detection zones
A. Front impact zone
B. Side impact zone
When one or more airbags are deployed,
the detonation of the pyrotechnic charge
incorporated in the system makes a noise and
releases a small quantity of smoke.
This smoke is not harmful, but sensitive
individuals may experience irritation.
The detonation noise associated with the
deployment of one or more airbags may result
in a slight loss of hearing for a short time.
Front airbags
This system protects the driver and front
passenger in the event of a serious front impact,
* For more information on Deactivating the front passenger airbag, refer t\
o the corresponding section.
Page 73 of 176
71
Driving
6Automatic operation
► Select position D for automatic changing of
the six gears.
The gearbox then operates in auto-adaptive
mode, without any intervention on the part of the
driver. It continuously selects the most suitable
gear according to the driving style, the road
profile and the load in the vehicle.
For maximum acceleration without touching the
selector, press the accelerator fully down (kick-
down). The gearbox changes down automatically
or holds the gear selected until the maximum
engine speed is reached.
When braking, the gearbox changes down
automatically to provide effective engine braking.
If you release the accelerator sharply, the
gearbox will not shift to a higher gear for safety
reasons.
Never select position N while the vehicle
is moving.
Never select positions P or R unless the
vehicle is completely stationary.
Manual operation
To limit fuel consumption during an extended standstill with the engine
running (for example, in a traffic jam), set the
gear selector to N and apply the parking
brake.
► Selecting position +/- enables sequential
shifting between the six gears.
►
T
o shift up/down through the gears, push the
control forwards/backwards.
The gearbox only changes gear if the vehicle
speed and engine speed conditions allow;
otherwise, the rules for automatic operation are
temporarily applied.
D disappears, and the gears engaged appear in
succession on the instrument panel.
If the engine speed is too low or too high, the
selected gear flashes for a few seconds, then the
gear actually engaged is shown.
It is possible to change from position D to
position +/-
at any time.
When the vehicle is stationary or moving very
slowly, the gearbox selects gear 1 automatically.
This symbol is displayed if a gear is not
engaged correctly (gear selector between
two positions).
Switching off the vehicle
Before switching off the engine, it is possible to
engage position P or N to place the gearbox in
neutral.
In both cases, apply the parking brake to
immobilise the vehicle.
If the gear selector is not in position P,
when the driver's door is opened or
approximately 45 seconds after the ignition is
switched off, an audible signal sounds and a
message appears.
►
Return the gear selector to P
; the audible
signal stops and the message disappears.
Malfunction
In the event of a malfunction, this warning
lamp comes on and a message is
displayed, when the ignition is switched on.
In this case, the gearbox goes into back-up
mode and is locked in 3
rd gear. You may feel a
significant jolt (without risk for the gearbox) while
changing from
P
to R and from N to R.
Do not exceed 62 mph (100
km/h), local speed
restrictions permitting.
Have the system checked by a PEUGEOT
dealer or a qualified workshop.
There is a risk of damaging the gearbox: – If the accelerator and brake pedals are
pressed simultaneously
.
–
In the event of a battery failure, forcing the
selector from position P
to another position.
Driving mode
Driving modes are selected using one of the
following controls, depending on version:
Page 78 of 176
76
Driving
To return to the speed setting, release the
accelerator pedal (when the set speed is
reached again, the displayed speed stops
flashing).
Operating limits
Never use the system in the following
situations:
– In an urban area with the risk of
pedestrians crossing the road.
– In heavy traffic.
– On winding or steep roads.
– On slippery or flooded roads.
– In poor weather conditions.
– Driving on a speed circuit.
– Driving on a rolling road.
– When using snow chains, non-slip covers
or studded tyres.
Cruise control
Refer to the General recommendations on the
use of driving and manoeuvring aids and to
Cruise control - particular recommendations.
This system automatically keeps the vehicle’s speed at the cruise value
programmed by the driver (speed setting),
without using the accelerator pedal.
Cruise control is switched on manually.
It requires a minimum vehicle speed of 25 mph
(40 km/h).
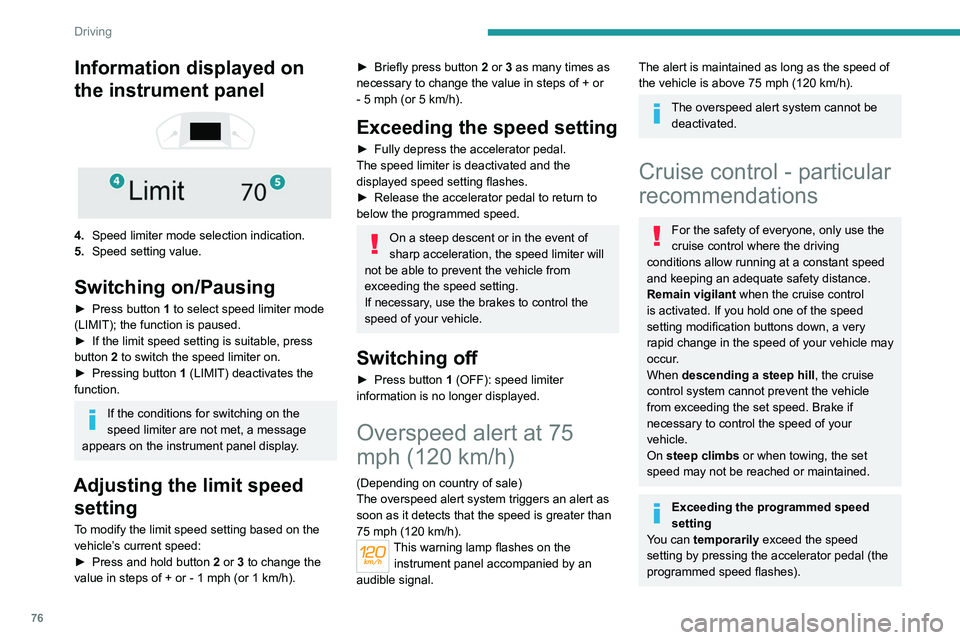
Information displayed on
the instrument panel
4. Speed limiter mode selection indication.
5. Speed setting value.
Switching on/Pausing
► Press button 1 to select speed limiter mode
(LIMIT); the function is paused.
►
If the limit speed setting is suitable, press
button
2 to switch the speed limiter on.
►
Pressing button 1
(LIMIT) deactivates the
function.
If the conditions for switching on the
speed limiter are not met, a message
appears on the instrument panel display.
Adjusting the limit speed setting
To modify the limit speed setting based on the
vehicle’s current speed:
►
Press and hold button
2
or 3 to change the
value in steps of +
or - 1 mph (or 1 km/h).
► Briefly press button 2 or 3 as many times as
necessary to change the value in steps of + or
-
5 mph (or 5 km/h).
Exceeding the speed setting
► Fully depress the accelerator pedal.
The speed limiter is deactivated and the
displayed speed setting flashes.
►
Release the accelerator pedal to return to
below the programmed speed.
On a steep descent or in the event of
sharp acceleration, the speed limiter will
not be able to prevent the vehicle from
exceeding the speed setting.
If necessary, use the brakes to control the
speed of your vehicle.
Switching off
► Press button 1 (OFF): speed limiter
information is no longer displayed.
Overspeed alert at 75
mph (120 km/h)
(Depending on country of sale)
The overspeed alert system triggers an alert as
soon as it detects that the speed is greater than
75 mph (120 km/h).
This warning lamp flashes on the
instrument panel accompanied by an
audible signal.
The alert is maintained as long as the speed of
the vehicle is above 75 mph (120 km/h).
The overspeed alert system cannot be deactivated.
Cruise control - particular
recommendations
For the safety of everyone, only use the
cruise control where the driving
conditions allow running at a constant speed
and keeping an adequate safety distance.
Remain vigilant when the cruise control
is activated. If you hold one of the speed
setting modification buttons down, a very
rapid change in the speed of your vehicle may
occur.
When descending a steep hill , the cruise
control system cannot prevent the vehicle
from exceeding the set speed. Brake if
necessary to control the speed of your
vehicle.
On steep climbs or when towing, the set
speed may not be reached or maintained.
Exceeding the programmed speed
setting
You can temporarily exceed the speed
setting by pressing the accelerator pedal (the
programmed speed flashes).