2021 Peugeot Landtrek bonnet
[x] Cancel search: bonnetPage 5 of 176

3
Contents
7Practical information
Recommended fuel 88
Refuelling 88
Towing device 89
Snow chains 89
Roof bars 90
Bonnet 90
Engine compartment 91
Checking levels 92
Checks
94
Maintenance 96
Free-wheeling 102
Advice on care and maintenance 102
8In the event of a breakdown
Warning triangle 104
Fire extinguisher 104
Running out of fuel (Diesel) 105
Tool kit 105
Spare wheel 106
Changing a bulb 11 0
Changing a fuse 11 3
12
V battery 11 6
Towing the vehicle 11 9
9Technical data
Engine technical data and towed loads 122
Petrol engines 123
Diesel engines 124
Dimensions 125
Identification markings 125
10Bluetooth® radio
Menus 127
Steering mounted controls 128
Radio 128
Media 129
Telephone 129
11Peugeot Connect 10" Touchscreen
First steps 131
Steering mounted controls
131
Menus 132
Navigation 133
Radio 133
Music player 133
Telephone 134
Applications 135
Settings 136
■
Alphabetical index
Page 13 of 176

11
Instruments
1Green warning/indicator lamps
Hill Assist Descent Control
Fixed.
The system has been activated, but the
conditions for regulation are not met (gradient,
speed too high, gear engaged).
Flashing.
The function is regulating the speed of
the vehicle.
The vehicle is being braked; the brake lamps
come on during the descent.
Cruise controlFixed.
Cruise control is selected.
Manual selection.
Lane Departure Warning SystemFixed.
(white)
The function has been activated, but no lane has
been detected by the camera.
Lane departure detection is not operational.
Fixed.
(green)
The system camera has detected lanes.
The function is operational.
4-wheel drive position (high speed)
4HFlashing.
The 4-wheel driving mode ( 4x4) is
selected but not yet activated.
4HFixed.
The 4-wheel driving mode ( 4x4) is
activated. The vehicle can travel at high speed
4-wheel drive position (low speed)
4LFlashing.
The 4-wheel driving mode (
4x4) is
selected but not yet activated.
4LFixed.
The 4-wheel driving mode ( 4x4) is
activated.
The vehicle can only travel at low speed.
Direction indicatorsFlashing with audible signal.
The direction indicators are on.
Front foglampsFixed.
The front foglamps are on.
SidelampsFixed.
The lamps are on.
Dipped beam headlampsFixed.
The lamps are on.
Blue warning/indicator lamps
Main beam headlamps
Fixed.
The lamps are on.
Engine coolant
temperature indicator
With the engine running:
– In zone A, the temperature is correct.
–
In zone
B, the temperature is too high; the
associated warning lamp and the central STOP
warning lamp come on in red on the instrument
panel, accompanied by the display of a message
and an audible signal.
You must stop the vehicle as soon as it is
safe to do so.
Wait a few minutes before switching off the
engine.
After switching off the ignition, carefully open the bonnet and check the coolant
level.
For more information on Checking
levels, refer to the corresponding
section.
Page 24 of 176

22
Access
Tailgate
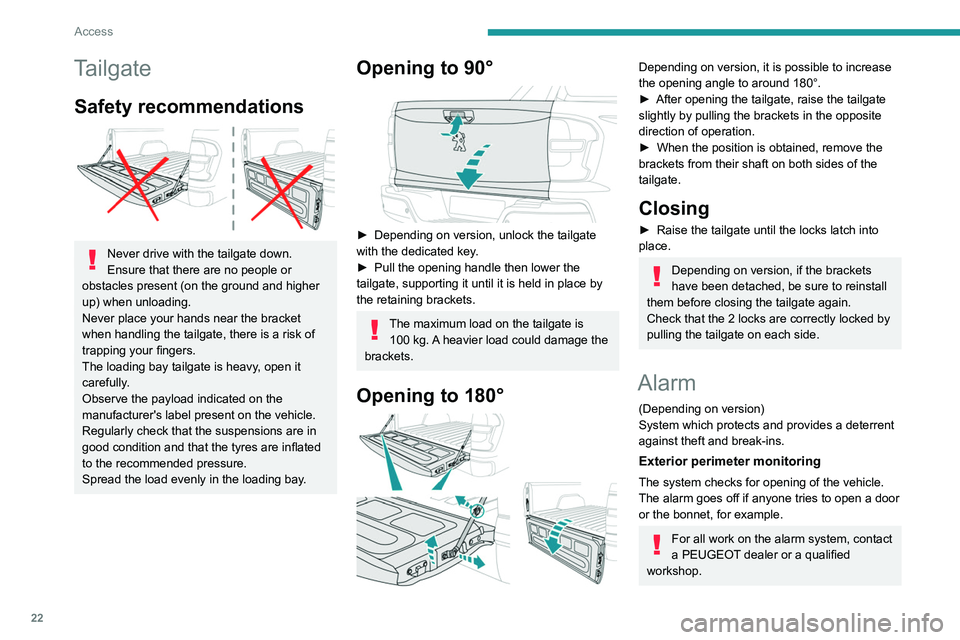
Safety recommendations
Never drive with the tailgate down.
Ensure that there are no people or
obstacles present (on the ground and higher
up) when unloading.
Never place your hands near the bracket
when handling the tailgate, there is a risk of
trapping your fingers.
The loading bay tailgate is heavy, open it
carefully.
Observe the payload indicated on the
manufacturer's label present on the vehicle.
Regularly check that the suspensions are in
good condition and that the tyres are inflated
to the recommended pressure.
Spread the load evenly in the loading bay.
Opening to 90°
► Depending on version, unlock the tailgate
with the dedicated key .
►
Pull the opening handle then lower the
tailgate, supporting it until it is held in place by
the retaining brackets.
The maximum load on the tailgate is 100 kg. A heavier load could damage the
brackets.
Opening to 180°
Depending on version, it is possible to increase
the opening angle to around 180°.
►
After opening the tailgate, raise the tailgate
slightly by pulling the brackets in the opposite
direction of operation.
►
When the position is obtained, remove the
brackets from their shaft on both sides of the
tailgate.
Closing
► Raise the tailgate until the locks latch into
place.
Depending on version, if the brackets
have been detached, be sure to reinstall
them before closing the tailgate again.
Check that the 2 locks are correctly locked by
pulling the tailgate on each side.
Alarm
(Depending on version)
System which protects and provides a deterrent
against theft and break-ins.
Exterior perimeter monitoring
The system checks for opening of the vehicle.
The alarm goes off if anyone tries to open a door
or the bonnet, for example.
For all work on the alarm system, contact
a PEUGEOT dealer or a qualified
workshop.
Locking the vehicle with
alarm system
Activation
► Switch off the ignition and exit the vehicle.
► Lock the vehicle using the remote control or
with the “Keyless Entry and Starting” system.
When the monitoring system is active,
this indicator lamp flashes once per
second on the instrument panel and the direction
indicators flash for about 2 seconds.
The exterior perimeter monitoring is activated
after 5 seconds.
If an opening (door or bonnet) is not
properly closed, the vehicle is not locked,
but the exterior perimeter monitoring will be
activated after 45 seconds.
Deactivation
► Press the remote control unlocking
button.
or
► Unlock the vehicle with the Keyless Entry and
Starting system.
The monitoring system is deactivated: the
indicator lamp on the instrument panel goes off
and the direction indicators flash for about 2
seconds.
If the vehicle automatically locks itself
again (as happens if a door is not
Page 25 of 176

23
Access
2Locking the vehicle with
alarm system
Activation
► Switch off the ignition and exit the vehicle.
► Lock the vehicle using the remote control or
with the “Keyless Entry and Starting” system.
When the monitoring system is active,
this indicator lamp flashes once per
second on the instrument panel and the direction
indicators flash for about 2 seconds.
The exterior perimeter monitoring is activated
after 5 seconds.
If an opening (door or bonnet) is not
properly closed, the vehicle is not locked,
but the exterior perimeter monitoring will be
activated after 45
seconds.
Deactivation
► Press the remote control unlocking
button.
or
►
Unlock the vehicle with the Keyless Entry and
Starting system.
The monitoring system is deactivated: the
indicator lamp on the instrument panel goes off
and the direction indicators flash for about 2
seconds.
If the vehicle automatically locks itself
again (as happens if a door is not
opened within 30 seconds of unlocking), the
monitoring system is automatically
reactivated.
Triggering of the alarm
This is indicated by sounding of the siren
and flashing of the direction indicators for 25
seconds.
The flashing of the direction indicators and of
the alarm warning lamp on the instrument panel
indicate that the alarm was triggered during your
absence. When the vehicle is unlocked using the
remote control or the Keyless Entry and Starting
system, the direction indicators and the warning
lamp on the instrument panel
stop flashing.
Failure of the remote control
To deactivate the monitoring functions:
► Unlock the vehicle using the key in the
driver's door lock.
►
Open the door; the alarm is triggered.
►
Switch on the ignition and start the engine;
this stops the alarm.
The indicator lamp on the
instrument panel goes off.
Locking the vehicle without
activating the alarm
► Lock the vehicle using the key (integral to the
remote control) in the driver's door lock.
Malfunction
When the ignition is switched on, fixed
illumination of the indicator lamp on the
instrument panel indicates a system malfunction.
Have the system checked by a PEUGEOT
dealer or a qualified workshop.
Automatic activation
(Depending on version)
The system is activated automatically 2 minutes
after the last door is closed.
►
T
o avoid triggering the alarm on entering the
vehicle, first press the unlocking button on the
remote control or unlock the vehicle using the
“Keyless Entry and Starting” system.
Deactivating the alarm
► Press the remote control unlocking
button for about 4 seconds. An audible
signal is triggered and the direction indicators
flash 4 times to indicate that the alarm is
deactivated (the indicator lamp on the instrument
panel is deactivated).
►
Reactivate the alarm by pressing the
unlocking button.
Page 92 of 176

90
Practical information
Opening
► Open the left-hand front door.
► Pull the interior release lever, located at the
bottom of the dashboard, towards you.
► Tilt the exterior safety catch to the left and
raise the bonnet.
► Unclip the stay from its housing and place it
in the support slot to hold the bonnet open.
* Depending on engine.
► Fit the snow chains following the instructions
provided by the manufacturer .
►
Move off gently and drive for a few moments,
without exceeding 19
mph (30 km/h) for metal
snow chains or 31 mph (50 km/h) for plastic
snow chains.
►
Stop the vehicle and check that the snow
chains are correctly tightened.
It is strongly recommended that you
practise fitting the snow chains on a level
and dry surface before setting off.
Avoid driving with snow chains on roads that have been cleared of snow to avoid
damaging the vehicle's tyres and the road
surface. If the vehicle is fitted with alloy
wheels, check that no part of the chain or its
fixings is in contact with the wheel rim.
Always use snow chains compatible with the tyre size. Chains that are the wrong
size can damage the braking system,
suspension, bodywork and wheels.
Remove the wheel trims before installing the
snow chains.
Never exceed the maximum speed limit
stated in the snow chains user guide.
Roof bars
As a safety measure and to avoid damaging the roof, it is essential to use
transverse roof bars approved for your
vehicle.
Observe the instructions on fitting and use
contained in the guide supplied with the roof
bars.
Maximum load distributed over the roof
bars, for a loading height not exceeding
40 cm: 100
kg.
As this value may change, please verify the
maximum load quoted in the guide supplied
with the roof bars.
If the height exceeds 40 cm, adapt the speed
of the vehicle to the profile of the road to
avoid damaging the roof bars and the fixings
on the vehicle.
Be sure to refer to national legislation in order
to comply with the regulations for transporting
objects that are longer than the vehicle.
Recommendations
Distribute the load uniformly, taking care
to avoid overloading one of the sides.
Arrange the heaviest part of the load as close
as possible to the roof.
Secure the load firmly.
Drive gently: the vehicle will be more
susceptible to the effects of side winds and its
stability may be affected.
Regularly check the security and tight
fastening of the roof bars, at least before each
trip.
Remove the roof bars once they are no longer
needed.
Bonnet
When the engine is hot, handle the
exterior safety catch and the bonnet stay
with care (risk of burns), using the protected
area.
When the bonnet is open, take care not to
damage the safety catch.
Do not open the bonnet under very windy
conditions.
Cooling of the engine when stopped
The engine cooling fan may start after
the engine has been switched off.
Take care with objects or clothing that
could be caught in the blades of the fan!
Page 93 of 176

91
Practical information
7Opening
► Open the left-hand front door.
► Pull the interior release lever , located at the
bottom of the dashboard, towards you.
► Tilt the exterior safety catch to the left and
raise the bonnet.
►
Unclip the stay from its housing and place it
in the support slot to hold the bonnet open.
* Depending on engine.
Closing
► Hold the bonnet and pull out the stay from the
support slot.
►
Clip the stay in its housing.
►
Lower the bonnet and release it near the end
of its travel.
►
Pull on the bonnet to check that it is locked
correctly
.
Because of the presence of electrical
equipment under the bonnet, it is strongly
recommended that exposure to water (rain,
washing, etc.) be limited.
Engine compartment
The engine shown here is an example for
illustrative purposes only.
The locations of the following elements may
vary:
–
Air filter
.
–
Engine oil dipstick.
–
Engine oil filler cap.
–
Priming pump.
–
Degassing screw
.
Petrol engine
Diesel engine
1.Screenwash fluid reservoir
2. Engine coolant reservoir
3. Brake fluid reservoir
4. Battery
5. Power steering fluid reservoir
6. Fusebox
7. Air filter
8. Engine oil filler cap
9. Engine oil dipstick
10. Priming pump*
11 . Degassing screw*
Page 94 of 176

92
Practical information
Oil grade
Before topping up or changing the
engine oil, check that the oil is suitable
for your engine and complies with the
recommendations in the service schedule
supplied with the vehicle (or available
from your PEUGEOT dealer or qualified
workshop).
Use of non-recommended oil may invalidate
your warranty in the event of engine failure.
Topping up the engine oil level
For the location of the engine oil filler cap, please
refer to the corresponding engine compartment
illustration.
Never remove the oil filler cap with the
engine running. Risk of burns and
splashes inside the engine compartment.
► Add oil in small quantities, avoiding any spills
on engine components (risk of fire).
► Wait a few minutes before checking the level
again using the dipstick.
► Top up the level if necessary.
► After checking the level, carefully screw the
oil filler cap back on and replace the dipstick in
its tube.
Brake fluid
�� ������ ��
The level of this fluid should be close to
the "MAX" mark. If not, check the brake
pad wear.
12. Fuel filter*
The Diesel fuel system operates under
very high pressure.
All work on this circuit must be carried out
only by a PEUGEOT dealer or a qualified
workshop.
Checking levels
Check all of the following levels regularly in
accordance with the manufacturer's service
schedule. Top them up if required, unless
otherwise indicated.
If a level drops significantly, have the
corresponding system checked by a PEUGEOT
dealer or a qualified workshop.
The fluids must comply with the manufacturer's requirements and with
the vehicle's engine.
Take care when working under the bonnet, as certain areas of the engine
may be extremely hot (risk of burns) and the
cooling fan could start at any time (even with
the ignition off).
Used products
Avoid prolonged contact of used oil or fluids with the skin.
Most of these fluids are harmful to health and
very corrosive.
Do not discard used oil or fluids into
sewers or onto the ground.
Empty used oil into the containers reserved
for this purpose at a PEUGEOT dealer or a
qualified workshop.
Engine oil
The level is checked, with the engine having been switched off for at least 30
minutes and on level ground, using the dipstick.
It is normal to top up the oil level between two
services (or oil changes). It is recommended
that you check the level, and top up if necessary,
every 3,000 miles (5,000 km).
In order to maintain the reliability of the
engine and emissions control system,
never use additives in the engine oil.
Checking using the dipstick
For the location of the dipstick, please refer
to the illustration of the corresponding engine
compartment.
►
Grasp the dipstick by its coloured grip and
pull it out completely
.
► Wipe the end of the dipstick using a clean,
lint-free cloth.
► Reinsert the dipstick and push fully down,
then pull it out again to visually check the oil
level: the correct level is between marks A
(max)
and B (min).
Do not start the engine if the level is:
–
above mark
A: contact a PEUGEOT dealer or
a qualified workshop.
–
below mark B
: top up the engine oil
immediately.
In extremely cold conditions, we
recommend replacing your engine's oil
with an oil with a more appropriate viscosity
which will help improve engine starting.
Contact a PEUGEOT dealer or a qualified
workshop to find out which type of oil is suited
to your vehicle's engine.
Page 98 of 176

96
Practical information
When the wear indicators no longer appear set
back from the tread, the depth of the grooves is
less than 1.6 mm; replace the tyres as soon as
possible.
Regularly remove foreign bodies trapped in the
tyre tread.
Using different size wheels and tyres from those
specified can affect the lifetime of tyres, wheel
rotation, ground clearance, the speedometer
reading and have an adverse effect on road
holding.
Fitting different tyres on the front and rear axles
can cause the ESC to mistime.
Fitting winter tyres to only one axle could cause
you to lose control of the vehicle. Fitting winter
tyres to both axles is recommended.
Always mark the direction of rotation on the tyres
that will be stored when fitting winter or summer
tyres. Store them in a cool, dry place and away
from direct exposure to the sun's rays.
Winter or 4-seasons tyres can be
identified by this symbol on their
sidewalls.
Tyres older than 6 years should always be replaced, even if no damage or wear
has been found.
When a rim is warped, cracked or corroded,
it is essential to replace it as it may cause the
tyre to come off. Do not use a wheel with a
rim that has been damaged (even if has been
straightened out).
Swapping tyres
To optimise wear and increase the lifetime of the tyres, swap the tyres
approximately every 3,100 to 6,200 miles
(5,000 to 10,000 km) .
In the event of irregular wear, bring the
swapping forward.
Shock absorbers
It is not easy for drivers to detect when
shock absorbers are worn. Nevertheless,
the shock absorbers have a major impact on
road holding and braking performance.
For your safety and driving comfort, it is
important to have them regularly checked by a
PEUGEOT dealer or a qualified workshop.
Timing and accessory kits
The timing and accessory kits are used
from the time the engine is started until it
is switched off. It is normal for them to wear over
time.
A
faulty timing or accessory kit can damage
the engine, rendering it unusable. Observe the
recommended replacement frequency, stated in
distance travelled or time elapsed, whichever is
reached first.
Maintenance
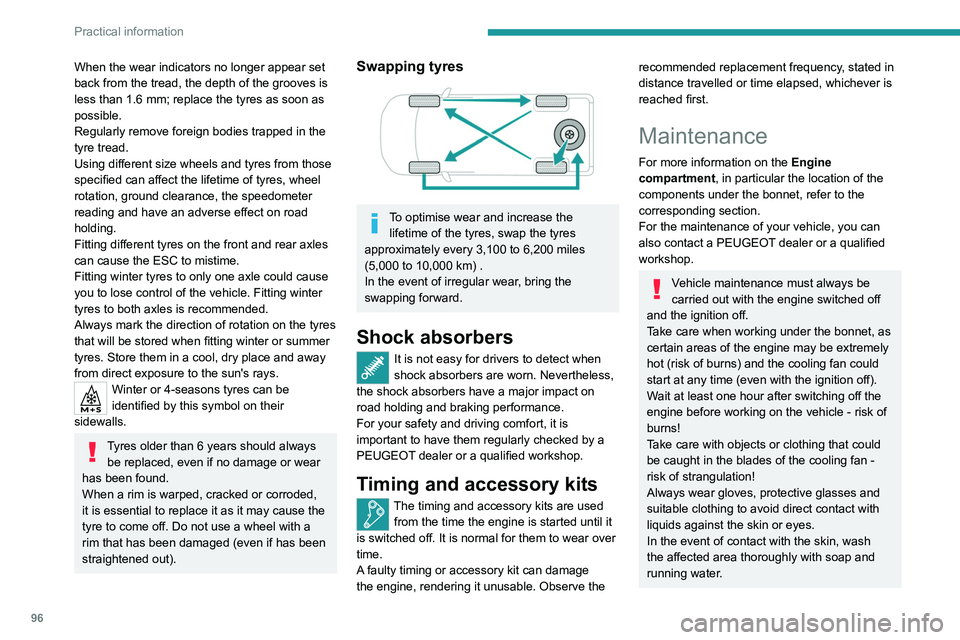
For more information on the Engine
compartment, in particular the location of the
components under the bonnet, refer to the
corresponding section.
For the maintenance of your vehicle, you can
also contact a PEUGEOT dealer or a qualified
workshop.
Vehicle maintenance must always be
carried out with the engine switched off
and the ignition off.
Take care when working under the bonnet, as
certain areas of the engine may be extremely
hot (risk of burns) and the cooling fan could
start at any time (even with the ignition off).
Wait at least one hour after switching off the
engine before working on the vehicle - risk of
burns!
Take care with objects or clothing that could
be caught in the blades of the cooling fan -
risk of strangulation!
Always wear gloves, protective glasses and
suitable clothing to avoid direct contact with
liquids against the skin or eyes.
In the event of contact with the skin, wash
the affected area thoroughly with soap and
running water.