2021 Peugeot Landtrek tow
[x] Cancel search: towPage 78 of 176
76
Driving
To return to the speed setting, release the
accelerator pedal (when the set speed is
reached again, the displayed speed stops
flashing).
Operating limits
Never use the system in the following
situations:
– In an urban area with the risk of
pedestrians crossing the road.
– In heavy traffic.
– On winding or steep roads.
– On slippery or flooded roads.
– In poor weather conditions.
– Driving on a speed circuit.
– Driving on a rolling road.
– When using snow chains, non-slip covers
or studded tyres.
Cruise control
Refer to the General recommendations on the
use of driving and manoeuvring aids and to
Cruise control - particular recommendations.
This system automatically keeps the vehicle’s speed at the cruise value
programmed by the driver (speed setting),
without using the accelerator pedal.
Cruise control is switched on manually.
It requires a minimum vehicle speed of 25 mph
(40 km/h).
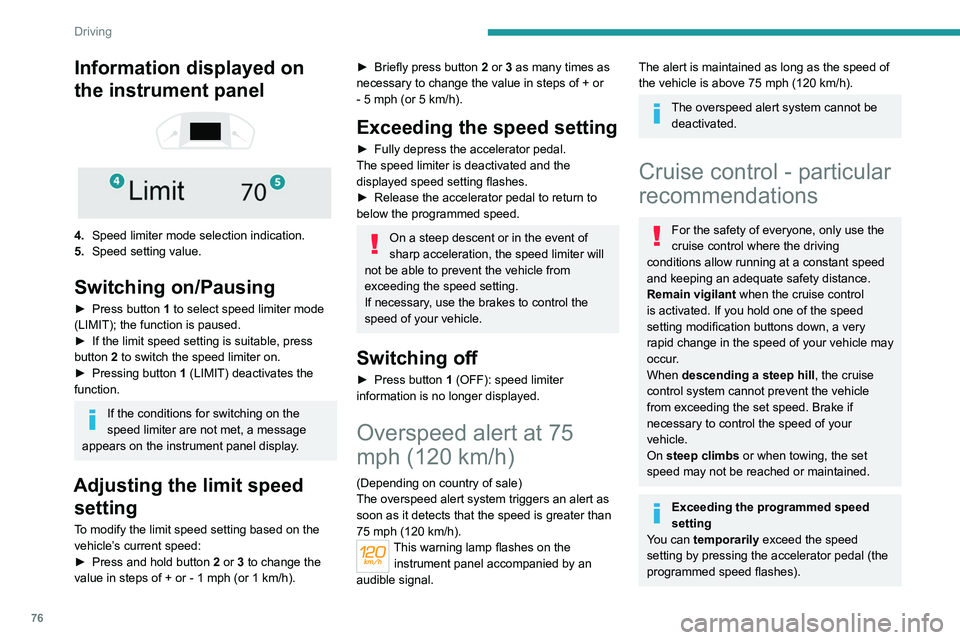
Information displayed on
the instrument panel
4. Speed limiter mode selection indication.
5. Speed setting value.
Switching on/Pausing
► Press button 1 to select speed limiter mode
(LIMIT); the function is paused.
►
If the limit speed setting is suitable, press
button
2 to switch the speed limiter on.
►
Pressing button 1
(LIMIT) deactivates the
function.
If the conditions for switching on the
speed limiter are not met, a message
appears on the instrument panel display.
Adjusting the limit speed setting
To modify the limit speed setting based on the
vehicle’s current speed:
►
Press and hold button
2
or 3 to change the
value in steps of +
or - 1 mph (or 1 km/h).
► Briefly press button 2 or 3 as many times as
necessary to change the value in steps of + or
-
5 mph (or 5 km/h).
Exceeding the speed setting
► Fully depress the accelerator pedal.
The speed limiter is deactivated and the
displayed speed setting flashes.
►
Release the accelerator pedal to return to
below the programmed speed.
On a steep descent or in the event of
sharp acceleration, the speed limiter will
not be able to prevent the vehicle from
exceeding the speed setting.
If necessary, use the brakes to control the
speed of your vehicle.
Switching off
► Press button 1 (OFF): speed limiter
information is no longer displayed.
Overspeed alert at 75
mph (120 km/h)
(Depending on country of sale)
The overspeed alert system triggers an alert as
soon as it detects that the speed is greater than
75 mph (120 km/h).
This warning lamp flashes on the
instrument panel accompanied by an
audible signal.
The alert is maintained as long as the speed of
the vehicle is above 75 mph (120 km/h).
The overspeed alert system cannot be deactivated.
Cruise control - particular
recommendations
For the safety of everyone, only use the
cruise control where the driving
conditions allow running at a constant speed
and keeping an adequate safety distance.
Remain vigilant when the cruise control
is activated. If you hold one of the speed
setting modification buttons down, a very
rapid change in the speed of your vehicle may
occur.
When descending a steep hill , the cruise
control system cannot prevent the vehicle
from exceeding the set speed. Brake if
necessary to control the speed of your
vehicle.
On steep climbs or when towing, the set
speed may not be reached or maintained.
Exceeding the programmed speed
setting
You can temporarily exceed the speed
setting by pressing the accelerator pedal (the
programmed speed flashes).
Page 83 of 176
81
Driving
6This supplements the audible signal by
displaying bars on the screen that move
progressively nearer to the vehicle.
Front parking sensors
Supplementing the rear parking sensors, the
front parking sensors are triggered when an
obstacle is detected in front and the speed of the
vehicle is still below 6 mph (10 km/h).
Front parking sensor operation is suspended if
an obstacle is no longer detected or the vehicle
speed exceeds 6
mph (10 km/h).
The sound emitted by the speaker (front or rear) locates the obstacle relative to
the vehicle, in front or behind it.
Deactivation / Activation
► To deactivate or activate the system, press
this button.
The indicator lamp is lit when the system is
deactivated.
The state of the system stays in the memory
when the ignition is switched off.
The rear parking sensors system will be deactivated automatically if a trailer or
bicycle carrier is connected to a towing device
installed in accordance with the
manufacturer's recommendations.
Operating limits
If the boot is heavily loaded, the vehicle may tilt,
affecting distance measurements.
Malfunction
In the event of a malfunction when
changing into reverse, this warning lamp
comes on on the instrument panel, accompanied
by an onscreen message and an audible signal
(short beep).
Contact a PEUGEOT dealer or a qualified
workshop to have the system checked.
Reversing camera
Refer to the General recommendations on the
use of driving and manoeuvring aids .
The visual reversing assistance camera is
activated automatically when reverse gear is
engaged.
The function may be supplemented by parking
sensors.
The image is displayed on the touch screen.
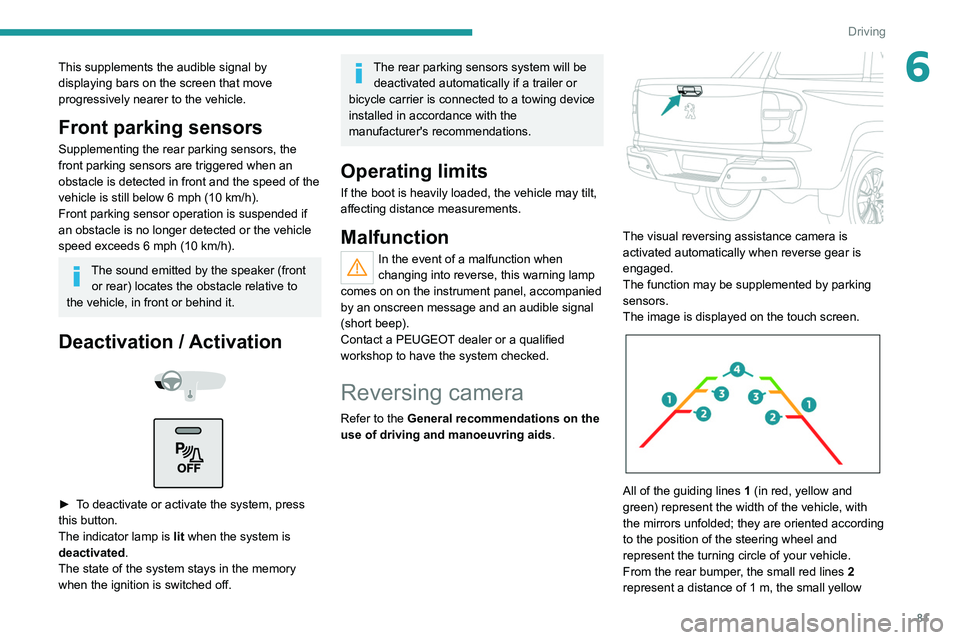
All of the guiding lines 1 (in red, yellow and
green) represent the width of the vehicle, with
the mirrors unfolded; they are oriented according
to the position of the steering wheel and
represent the turning circle of your vehicle.
From the rear bumper, the small red lines 2
represent a distance of 1 m, the small yellow
Page 90 of 176
88
Practical information
► Turn the filler cap to the left, remove it and
place it on its support (on the filler flap).
► Introduce the filler nozzle and push it in as far
as possible before starting to refuel (to minimise
the risk of splashing).
Do not continue after the nozzle’s third cut-
out. Doing so may cause malfunctions.
► Put the filler cap back in place and turn it to
the right.
► Close the fuel filler flap.
If you have put in the wrong fuel for the
vehicle, you must have the fuel tank
drained and filled with the correct fuel before
starting the engine.
Depending on version, the vehicle is fitted with
a catalytic converter, which helps to reduce the
level of harmful emissions in the exhaust gases.
For petrol engines, you must use unleaded
fuel.
The filler neck is narrower, admitting unleaded
petrol nozzles only.
Towing device
Load distribution
► Distribute the load in the trailer so that the
heaviest items are as close as possible to the
axle, and the nose weight approaches the
maximum permitted without exceeding it.
Air density decreases with altitude, thus reducing
engine performance. The maximum towable load
Recommended fuel
The vehicle complies with Euro 1, Euro 4 and Euro 5 emission standards.
The petrol engines are compatible with 92 RON
minimum unleaded fuel.
Diesel engines are compatible with type B0
fuel
not containing Fatty Acid Methyl Ester
(biofuel) and B7 and B10 type fuels conforming
to EN590 and EN16734 standards containing
respectively up to 7% and 10% of Fatty Acid
Methyl Ester.
Depending on the country of sale, the Diesel
fuel must be suited to the ambient temperature
in order to optimise engine performance and
minimise polluting emissions.
Temperature greater than Diesel quality
5°C (+41°F) N°0
-5°C (+23°F) N°-10
-10°C (+14°F) N°-20
-25°C (-13°F) N°-35
The use of any other type of (bio) fuel
(vegetable or animal oils, pure or diluted,
domestic fuel, etc.) is strictly prohibited (risk
of damage to the engine and fuel system).
Diesel at low temperature
At temperatures below 0 °C (+32 °F), the
formation of paraffins in summer-type Diesel
fuels could prevent the engine from operating
correctly
. In these temperature conditions, use
winter-type Diesel fuel and keep the fuel tank
more than 50
% full.
At temperatures below -15
°C (+5 °F) to avoid
problems starting, it is best to park the vehicle
under shelter (heated garage).
Travelling abroad
Certain fuels could damage your vehicle’s
engine.
In certain countries, the use of a particular
fuel may be required (specific octane rating,
specific trade name, etc.) to ensure correct
operation of the engine.
For all additional information, consult a dealer.
Refuelling
Fuel tank capacity: approximately 80 litres.
Reserve level: approximately 11 litres.
Low fuel level
When the low fuel level is reached, this
warning lamp lights up on the instrument
panel. When it first comes on, about 11 litres of
fuel remain.
Until sufficient fuel is added, this warning lamp
appears every time the ignition is switched on,
accompanied by an onscreen message and
an audible signal. When driving, this message
and audible signal are repeated with increasing
frequency as the fuel level drops towards 0.
You must refuel as soon as possible to avoid
running out of fuel.
For more information on Running out of fuel
(Diesel), refer to the corresponding section.
A small arrow by the warning lamp indicates which side of the vehicle the
fuel filler flap is located on.
Refuelling
When refuelling, at least 10 litres must be added
in order to be registered by the fuel gauge.
Opening the filler cap may create a noise caused
by an inrush of air. This vacuum is normal,
caused by the sealing of the fuel system.
To refuel in complete safety:
►
Always switch off the engine.
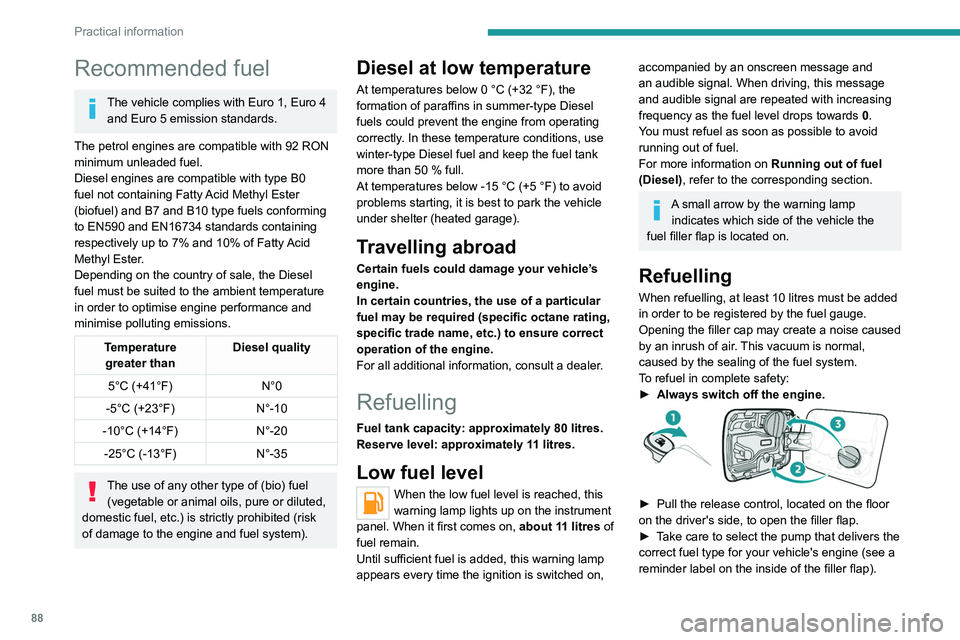
► Pull the release control, located on the floor
on the driver's side, to open the filler flap.
►
T
ake care to select the pump that delivers the
correct fuel type for your vehicle's engine (see a
reminder label on the inside of the filler flap).
Page 91 of 176

89
Practical information
7► Turn the filler cap to the left, remove it and
place it on its support (on the filler flap).
►
Introduce the filler nozzle and push it in as far
as possible before starting to refuel (to minimise
the risk of splashing).
Do not continue after the nozzle’
s third cut-
out. Doing so may cause malfunctions.
►
Put the filler cap back in place and turn it to
the right.
►
Close the fuel filler flap.
If you have put in the wrong fuel for the
vehicle, you must have the fuel tank
drained and filled with the correct fuel before
starting the engine.
Depending on version, the vehicle is fitted with
a catalytic converter, which helps to reduce the
level of harmful emissions in the exhaust gases.
For petrol engines, you must use unleaded
fuel.
The filler neck is narrower, admitting unleaded
petrol nozzles only.
Towing device
Load distribution
► Distribute the load in the trailer so that the
heaviest items are as close as possible to the
axle, and the nose weight approaches the
maximum permitted without exceeding it.
Air density decreases with altitude, thus reducing
engine performance.
The maximum towable load
must be reduced by 10% per 1,000 metres of
altitude.
Use genuine towing devices and their
wiring harnesses approved by
PEUGEOT. We recommend having them
fitted by a PEUGEOT dealer or a qualified
workshop.
If not fitted by a PEUGEOT dealer, they must
still be fitted in accordance with the vehicle
manufacturer's instructions.
Certain driving or manoeuvring aid functions
are automatically deactivated while an
approved towing system is in use.
For more information about driving with a
towing device fitted to a trailer and associated
with the Trailer stability assist, refer to the
corresponding section.
Comply with the maximum authorised
towable weight, as indicated on your
vehicle's registration certificate, on the
manufacturer's label and in the Technical
data section of this guide.
Complying with the maximum authorised
nose weight (towball weight) also includes
the use of accessories (bicycle carriers,
tow boxes, etc.).
Observe the legislation in force in the
country where you are driving.
Snow chains
In wintry conditions, snow chains improve
traction as well as the behaviour of the vehicle
when braking.
Snow chains must be fitted only to
driving wheels.
Observe the legislation in force in your
country relating to the use of snow
chains and maximum authorised speeds.
Only use chains designed for the vehicle's wheel
type:
Tyre size Link size
245/70 R16 13 to 16
mm
265/65 R17 13 to 16
mm
265/60R18 13 to 16
mm
It is also possible to use snow socks.
For more information on snow chains, contact a
PEUGEOT dealer or a qualified workshop.
Installation tips
► To fit the snow chains during a journey, stop
the vehicle on a flat surface at the side of the
road.
►
Apply the parking brake and position any
wheel chocks under the wheels to prevent
movement of the vehicle.
Page 92 of 176
90
Practical information
Opening
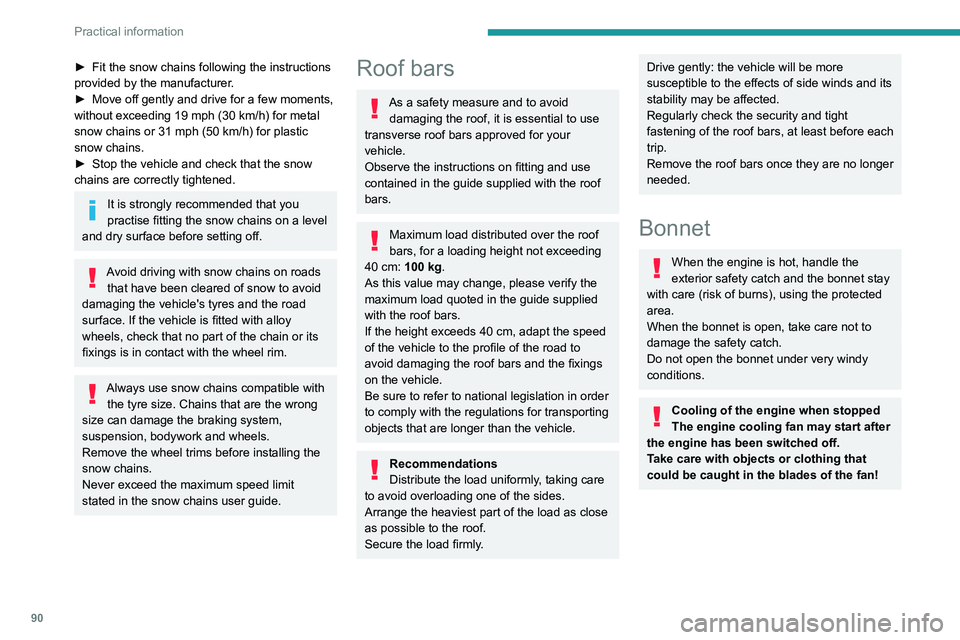
► Open the left-hand front door.
► Pull the interior release lever, located at the
bottom of the dashboard, towards you.
► Tilt the exterior safety catch to the left and
raise the bonnet.
► Unclip the stay from its housing and place it
in the support slot to hold the bonnet open.
* Depending on engine.
► Fit the snow chains following the instructions
provided by the manufacturer .
►
Move off gently and drive for a few moments,
without exceeding 19
mph (30 km/h) for metal
snow chains or 31 mph (50 km/h) for plastic
snow chains.
►
Stop the vehicle and check that the snow
chains are correctly tightened.
It is strongly recommended that you
practise fitting the snow chains on a level
and dry surface before setting off.
Avoid driving with snow chains on roads that have been cleared of snow to avoid
damaging the vehicle's tyres and the road
surface. If the vehicle is fitted with alloy
wheels, check that no part of the chain or its
fixings is in contact with the wheel rim.
Always use snow chains compatible with the tyre size. Chains that are the wrong
size can damage the braking system,
suspension, bodywork and wheels.
Remove the wheel trims before installing the
snow chains.
Never exceed the maximum speed limit
stated in the snow chains user guide.
Roof bars
As a safety measure and to avoid damaging the roof, it is essential to use
transverse roof bars approved for your
vehicle.
Observe the instructions on fitting and use
contained in the guide supplied with the roof
bars.
Maximum load distributed over the roof
bars, for a loading height not exceeding
40 cm: 100
kg.
As this value may change, please verify the
maximum load quoted in the guide supplied
with the roof bars.
If the height exceeds 40 cm, adapt the speed
of the vehicle to the profile of the road to
avoid damaging the roof bars and the fixings
on the vehicle.
Be sure to refer to national legislation in order
to comply with the regulations for transporting
objects that are longer than the vehicle.
Recommendations
Distribute the load uniformly, taking care
to avoid overloading one of the sides.
Arrange the heaviest part of the load as close
as possible to the roof.
Secure the load firmly.
Drive gently: the vehicle will be more
susceptible to the effects of side winds and its
stability may be affected.
Regularly check the security and tight
fastening of the roof bars, at least before each
trip.
Remove the roof bars once they are no longer
needed.
Bonnet
When the engine is hot, handle the
exterior safety catch and the bonnet stay
with care (risk of burns), using the protected
area.
When the bonnet is open, take care not to
damage the safety catch.
Do not open the bonnet under very windy
conditions.
Cooling of the engine when stopped
The engine cooling fan may start after
the engine has been switched off.
Take care with objects or clothing that
could be caught in the blades of the fan!
Page 93 of 176

91
Practical information
7Opening
► Open the left-hand front door.
► Pull the interior release lever , located at the
bottom of the dashboard, towards you.
► Tilt the exterior safety catch to the left and
raise the bonnet.
►
Unclip the stay from its housing and place it
in the support slot to hold the bonnet open.
* Depending on engine.
Closing
► Hold the bonnet and pull out the stay from the
support slot.
►
Clip the stay in its housing.
►
Lower the bonnet and release it near the end
of its travel.
►
Pull on the bonnet to check that it is locked
correctly
.
Because of the presence of electrical
equipment under the bonnet, it is strongly
recommended that exposure to water (rain,
washing, etc.) be limited.
Engine compartment
The engine shown here is an example for
illustrative purposes only.
The locations of the following elements may
vary:
–
Air filter
.
–
Engine oil dipstick.
–
Engine oil filler cap.
–
Priming pump.
–
Degassing screw
.
Petrol engine
Diesel engine
1.Screenwash fluid reservoir
2. Engine coolant reservoir
3. Brake fluid reservoir
4. Battery
5. Power steering fluid reservoir
6. Fusebox
7. Air filter
8. Engine oil filler cap
9. Engine oil dipstick
10. Priming pump*
11 . Degassing screw*
Page 97 of 176
95
Practical information
7Particle filter (Diesel)
(Depending on version)The start of clogging of the particle filter is indicated by the temporary lighting of this
warning lamp, accompanied by an alert
message.
As soon as the traffic conditions permit,
regenerate the filter by driving at a speed of at
least 37
mph (60 km/h) until the warning lamp
goes off.
If the warning lamp stays on, this
indicates a low Diesel additive level.
For more information on Checking levels,
refer to the corresponding section.
Following prolonged operation of the
vehicle at very low speed or at idle, you
may, in exceptional circumstances, notice
water vapour coming from the exhaust while
accelerating. These emissions have no
impact on the vehicle’s behaviour and the
environment.
New vehicle
During the first few particle filter
regeneration operations, you may notice a
"burning" smell. This is perfectly normal.
Manual gearbox
The gearbox does not require any maintenance (no oil change).
Automatic gearbox
The gearbox does not require any maintenance (no oil change).
Brake pads
Brake wear depends on the style of
driving, particularly in the case of vehicles
used in town, over short distances. It may be
necessary to have the condition of the brakes
checked, even between vehicle services.
Unless there is a leak in the circuit, a drop in the
brake fluid level indicates that the brake pads
are worn.
After washing the vehicle, moisture, or in wintry conditions, ice can form on the
brake discs and pads: braking efficiency may
be reduced. Gently dab the brakes to dry and
defrost them.
Brake disc wear
For information on checking brake disc
wear, contact a PEUGEOT dealer or a
qualified workshop.
Manual parking brake
If you notice excessive brake lever travel
or decreased effectiveness, the parking
brake must be adjusted, even between two
services.
This system must be checked by a PEUGEOT
dealer or a qualified workshop.
Steering wheel
Play or a loss of precision in the steering
means that this system needs to be
checked.
This system must be checked by a PEUGEOT
dealer or a qualified workshop.
Wheels and tyres
The inflation pressure of all tyres, including the spare wheel, must be
checked on "cold” tyres at least once a month.
The pressures indicated on the tyre pressure
label are valid for "cold" tyres. If you have driven
for more than 10 minutes or more than 6 miles
(10 kilometres) at over 31 mph (50
km/h), add
0.3 bar (30 kPa) to the values indicated on the
label.
The pressure difference between the left-hand
side and right-hand side tyres must not exceed
0.05 bar (5 kPa).
Under-inflation increases energy
consumption. Non-compliant tyre
pressures cause tyres to wear prematurely
and have an adverse effect on the vehicle's
road holding - risk of accident!
Driving with worn or damaged tyres reduces the
braking and road holding performance of the
vehicle. Regularly check the condition of the
tyres (tread and sidewalls) and rims as well as
the presence of the valve caps.
Page 100 of 176
98
Practical information
Electrical system
Never:
–
disconnect the battery cables or the
electrical wiring harness connectors when the
engine is running.
–
reverse the polarities when reconnecting
the battery (risk of damage to electronic
components).
–
pierce the insulation of the electrical wires
during an electrical check or diagnosis.
Changing the 12 V battery
Petrol engine
Diesel engine
► Switch off the engine and the ignition.
In the engine compartment :
►
Loosen and disconnect the cable from the
negative terminal
1.
►
Lift the protective cover
, then loosen and
disconnect the cable from the positive terminal
2.
►
Loosen and remove the retaining clamp 3
.
►
Remove and change the battery
.
For more information on the 12 V battery
and in particular the precautionary measures
to be taken before any work, refer to the
corresponding section.
To reassemble, perform the operations in the reverse order to those for removal.
When connecting cables, always start with
the positive terminal.
Changing the passenger
compartment filter
► Switch off the engine and the ignition.
In the passenger compartment:
►
Open the glove box.
►
Unclip the damper 1
located on the right of
the glove box.
►
Press the walls
2 on each side of the glove
box 3, then tilt it downwards to release it
completely.
►
Pull the glove box 3
towards you to unclip
and remove it.
► Unclip and remove the protective cover 4
using a suitable tool.