2021 Peugeot Landtrek fuel
[x] Cancel search: fuelPage 71 of 176
69
Driving
6The mode cannot be changed if the vehicle is in motion.
With a manual gearbox, depress and hold
the clutch pedal to change the mode.
There is a risk of damaging the
transfer box!
While the indicator lamp for the selected
mode is flashing on the instrument panel:
–
Do not accelerate.
–
Do not release the clutch pedal with a
manual gearbox
.
–
Do not engage a gear with an automatic
gearbox
.
Recommendations
On dry, tarmac or high-speed roads,
mainly use the 2H mode.
In 4L mode, avoid driving at a speed above
25 mph (40 km/h) and stay in a straight line.
Driving in 4H or 4L mode:
–
on dry or tarmac road can cause oil
leakage, and seizure or malfunctions of the
transmission
- risk of accident or serious
damage!
–
on hard roads increases tyre wear and fuel
consumption.
Do not turn the selector suddenly from the 2L
position to 4H or 4L - risk of loss of control of
the vehicle!
Never change from 2H to 4H mode when the
wheels are spinning or skidding.
Malfunction
4H4LIf one of these indicator lamps is
still flashing, contact a PEUGEOT
dealer or a qualified workshop.
If the vehicle is driven in 4H or 4L mode
for too long, this indicator lamp flashes,
accompanied by an audible signal and the
display of a message indicating that the
transmission oil temperature is too high.
►
Select 2H mode, then wait for the warnings to
disappear before changing the mode.
If the warnings persist, visit a PEUGEOT
dealer
or a qualified workshop.
In cold weather, engaging modes 2H and
4H may not be possible. Reduce the
speed or stop the vehicle to select the mode.
6-speed manual gearbox
Engaging 5th or 6th gear
► Move the gear selector fully to the right to
engage 5th or 6th gear.
Failure to follow this instruction could
cause permanent damage to the gearbox
(inadvertent engagement of 3
rd or 4th gear).
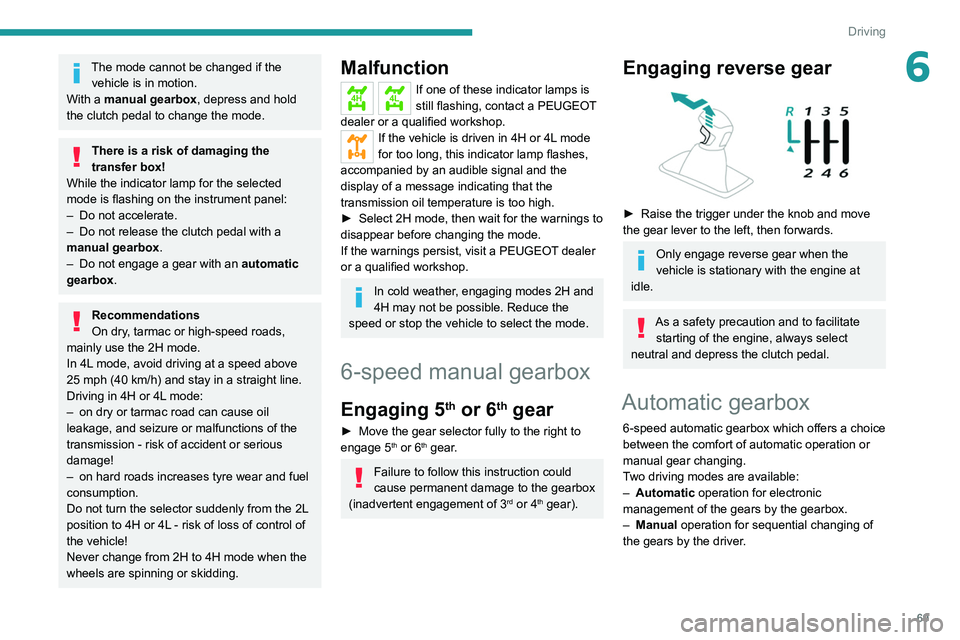
Engaging reverse gear
► Raise the trigger under the knob and move
the gear lever to the left, then forwards.
Only engage reverse gear when the
vehicle is stationary with the engine at
idle.
As a safety precaution and to facilitate starting of the engine, always select
neutral and depress the clutch pedal.
Automatic gearbox
6-speed automatic gearbox which offers a choice
between the comfort of automatic operation or
manual gear changing.
Two driving modes are available:
–
Automatic
operation for electronic
management of the gears by the gearbox.
–
Manual
operation for sequential changing of
the gears by the driver.
Page 72 of 176
70
Driving
Automatic operation
► Select position D for automatic changing of
the six gears.
The gearbox then operates in auto-adaptive
mode, without any intervention on the part of the
driver. It continuously selects the most suitable
gear according to the driving style, the road
profile and the load in the vehicle.
For maximum acceleration without touching the
selector, press the accelerator fully down (kick-
down). The gearbox changes down automatically
or holds the gear selected until the maximum
engine speed is reached.
When braking, the gearbox changes down
automatically to provide effective engine braking.
If you release the accelerator sharply, the
gearbox will not shift to a higher gear for safety
reasons.
Never select position N while the vehicle
is moving.
Never select positions P or R unless the
vehicle is completely stationary.
Manual operation
To limit fuel consumption during an extended standstill with the engine
running (for example, in a traffic jam), set the
gear selector to N and apply the parking
brake.
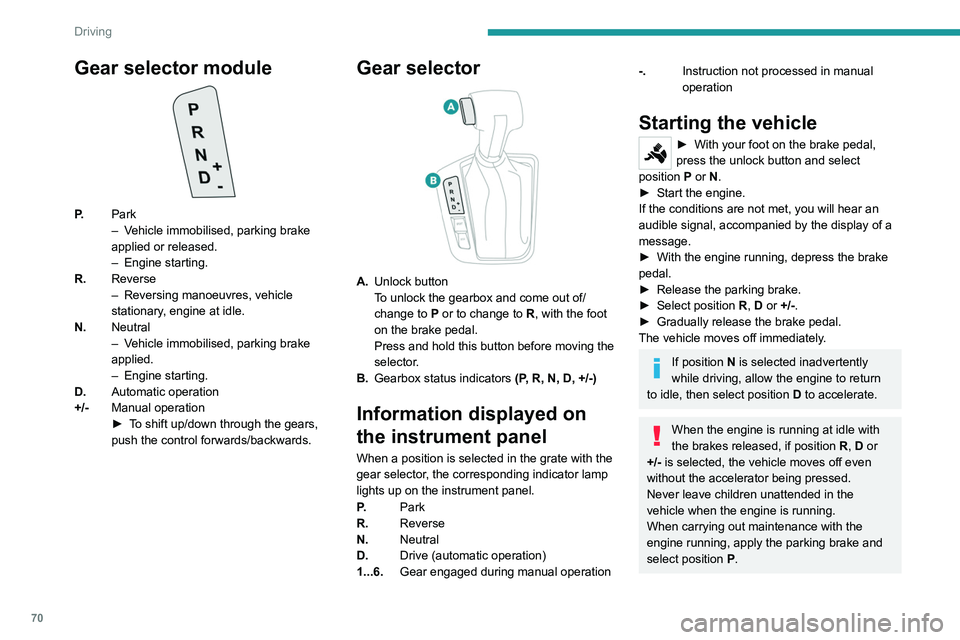
Gear selector module
P. Park
–
V ehicle immobilised, parking brake
applied or released.
–
Engine starting.
R. Reverse
–
Reversing manoeuvres, vehicle
stationary
, engine at idle.
N. Neutral
–
V
ehicle immobilised, parking brake
applied.
–
Engine starting.
D. Automatic operation
+/- Manual operation
►
T
o shift up/down through the gears,
push the control forwards/backwards.
Gear selector
A. Unlock button
To unlock the gearbox and come out of/
change to
P or to change to R, with the foot
on the brake pedal.
Press and hold this button before moving the
selector.
B. Gearbox status indicators (P, R, N, D, +/-)
Information displayed on
the instrument panel
When a position is selected in the grate with the
gear selector, the corresponding indicator lamp
lights up on the instrument panel.
P.Park
R. Reverse
N. Neutral
D. Drive (automatic operation)
1...6. Gear engaged during manual operation
-.Instruction not processed in manual
operation
Starting the vehicle
► With your foot on the brake pedal,
press the unlock button and select
position P
or N.
►
Start the engine.
If the conditions are not met, you will hear an
audible signal, accompanied by the display of a
message.
►
With the engine running, depress the brake
pedal.
►
Release the parking brake.
►
Select position R
, D or +/-.
►
Gradually release the brake pedal.
The vehicle moves off immediately
.
If position N is selected inadvertently
while driving, allow the engine to return
to idle, then select position D to accelerate.
When the engine is running at idle with
the brakes released, if position R, D or
+/- is selected, the vehicle moves off even
without the accelerator being pressed.
Never leave children unattended in the
vehicle when the engine is running.
When carrying out maintenance with the
engine running, apply the parking brake and
select position P.
Page 73 of 176
71
Driving
6Automatic operation
► Select position D for automatic changing of
the six gears.
The gearbox then operates in auto-adaptive
mode, without any intervention on the part of the
driver. It continuously selects the most suitable
gear according to the driving style, the road
profile and the load in the vehicle.
For maximum acceleration without touching the
selector, press the accelerator fully down (kick-
down). The gearbox changes down automatically
or holds the gear selected until the maximum
engine speed is reached.
When braking, the gearbox changes down
automatically to provide effective engine braking.
If you release the accelerator sharply, the
gearbox will not shift to a higher gear for safety
reasons.
Never select position N while the vehicle
is moving.
Never select positions P or R unless the
vehicle is completely stationary.
Manual operation
To limit fuel consumption during an extended standstill with the engine
running (for example, in a traffic jam), set the
gear selector to N and apply the parking
brake.
► Selecting position +/- enables sequential
shifting between the six gears.
►
T
o shift up/down through the gears, push the
control forwards/backwards.
The gearbox only changes gear if the vehicle
speed and engine speed conditions allow;
otherwise, the rules for automatic operation are
temporarily applied.
D disappears, and the gears engaged appear in
succession on the instrument panel.
If the engine speed is too low or too high, the
selected gear flashes for a few seconds, then the
gear actually engaged is shown.
It is possible to change from position D to
position +/-
at any time.
When the vehicle is stationary or moving very
slowly, the gearbox selects gear 1 automatically.
This symbol is displayed if a gear is not
engaged correctly (gear selector between
two positions).
Switching off the vehicle
Before switching off the engine, it is possible to
engage position P or N to place the gearbox in
neutral.
In both cases, apply the parking brake to
immobilise the vehicle.
If the gear selector is not in position P,
when the driver's door is opened or
approximately 45 seconds after the ignition is
switched off, an audible signal sounds and a
message appears.
►
Return the gear selector to P
; the audible
signal stops and the message disappears.
Malfunction
In the event of a malfunction, this warning
lamp comes on and a message is
displayed, when the ignition is switched on.
In this case, the gearbox goes into back-up
mode and is locked in 3
rd gear. You may feel a
significant jolt (without risk for the gearbox) while
changing from
P
to R and from N to R.
Do not exceed 62 mph (100
km/h), local speed
restrictions permitting.
Have the system checked by a PEUGEOT
dealer or a qualified workshop.
There is a risk of damaging the gearbox: – If the accelerator and brake pedals are
pressed simultaneously
.
–
In the event of a battery failure, forcing the
selector from position P
to another position.
Driving mode
Driving modes are selected using one of the
following controls, depending on version:
Page 74 of 176
72
Driving
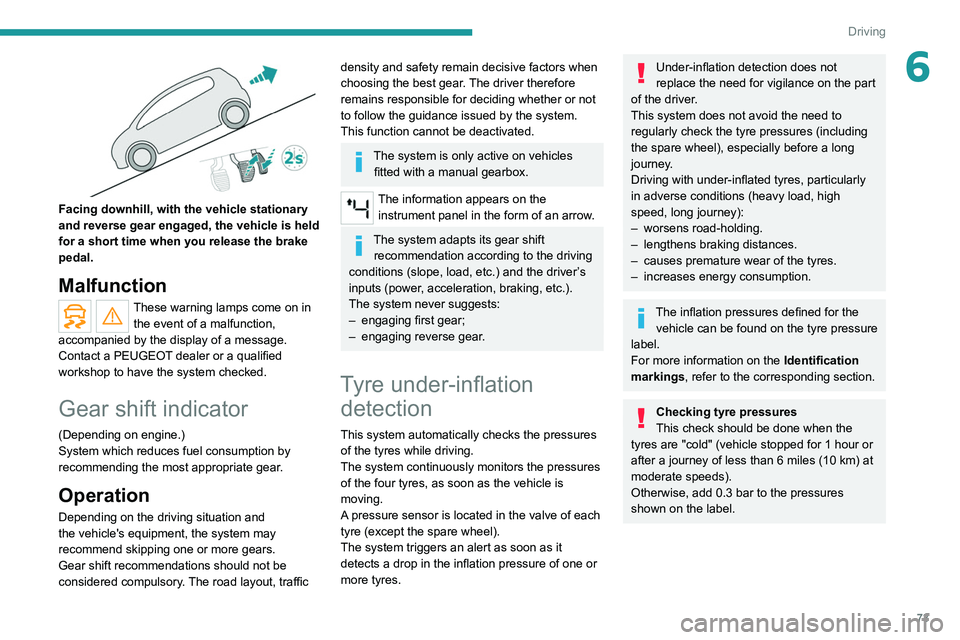
Facing downhill, with the vehicle stationary
and reverse gear engaged, the vehicle is held
for a short time when you release the brake
pedal.
Malfunction
These warning lamps come on in the event of a malfunction,
accompanied by the display of a message.
Contact a PEUGEOT dealer or a qualified
workshop to have the system checked.
Gear shift indicator
(Depending on engine.)
System which reduces fuel consumption by
recommending the most appropriate gear.
Operation
Depending on the driving situation and
the vehicle's equipment, the system may
recommend skipping one or more gears.
Gear shift recommendations should not be
considered compulsory. The road layout, traffic
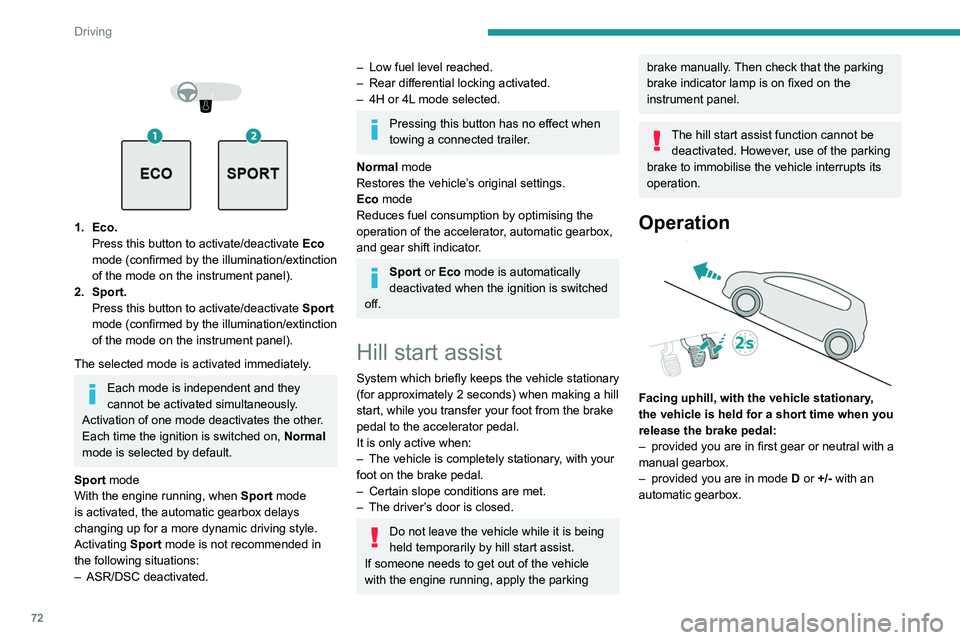
1. Eco. Press this button to activate/deactivate Eco
mode (confirmed by the illumination/extinction
of the mode on the instrument panel).
2. Sport. Press this button to activate/deactivate
Sport
mode (confirmed by the illumination/extinction
of the mode on
the instrument panel).
The selected mode is activated immediately.
Each mode is independent and they
cannot be activated simultaneously.
Activation of one mode deactivates the other.
Each time the ignition is switched on, Normal
mode is selected by default.
Sport mode
With the engine running, when
Sport
mode
is activated, the automatic gearbox delays
changing up for a more dynamic driving style.
Activating
Sport mode is not recommended in
the following situations:
–
ASR/DSC deactivated.
– Low fuel level reached.
– Rear differential locking activated.
–
4H or 4L
mode selected.
Pressing this button has no effect when
towing a connected trailer.
Normal mode
Restores the vehicle’s original settings.
Eco mode
Reduces fuel consumption by optimising the
operation of the accelerator, automatic gearbox,
and gear shift indicator.
Sport or Eco mode is automatically
deactivated when the ignition is switched
off.
Hill start assist
System which briefly keeps the vehicle stationary
(for approximately 2 seconds) when making a hill
start, while you transfer your foot from the brake
pedal to the accelerator pedal.
It is only active when:
–
The vehicle is completely stationary
, with your
foot on the brake pedal.
–
Certain slope conditions are met.
–
The driver
’s door is closed.
Do not leave the vehicle while it is being
held temporarily by hill start assist.
If someone needs to get out of the vehicle
with the engine running, apply the parking
brake manually. Then check that the parking
brake indicator lamp is on fixed on the
instrument panel.
The hill start assist function cannot be deactivated. However, use of the parking
brake to immobilise the vehicle interrupts its
operation.
Operation
Facing uphill, with the vehicle stationary,
the vehicle is held for a short time when you
release the brake pedal:
–
provided you are in first gear or neutral with a
manual gearbox.
–
provided you are in mode D
or +/- with an
automatic gearbox.
Page 75 of 176
73
Driving
6
Facing downhill, with the vehicle stationary
and reverse gear engaged, the vehicle is held
for a short time when you release the brake
pedal.
Malfunction
These warning lamps come on in the event of a malfunction,
accompanied by the display of a message.
Contact a PEUGEOT dealer or a qualified
workshop to have the system checked.
Gear shift indicator
(Depending on engine.)
System which reduces fuel consumption by
recommending the most appropriate gear.
Operation
Depending on the driving situation and
the vehicle's equipment, the system may
recommend skipping one or more gears.
Gear shift recommendations should not be
considered compulsory. The road layout, traffic
density and safety remain decisive factors when
choosing the best gear. The driver therefore
remains responsible for deciding whether or not
to follow the guidance issued by the system.
This function cannot be deactivated.
The system is only active on vehicles fitted with a manual gearbox.
The information appears on the instrument panel in the form of an arrow.
The system adapts its gear shift recommendation according to the driving
conditions (slope, load, etc.) and the driver’s
inputs (power, acceleration, braking, etc.).
The system never suggests:
–
engaging first gear;
–
engaging reverse gear
.
Tyre under-inflation detection
This system automatically checks the pressures
of the tyres while driving.
The system continuously monitors the pressures
of the four tyres, as soon as the vehicle is
moving.
A pressure sensor is located in the valve of each
tyre (except the spare wheel).
The system triggers an alert as soon as it
detects a drop in the inflation pressure of one or
more tyres.
Under-inflation detection does not
replace the need for vigilance on the part
of the driver.
This system does not avoid the need to
regularly check the tyre pressures (including
the spare wheel), especially before a long
journey.
Driving with under-inflated tyres, particularly
in adverse conditions (heavy load, high
speed, long journey):
–
worsens road-holding.
–
lengthens braking distances.
–
causes premature wear of the tyres.
–
increases energy consumption.
The inflation pressures defined for the vehicle can be found on the tyre pressure
label.
For more information on the Identification
markings, refer to the corresponding section.
Checking tyre pressures
This check should be done when the
tyres are "cold" (vehicle stopped for 1 hour or
after a journey of less than 6 miles (10
km) at
moderate speeds).
Otherwise, add 0.3 bar to the pressures
shown on the label.
Page 90 of 176
88
Practical information
► Turn the filler cap to the left, remove it and
place it on its support (on the filler flap).
► Introduce the filler nozzle and push it in as far
as possible before starting to refuel (to minimise
the risk of splashing).
Do not continue after the nozzle’s third cut-
out. Doing so may cause malfunctions.
► Put the filler cap back in place and turn it to
the right.
► Close the fuel filler flap.
If you have put in the wrong fuel for the
vehicle, you must have the fuel tank
drained and filled with the correct fuel before
starting the engine.
Depending on version, the vehicle is fitted with
a catalytic converter, which helps to reduce the
level of harmful emissions in the exhaust gases.
For petrol engines, you must use unleaded
fuel.
The filler neck is narrower, admitting unleaded
petrol nozzles only.
Towing device
Load distribution
► Distribute the load in the trailer so that the
heaviest items are as close as possible to the
axle, and the nose weight approaches the
maximum permitted without exceeding it.
Air density decreases with altitude, thus reducing
engine performance. The maximum towable load
Recommended fuel
The vehicle complies with Euro 1, Euro 4 and Euro 5 emission standards.
The petrol engines are compatible with 92 RON
minimum unleaded fuel.
Diesel engines are compatible with type B0
fuel
not containing Fatty Acid Methyl Ester
(biofuel) and B7 and B10 type fuels conforming
to EN590 and EN16734 standards containing
respectively up to 7% and 10% of Fatty Acid
Methyl Ester.
Depending on the country of sale, the Diesel
fuel must be suited to the ambient temperature
in order to optimise engine performance and
minimise polluting emissions.
Temperature greater than Diesel quality
5°C (+41°F) N°0
-5°C (+23°F) N°-10
-10°C (+14°F) N°-20
-25°C (-13°F) N°-35
The use of any other type of (bio) fuel
(vegetable or animal oils, pure or diluted,
domestic fuel, etc.) is strictly prohibited (risk
of damage to the engine and fuel system).
Diesel at low temperature
At temperatures below 0 °C (+32 °F), the
formation of paraffins in summer-type Diesel
fuels could prevent the engine from operating
correctly
. In these temperature conditions, use
winter-type Diesel fuel and keep the fuel tank
more than 50
% full.
At temperatures below -15
°C (+5 °F) to avoid
problems starting, it is best to park the vehicle
under shelter (heated garage).
Travelling abroad
Certain fuels could damage your vehicle’s
engine.
In certain countries, the use of a particular
fuel may be required (specific octane rating,
specific trade name, etc.) to ensure correct
operation of the engine.
For all additional information, consult a dealer.
Refuelling
Fuel tank capacity: approximately 80 litres.
Reserve level: approximately 11 litres.
Low fuel level
When the low fuel level is reached, this
warning lamp lights up on the instrument
panel. When it first comes on, about 11 litres of
fuel remain.
Until sufficient fuel is added, this warning lamp
appears every time the ignition is switched on,
accompanied by an onscreen message and
an audible signal. When driving, this message
and audible signal are repeated with increasing
frequency as the fuel level drops towards 0.
You must refuel as soon as possible to avoid
running out of fuel.
For more information on Running out of fuel
(Diesel), refer to the corresponding section.
A small arrow by the warning lamp indicates which side of the vehicle the
fuel filler flap is located on.
Refuelling
When refuelling, at least 10 litres must be added
in order to be registered by the fuel gauge.
Opening the filler cap may create a noise caused
by an inrush of air. This vacuum is normal,
caused by the sealing of the fuel system.
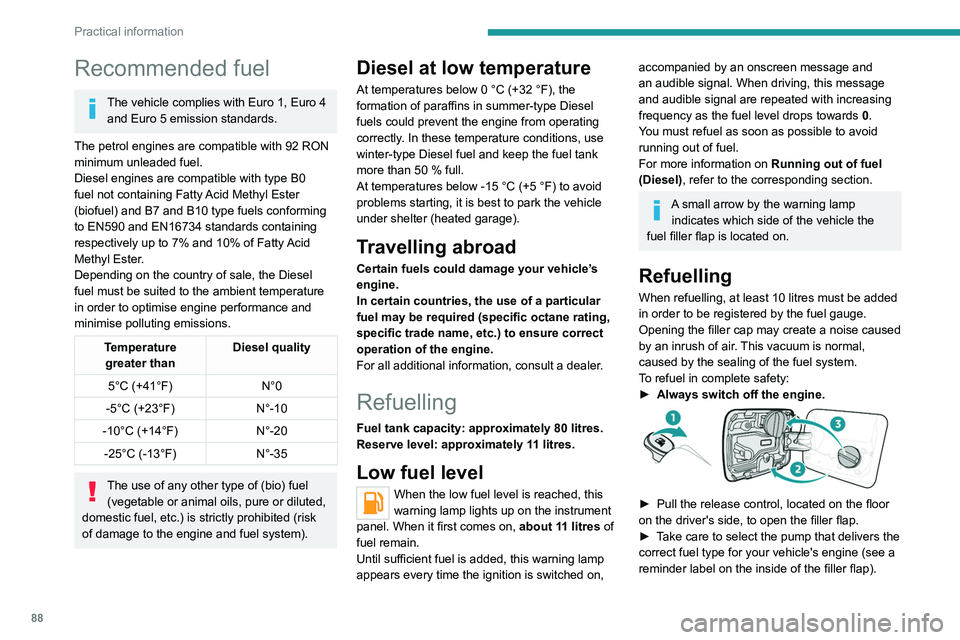
To refuel in complete safety:
►
Always switch off the engine.
► Pull the release control, located on the floor
on the driver's side, to open the filler flap.
►
T
ake care to select the pump that delivers the
correct fuel type for your vehicle's engine (see a
reminder label on the inside of the filler flap).
Page 91 of 176

89
Practical information
7► Turn the filler cap to the left, remove it and
place it on its support (on the filler flap).
►
Introduce the filler nozzle and push it in as far
as possible before starting to refuel (to minimise
the risk of splashing).
Do not continue after the nozzle’
s third cut-
out. Doing so may cause malfunctions.
►
Put the filler cap back in place and turn it to
the right.
►
Close the fuel filler flap.
If you have put in the wrong fuel for the
vehicle, you must have the fuel tank
drained and filled with the correct fuel before
starting the engine.
Depending on version, the vehicle is fitted with
a catalytic converter, which helps to reduce the
level of harmful emissions in the exhaust gases.
For petrol engines, you must use unleaded
fuel.
The filler neck is narrower, admitting unleaded
petrol nozzles only.
Towing device
Load distribution
► Distribute the load in the trailer so that the
heaviest items are as close as possible to the
axle, and the nose weight approaches the
maximum permitted without exceeding it.
Air density decreases with altitude, thus reducing
engine performance.
The maximum towable load
must be reduced by 10% per 1,000 metres of
altitude.
Use genuine towing devices and their
wiring harnesses approved by
PEUGEOT. We recommend having them
fitted by a PEUGEOT dealer or a qualified
workshop.
If not fitted by a PEUGEOT dealer, they must
still be fitted in accordance with the vehicle
manufacturer's instructions.
Certain driving or manoeuvring aid functions
are automatically deactivated while an
approved towing system is in use.
For more information about driving with a
towing device fitted to a trailer and associated
with the Trailer stability assist, refer to the
corresponding section.
Comply with the maximum authorised
towable weight, as indicated on your
vehicle's registration certificate, on the
manufacturer's label and in the Technical
data section of this guide.
Complying with the maximum authorised
nose weight (towball weight) also includes
the use of accessories (bicycle carriers,
tow boxes, etc.).
Observe the legislation in force in the
country where you are driving.
Snow chains
In wintry conditions, snow chains improve
traction as well as the behaviour of the vehicle
when braking.
Snow chains must be fitted only to
driving wheels.
Observe the legislation in force in your
country relating to the use of snow
chains and maximum authorised speeds.
Only use chains designed for the vehicle's wheel
type:
Tyre size Link size
245/70 R16 13 to 16
mm
265/65 R17 13 to 16
mm
265/60R18 13 to 16
mm
It is also possible to use snow socks.
For more information on snow chains, contact a
PEUGEOT dealer or a qualified workshop.
Installation tips
► To fit the snow chains during a journey, stop
the vehicle on a flat surface at the side of the
road.
►
Apply the parking brake and position any
wheel chocks under the wheels to prevent
movement of the vehicle.
Page 94 of 176
92
Practical information
Oil grade
Before topping up or changing the
engine oil, check that the oil is suitable
for your engine and complies with the
recommendations in the service schedule
supplied with the vehicle (or available
from your PEUGEOT dealer or qualified
workshop).
Use of non-recommended oil may invalidate
your warranty in the event of engine failure.
Topping up the engine oil level
For the location of the engine oil filler cap, please
refer to the corresponding engine compartment
illustration.
Never remove the oil filler cap with the
engine running. Risk of burns and
splashes inside the engine compartment.
► Add oil in small quantities, avoiding any spills
on engine components (risk of fire).
► Wait a few minutes before checking the level
again using the dipstick.
► Top up the level if necessary.
► After checking the level, carefully screw the
oil filler cap back on and replace the dipstick in
its tube.
Brake fluid
�� ������ ��
The level of this fluid should be close to
the "MAX" mark. If not, check the brake
pad wear.
12. Fuel filter*
The Diesel fuel system operates under
very high pressure.
All work on this circuit must be carried out
only by a PEUGEOT dealer or a qualified
workshop.
Checking levels
Check all of the following levels regularly in
accordance with the manufacturer's service
schedule. Top them up if required, unless
otherwise indicated.
If a level drops significantly, have the
corresponding system checked by a PEUGEOT
dealer or a qualified workshop.
The fluids must comply with the manufacturer's requirements and with
the vehicle's engine.
Take care when working under the bonnet, as certain areas of the engine
may be extremely hot (risk of burns) and the
cooling fan could start at any time (even with
the ignition off).
Used products
Avoid prolonged contact of used oil or fluids with the skin.
Most of these fluids are harmful to health and
very corrosive.
Do not discard used oil or fluids into
sewers or onto the ground.
Empty used oil into the containers reserved
for this purpose at a PEUGEOT dealer or a
qualified workshop.
Engine oil
The level is checked, with the engine having been switched off for at least 30
minutes and on level ground, using the dipstick.
It is normal to top up the oil level between two
services (or oil changes). It is recommended
that you check the level, and top up if necessary,
every 3,000 miles (5,000 km).
In order to maintain the reliability of the
engine and emissions control system,
never use additives in the engine oil.
Checking using the dipstick
For the location of the dipstick, please refer
to the illustration of the corresponding engine
compartment.
►
Grasp the dipstick by its coloured grip and
pull it out completely
.
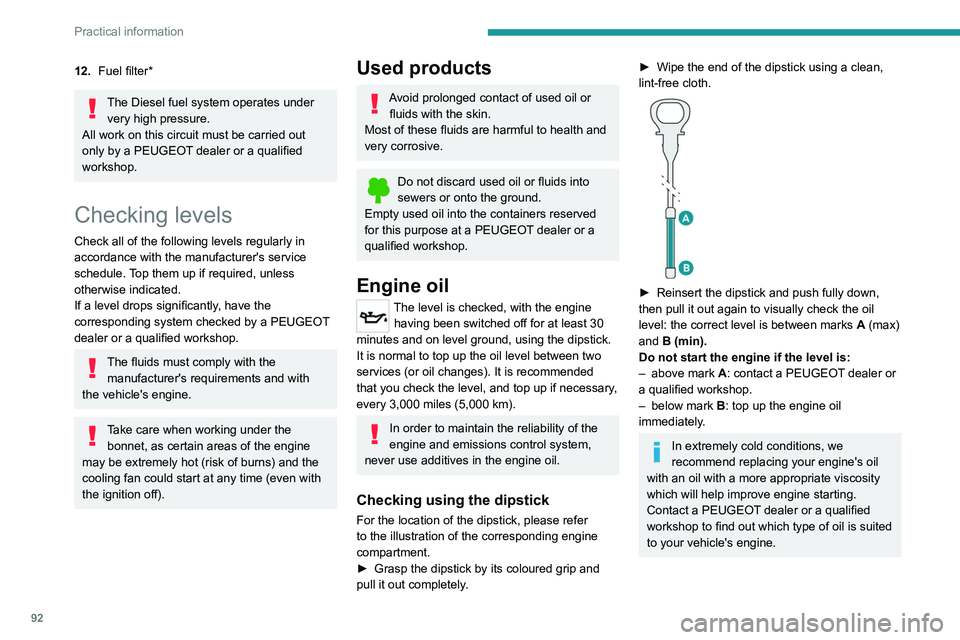
► Wipe the end of the dipstick using a clean,
lint-free cloth.
► Reinsert the dipstick and push fully down,
then pull it out again to visually check the oil
level: the correct level is between marks A
(max)
and B (min).
Do not start the engine if the level is:
–
above mark
A: contact a PEUGEOT dealer or
a qualified workshop.
–
below mark B
: top up the engine oil
immediately.
In extremely cold conditions, we
recommend replacing your engine's oil
with an oil with a more appropriate viscosity
which will help improve engine starting.
Contact a PEUGEOT dealer or a qualified
workshop to find out which type of oil is suited
to your vehicle's engine.