2021 PEUGEOT EXPERT night screen
[x] Cancel search: night screenPage 26 of 324
24
Instruments
► Press this button for more than 2 seconds.
Definitions
Range
(miles or km)Distance that can still be travelled with the
fuel remaining in the tank (based on the
average fuel consumption over the last few miles
(kilometres) travelled).
This value may vary following a change in driving
style or terrain, leading to a significant change in
current fuel consumption.
When the range falls below 19 miles (30 km),
dashes are displayed.
After filling with at least 5 litres of fuel, the range
is recalculated and is displayed if it exceeds 62
miles (100 km).
If dashes instead of figures continue to be
displayed while driving, contact a PEUGEOT
dealer or a qualified workshop.
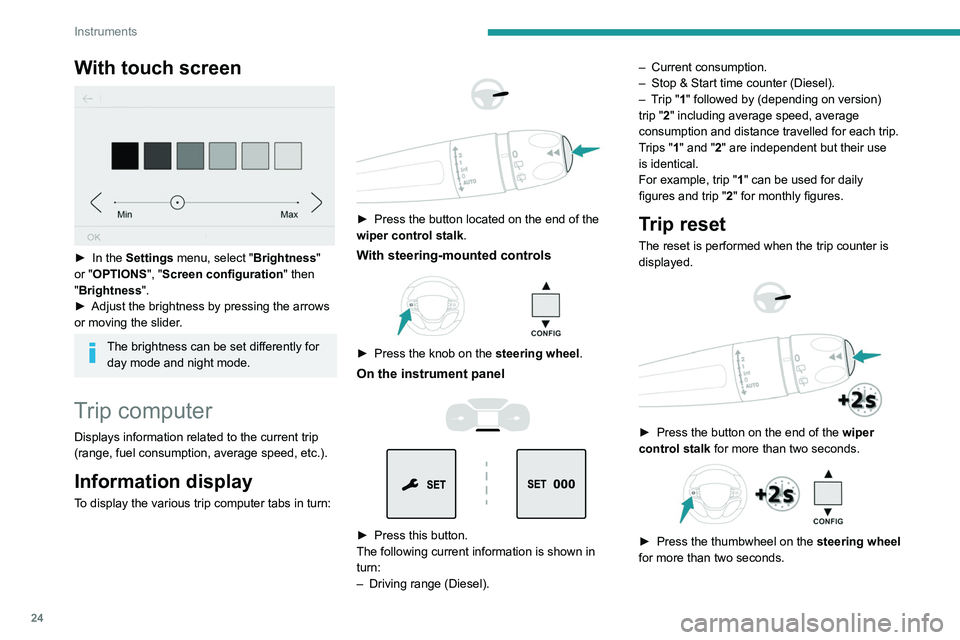
With touch screen
► In the Settings menu, select "Brightness"
or "OPTIONS ", "Screen configuration " then
"Brightness".
►
Adjust the brightness by pressing the arrows
or moving the slider
.
The brightness can be set differently for day mode and night mode.
Trip computer
Displays information related to the current trip
(range, fuel consumption, average speed, etc.).
Information display
To display the various trip computer tabs in turn:
► Press the button located on the end of the
wiper control stalk .
With steering-mounted controls
► Press the knob on the steering wheel.
On the instrument panel
► Press this button.
The following current information is shown in
turn:
–
Driving range (Diesel). –
Current consumption.
–
Stop & Start time counter (Diesel).
–
T
rip "1" followed by (depending on version)
trip "2" including average speed, average
consumption and distance travelled for each trip.
Trips "1" and "2" are independent but their use
is identical.
For example, trip "1" can be used for daily
figures and trip " 2" for monthly figures.
Trip reset
The reset is performed when the trip counter is
displayed.
► Press the button on the end of the wiper
control stalk for more than two seconds.
► Press the thumbwheel on the steering wheel
for more than two seconds.
Page 56 of 324

54
Ease of use and comfort
Refitting the flap
► Tilt the flap, with the yellow hinges pointing
downwards.
► Insert the hinges into their housing then press
down fully (to avoid vibrations).
► With one hand lift the flap to close it, then
with the other hand turn the control at the top of
the flap to secure it.
Removable flap (type 2)
► To open or close the flap, slide it to the left
or right.
Heated mirrors
► Press this button.
For more information on Rear screen
demisting/defrosting , refer to the
corresponding section.
Rear view mirror
Equipped with an anti-dazzle system, which
darkens the mirror glass and reduces the
nuisance to the driver caused by the sun,
headlamps of other vehicles, etc.
Day/night position
► Pull the lever to change to the anti-dazzle
"night” position.
► Push the lever to change to the normal "day"
position.
Moduwork
The cushion of the bench seat's outer seat can
be folded up against the backrest to create a
loading area inside the cab.
A removable flap on the partition can be
removed to allow long objects to be loaded.
Once the removable flap has been
removed, you can load long objects
under the outer seat.
Removable flap (type 1)
Removing the flap
► While holding the flap with one hand, turn the
control at the top of the flap with the other hand
to release it.
►
Lower the flap to remove it from its housing.
►
Stow
it behind the driver’s seat, clipping it into
the attachment lugs.
►
T
urn the control at the top of the flap to
secure it.
Page 95 of 324
93
Lighting and visibility
4► A "headlamp flash" pauses the
function and the lighting system switches
to "automatic illumination of lamps" mode:
–
If the "AUT
O" and "Dipped beam" indicator
lamps were on, the system changes to main
beam.
–
If the "AUT
O" and "Main beam"
indicator
lamps were on, the system changes to
dipped beam.
►
T
o reactivate the function, once again switch
the headlamps manually between dipped and
main beam.
Flashing the headlamps does not
deactivate the system.
The state of the system is stored when the
ignition is switched off.
The system may be disrupted or not work correctly:
–
When visibility conditions are poor
(snowfall, heavy rain, etc.).
–
If the windscreen in front of the camera is
dirty
, misted or obscured (for example, by a
sticker).
–
If the vehicle is facing highly reflective
signs.
When the system detects thick fog, it
temporarily deactivates the function.
The system is not able to detect:
–
Road users that do not have their own
lighting, such as pedestrians.
– Vehicles whose lighting is obscured (for
example, vehicles driving behind a safety
barrier on a motorway).
–
V
ehicles at the top or bottom of a steep
slope, on winding roads, on crossroads.
Clean the windscreen regularly,
particularly the area in front of the
camera.
The internal surface of the windscreen can
also become misted around the camera.
In humid and cold weather, demist the
windscreen regularly.
Do not allow snow to accumulate on the
bonnet or roof of the vehicle as this could
obstruct the detection camera.
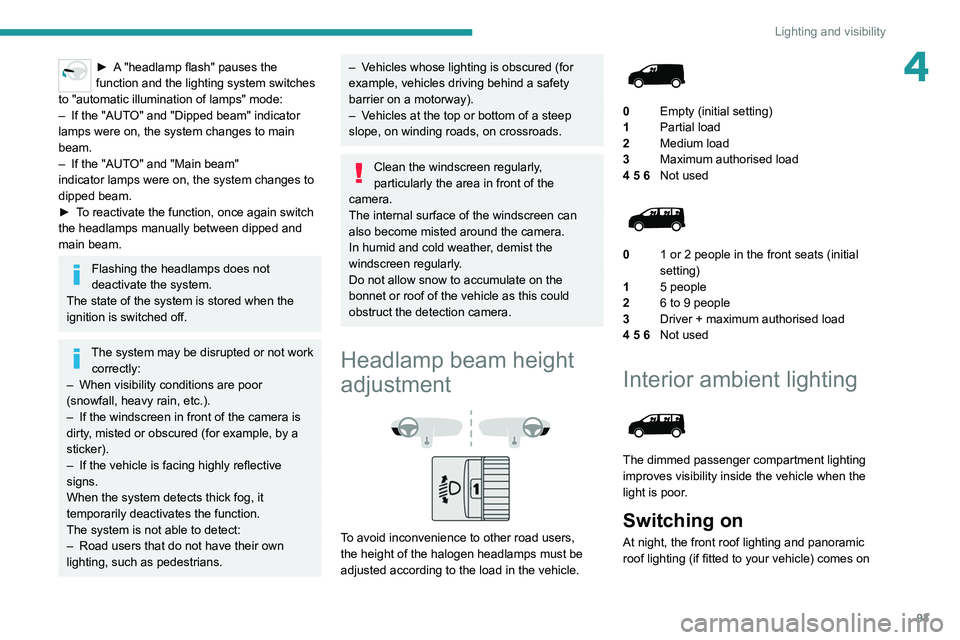
Headlamp beam height
adjustment
To avoid inconvenience to other road users,
the height of the halogen headlamps must be
adjusted according to the load in the vehicle.
0 Empty (initial setting)
1 Partial load
2 Medium load
3 Maximum
authorised load
4 5 6 Not used
01 or 2 people in the front seats (initial
setting)
1 5 people
2 6 to 9 people
3 Driver + maximum authorised load
4 5 6 Not used
Interior ambient lighting
The dimmed passenger compartment lighting
improves visibility inside the vehicle when the
light is poor.
Switching on
At night, the front roof lighting and panoramic
roof lighting (if fitted to your vehicle) comes on
Page 168 of 324
166
Driving
Operating limits
The regulation range is limited to a maximum
difference of 19 mph (30 km/h) between the
cruise speed setting and the speed of the
vehicle in front.
Above this, the system pauses itself if the safety
distance becomes too short.
The adaptive cruise control uses only engine
braking to slow the vehicle. Consequently the
vehicle loses speed slowly, as when releasing
the accelerator pedal.
The system is paused automatically:
–
if the vehicle in front slows down too much or
too suddenly
, and the driver does not brake,
–
if a vehicle comes between your vehicle and
the vehicle in front,
–
if the system does not slow the vehicle enough
to continue to maintain a safe distance, for
example when descending a steep hill.
Cases of non-detection by the radar:
–
Stationary vehicles (traffic jam, breakdown,
etc.).
–
V
ehicles driving in the opposite direction.
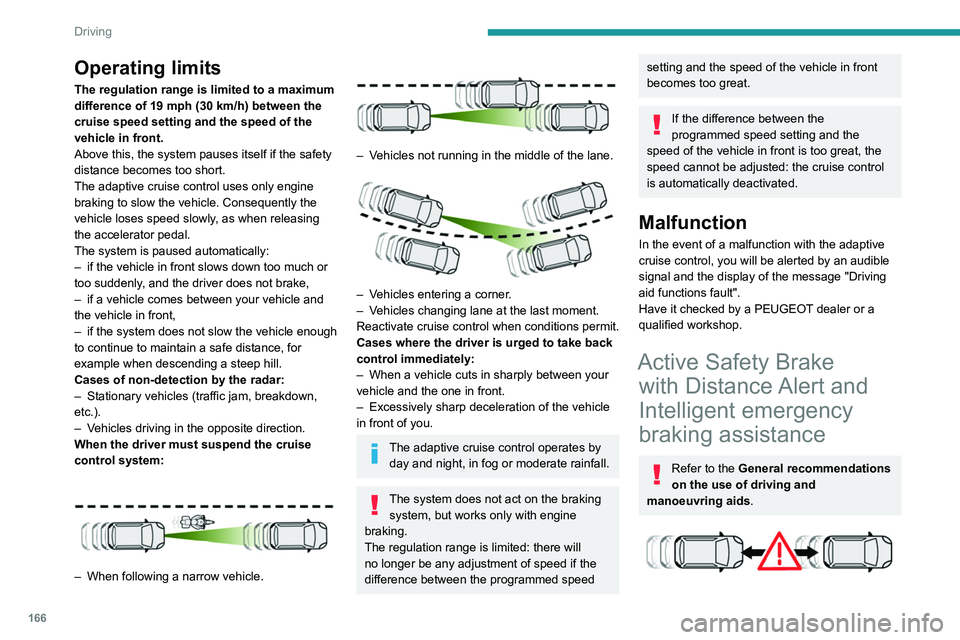
When the driver must suspend the cruise
control system:
– When following a narrow vehicle.
– Vehicles not running in the middle of the lane.
– Vehicles entering a corner.
– V ehicles changing lane at the last moment.
Reactivate cruise control when conditions permit.
Cases where the driver is urged to take back
control immediately:
–
When a vehicle cuts in sharply between your
vehicle and the one in front.
–
Excessively sharp deceleration of the vehicle
in front of you.
The adaptive cruise control operates by day and night, in fog or moderate rainfall.
The system does not act on the braking system, but works only with engine
braking.
The regulation range is limited: there will
no longer be any adjustment of speed if the
difference between the programmed speed
setting and the speed of the vehicle in front
becomes too great.
If the difference between the
programmed speed setting and the
speed of the vehicle in front is too great, the
speed cannot be adjusted: the cruise control
is automatically deactivated.
Malfunction
In the event of a malfunction with the adaptive
cruise control, you will be alerted by an audible
signal and the display of the message "Driving
aid functions fault".
Have it checked by a PEUGEOT dealer or a
qualified workshop.
Active Safety Brake with Distance Alert and
Intelligent emergency
braking assistance
Refer to the General recommendations
on the use of driving and
manoeuvring aids.
This system:
– warns the driver that their vehicle is at risk of
collision with the vehicle in front.
– reduces the vehicle's speed to avoid a
collision or limit its severity.
This system is comprised of three functions:
– Distance Alert.
– Intelligent emergency braking assistance
(iEBA).
– Active Safety Brake (automatic emergency
braking).
The vehicle has a camera located at the top of
the windscreen and, depending on version, a
radar located in the front bumper.
This system does not replace the need for vigilance on the part of the driver.
This system is designed to assist the driver
and improve road safety.
It is the driver's responsibility to continuously
monitor traffic conditions in accordance with
applicable driving regulations.
Page 190 of 324
188
Practical information
the driver's door will display the charge level
on the instrument panel for about 20 seconds.
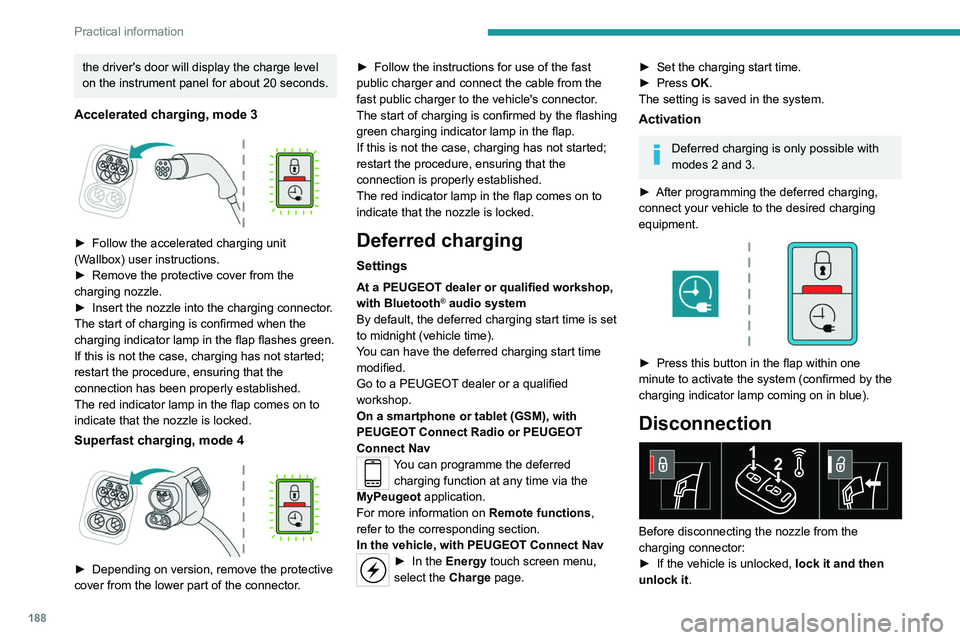
Accelerated charging, mode 3
► Follow the accelerated charging unit
(W allbox) user instructions.
►
Remove the protective cover from the
charging nozzle.
►
Insert the nozzle into the charging connector
.
The start of charging is confirmed when the
charging indicator lamp in the flap flashes green.
If this is not the case, charging has not started;
restart the procedure, ensuring that the
connection has been properly established.
The red indicator lamp in the flap comes on to
indicate that the nozzle is locked.
Superfast charging, mode 4
► Depending on version, remove the protective
cover from the lower part of the connector .►
Follow the instructions for use of the fast
public charger and connect the cable from the
fast public charger
to the vehicle's connector.
The start of charging is confirmed by the flashing
green charging indicator lamp in the flap.
If this is not the case, charging has not started;
restart the procedure, ensuring that the
connection is properly established.
The red indicator lamp in the flap comes on to
indicate that the nozzle is locked.
Deferred charging
Settings
At a PEUGEOT dealer or qualified workshop,
with Bluetooth® audio system
By default, the deferred charging start time is set
to midnight (vehicle time).
You can have the deferred charging start time
modified.
Go to a PEUGEOT dealer or a qualified
workshop.
On a smartphone or tablet (GSM), with
PEUGEOT Connect Radio or PEUGEOT
Connect Nav
You can programme the deferred charging function at any time via the
MyPeugeot application.
For more information on Remote functions,
refer to the corresponding section.
In the vehicle, with PEUGEOT Connect Nav
► In the Energy touch screen menu,
select the Charge page.
► Set the charging start time.
► Press OK.
The setting is saved in the system.
Activation
Deferred charging is only possible with
modes 2 and 3.
►
After programming the deferred charging,
connect your vehicle to the desired charging
equipment.
► Press this button in the flap within one
minute to activate the system (confirmed by the
charging indicator lamp coming on in blue).
Disconnection
Before disconnecting the nozzle from the
charging connector:
►
If the vehicle is unlocked, lock it and then
unlock it .
Page 275 of 324
273
PEUGEOT Connect Nav
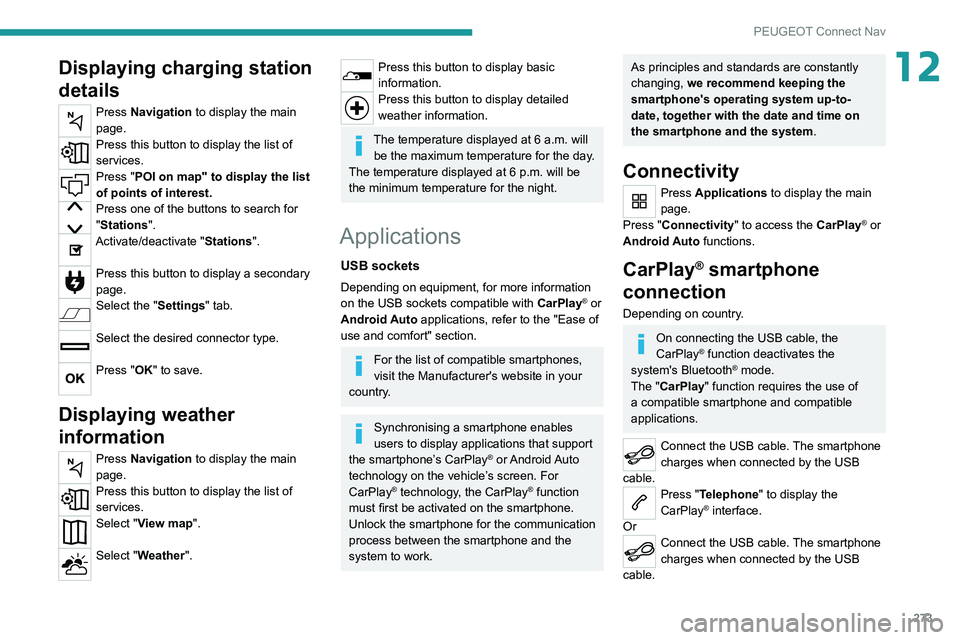
12Displaying charging station
details
Press Navigation to display the main
page.
Press this button to display the list of
services.
Press "POI on map" to display the list
of points of interest.
Press one of the buttons to search for
"Stations".
Activate/deactivate "Stations".
Press this button to display a secondary
page.
Select the "Settings" tab.
Select the desired connector type.
Press "OK" to save.
Displaying weather
information
Press Navigation to display the main
page.
Press this button to display the list of
services.
Select "View map".
Select "Weather".
Press this button to display basic
information.
Press this button to display detailed
weather information.
The temperature displayed at 6 a.m. will be the maximum temperature for the day.
The temperature displayed at 6 p.m. will be
the minimum temperature for the night.
Applications
USB sockets
Depending on equipment, for more information
on the USB sockets compatible with CarPlay® or
Android Auto applications, refer to the "Ease of
use and comfort" section.
For the list of compatible smartphones,
visit the Manufacturer's website in your
country.
Synchronising a smartphone enables
users to display applications that support
the smartphone’s CarPlay
® or Android Auto
technology on the vehicle’s screen. For
CarPlay
® technology, the CarPlay® function
must first be activated on the smartphone.
Unlock the smartphone for the communication
process between the smartphone and the
system to work.
As principles and standards are constantly
changing, we recommend keeping the
smartphone's operating system up-to-
date, together with the date and time on
the smartphone and the system.
Connectivity
Press Applications to display the main
page.
Press "Connectivity" to access the CarPlay
® or
Android Auto functions.
CarPlay® smartphone
connection
Depending on country.
On connecting the USB cable, the
CarPlay® function deactivates the
system's Bluetooth® mode.
The "CarPlay " function requires the use of
a compatible smartphone and compatible
applications.
Connect the USB cable. The smartphone
charges when connected by the USB
cable.
Press "Telephone" to display the
CarPlay® interface.
Or
Connect the USB cable. The smartphone
charges when connected by the USB
cable.