2021 PEUGEOT EXPERT driver seat adjustment
[x] Cancel search: driver seat adjustmentPage 51 of 324
49
Ease of use and comfort
3Correct driving position
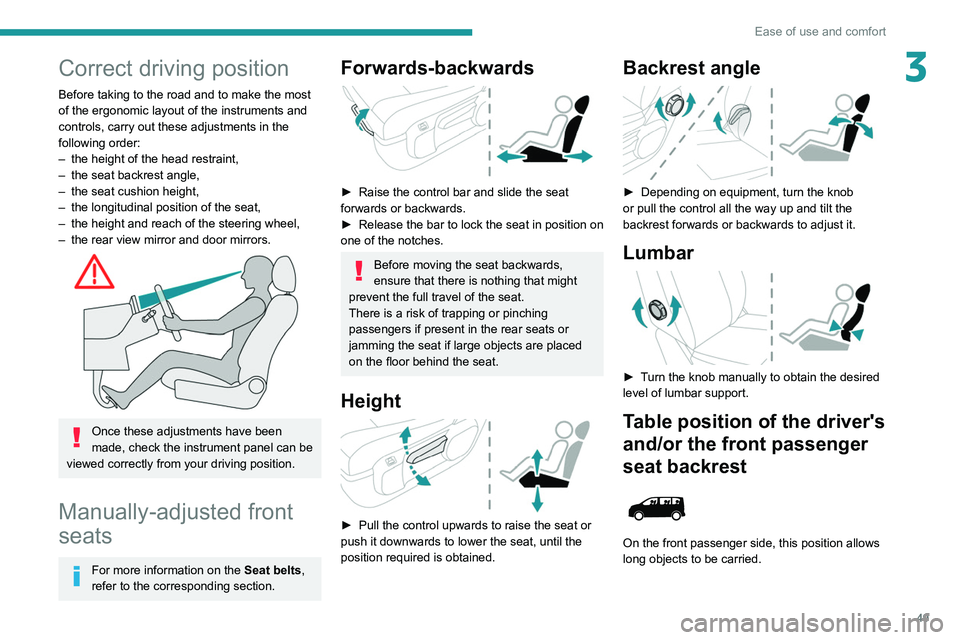
Before taking to the road and to make the most
of the ergonomic layout of the instruments and
controls, carry out these adjustments in the
following order:
–
the height of the head restraint,
–
the seat backrest angle,
–
the seat cushion height,
–
the longitudinal position of the seat,
–
the height and reach of the steering wheel,
–
the rear view mirror and door mirrors.
Once these adjustments have been
made, check the instrument panel can be
viewed correctly from your driving position.
Manually-adjusted front
seats
For more information on the Seat belts,
refer to the corresponding section.
Forwards-backwards
► Raise the control bar and slide the seat
forwards or backwards.
►
Release the bar to lock the seat in position on
one of the notches.
Before moving the seat backwards,
ensure that there is nothing that might
prevent the full travel of the seat.
There is a risk of trapping or pinching
passengers if present in the rear seats or
jamming the seat if large objects are placed
on the floor behind the seat.
Height
► Pull the control upwards to raise the seat or
push it downwards to lower the seat, until the
position required is obtained.
Backrest angle
► Depending on equipment, turn the knob
or pull the control all the way up and tilt the
backrest forwards or backwards to adjust it.
Lumbar
► Turn the knob manually to obtain the desired
level of lumbar support.
Table position of the driver's
and/or the front passenger
seat backrest
On the front passenger side, this position allows
long objects to be carried.
Page 52 of 324
50
Ease of use and comfort
Head restraint height
adjustment
If fitted to your vehicle.
► To raise it, pull it upwards as far as possible
(notch).
► To remove it, press the lug A and pull it
upwards.
► To put it back in place, engage the head
restraint rods in the openings keeping them in
line with the seat backrest.
► To lower it, press the lug A and push down on
the head restraint at the same time.
The head restraint has a frame with notches which prevents it from lowering;
this is a safety device in case of impact.
The adjustment is correct when the upper
edge of the head restraint is level with the
top of the head.
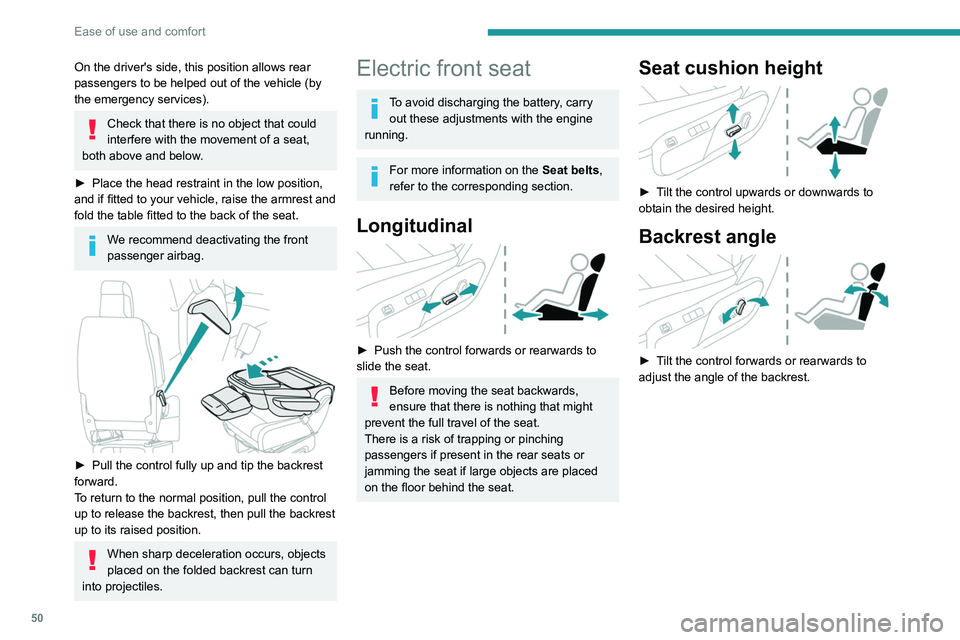
On the driver's side, this position allows rear
passengers to be helped out of the vehicle (by
the emergency services).
Check that there is no object that could
interfere with the movement of a seat,
both above and below.
►
Place the head restraint in the low position,
and if fitted to your vehicle, raise the armrest and
fold the table fitted to the back of the seat.
We recommend deactivating the front
passenger airbag.
► Pull the control fully up and tip the backrest
forward.
T
o return to the normal position, pull the control
up to release the backrest, then pull the backrest
up to its raised position.
When sharp deceleration occurs, objects
placed on the folded backrest can turn
into projectiles.
Electric front seat
To avoid discharging the battery, carry out these adjustments with the engine
running.
For more information on the Seat belts,
refer to the corresponding section.
Longitudinal
► Push the control forwards or rearwards to
slide the seat.
Before moving the seat backwards,
ensure that there is nothing that might
prevent the full travel of the seat.
There is a risk of trapping or pinching
passengers if present in the rear seats or
jamming the seat if large objects are placed
on the floor behind the seat.
Seat cushion height
► Tilt the control upwards or downwards to
obtain the desired height.
Backrest angle
► Tilt the control forwards or rearwards to
adjust the angle of the backrest.
Page 53 of 324
51
Ease of use and comfort
3Head restraint height
adjustment
If fitted to your vehicle.
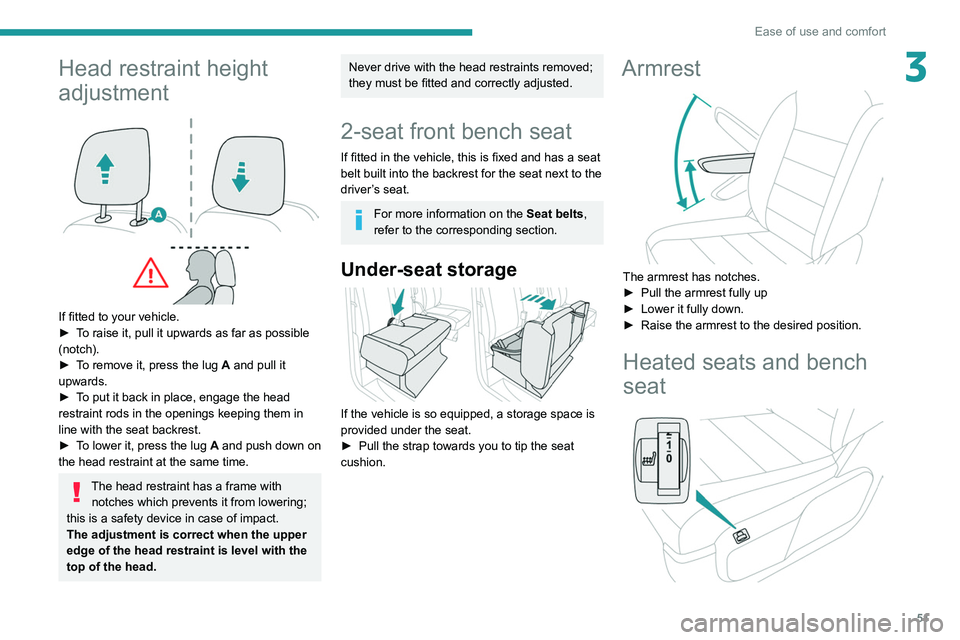
► T o raise it, pull it upwards as far as possible
(notch).
►
T
o remove it, press the lug A and pull it
upwards.
►
T
o put it back in place, engage the head
restraint rods in the openings keeping them in
line with the seat backrest.
►
T
o lower it, press the lug A and push down on
the head restraint at the same time.
The head restraint has a frame with notches which prevents it from lowering;
this is a safety device in case of impact.
The adjustment is correct when the upper
edge of the head restraint is level with the
top of the head.
Never drive with the head restraints removed;
they must be fitted and correctly adjusted.
2-seat front bench seat
If fitted in the vehicle, this is fixed and has a seat
belt built into the backrest for the seat next to the
driver’s seat.
For more information on the Seat belts,
refer to the corresponding section.
Under-seat storage
If the vehicle is so equipped, a storage space is
provided under the seat.
►
Pull the strap towards you to tip the seat
cushion.
Armrest
The armrest has notches.
► Pull the armrest fully up
►
Lower it fully down.
►
Raise the armrest to the desired position.
Heated seats and bench
seat
Page 95 of 324
93
Lighting and visibility
4► A "headlamp flash" pauses the
function and the lighting system switches
to "automatic illumination of lamps" mode:
–
If the "AUT
O" and "Dipped beam" indicator
lamps were on, the system changes to main
beam.
–
If the "AUT
O" and "Main beam"
indicator
lamps were on, the system changes to
dipped beam.
►
T
o reactivate the function, once again switch
the headlamps manually between dipped and
main beam.
Flashing the headlamps does not
deactivate the system.
The state of the system is stored when the
ignition is switched off.
The system may be disrupted or not work correctly:
–
When visibility conditions are poor
(snowfall, heavy rain, etc.).
–
If the windscreen in front of the camera is
dirty
, misted or obscured (for example, by a
sticker).
–
If the vehicle is facing highly reflective
signs.
When the system detects thick fog, it
temporarily deactivates the function.
The system is not able to detect:
–
Road users that do not have their own
lighting, such as pedestrians.
– Vehicles whose lighting is obscured (for
example, vehicles driving behind a safety
barrier on a motorway).
–
V
ehicles at the top or bottom of a steep
slope, on winding roads, on crossroads.
Clean the windscreen regularly,
particularly the area in front of the
camera.
The internal surface of the windscreen can
also become misted around the camera.
In humid and cold weather, demist the
windscreen regularly.
Do not allow snow to accumulate on the
bonnet or roof of the vehicle as this could
obstruct the detection camera.
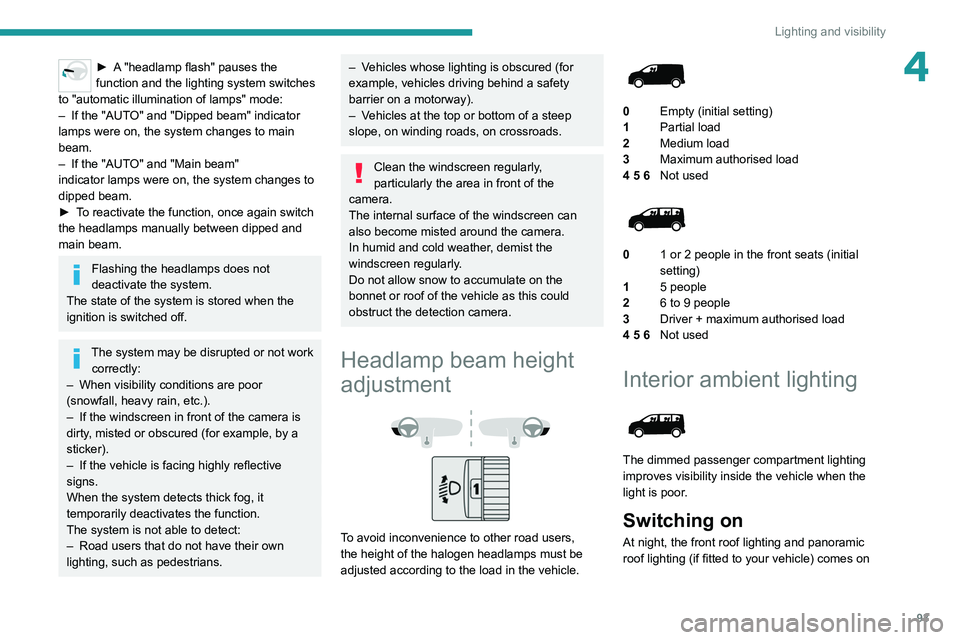
Headlamp beam height
adjustment
To avoid inconvenience to other road users,
the height of the halogen headlamps must be
adjusted according to the load in the vehicle.
0 Empty (initial setting)
1 Partial load
2 Medium load
3 Maximum
authorised load
4 5 6 Not used
01 or 2 people in the front seats (initial
setting)
1 5 people
2 6 to 9 people
3 Driver + maximum authorised load
4 5 6 Not used
Interior ambient lighting
The dimmed passenger compartment lighting
improves visibility inside the vehicle when the
light is poor.
Switching on
At night, the front roof lighting and panoramic
roof lighting (if fitted to your vehicle) comes on