2021 PEUGEOT BOXER window
[x] Cancel search: windowPage 65 of 212
63
Safety
5Lateral airbags and curtain
airbags
If fitted to your vehicle, the lateral airbags are
built into the backrests of the front seats, on the
side by the door.
The curtain airbags are built into the pillars and
the upper passenger compartment area, in the
roof above the front seats.
They inflate between the occupant and the
window.
They deploy on one side only (the side where
the collision occurs).
Malfunction
If this warning lamp comes on, contact a
PEUGEOT dealer to have the system
checked.
Advice
For the airbags to be fully effective,
observe the safety recommendations
below.
Adopt a normal upright sitting position.
Fasten the seat belt ensuring it is correctly
positioned and adjusted.
Do not leave anything between the occupants
and the airbags (a child, pet, object, etc.), nor
fix or attach anything close to or in the way of
the airbag release trajectory; this could cause
injuries during their deployment.
Never modify the original definition of your
vehicle, particularly in the area directly around
the airbags.
After an accident or if the vehicle has been
stolen, have the airbag systems checked.
All work on the airbag systems must only
be performed by a PEUGEOT dealer or a
qualified workshop.
Even if all of the precautions mentioned
are observed, a risk of injury or of minor
burns to the head, chest or arms cannot be
ruled out when an airbag is deployed. The
airbag inflates almost instantly (within a few
milliseconds) then deflates within the same
time discharging the hot gas via openings
provided for this purpose.
Front airbags
Do not drive holding the steering wheel
by its spokes or resting your hands on the
centre part of the wheel.
Passengers must not place their feet on the
dashboard.
Do not smoke as deployment of the airbags
can cause burns or the risk of injury from a
cigarette or pipe.
Never remove or pierce the steering wheel or
hit it violently.
Do not fix or attach anything to the steering
wheel or dashboard, as this could cause
injuries when the airbags are deployed.
Lateral airbags
Use only approved covers on the seats,
compatible with the deployment of the lateral
airbags. For information on the range of seat
covers suitable for your vehicle, contact a
PEUGEOT dealer.
Do not fix or attach anything to the seat
backrests (clothes, etc.), as this could cause
injuries to the thorax or arm when the lateral
airbag is deployed.
Do not sit with the upper part of the body any
nearer to the door than necessary.
Curtain airbags
Do not fix or attach anything to the roof,
as this could cause head injuries when the
curtain airbag is deployed.
Do not remove the grab handles installed on
the roof, as they play a part in securing the
curtain airbags.
Child seats
The regulations on carrying children are specific to each country. Refer to the
legislation in force in your country.
For maximum safety, please observe the
following recommendations:
–
In accordance with European regulations,
all children under the age of 12 or less than
1.5 metres tall must travel in approved child
Page 66 of 212
64
Safety
seats suited to their weight, on seats fitted with
a seat belt or ISOFIX mountings.
–
Statistically
, the safest seats in your
vehicle for carrying children are the rear
seats.
–
Children weighing less than 9 kg must
travel in the "rearward facing" position,
whether in the front or rear of the vehicle.
It is recommended that children travel
on the rear seats of the vehicle:
–
"rearward facing" up to the age of 3,
–
"forward facing" over the age of 3.
Make sure that the seat belt is correctly
positioned and tightened.
For child seats with a support leg, ensure that
the support leg is in firm and steady contact
with the floor.
An incorrectly installed child seat in a vehicle compromises the child's safety in
the event of an accident.
Ensure that there is no seat belt or seat belt
buckle under the child seat, as this could
destabilise it.
Remember to fasten the seat belts or the
child seat harness keeping the slack relative
to the child's body to a minimum, even for
short journeys.
When installing a child seat using the seat
belt, ensure that the seat belt is tightened
correctly on the child seat and that it secures
the child seat firmly on the vehicle seat. If
the passenger seat is adjustable, move it
forwards if necessary.
Remove the head restraint before
installing a child seat with a backrest on a
passenger seat.
Ensure that the head restraint is stored or
attached securely to prevent it from being
thrown around the vehicle in the event of
sharp braking. Refit the head restraint once
the child seat has been removed.
Installing a booster seat
The chest part of the seat belt must be
positioned on the child's shoulder without
touching the neck.
Ensure that the lap part of the seat belt
passes correctly over the child's thighs.
Use a booster seat with a backrest, equipped
with a belt guide at shoulder level.
Additional protections
To prevent accidental opening of the
doors and rear windows, use the "Child lock".
Take care not to open the rear windows by
more than one third.
To protect young children from the sun's rays,
fit side blinds on the rear windows.
As a safety measure, do not leave:
–
A
child alone and unsupervised inside a
vehicle.
– A child or an animal in a vehicle which is
exposed to the sun, with the windows closed.
–
The keys within reach of children inside the
vehicle.
Child seat at the rear
Forward-facing or rearward-facing
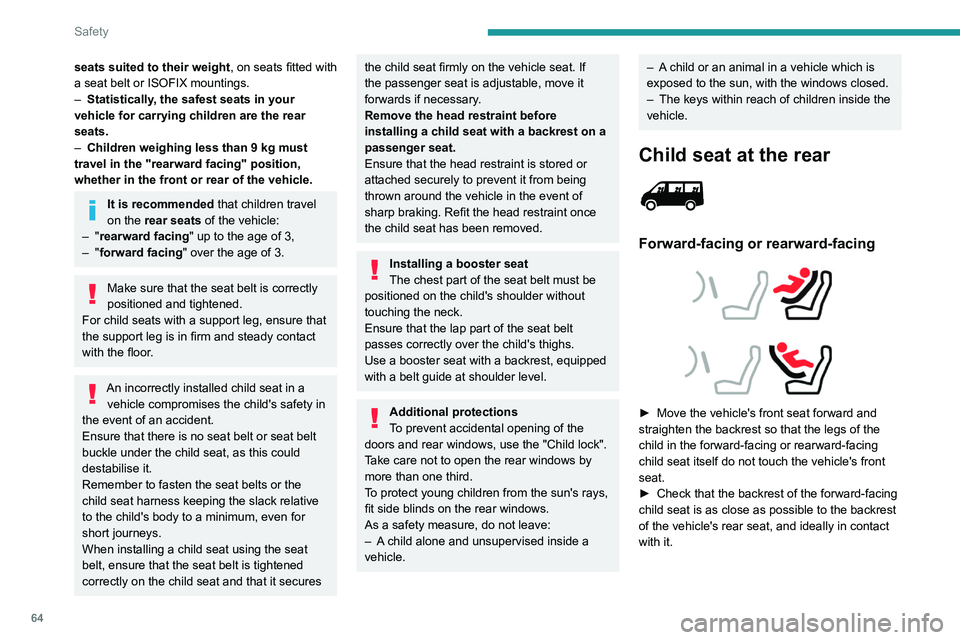
► Move the vehicle's front seat forward and
straighten the backrest so that the legs of the
child in the forward-facing or rearward-facing
child seat itself do not touch the vehicle's front
seat.
►
Check that the backrest of the forward-facing
child seat is as close as possible to the backrest
of the vehicle's rear seat, and ideally in contact
with it.
Page 85 of 212
83
Driving
6– These traffic signs are then displayed in the
instrument panel.
The system can display two traffic signs (speed
limit and no overtaking/end of no overtaking)
in parallel in the two dedicated zones of the
instrument panel.
If an additional traffic sign is detected, such as
one for a reduced speed limit when the road is
wet, this is displayed in an empty window below
the corresponding sign.
Additional traffic signs are filtered as follows:
–
Signs related to snow or ice are displayed only
if the exterior temperature is below 3°C.
–
Signs related to snow
, rain or fog are
displayed only if the wipers are on and the
exterior temperature is below 3°C.
–
Signs related to heavy goods vehicles are only
displayed if they apply to vehicles weighing less
than 4 tonnes.
–
Signs related to farm vehicles are not
displayed.
Signs such as no overtaking are cleared from
the instrument panel after approximately 40
seconds.
Activation/Deactivation
This function can be set using the MODE button: in the “Traffic Sign” menu, select
“ON” or “OFF”.
For more information on Vehicle
configuration (MODE) , refer to the
corresponding section.
Operating limits
The system does not take account of reduced
speed limits, especially those imposed in the
following cases:
–
Poor weather (rain, snow).
–
Atmospheric pollution.
–
T
owing.
–
Driving with a space-saver type spare wheel
or snow chains fitted.
–
Driving with a non-standard suspension kit.
–
T
yre repaired using the temporary puncture
repair kit.
–
Y
oung drivers.
The system may not display the speed limit if it
does not detect a speed limit sign within a preset
period and in the following situations:
–
Road signs that are obstructed, non-standard,
damaged or bent.
–
Obsolete or incorrect maps.
–
Road incline causing the sign to be out of the
camera field of vision (on a slope, for example).
–
Change in the vehicle load that causes the
camera to tilt significantly (system operation may
temporarily be suspended to enable camera
self-calibration).
Speed limiter
For more information, refer to the
General recommendations on the use
of driving and manoeuvring aids .
System which prevents the vehicle
from exceeding the speed
programmed by the driver.
The speed is selected when the vehicle is
stationary with the engine running or while
driving with at least 2
nd gear engaged.
The minimum speed to be programmed is 19
mph (30 km/h).
Fully depressing the accelerator pedal allows
you to exceed the programmed speed. To
resume use of the speed limiter, gradually
release the pressure on the accelerator pedal
and return below the programmed speed.
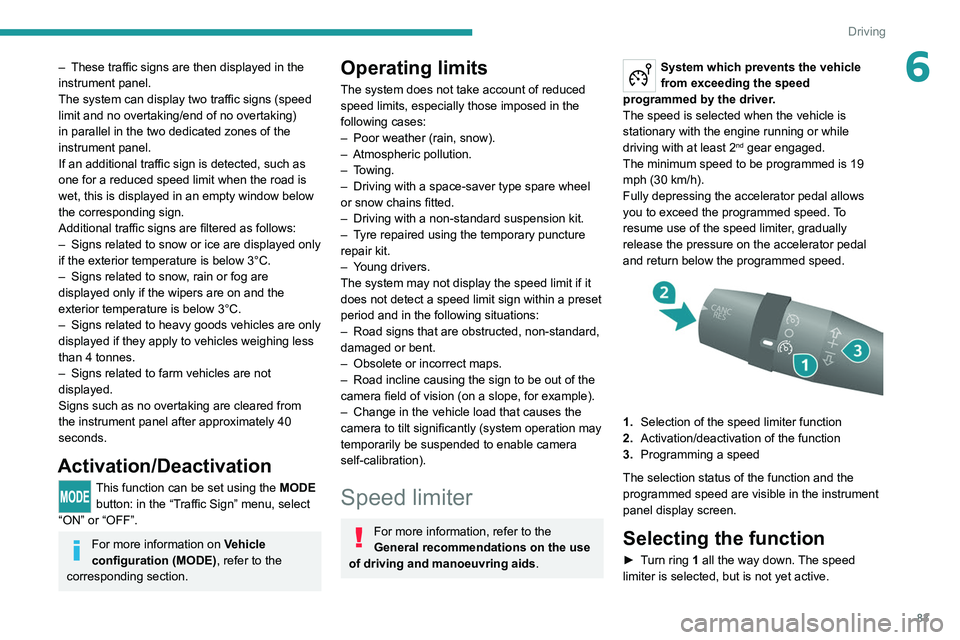
1. Selection of the speed limiter function
2. Activation/deactivation of the function
3. Programming a speed
The selection status of the function and the
programmed speed are visible in the instrument
panel display screen.
Selecting the function
► Turn ring 1 all the way down. The speed
limiter is selected, but is not yet active.
Page 133 of 212

131
In the event of a breakdown
8Disconnecting the battery
► Tilt lever 1 downwards to release the
terminals.
►
Remove terminals
2
from the negative (-)
terminal.
Wait approximately 6 minutes after
switching off the ignition before
disconnecting the battery.
Do not disconnect the terminals while the
engine is running.
Do not charge a battery without disconnecting
the terminals first.
Close the windows and the doors before
disconnecting the battery.
After reconnecting the battery, turn on the
ignition and wait 1 minute before starting the
engine, to enable the electronic systems to
initialise. If minor problems nevertheless persist
following this operation, contact a PEUGEOT
dealer or a qualified workshop.
It is recommended to disconnect the (-)
terminal of the battery if the vehicle is to
be left unused for more than one month.
The description of the battery charging
procedure is only indicative.
After prolonged battery disconnection, it may be
necessary to reinitialise the following functions:
–
the display parameters (date, time, language,
distance and temperature units),
–
the stations of the audio system,
–
the central locking.
Some settings are cancelled and must be
entered once again; contact a PEUGEOT
dealer.
If the vehicle is equipped with a tachograph or
an alarm,
it is recommended that the (-) terminal
of the battery (located under the floor on the
left-hand side, in the cab) be disconnected if the
vehicle is not going to be used for more than 5
days.
Starting using another
battery
Never start the engine by connecting a
battery charger.
Never use a 24 V or higher battery booster.
Check beforehand that the backup battery
has a nominal voltage of 12 V and a capacity
at least equal to that of the discharged
battery.
The two vehicles must not be in contact with
each other.
Switch off all electricity-consuming equipment
on both vehicles (audio system, wipers,
lighting, etc.).
Make sure that the jump leads are well away
from the engine’s moving parts (fan, belt,
etc.).
Do not disconnect the (+) terminal while the
engine is running.
Starting the engine using another battery is to be
performed inside the engine compartment.
►
Open the bonnet.
A. Positive metallic terminal on the vehicle
B. Backup battery
C. Vehicle earth point
The positive metallic terminal A is accessible
through a flap located on the side of the fuse
box.
Page 150 of 212
148
Special features
Crew cab
The crew cab, available on van
versions, consists of a bench
seat, seat belts, a storage
compartment and side windows.
It is separated from the loading area by a high-
resistance partition providing comfort and safety.
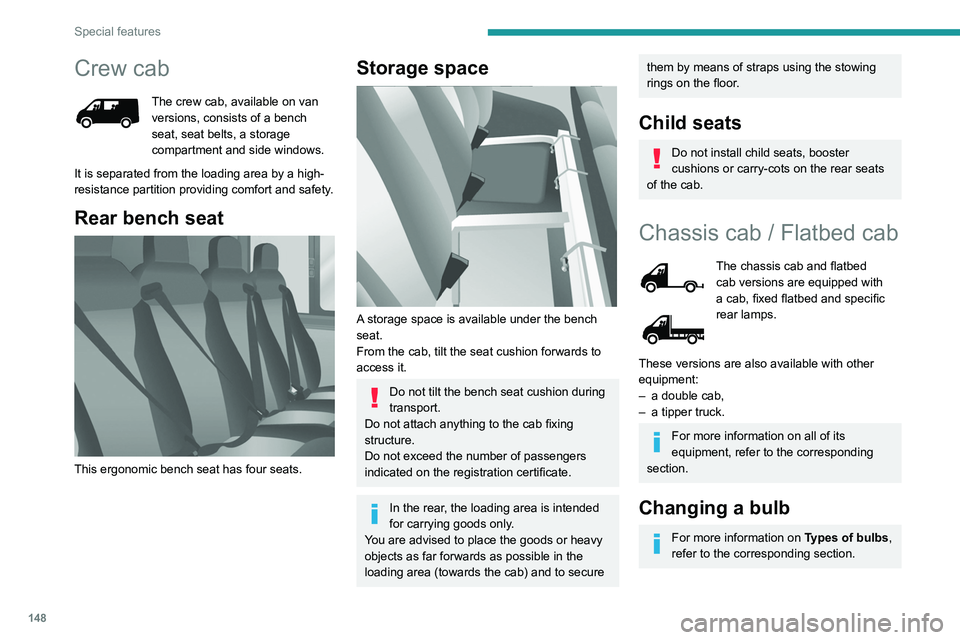
Rear bench seat
This ergonomic bench seat has four seats.
Storage space
A storage space is available under the bench
seat.
From the cab, tilt the seat cushion forwards to
access it.
Do not tilt the bench seat cushion during
transport.
Do not attach anything to the cab fixing
structure.
Do not exceed the number of passengers
indicated on the registration certificate.
In the rear, the loading area is intended
for carrying goods only.
You are advised to place the goods or heavy
objects as far forwards as possible in the
loading area (towards the cab) and to secure
them by means of straps using the stowing
rings on the floor.
Child seats
Do not install child seats, booster
cushions or carry-cots on the rear seats
of the cab.
Chassis cab / Flatbed cab
The chassis cab and flatbed
cab versions are equipped with
a cab, fixed flatbed and specific
rear lamps.
These versions are also available with other
equipment:
–
a double cab,
–
a tipper truck.
For more information on all of its
equipment, refer to the corresponding
section.
Changing a bulb
For more information on Types of bulbs,
refer to the corresponding section.
Page 156 of 212
154
Special features
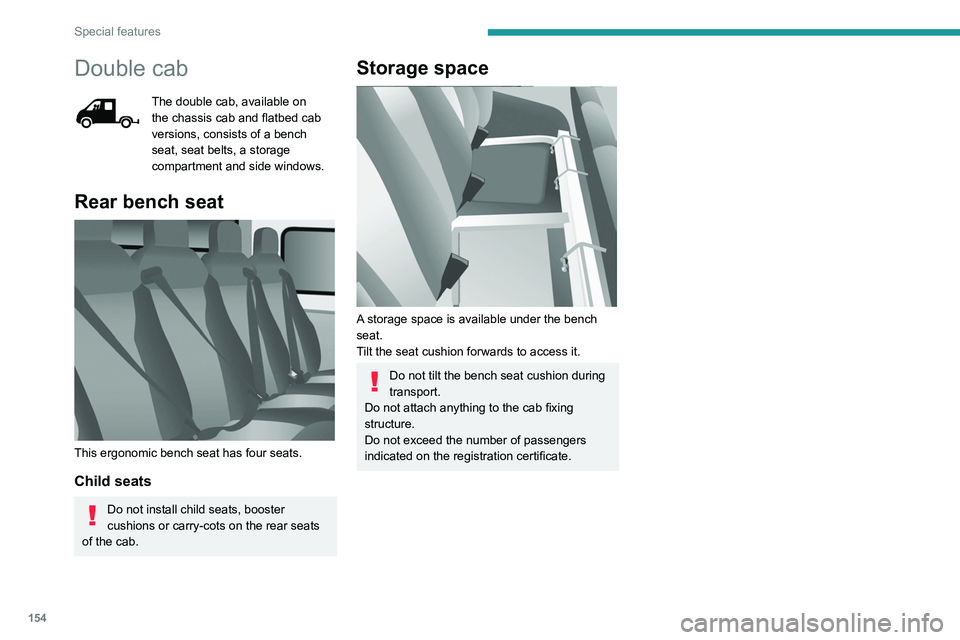
Double cab
The double cab, available on
the chassis cab and flatbed cab
versions, consists of a bench
seat, seat belts, a storage
compartment and side windows.
Rear bench seat
This ergonomic bench seat has four seats.
Child seats
Do not install child seats, booster
cushions or carry-cots on the rear seats
of the cab.
Storage space
A storage space is available under the bench
seat.
Tilt the seat cushion forwards to access it.
Do not tilt the bench seat cushion during
transport.
Do not attach anything to the cab fixing
structure.
Do not exceed the number of passengers
indicated on the registration certificate.
Page 168 of 212
166
Audio system
Voice commands
Information - Using the
system
Instead of touching the screen, you can
use your voice to control the system.
To ensure that voice commands are always recognised by the system, please
observe the following recommendations:
–
speak in a normal tone of voice,
–
before speaking, always wait for the "beep"
(acoustic signal),
–
the system is able to recognise the voice
commands provided, regardless of gender
,
tone and inflection of the voice of the speaker,
–
if possible, minimise the noise inside the
passenger compartment,
–
before issuing a voice command, ask any
other passengers to refrain from speaking.
Since the system recognises commands
regardless of who is speaking, when several
people are speaking simultaneously
, it
is possible for the system to recognise
commands that are different or additional to
what has been requested,
–
for optimal operation, you are advised to
close the windows and any sunroof present
(on versions/markets where fitted) to avoid
any external source of disturbance.
Steering-mounted controls
This button is used to activate the “Telephone” voice recognition mode that
allows you to make calls, view recent/received/
outgoing calls, display the directory, etc.
This button is used to activate the "Radio/ Media" voice recognition mode that allows
you to tune to a specific radio station or a
specific AM/FM radio frequency, play a track or
an album contained on a USB stick/iPod/MP3/
CD.
Quick voice interaction can be used if
these buttons are depressed during a
voice message from the system; it allows you
to directly say a voice command.
For example, if the system is in the middle
of saying a voice help message and if we
know the command to give the system, by
pressing these buttons, the voice message
is interrupted and it is possible to directly
say the desired voice command (so avoiding
having to listen to the complete voice help
message).
When the system is waiting for a voice
command from the user, pressing these
buttons closes the voice session.
Each time a button is pressed, a "beep"
(acoustic signal) is emitted and the
screen displays a screen page of suggestions
asking the user to say a command.
Global voice commands
These commands can be made from any screen page after
pressing the voice recognition or telephone
button located on the steering wheel, as long as
there is no telephone call in progress.
Help
Provide generic help to the user by offering
some available commands.
Cancel
Close the current voice sequence.
Repeat
Repeat the last spoken voice message to the
user.
Voice tutorial
Provide a detailed description to the user on how
to use the voice system.
"Telephone" voice
commands
If a telephone is connected to the system,
the following voice commands can be
made from any main screen page after pressing
the telephone button located on the steering
wheel, as long as there is no telephone call in
progress.
If no telephone is connected, a voice message
announces: "No telephone is connected.
Connect a telephone and try again” and the
voice session will be closed.
Page 182 of 212
180
Touch screen audio and telematics system
– Memorise the selected mobile device in the
favourites.
–
Set the parameters.
–
Add device
.
–
Add a new mobile device.
–
Connected audio.
–
Connect the mobile device only for audio.
Radio setting
–
DAB announcements
.
–
Activate or deactivate the announcements.
–
Activate or deactivate the options:
Alarm,
Event announc., Stock market newsflash,
Newsflash, Programme info, Special event, Sport
info, Public transp. info. Alarm announcement,
Weather newsflash.
Restore settings
Restore the default settings of the screen, clock,
sound and radio.
Delete personal data
Delete personal data, Bluetooth
® devices and
built-in presets.
Voice commands
Information - Using the
system
Instead of touching the screen, you can
use your voice to control the system.
To ensure that voice commands are always recognised by the system, please
observe the following recommendations:
–
speak in a normal tone of voice,
–
before speaking, always wait for the "beep"
(acoustic signal),
–
the system is able to recognise the voice
commands provided, regardless of gender
,
tone and inflection of the voice of the speaker,
–
if possible, minimise the noise inside the
passenger compartment,
–
before issuing a voice command, ask any
other passengers to refrain from speaking.
Since the system recognises commands
regardless of who is speaking, when several
people are speaking simultaneously
, it
is possible for the system to recognise
commands that are different or additional to
what has been requested,
–
for optimal operation, you are advised to
close the windows and any sunroof present
(on versions/markets where fitted) to avoid
any external source of disturbance.
Steering-mounted controls
This button is used to activate the “Telephone” voice recognition mode that
allows you to make calls, view recent/received/
outgoing calls, display the directory, etc.
This button is used to activate the "Radio/ Media" voice recognition mode that allows
you to tune to a specific radio station or a
specific AM/FM radio frequency, play a track or
an album contained on a USB stick/iPod/MP3/
CD.
Quick voice interaction can be used if
these buttons are depressed during a
voice message from the system; it allows you
to directly say a voice command.
For example, if the system is in the middle
of saying a voice help message and if we
know the command to give the system, by
pressing these buttons, the voice message
is interrupted and it is possible to directly
say the desired voice command (so avoiding
having to listen to the complete voice help
message).
When the system is waiting for a voice
command from the user, pressing these
buttons closes the voice session.
Each time a button is pressed, a "beep"
(acoustic signal) is emitted and the
screen displays a screen page of suggestions
asking the user to say a command.
Global voice commands
These commands can be made from any screen page after
pressing the voice recognition or telephone
button located on the steering wheel, as long as
there is no telephone call in progress.
Help