2021 PEUGEOT 508 reset
[x] Cancel search: resetPage 20 of 292

18
Instruments
► Press and hold the button located on the end
of the lighting control stalk.
► Without pressing the brake pedal, press the
START/STOP button once; a temporary display
window appears and a countdown begins.
► When the display indicates =0, release the
lighting control stalk button; the spanner symbol
disappears.
If you disconnect the battery following
this operation, lock the vehicle and wait
at least 5 minutes for the reset to be
registered.
Reminder of the servicing information
You can view the servicing information by pressing the " Check/Diagnostic"
button in the Driving/Vehicle touch screen
menu.
Engine oil level indicator
(Depending on version)
Night VisionFixed.
(grey)
The function is activated, but not available.
Fixed.
The function is active.
All of the conditions are met: the system is
operating.
For more information, refer to the Lighting and
visibility section.
Direction indicatorsFlashing with audible signal.
The direction indicators are on.
SidelampsFixed.
The lamps are on.
Dipped beam headlampsFixed.
The lamps are on.
Automatic headlamp dippingFixed.
The function has been activated
via the touch screen (Driving/Vehicle menu).
The lighting control stalk is in the "AUTO"
position.
For more information, refer to the Lighting and
visibility section.
Blue warning/indicator lamps
Main beam headlamps
Fixed.
The lamps are on.
Black/white warning lamps
Automatic gearbox or Electric automatic
gearbox (e-EAT8) (Rechargeable hybrid)
Fixed.
The automatic gearbox is locked.
You must press the Unlock button to unlock it.
eSave function (Rechargeable hybrid)Fixed, accompanied by the reserved
electric range.
The
eSave function is activated.
Indicators
Service indicator
The servicing information is expressed in terms
of distance (miles or kilometres) and time
(months or days).
The alert is given at whichever of these two
terms is reached first.
The servicing information is displayed in the
instrument panel. Depending on the version of
the vehicle:
–
The distance recorder display line indicates
the distance remaining before the next service
is due, or the distance travelled since it was due
preceded by the "-" sign.
–
An alert message indicates the distance
remaining, as well as the period before the next
service is due or how long it is overdue.
The value indicated is calculated according to the distance covered and
the time elapsed since the last service.
The alert may also be triggered close to a
due date.
Service spannerOn temporarily when the ignition is
switched on.
Between 620 and 1,860 miles (1,000 and 3,000
km) remain before the next service is due.
Fixed, when the ignition is switched on.
The next service is due in less than 620
miles (1,000 km).
Have your vehicle serviced very soon.
Service spanner flashingFlashing then fixed, when the
ignition is switched on.
(With
BlueHDi Diesel engines, associated with
the Service warning lamp.)
The servicing interval has been exceeded.
Have your vehicle serviced as soon as possible.
Resetting the service indicator
The service indicator must be reset after each
service.
If you have serviced your vehicle yourself:
►
Switch the ignition off.
Page 21 of 292
19
Instruments
1
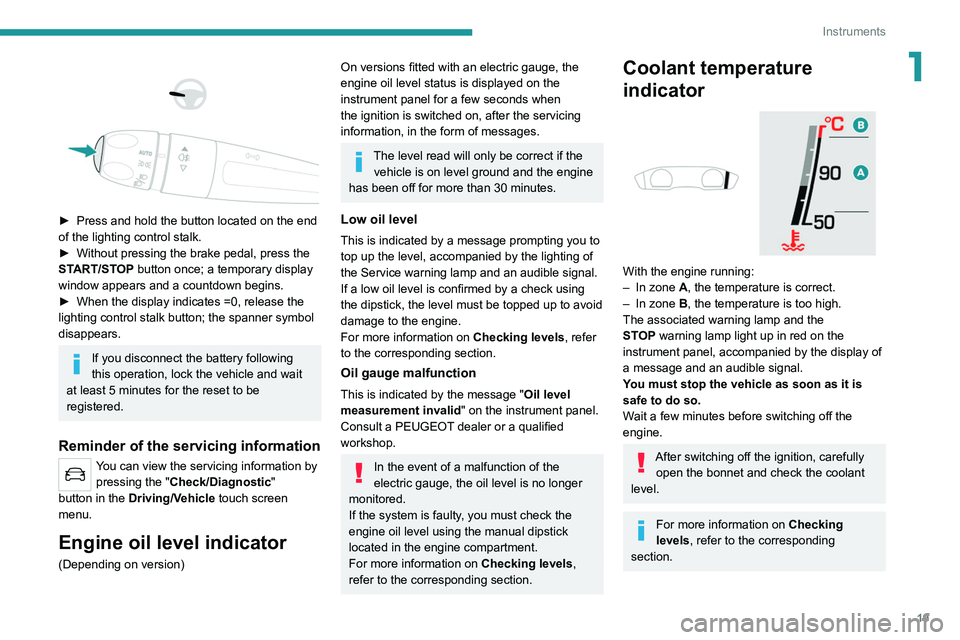
► Press and hold the button located on the end
of the lighting control stalk.
►
Without pressing the brake pedal, press the
ST
ART/STOP button once; a temporary display
window appears and a countdown begins.
►
When the display indicates =0, release the
lighting control stalk button; the spanner symbol
disappears.
If you disconnect the battery following
this operation, lock the vehicle and wait
at least 5 minutes for the reset to be
registered.
Reminder of the servicing information
You can view the servicing information by pressing the " Check/Diagnostic"
button
in the Driving/Vehicle touch screen
menu.
Engine oil level indicator
(Depending on version)
On versions fitted with an electric gauge, the
engine oil level status is displayed on the
instrument panel for a few seconds when
the ignition is switched on, after the servicing
information, in the form of messages.
The level read will only be correct if the vehicle is on level ground and the engine
has been off for more than 30 minutes.
Low oil level
This is indicated by a message prompting you to
top up the level, accompanied by the lighting of
the Service warning lamp and an audible signal.
If a low oil level is confirmed by a check using
the dipstick, the level must be topped up to avoid
damage to the engine.
For more information on Checking levels, refer
to the corresponding section.
Oil gauge malfunction
This is indicated by the message " Oil level
measurement invalid" on the instrument panel.
Consult a PEUGEOT dealer or a qualified
workshop.
In the event of a malfunction of the
electric gauge, the oil level is no longer
monitored.
If the system is faulty, you must check the
engine oil level using the manual dipstick
located in the engine compartment.
For more information on Checking levels,
refer to the corresponding section.
Coolant temperature
indicator
With the engine running:
– In zone A, the temperature is correct.
–
In zone
B, the temperature is too high.
The associated warning lamp and the
STOP
warning lamp light up in red on the
instrument panel, accompanied by the display of
a message and an audible signal.
You must stop the vehicle as soon as it is
safe to do so.
Wait a few minutes before switching off the
engine.
After switching off the ignition, carefully open the bonnet and check the coolant
level.
For more information on Checking
levels, refer to the corresponding
section.
Page 25 of 292
23
Instruments
1Data displayed on the
instrument panel
Trip computer data is permanently displayed
when the "Personal" display mode is selected.
In all other display modes, pressing the end of
the wiper control stalk will cause this data to
appear temporarily in a specific window.
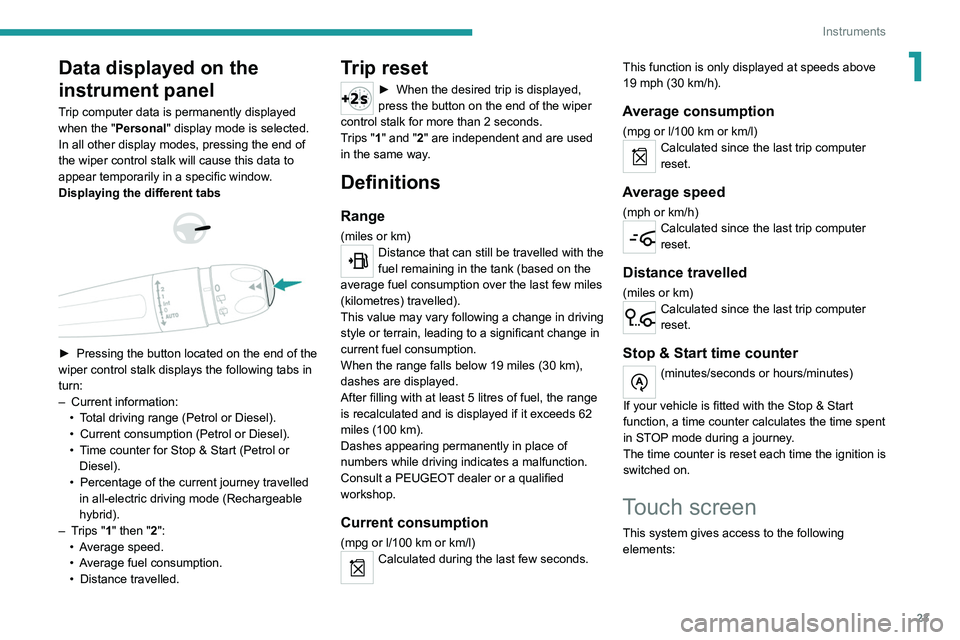
Displaying the different tabs
► Pressing the button located on the end of the
wiper control stalk displays the following tabs in
turn:
–
Current information:
•
T
otal driving range (Petrol or Diesel).
•
Current consumption (Petrol or Diesel).
•
T
ime counter for Stop & Start (Petrol or
Diesel).
•
Percentage of the current journey travelled
in all-electric driving mode (Rechargeable
hybrid).
–
T
rips "1" then "2":
•
A
verage speed.
•
A
verage fuel consumption.
•
Distance travelled.
Trip reset
► When the desired trip is displayed,
press the button on the end of the wiper
control stalk for more than 2
seconds.
Trips "1" and "2" are independent and are used
in the same way.
Definitions
Range
(miles or km)Distance that can still be travelled with the
fuel remaining in the tank (based on the
average fuel consumption over the last few miles
(kilometres) travelled).
This value may vary following a change in driving
style or terrain, leading to a significant change in
current fuel consumption.
When the range falls below 19 miles (30
km),
dashes are displayed.
After filling with at least 5 litres of fuel, the range
is recalculated and is displayed if it exceeds 62
miles (100
km).
Dashes appearing permanently in place of
numbers while driving indicates a malfunction.
Consult a PEUGEOT dealer or a qualified
workshop.
Current consumption
(mpg or l/100 km or km/l)Calculated during the last few seconds. This function is only displayed at speeds above
19 mph (30
km/h).
Average consumption
(mpg or l/100 km or km/l)Calculated since the last trip computer
reset.
Average speed
(mph or km/h)Calculated since the last trip computer
reset.
Distance travelled
(miles or km)Calculated since the last trip computer
reset.
Stop & Start time counter
(minutes/seconds or hours/minutes)
If your vehicle is fitted with the Stop & Start
function, a time counter calculates the time spent
in STOP mode during a journey.
The time counter is reset each time the ignition is
switched on.
Touch screen
This system gives access to the following elements:
Page 31 of 292

29
Access
2inoperative. It would then be necessary to
reset it.
Anti-theft protection
Do not modify the electronic vehicle
immobiliser, as this might result in
malfunctions.
Locking the vehicle
Driving with the doors locked could make
it more difficult for the emergency services
to enter the passenger compartment in an
emergency.
As a safety precaution, take the electronic key
with you when leaving the vehicle, even for a
short time.
Purchasing a second-hand vehicle
Have the key codes memorised by a
PEUGEOT dealer, to ensure that the keys
in your possession are the only ones able to
start the vehicle.
Keyless Entry and Start
This system allows the unlocking, locking
and starting of the vehicle, while carrying the
electronic key on your person in the recognition
zone A.
Unlocking the vehicle
Selective unlocking (driver’s door, boot) is
configured in the Driving/Vehicle touch
screen menu.
Selective unlocking is deactivated by default.
Complete unlocking
► Pass your hand behind the handle of one
of the four doors or press the tailgate opening
control.
If the motorised tailgate opening control is
activated, this action triggers its automatic
opening.
Opening the windows
Depending on version, keeping your hand
behind the door handle or maintaining the
press on the tailgate opening control allows the
windows to be opened to the desired position.
Selective unlocking
Driver’s door and fuel/charging flap
► Pass your hand behind the driver ’s door
handle.
►
T
o unlock the vehicle completely, pass your
hand behind the handle of one of the passenger
doors with the electronic key close to the
passenger door, or press the tailgate opening
control with the electronic key close to the rear of
the vehicle.
Complete or selective unlocking, and
deactivation of the alarm
depending on
version,
is confirmed by the flashing of the
sidelamps and/or daytime running lamps.
The door mirrors unfold.
Selective unlocking of the tailgate
► Press the tailgate opening control to unlock
just the boot.
The doors remain locked.
Page 116 of 292
11 4
Driving
To deactivate/reactivate the function:
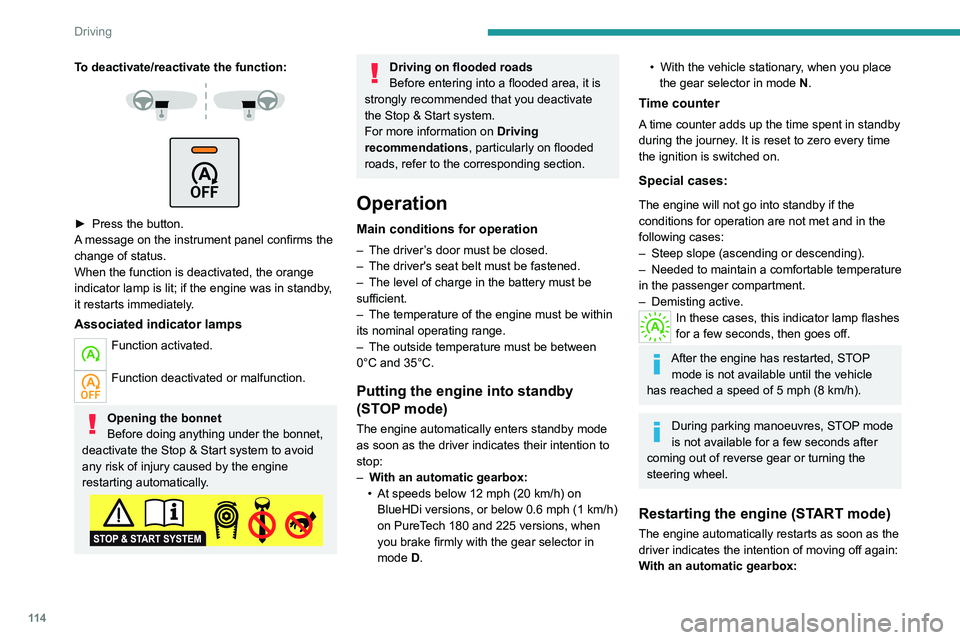
► Press the button.
A message on the instrument panel confirms the
change of status.
When the function is deactivated, the orange
indicator lamp is lit; if the engine was in standby,
it restarts immediately.
Associated indicator lamps
Function activated.
Function deactivated or malfunction.
Opening the bonnet
Before doing anything under the bonnet,
deactivate the Stop & Start system to avoid
any risk of injury caused by the engine
restarting automatically.
Driving on flooded roads
Before entering into a flooded area, it is
strongly recommended that you deactivate
the Stop & Start system.
For more information on Driving
recommendations, particularly on flooded
roads, refer to the corresponding section.
Operation
Main conditions for operation
– The driver ’s door must be closed.
– The driver's seat belt must be fastened.
–
The level of charge in the battery must be
sufficient.
–
The temperature of the engine must be within
its nominal operating range.
–
The outside temperature must be between
0°C and 35°C.
Putting the engine into standby
(STOP mode)
The engine automatically enters standby mode
as soon as the driver indicates their intention to
stop:
–
W
ith an automatic gearbox:
•
At speeds below 12 mph (20
km/h) on
BlueHDi versions, or below 0.6 mph (1
km/h)
on PureTech 180 and 225 versions, when
you brake firmly with the gear selector in
mode D.
• With the vehicle stationary , when you place
the gear selector in mode N.
Time counter
A time counter adds up the time spent in standby
during the journey. It is reset to zero every time
the ignition is switched on.
Special cases:
The engine will not go into standby if the
conditions for operation are not met and in the
following cases:
–
Steep slope (ascending or descending).
–
Needed
to maintain a comfortable temperature
in the passenger compartment.
–
Demisting active.
In these cases, this indicator lamp flashes
for a few seconds, then goes off.
After the engine has restarted, STOP mode is not available until the vehicle
has reached a speed of 5 mph (8
km/h).
During parking manoeuvres, STOP mode
is not available for a few seconds after
coming out of reverse gear or turning the
steering wheel.
Restarting the engine (START mode)
The engine automatically restarts as soon as the
driver indicates the intention of moving off again:
With an automatic gearbox:
– With the selector in mode D or M: with the
brake pedal released.
– With the selector in mode N and the brake
pedal released: with the selector at D or M.
– With the selector in mode P and the brake
pedal depressed: with the selector at R, N, D
or M.
– With reverse gear engaged.
Special cases
The engine will restart automatically if the
conditions for operation are met again and in the
following cases:
– With an automatic gearbox, in mode N, vehicle
speed exceeds 0.6 mph (1 km/h).
In these cases, this indicator lamp flashes
for a few seconds, then goes off.
Malfunctions
In the event of a fault with the system, this
warning lamp flashes for a few moments
on the instrument panel, then remains on,
accompanied by the display of a message.
Have it checked by a PEUGEOT dealer or a
qualified workshop.
The vehicle stalls in STOP mode
All of the instrument panel warning lamps come
on if there is a fault.
► Switch off the ignition then start the engine
again with the " START/STOP" button.
Page 122 of 292
120
Driving
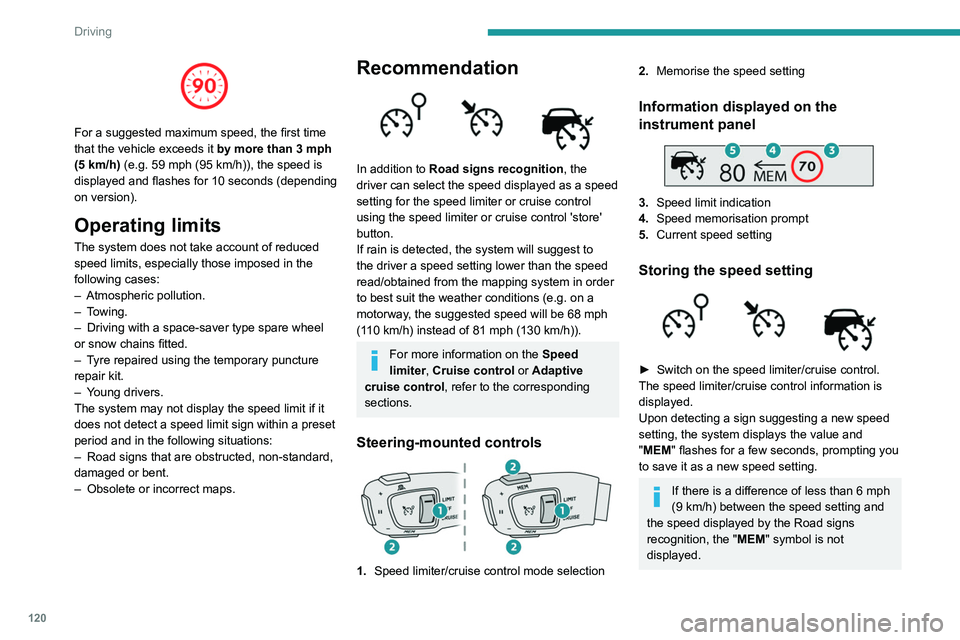
For a suggested maximum speed, the first time
that the vehicle exceeds it by more than 3 mph
(5
km/h) (e.g. 59 mph (95 km/h)), the speed is
displayed and flashes for 10 seconds (depending
on version).
Operating limits
The system does not take account of reduced
speed limits, especially those imposed in the
following cases:
–
Atmospheric pollution.
–
Towing.
–
Driving with a space-saver type spare wheel
or snow chains fitted.
–
T
yre repaired using the temporary puncture
repair kit.
–
Y
oung drivers.
The system may not display the speed limit if it
does not detect a speed limit sign within a preset
period and in the following situations:
–
Road signs that are obstructed, non-standard,
damaged or bent.
–
Obsolete or incorrect maps.
Recommendation
In addition to Road signs recognition , the
driver can select the speed displayed as a speed
setting for the speed limiter or cruise control
using the speed limiter or cruise control 'store'
button.
If rain is detected, the system will suggest to
the driver a speed setting lower than the speed
read/obtained from the mapping system in order
to best suit the weather conditions (e.g. on a
motorway, the suggested speed will be 68 mph
(110 km/h) instead of 81 mph (130
km/h)).
For more information on the Speed
limiter, Cruise control or Adaptive
cruise control, refer to the corresponding
sections.
Steering-mounted controls
1. Speed limiter/cruise control mode selection
2.Memorise the speed setting
Information displayed on the
instrument panel
3.Speed limit indication
4. Speed memorisation prompt
5. Current speed setting
Storing the speed setting
► Switch on the speed limiter/cruise control.
The speed limiter/cruise control information is
displayed.
Upon detecting a sign suggesting a new speed
setting, the system displays the value and
"
MEM" flashes for a few seconds, prompting you
to save it as a new speed setting.
If there is a difference of less than 6 mph
(9 km/h) between the speed setting and
the speed displayed by the Road signs
recognition, the " MEM" symbol is not
displayed.
Depending on the road conditions, several
speeds may be displayed.
► Press button 2once to save the suggested
speed value.
A message is displayed, confirming the request.
► Press button 2again to confirm and save the
new speed setting.
The display then reverts to its previous state.
Extended Traffic Sign
Recognition
For more information, refer to the
General recommendations on the use
of driving and manoeuvring aids .
This additional system recognises these road
signs and displays them on the instrument panel
if the appropriate display mode is selected:
– No entry: when entering a lane in the wrong
direction, an alert message, including the symbol
of this sign, is displayed on the instrument panel
(request to check the direction of traffic).
– Other signs: as you approach it, the symbol
of the corresponding sign is displayed on the
instrument panel.
Page 138 of 292
136
Driving
The brake pedal may vibrate slightly while the function is operating.
If the vehicle comes to a complete stop,
automatic braking is maintained for 1 to 2
seconds.
Malfunction
In the event of a malfunction, this warning
lamp lights up on the instrument panel,
accompanied by the display of a message and
an audible signal.
Have it checked by a PEUGEOT dealer or a
qualified workshop.
If these warning lamps come on
after the engine has been switched
off and then restarted, contact a PEUGEOT
dealer or a qualified workshop to have the
system checked.
These warning lamps light up on the instrument panel to indicate
that the driver's and/or front passenger's seat
belt is not fastened (depending on version). The
automatic braking system is deactivated until the
seat belts are fastened.
Distraction detection
For more information, refer to the
General recommendations on the use
of driving and manoeuvring aids .
The function comprises the "Driver Attention
Warning" system combined with the "Driver
Attention Warning by Camera" system.
These systems are in no way designed
to keep the driver awake or to prevent
the driver from falling asleep at the wheel.
It is the driver’s responsibility to stop if feeling
tired.
Take a break if you are feeling tired or at least
every 2 hours.
Activation/Deactivation
This function is set via the touch screen Driving/Vehicle menu.
The state of the system is memorised when the
ignition is switched off.
Driver Attention Warning
The system triggers an alert when it detects that the driver has not taken a
break after two hours of driving at a speed above
43 mph (70
km/h).
This alert is issued via the display of a message
encouraging the driver to take a break,
accompanied by an audible signal.
If the driver does not follow this advice, the alert
is repeated hourly until the vehicle is stopped.
The system resets itself if one of the following
conditions is met:
–
With the engine running, the vehicle has been
stationary for more than 15 minutes.
– The ignition has been switched off for a few
minutes.
–
The driver's seat belt is unfastened and their
door is opened.
As soon as the speed of the vehicle drops below 43 mph (70 km/h), the
system goes into standby.
Driving time starts being counted again once
the speed reaches above 43
mph (70 km/h).
Driver Attention Warning by
Camera
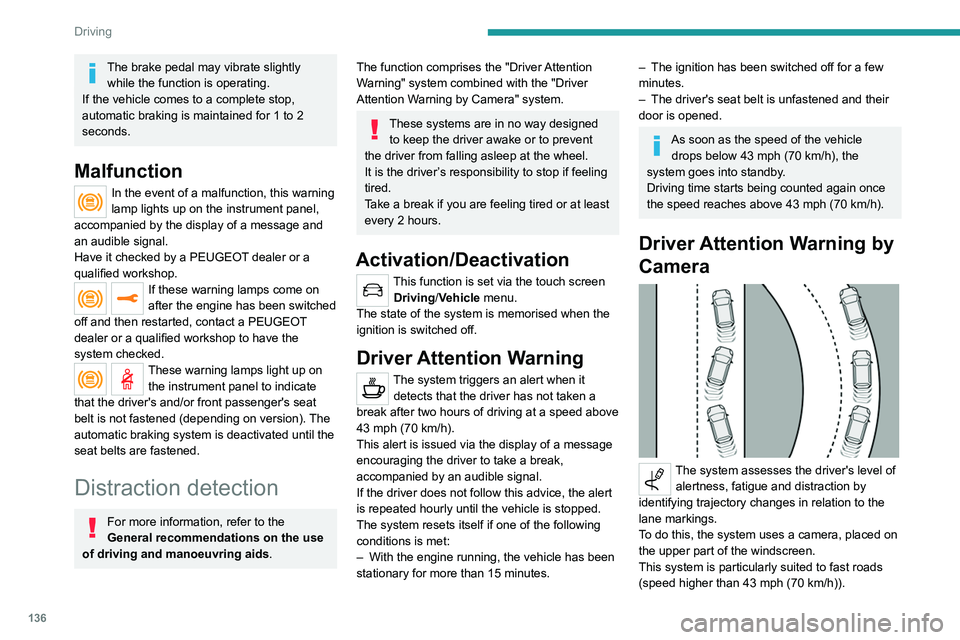
The system assesses the driver's level of alertness, fatigue and distraction by
identifying trajectory changes in relation to the
lane markings.
To do this, the system uses a camera, placed on
the upper part of the windscreen.
This system is particularly suited to fast roads
(speed higher than 43 mph (70
km/h)).
At a first alert level, the driver is warned by the
message "Be vigilant!", accompanied by an
audible signal.
After three first-level alerts, the system triggers
a further alert with the message " Dangerous
driving: take a break", accompanied by a more
pronounced audible signal.
In certain driving conditions (poor road
surface or strong winds), the system may
give alerts independent of the driver's level of
vigilance.
The following situations may interfere with the operation of the system or
prevent it from working:
– lane markings absent, worn, hidden (snow,
mud) or multiple (roadworks);
– close to the vehicle ahead (lane markings
not detected);
– roads that are narrow, winding, etc.
Active lane departure
warning system
For more information, refer to the
General recommendations on the use
of driving and manoeuvring aids .
The system corrects the vehicle's trajectory by
alerting the driver as soon as it detects a risk of
Page 167 of 292
165
Practical information
7POWERCHARGE FAULT SymbolDescription
(green)
(green)
Connected to the power supply and to the Electric
Vehicle (EV).
The EV is on charge or in a temperature pre-
conditioning sequence.
(green)
(green)
Connected to the power supply and to the Electric
Vehicle (EV).
The EV is waiting for charging or the charging of
the EV is completed.
(red)
Control unit malfunction. No charging allowed.
If an error indicator reappears after a manual reset,
the control unit must be checked by a PEUGEOT
dealer before the next charge.
(green)
(green)
(red)
The control unit is in diagnostic mode.
Manual reset procedure
The control unit can be reset by simultaneously disconnecting the chargi\
ng connector and the wall socket.
Then, reconnect the wall socket first. For more information, refer to the handbook.
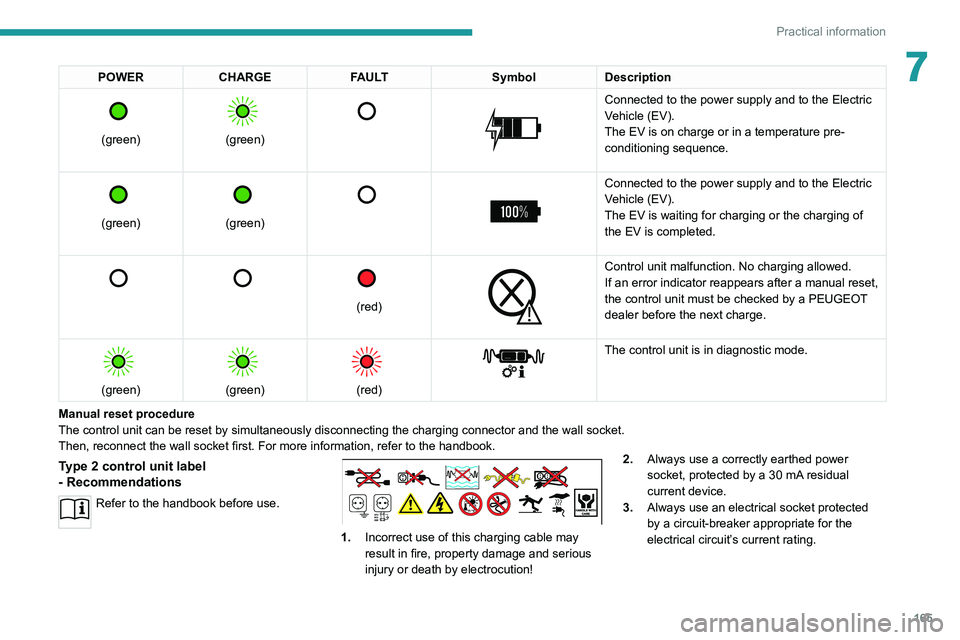
Type 2 control unit label
- Recommendations
Refer to the handbook before use.
1. Incorrect use of this charging cable may
result in fire, property damage and serious
injury or death by electrocution! 2.
Always use a correctly earthed power
socket, protected by a 30 mA residual
current device.
3. Always use an electrical socket protected
by a circuit-breaker appropriate for the
electrical circuit’s current rating.