2021 PEUGEOT 508 ECU
[x] Cancel search: ECUPage 17 of 292
15
Instruments
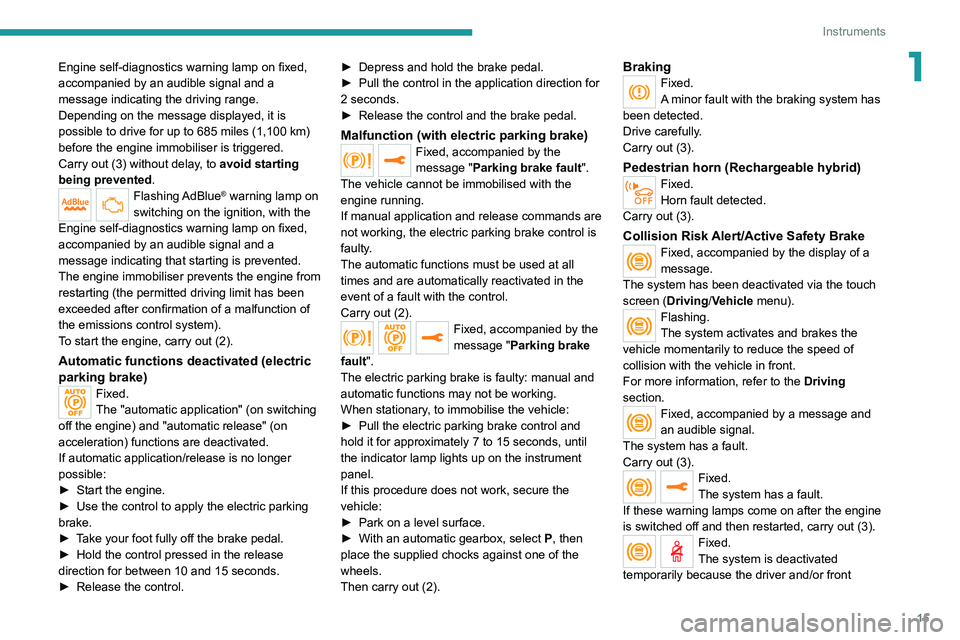
1Engine self-diagnostics warning lamp on fixed,
accompanied by an audible signal and a
message indicating the driving range.
Depending on the message displayed, it is
possible to drive for up to 685 miles (1,100 km)
before the engine immobiliser is triggered.
Carry out (3) without delay, to avoid starting
being prevented.
Flashing AdBlue® warning lamp on
switching on the ignition, with the
Engine self-diagnostics warning lamp on fixed,
accompanied by an audible signal and a
message indicating that starting is prevented.
The engine immobiliser prevents the engine from
restarting (the permitted driving limit has been
exceeded after confirmation of a malfunction of
the emissions control system).
To start the engine, carry out (2).
Automatic functions deactivated (electric
parking brake)
Fixed.
The "automatic application" (on switching
off the engine) and "automatic release" (on
acceleration) functions are deactivated.
If automatic application/release is no longer
possible:
►
Start the engine.
►
Use the control to apply the electric parking
brake.
►
T
ake your foot fully off the brake pedal.
►
Hold the control pressed in the release
direction for between 10 and 15 seconds.
►
Release the control. ►
Depress and hold the brake pedal.
►
Pull the control in the application direction for
2
seconds.
►
Release the control and the brake pedal.
Malfunction (with electric parking brake)Fixed, accompanied by the
message "Parking brake fault".
The vehicle cannot be immobilised with the
engine running.
If manual application and release commands are
not working, the electric parking brake control is
faulty.
The automatic functions must be used at all
times and are automatically reactivated in the
event of a fault with the control.
Carry out (2).
Fixed, accompanied by the
message "Parking brake
fault".
The electric parking brake is faulty: manual and
automatic functions may not be working.
When stationary, to immobilise the vehicle:
►
Pull the electric parking brake control and
hold it for approximately 7 to 15 seconds, until
the indicator lamp lights up on the instrument
panel.
If this procedure does not work, secure the
vehicle:
►
Park on a level surface.
►
With an automatic gearbox, select
P
, then
place the supplied chocks against one of the
wheels.
Then carry out (2).
BrakingFixed.
A minor fault with the braking system has
been detected.
Drive carefully.
Carry out (3).
Pedestrian horn (Rechargeable hybrid)Fixed.
Horn fault detected.
Carry out (3).
Collision Risk Alert/Active Safety BrakeFixed, accompanied by the display of a
message.
The system has been deactivated via the touch
screen (Driving/Vehicle menu).
Flashing.
The system activates and brakes the
vehicle momentarily to reduce the speed of
collision with the vehicle in front.
For more information, refer to the Driving
section.
Fixed, accompanied by a message and
an audible signal.
The system has a fault.
Carry out (3).
Fixed.
The system has a fault.
If these warning lamps come on after the engine
is switched off and then restarted, carry out (3).
Fixed.
The system is deactivated
temporarily because the driver and/or front
Page 35 of 292

33
Access
2Reinitialising the remote
control
Following replacement of the battery or in
the event of a fault, it may be necessary to
reinitialise the remote control.
► Insert the mechanical key (incorporated into
the remote control) into the lock to open the
vehicle.
►
Place the electronic key against the back-up
reader on the steering column and hold it there
until the ignition is switched on.
►
W
ith an automatic gearbox, while in mode
P, depress the brake pedal.
►
Switch on the ignition by pressing the
"
START/STOP" button.
If the fault persists after reinitialisation, contact
a PEUGEOT dealer or a qualified workshop
without delay.
Central locking
Manual
► Press this button to lock/unlock the vehicle
(doors and boot) from inside the passenger
compartment.
The indicator lamp comes on to confirm the
central locking of the vehicle.
Central locking does not take place if any
of the doors are open.
When locking/deadlocking from the
outside
When the vehicle is locked or deadlocked
from the outside, the indicator lamp flashes
and the button is deactivated.
►
After normal locking, pull one of the
interior door controls to unlock the vehicle.
►
After deadlocking, you must use the
remote control, the "Keyless Entry and
Start" system or the built-in key to unlock the
vehicle.
Automatic (anti-intrusion security)
The doors and boot lock automatically while
driving (speed above 6 mph (10
km/h)).
To deactivate/reactivate this function (activated
by default):
►
Press the button until an audible signal is
triggered and a confirmation message appears.
Transporting long or voluminous
objects
Press the central locking control to drive
with the boot open and the doors locked.
Otherwise, every time the speed of the
vehicle exceeds 6 mph (10 km/h), the sound
of the locks rebounding will be heard and an
alert will be displayed.
Alarm
(Depending on version)
System which protects and provides a deterrent
against theft and break-ins.
Page 36 of 292
34
Access
► Immediately lock the vehicle using the remote
control or the Keyless Entry and Start system.
Only the exterior perimeter monitoring is
activated; the button's red indicator lamp flashes
once every second.
To take effect, this deactivation must be carried out after each time the ignition is
switched off.
Reactivating the interior volumetric
and anti-tilt monitoring
► Deactivate the exterior perimeter monitoring
by unlocking the vehicle using the remote control
or the Keyless Entry and Start system.
The indicator lamp in the button goes off.
► Reactivate all monitoring by locking the
vehicle using the remote control or the Keyless
Entry and Start system.
The red indicator lamp in the button once again
flashes every second.
Triggering of the alarm
This is indicated by sounding of the siren
and flashing of the direction indicators for 30
seconds.
Depending on the country of sale, certain
monitoring functions remain active until the alarm
has been triggered eleven times consecutively.
When the vehicle is unlocked using the remote
control or the Keyless Entry and Start system,
rapid flashing of the red indicator lamp in the
Exterior perimeter monitoring
The system checks for opening of the vehicle.
The alarm is triggered if anyone tries to open a
door, the boot or the bonnet, for example.
Interior volumetric monitoring
The system checks for any variation in volume in
the passenger compartment.
The alarm is triggered if anyone breaks a
window, enters the passenger compartment or
moves inside the vehicle.
Anti-tilt monitoring
The system checks for any change in the attitude
of the vehicle.
The alarm goes off if the vehicle is lifted or
moved.
When the vehicle is parked, the alarm
will not be triggered if the vehicle is
knocked.
Self-protection function
The system checks whether any of its
components are out of service.
The alarm is triggered if the battery, the central
control or the siren wiring is put out of service or
damaged.
Work on the alarm system
Consult a PEUGEOT dealer or a
qualified workshop.
Locking the vehicle with full
alarm system
Activation
► Switch off the ignition and exit the vehicle.
► Lock or deadlock the vehicle using the
remote control or with the Keyless Entry and
Start system.
When the monitoring system is active, the red
indicator lamp in the button flashes once per
second and the direction indicators come on for
about 2 seconds.
The exterior perimeter monitoring is activated
after 5 seconds and the interior volumetric and
anti-tilt monitoring after 45 seconds.
If an opening (door, boot or bonnet) is not
properly closed, the vehicle is not locked,
but the exterior perimeter monitoring will be
activated after 45 seconds, at the same time
as the interior volumetric and anti-tilt
monitoring.
Deactivation
► Press one of the remote control unlocking
buttons:
short press
long press
or
► Unlock the vehicle with the Keyless Entry and
Start system.
The monitoring system is deactivated: the
indicator lamp in the button goes off and the
sidelamps and/or the daytime running lamps
flash for about 2 seconds.
If the vehicle automatically locks itself
again (as happens if a door or the boot is
not opened within 30 seconds of unlocking),
the monitoring system is automatically
reactivated.
Locking the vehicle
with exterior perimeter
monitoring only
Deactivate the interior volumetric and anti-tilt
monitoring to avoid the unwanted triggering of
the
alarm, in certain cases such as:
–
Slightly open window
.
–
W
ashing the vehicle.
–
Changing a wheel.
–
T
owing the vehicle.
–
T
ransport on a ship or ferry.
Deactivating the interior volumetric
and anti-tilt monitoring
► Switch off the ignition and within 10 seconds
press the alarm button until its red indicator lamp
is on fixed.
►
Get out of the vehicle.
Page 37 of 292
35
Access
2► Immediately lock the vehicle using the remote
control or the Keyless Entry and Start system.
Only the exterior perimeter monitoring is
activated; the button's red indicator lamp flashes
once every second.
To take effect, this deactivation must be carried out after each time the ignition is
switched off.
Reactivating the interior volumetric
and anti-tilt monitoring
► Deactivate the exterior perimeter monitoring
by unlocking the vehicle using the remote control
or the Keyless Entry and Start system.
The indicator lamp in the button goes off.
►
Reactivate all monitoring by locking the
vehicle using the remote control or the Keyless
Entry and Start system.
The red indicator lamp in the button once again
flashes every second.
Triggering of the alarm
This is indicated by sounding of the siren
and flashing of the direction indicators for 30
seconds.
Depending on the country of sale, certain
monitoring functions remain active until the alarm
has been triggered eleven times consecutively.
When the vehicle is unlocked using the remote
control or the Keyless Entry and Start system,
rapid flashing of the red indicator lamp in the button informs you that the alarm was triggered
during your absence. When the ignition is
switched on, this flashing stops.
Failure of the remote control
To deactivate the monitoring functions:
►
Unlock the vehicle using the key in the front
left-hand door lock.
►
Open the door; the alarm is triggered.
►
Switch on the ignition; this stops the alarm.
The indicator lamp in the button goes off.
Locking the vehicle without
activating the alarm
► Lock the vehicle using the key (built-in the
remote control) in the front left-hand door lock.
Malfunction
When the ignition is switched on, the fixed
lighting of the red indicator lamp in the button
indicates a system malfunction.
Have it checked by a PEUGEOT dealer or a
qualified workshop.
Automatic activation
(Depending on version)
The system is activated automatically 2 minutes
after the last door or the boot is closed.
►
T
o avoid triggering the alarm on entering the
vehicle, first press the unlocking button on the
remote control or unlock the vehicle using the
"Keyless Entry and Start" system.
Doors
Your vehicle has doors with frameless windows. A window micro-descent system is activated
when the door is opened and closed, as soon as
an action is performed on the interior or exterior
door handle.
Opening
From outside
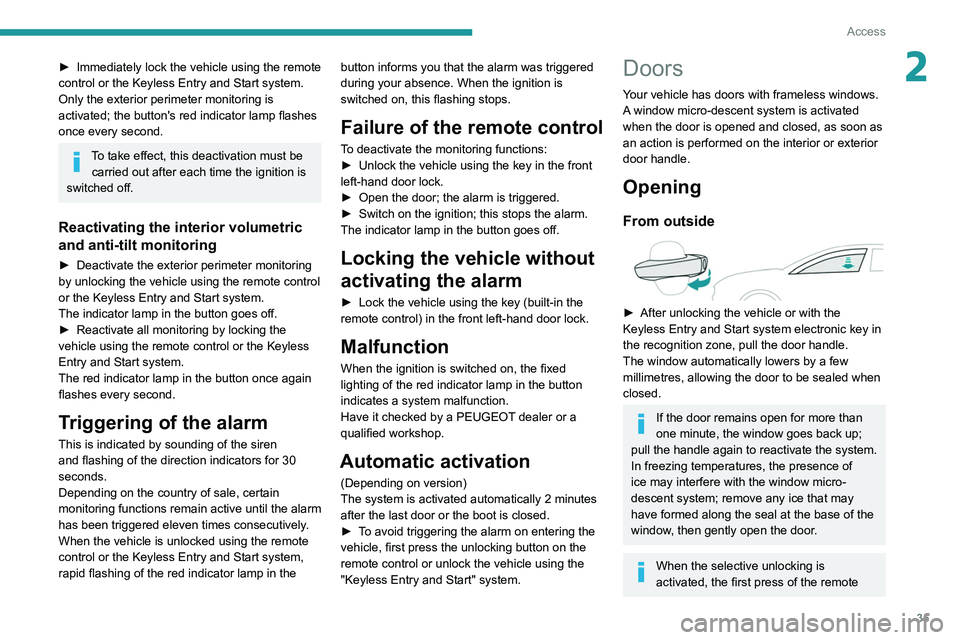
► After unlocking the vehicle or with the
Keyless Entry and Start system electronic key in
the recognition zone, pull the door handle.
The window automatically lowers by a few
millimetres, allowing the door to be sealed when
closed.
If the door remains open for more than
one minute, the window goes back up;
pull the handle again to reactivate the system.
In freezing temperatures, the presence of
ice may interfere with the window micro-
descent system; remove any ice that may
have formed along the seal at the base of the
window, then gently open the door.
When the selective unlocking is
activated, the first press of the remote
Page 40 of 292
38
Access
► press button C or the exterior control B for
more than 3 seconds (memorisation is confirmed
by a brief audible signal).
Memorising is not available until the
height of opening is more than or equal
to 1 metre between the low position and the
high position of the tailgate.
To delete the memorised position:
► open the tailgate to any position.
► press button C or the exterior control B for
more than 3 seconds (deletion is confirmed by a
long audible signal).
Manual operation
The tailgate can be manoeuvred by hand, even
with motorised operation activated.
The tailgate must be stationary.
When opening and closing the motorised tailgate
manually, there is no assistance from gas struts.
Resistance to opening and closing is therefore
entirely normal.
Repeatedly opening and closing the
motorised tailgate can cause overheating
of its electric motor, after which opening and
closing will not be possible.
Allow at least 10 minutes for the electric
motor to cool down before operating the
tailgate again.
If you are unable to wait, operate it manually.
– monitor the activity of the rear passengers,
particularly any children.
Bicycle carrier/Towing device
The motorised tailgate is not designed to support
a bicycle carrier.
When installing a bicycle carrier on the towing
device with connection of the cable to the trailer
socket, the motorised operation of the tailgate
will be automatically deactivated.
If using a towing device or bicycle carrier
not recommended by PEUGEOT, it is
essential to deactivate the motorised
operation of the tailgate.
Motorised operation
Motorised operation of the tailgate is set
via the Driving/Vehicle touch screen
menu.
* Depending on version.
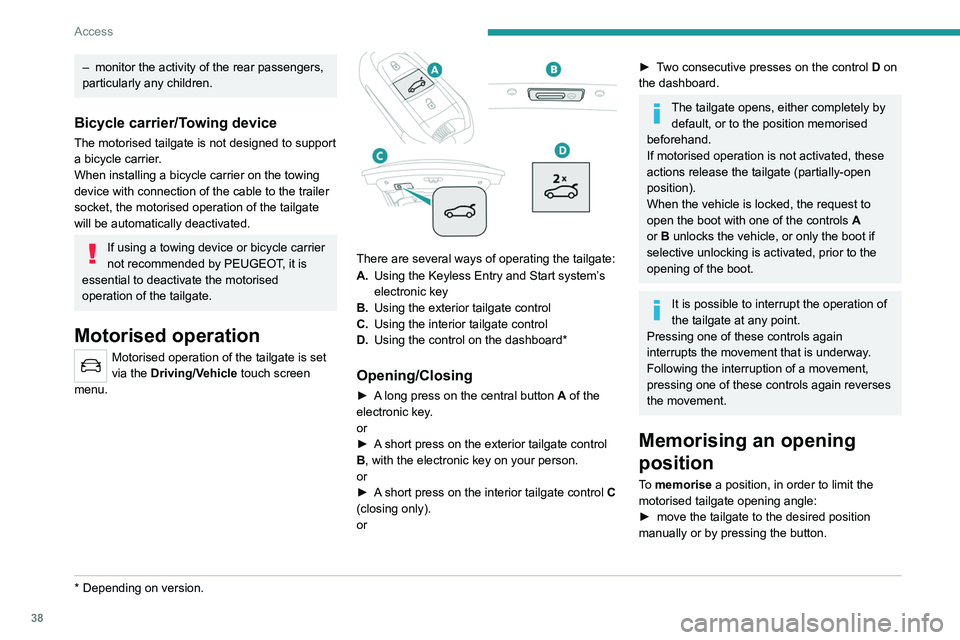
There are several ways of operating the tailgate:
A. Using the Keyless Entry and Start system’s
electronic key
B. Using the exterior tailgate control
C. Using the interior tailgate control
D. Using the control on the dashboard*
Opening/Closing
► A long press on the central button A of the
electronic key.
or
►
A
short press on the exterior tailgate control
B, with the electronic key on your person.
or
►
A
short press on the interior tailgate control C
(closing only).
or
► Two consecutive presses on the control D on
the dashboard.
The tailgate opens, either completely by default, or to the position memorised
beforehand.
If motorised operation is not activated, these
actions release the tailgate (partially-open
position).
When the vehicle is locked, the request to
open the boot with one of the controls A
or B unlocks the vehicle, or only the boot if
selective unlocking is activated, prior to the
opening of the boot.
It is possible to interrupt the operation of
the tailgate at any point.
Pressing one of these controls again
interrupts the movement that is underway.
Following the interruption of a movement,
pressing one of these controls again reverses
the movement.
Memorising an opening
position
To memorise a position, in order to limit the
motorised tailgate opening angle:
►
move the tailgate to the desired position
manually or by pressing the button.
Page 47 of 292

45
Ease of use and comfort
3Front seats
Before moving the seat backwards,
ensure that there is no person or object
that might prevent the full travel of the seat.
There is a risk of trapping or pinching
passengers if present in the rear seats or of
jamming the seat if large objects are placed
on the floor behind the seat.
Front head restraints
Adjusting the height
Upwards:
► Pull the head restraint up to the desired
position; you can feel the head restraint clicking
into position.
Downwards:
►
Depending on equipment, press lug A
or
button B and then, while still pressing, lower the
head restraint.
The head restraint is correctly adjusted when its upper edge is level with the top
of the head.
Removing a head restraint
► Pull the head restraint fully up.
► Press lug A to release the head restraint and
raise it fully.
►
Stow the head restraint securely
.
Refitting a head restraint
► Insert the head restraint rods into the guides
in the corresponding seat backrest.
►
Push the head restraint fully down.
►
Press the lug
A to release the head restraint
and push it down.
►
Adjust the height of the head restraint.
Never drive with the head restraints
removed; they should be in place and
adjusted for the occupant of the seat.
Manually-adjustable seats
Longitudinal
► Raise the control bar and slide the seat
forwards or backwards.
►
Release the control bar to lock the seat in
position on one of the notches.
Height
► Pull the control upwards to raise or push it
downwards to lower , until you obtain the position
required.
Backrest angle
► Turn the knob to obtain the desired angle.
Seats with electric lumbar
adjustment
In addition to the previously mentioned
manual adjustments, this seat features electric
adjustment of the lumbar support.
Page 60 of 292

58
Ease of use and comfort
Front fittings
1.Sun visor
2. Card holder
3. Illuminated glove box
4. Door pockets
5. USB socket(s) / Front 12 V socket (120 W)
Storage compartment or Wireless
smartphone charger
6. Cup holder
7. Front armrest with storage
8. USB ports or Rear 12 V socket (120 W)
Sun visor
► With the ignition on, raise the concealing
flap; depending on the version, the mirror is
illuminated automatically.
This sun visor is also equipped with a ticket
holder.
To avoid the risk of poisoning or asphyxia, the programmable heating
must not be used, even for short periods, in a
closed environment such as a garage or
workshop which is not equipped with an
exhaust gas extraction system.
Do not park the vehicle on a flammable
surface (dry grass, dead leaves, paper, etc.)
- Risk of fire!
Glazed surfaces such as the rear screen
or windscreen can become very hot in
places.
Never put objects on these surfaces; never
touch these surfaces - Risk of burns!
Temperature pre-conditioning
(Rechargeable hybrid)
This function allows you to programme the
temperature in the passenger compartment to
reach a pre-defined, non-modifiable temperature
(approx. 21°C) before you enter the vehicle, on
the days and at the times of your choice.
This function is available when the vehicle is
connected or not connected.
Programming
(With PEUGEOT Connect Nav)
In the Climate > OPTIONS menu:
Select Temperature conditioning .
►
Press
+ to add a programme.
►
Select the time of entry into the vehicle and
the desired days. Press
OK.
►
Press
ON to activate this programming.
The pre-conditioning sequence begins
approximately 45 minutes before the
programmed time when the vehicle is connected
(20 minutes when it is not connected) and is
maintained for 10 minutes after.
This indicator lamp comes on fixed when
a temperature pre-conditioning cycle is
programmed. It flashes when temperature pre-
conditioning is in progress.
You can set multiple programmes. Each one is saved in the system.
To optimise the driving range, we recommend
starting a programme while the vehicle is
connected.
Programming can also be carried out
from a smartphone using the
MYPEUGEOT APP application.
With PEUGEOT Connect Radio, programming
can only be carried out from a smartphone using
the application.
For more information on Remote functions,
refer to the corresponding section.
The fan noise that occurs during temperature pre-conditioning is perfectly
normal.
Operating conditions
– The function is only activated when the
ignition is switched off and the
vehicle
locked.
–
When the vehicle is not connected, the
function is only activated if the battery charge
level is greater than 20%.
–
When the vehicle is not connected and a
recurring programme is active (e.g. from Monday
to Friday), if two temperature pre-conditioning
sequences are run without the vehicle being
used, the programme will be deactivated.
Page 64 of 292
62
Ease of use and comfort
Front touch-sensitive
courtesy lamp
It comes on gradually:
– when the vehicle is unlocked.
– when the ignition is switched off.
– when a door is opened.
– when the remote control locking button is
activated, in order to locate the vehicle.
It switches off:
– when the vehicle is locked.
– when the ignition is switched on.
– 30 seconds after the last door is closed.
The front and rear touch-sensitive reading lamps
come on and go off at the same time as the
courtesy lamp.
A long press on the courtesy lamp completely
deactivates it from coming on (confirmed by the
“OFF" symbol).
Touch-sensitive reading
lamps
► With the ignition on, press the corresponding
reading lamp.
Interior ambient lighting
The dimmed passenger compartment lighting
improves visibility in the vehicle when the light
is poor.
At night, the ambient lighting comes on/goes off
automatically when the sidelamps are switched
on/off.
Opening
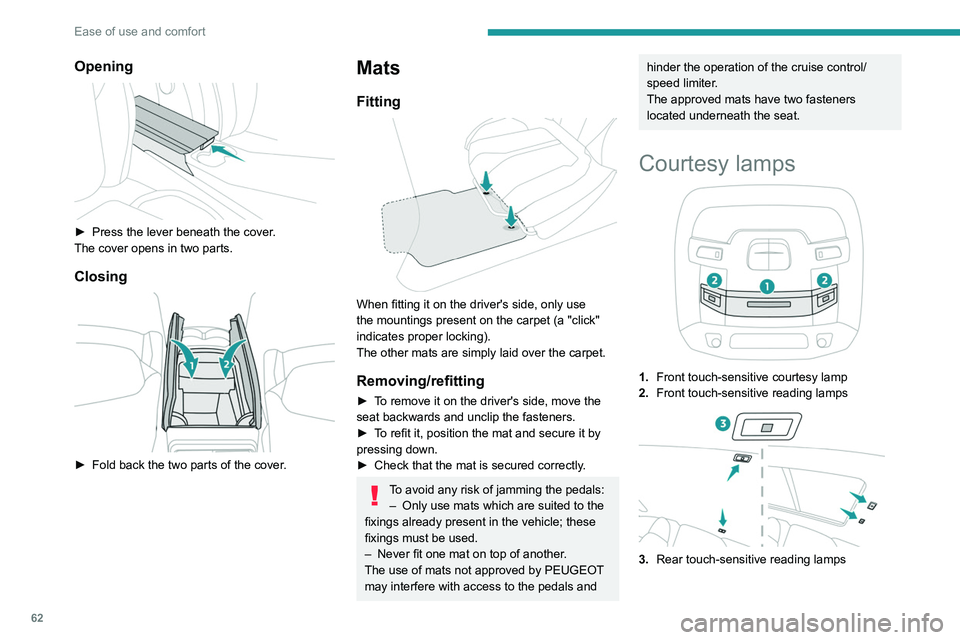
► Press the lever beneath the cover .
The cover opens in two parts.
Closing
► Fold back the two parts of the cover .
Mats
Fitting
When fitting it on the driver's side, only use
the mountings present on the carpet (a "click"
indicates proper locking).
The other mats are simply laid over the carpet.
Removing/refitting
► To remove it on the driver's side, move the
seat backwards and unclip the fasteners.
►
T
o refit it, position the mat and secure it by
pressing down.
►
Check that the mat is secured correctly
.
To avoid any risk of jamming the pedals:– Only use mats which are suited to the
fixings already present in the vehicle; these
fixings must be used.
–
Never fit one mat on top of another
.
The use of mats not approved by PEUGEOT
may interfere with access to the pedals and
hinder the operation of the cruise control/
speed limiter.
The approved mats have two fasteners
located underneath the seat.
Courtesy lamps
1. Front touch-sensitive courtesy lamp
2. Front touch-sensitive reading lamps
3.Rear touch-sensitive reading lamps