2021 PEUGEOT 508 warning
[x] Cancel search: warningPage 185 of 292

183
In the event of a breakdown
8Warning triangle
This reflective and dismantlable device is to be
installed on the side of the road when a vehicle
is broken down or damaged.
Before getting out of the vehicle
Turn on the hazard warning lamps, then
put on the safety vest to assemble and install
the triangle.
Storage compartment
There is a compartment in the interior trim of the
tailgate to store a warning triangle.
►
After opening the tailgate, release the cover
by turning the screw a quarter turn to the left.
Assembling and placing the triangle
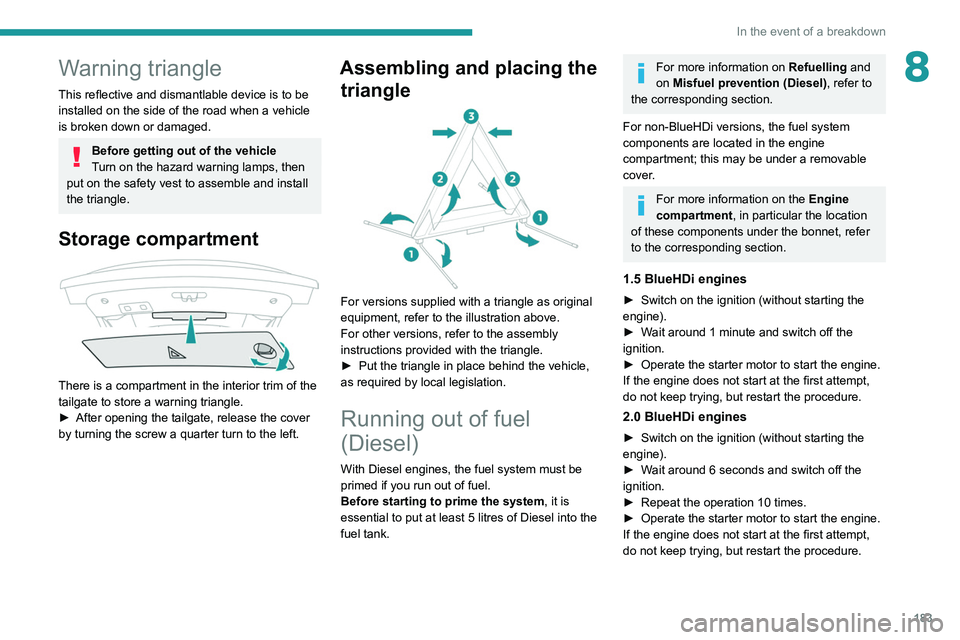
For versions supplied with a triangle as original
equipment, refer to the illustration above.
For other versions, refer to the assembly
instructions provided with the triangle.
►
Put the triangle in place behind the vehicle,
as required by local legislation.
Running out of fuel
(Diesel)
With Diesel engines, the fuel system must be
primed if you run out of fuel.
Before starting to prime the system, it is
essential to put at least 5 litres of Diesel into the
fuel tank.
For more information on Refuelling and
on Misfuel prevention (Diesel), refer to
the corresponding section.
For non-BlueHDi versions, the fuel system
components are located in the engine
compartment; this may be under a removable
cover.
For more information on the Engine
compartment, in particular the location
of these components under the bonnet, refer
to the corresponding section.
1.5 BlueHDi engines
► Switch on the ignition (without starting the
engine).
►
W
ait around 1 minute and switch off the
ignition.
►
Operate the starter motor to start the engine.
If the engine does not start at the first attempt,
do not keep trying, but restart the procedure.
2.0 BlueHDi engines
► Switch on the ignition (without starting the
engine).
►
W
ait around 6 seconds and switch off the
ignition.
►
Repeat the operation 10
times.
►
Operate the starter motor to start the engine.
If the engine does not start at the first attempt,
do not keep trying, but restart the procedure.
Page 188 of 292

186
In the event of a breakdown
Made up of a compressor and a sealant
cartridge, it allows you to carry out a temporary
repair of the tyre so that you can drive to the
nearest garage.
It is designed to repair most punctures located
on the tyre tread.
The vehicle's electric system allows the connection of the compressor to the 12 V
power supply for long enough to repair a tyre
after a puncture.
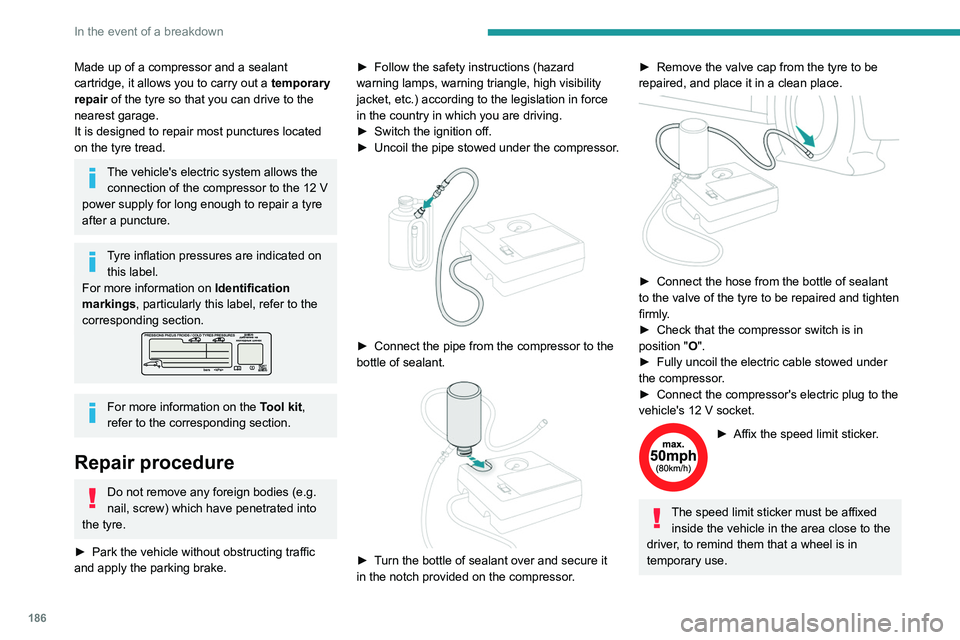
Tyre inflation pressures are indicated on this label.
For more information on Identification
markings, particularly this label, refer to the
corresponding section.
For more information on the Tool kit,
refer to the corresponding section.
Repair procedure
Do not remove any foreign bodies (e.g.
nail, screw) which have penetrated into
the tyre.
►
Park the vehicle without obstructing traffic
and apply the parking brake. ►
Follow the safety instructions (hazard
warning lamps, warning triangle, high visibility
jacket, etc.) according to the legislation in force
in the country in which you are driving.
►
Switch the ignition off.
►
Uncoil
the pipe stowed under the compressor.
► Connect the pipe from the compressor to the
bottle of sealant.
► Turn the bottle of sealant over and secure it
in the notch provided on the compressor.
► Remove the valve cap from the tyre to be
repaired, and place it in a clean place.
► Connect the hose from the bottle of sealant
to the valve of the tyre to be repaired and tighten
firmly
.
►
Check that the compressor switch is in
position
"O".
►
Fully uncoil the electric cable stowed under
the compressor
.
►
Connect the compressor's electric plug to the
vehicle's 12
V socket.
► Affix the speed limit sticker .
The speed limit sticker must be affixed
inside the vehicle in the area close to the
driver, to remind them that a wheel is in
temporary use.
Page 204 of 292

202
In the event of a breakdown
Towing your vehicle
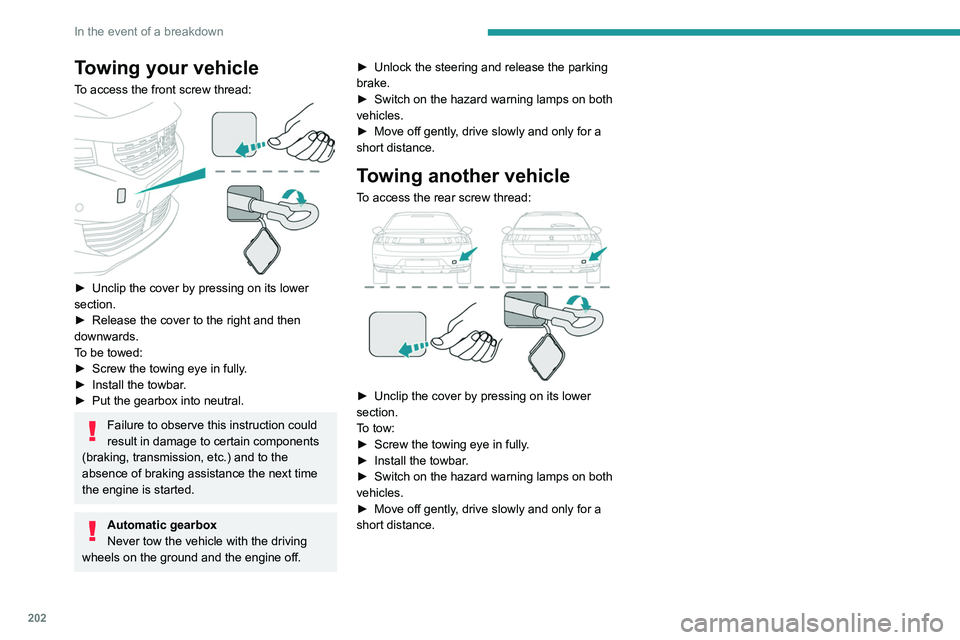
To access the front screw thread:
► Unclip the cover by pressing on its lower
section.
►
Release the cover to the right and then
downwards.
T
o be towed:
►
Screw the towing eye in fully
.
►
Install the towbar
.
►
Put the gearbox into neutral.
Failure to observe this instruction could
result in damage to certain components
(braking, transmission, etc.) and to the
absence of braking assistance the next time
the engine is started.
Automatic gearbox
Never tow the vehicle with the driving
wheels on the ground and the engine off. ►
Unlock the steering and release the parking
brake.
►
Switch on the hazard warning lamps on both
vehicles.
►
Move off gently
, drive slowly and only for a
short distance.
Towing another vehicle
To access the rear screw thread:
► Unclip the cover by pressing on its lower
section.
T
o tow:
►
Screw the towing eye in fully
.
►
Install the towbar
.
►
Switch on the hazard warning lamps on both
vehicles.
►
Move off gently
, drive slowly and only for a
short distance.
Page 236 of 292

234
PEUGEOT Connect Nav
Activate or deactivate:
–
"No data sharing except for company
vehicles".
–
"Only data sharing "
–
"Sharing data and vehicle position "
Settings specific to
connected navigation
Press Navigation to display the main
page.
Press the "MENU" button to access the
secondary page.
Select "Settings".
Select the "Map” tab.
Activate or deactivate: – "Allow declaration of danger zones ".
–
"Guidance to final destination on foot ".
These settings must be configured for each
profile.
Press “OK” to confirm your selection.
Select the "Alerts” tab.
Activate or deactivate:
–
"Advise of car park nearby ".
–
"Filling station alert ".
–
“Risk areas alert " then press the warning icon
(triangle) to configure the alerts.
– "Give an audible warning ".
– "Advise proximity of POI 1 ".
–
"Advise proximity of POI 2 ".
Press “OK” to confirm your selection.
The "Notifications", located in the upper
bar, can be accessed at any time.
Danger zone alerts may or may not be
displayed, depending on the applicable
legislation and subscription to the
corresponding service.
When "TOMTOM TRAFFIC” appears, the
services are available.
The services offered with connected navigation are as follows.
A Connected Services pack:
–
Weather,
–
Filling stations,
–
Car park,
–
T
raffic,
–
POI local search.
A
Danger area pack (optional).
Declaration: "Risk areas
alert"
To send information about danger zones, select the option:Allow declaration of
danger zones
Press Navigation to display the main
page.
Press the "Declare a new danger zone"
button located in the side bars or the
upper bar of the touch screen (depending on
equipment).
Select the "Type” option to select the type
of "Danger area".
Select the ""Speed" option and enter it
using the virtual keypad.
Press "OK" to save and send the
information.
Displaying fuel information
Press Navigation to display the main
page.
Press this button to display the list of
services.
Press "POI on map" to display the list
of points of interest.
Press one of the buttons to search for
"Stations".
Activate/deactivate "Stations".
Press this button to display a secondary
page.
Select the "Settings” tab.
Select the desired fuel.
Press "OK" to save.
Displaying charging station
details
Press Navigation to display the main
page.
Press this button to display the list of
services.
Press "POI on map" to display the list
of points of interest.
Press one of the buttons to search for
"Stations".
Activate/deactivate "Stations".
Press this button to display a secondary
page.
Select the "Settings" tab.
Select the desired connector type.
Press "OK" to save.
Displaying weather
information
Press Navigation to display the main
page.
Press this button to display the list of
services.
Select "View map".
Select "Weather".
Page 247 of 292

245
PEUGEOT Connect Nav
11Select "Setting the time-date".
Select "Date".
Press this button to set the date.
Press "OK" to confirm.
Select the display format for the date.
Time and date setting is only available if "GPS synchronisation" is deactivated.
Setting the time
Press Settings to display the main page.
Press the "OPTIONS " button to access the
secondary page.
Select "Setting the time-date".
Select "Time".
Press this button to set the time using the
virtual keypad.
Press "OK" to confirm.
Press this button to set the time zone.
Select the display format for the time
(12h/24h).
Activate or deactivate summer time (+1 hour).
Activate or deactivate GPS synchronisation (UTC).
Press "OK" to confirm.
The system may not automatically manage the change between winter and
summer time (depending on the country of
sale).
Colour schemes
Depending on equipment/Depending on version.
As a safety measure, the procedure for changing the colour scheme is only
possible when the vehicle is stationary.
Press Settings to display the main page.
Select "Color schemes ".
Select a colour scheme in the list then
press "OK" to confirm.
Whenever the colour scheme is
changed, the system restarts, temporarily
displaying a black screen.
Frequently asked
questions
The following information groups together the answers to the most frequently asked questions
concerning the system.
Navigation
I cannot enter the navigation address.
The address is not recognised.
►
Use the "intuitive method" by pressing
the "Search…" button at the bottom of the
"Navigation” page.
The route calculation is not successful.
The route settings may conflict with the current
location (for example, if toll roads are excluded
but the vehicle is on a toll road).
►
Check the route settings in the "Navigation"
menu.
I am not receiving "Danger zone" alerts.
Y
ou have not subscribed to the online services
option.
►
If you have subscribed to the option:
- a few days may elapse before the service is
activated,
- services may not be selected in the system
menu,
- online services are not active ("T
OMTOM
TRAFFIC" not shown on the map).
The POIs do not appear.
The POIs have not been selected.
►
Set the zoom level to 200 metres (656 ft), or
select POIs from the POI list.
The "Danger zone" audible warning feature is
not working.
The audible warning is not active or the volume
is too low
.
Page 248 of 292

246
PEUGEOT Connect Nav
► Activate the audible warning in the
"Navigation" menu and check the voice volume
in the sound settings.
The system does not suggest a detour
around an incident on the route.
The route settings do not take account of
TMC
messages.
►
Configure the "T
raffic info" function in the
route settings list (None, Manual or Automatic).
I am receiving a "Danger zone" alert which is
not on my route.
As well as providing guided navigation, the
system announces all "Danger areas" positioned
in a cone located in front of the vehicle. It may
provide an alert for "Danger areas" located on
nearby or parallel roads.
►
Zoom the map to show the exact location
of the "Danger area".
You can select "On the
route" to stop receiving warnings or decrease the
warning duration.
Certain traffic jams along the route are not
indicated in real time.
On starting, a few minutes may elapse before
the system begins to receive traffic information.
►
W
ait until traffic information is being received
correctly (traffic information icons shown on the
map).
In certain countries, only major routes
(motorways, etc.) are listed for the traffic
information.
This is perfectly normal. The system is
dependent on the traffic information available.
The altitude is not displayed. On starting, GPS initialisation may take up to
3 minutes to receive more than 4 satellites
correctly.
►
W
ait until the system has started up
completely so that there is GPS coverage by at
least 4
satellites.
Depending on the geographical environment
(tunnel, etc.) or the weather, the conditions of
reception of the GPS signal may vary.
This behaviour is normal. The system is
dependent on the GPS signal reception
conditions.
My navigation is no longer connected.
During start-up and in certain geographical
areas, the connection may be unavailable.
►
Check that the online services are activated
(settings, contract).
Radio
The reception quality of the radio station
being listened to gradually deteriorates or
the station presets are not working (e.g.
no
sound, "87.5" MHz is displayed).
The vehicle is too far from the selected station’s
transmitter, or no transmitter is present in the
geographical area.
►
Activate the "RDS" function by means of the
short-cut menu to enable the system to check
whether there is a more powerful transmitter in
the geographical area.
The aerial is missing or damaged (e.g.
when
going through a car wash or in an underground
car park). ►
Have the aerial checked by a dealer
.
The surrounding area (e.g. hill, building, tunnel,
underground car park, etc.) is blocking reception,
including in RDS tracking mode.
This is a perfectly normal phenomenon, and is
not indicative of an audio system malfunction.
I cannot find some radio stations in the list of
stations received.
The name of the radio station changes.
The station is no longer received or its name has
changed in the list.
Some radio stations send other information
in place of their name (the title of the song for
example).
The system interprets these details as the station
name.
►
Press "Update list" in the "Radio stations"
secondary menu.
Media
Playback of my USB memory stick starts only
after a very long wait (around 2 to 3 minutes).
Some files supplied with the memory stick may
greatly slow down access to reading the memory
stick (multiplication by 10 of the cataloguing
time).
►
Delete the files supplied with the memory
stick and limit the number of sub-folders in the
file structure on the memory stick.
There may be an extended pause after
inserting a USB stick.
The system reads a variety of data (folder, title,
artist, etc.). This can take from a few seconds to
a few minutes.
This is perfectly normal.
Some characters in information about the
currently playing media may not be displayed
correctly.
The audio system is unable to process certain
types of character.
► Use standard characters to name tracks and
folders.
Playback of streaming files does not start.
The connected device does not automatically
launch playback.
► Start playback from the device.
Track names and playing times are not
displayed on the audio streaming screen.
The Bluetooth profile does not allow the transfer
of this information.
Telephone
I am unable to connect my Bluetooth
telephone.
The telephone's Bluetooth function may be
switched off or the device may not be visible.
► Check that the telephone has Bluetooth
switched on.
► Check in the telephone settings that it is
"visible to all".
► Deactivate then reactivate the telephone’s
Bluetooth function.
The Bluetooth telephone is not compatible with
the system.
Page 253 of 292

251
Alphabetical index
180° rear vision 147
A
ABS 82
Accelerated charging unit (Wallbox)
161–162
Accessories
79, 172
Active Safety Brake
133–135
Active suspension
111
Active Suspension Control
111
Adaptive LED Technology
30, 69
Adaptive rear lighting
69
AdBlue®
20, 178
AdBlue® tank
179
Additive, Diesel
176–177
Adjusting headlamps
71
Adjusting head restraints
45
Adjusting seat
45–46
Adjusting the air distribution
53–54
Adjusting the air flow
53–54
Adjusting the date
222, 244
Adjusting the height and reach of
the steering wheel
48
Adjusting the lumbar support
45–46
Adjusting the seat angle
45
Adjusting the temperature
53
Adjusting the time
221, 245
Advice on care and maintenance
160, 181
Advice on driving
8, 100
Airbags
86–88, 90
Airbags, curtain
87–88
Airbags, front 86–87, 91
Airbags, lateral
87–88
Air conditioning
52, 55
Air conditioning, automatic
55
Air conditioning, digital
53
Air conditioning, dual-zone automatic
53
Air intake
54–55
Air vents
51
Alarm
33–34
Amplifier, audio
61
Android Auto connection
236
Anti-lock braking system (ABS)
82
Antitheft / Immobiliser
28
Apple CarPlay connection
218, 235
Applications
236
Armrest, front
61–62
Armrest, rear
63
Assistance call
80–81
Assistance, emergency braking
82, 135
Audible warning
80
Audio streaming (Bluetooth)
217, 240
B
Battery, 12 V 173, 177, 194–199
Battery, ancillaries
197
Battery, charging
196, 198–199
Battery, remote control
32, 57
Bicycle carrier
172
Blanking screen (snow shield)
172
Blind
42–43
Blind spot monitoring system, active 142
Blind spot sensors
140, 142
BlueHDi
20, 176, 183
Bluetooth (hands-free)
219, 241
Bluetooth (telephone)
219–220, 241–242
Bodywork
181
Bonnet
173–174
Bonnet, active
88
Boot
36–38, 68
Brake discs
178
Brake lamps
193–194
Brakes
177–178
Braking
109
Braking assistance system
82
Braking, automatic emergency
133–135
Braking, dynamic emergency
104–105
Brightness
221
Bulbs
192
Bulbs (changing)
191–194
C
Cable, audio 239
Cable, Jack
239
Capacity, fuel tank
157
Care of the bodywork
181
Central locking
30, 33
Changing a bulb
191–194
Changing a fuse
194
Changing a wheel
184, 188
Changing a wiper blade
77
Page 254 of 292

252
Alphabetical index
Changing the remote control battery 32
Charge level indicator (Rechargeable
hybrid)
21
Charger, induction
60
Charger, wireless
60
Charging cable
163
Charging cable (Rechargeable
hybrid)
161–162, 167
Charging connector (Rechargeable
hybrid)
160, 166–168
Charging flap (Rechargeable hybrid)
160,
166–168
Charging the traction battery
(Rechargeable hybrid)
21, 159, 166–168
CHECK
22
Checking the engine oil level
19
Checking the levels
175–176
Checking tyre pressures (using
the kit)
185, 187
Checks
175, 176–178
Checks, routine
176–178
Child lock
98–99
Children
85, 92–97
Children (safety)
98
Child seats
85, 89–92
Child seats, conventional
91–92
Child seats, i-Size
97
Child seats, ISOFIX
93–96
Cigar lighter
59
Cleaning (advice)
160, 181–182
Closing the boot
30, 37
Closing the doors
30, 35Collision Risk Alert 133–134
Comfort mode
11 3
Configuration, vehicle
24
Connected applications
236
Connection, Bluetooth
219–220,
236–237, 241–242
Connection, MirrorLink
218
Connection, Wi-Fi network
237
Connectivity
235
Consumption figures
25
Container, AdBlue®
179
Control, emergency boot release
37
Control, emergency door
31
Control, heated seats
47
Controls, steering mounted
106–108
Control stalk, lighting
69–70
Control stalk, wipers
75–78
Control unit
161–163, 167
Courtesy lamp, front
63
Courtesy lamps
63–64
Cover, load space
65
Cruise control
120, 123–125
Cruise control, adaptive
125–126
Cruise control by speed limit recognition
120
Cruise control, dynamic with Stop function
120
Cup holder
59
D
DAB (Digital Audio Broadcasting) -
Digital radio
216, 239
Date (setting) 222, 244
Daytime running lamps
70, 192
Deactivating the passenger airbag
86, 90–91
Deadlocking
28, 30
Deferred charging
25, 168
Deferred charging (Rechargeable
hybrid)
25–26, 160, 166
Defrosting
48, 55
Defrosting, front
55
Demisting
48, 55
Demisting, front
55
Demisting, rear
56
Demisting, rear screen
56
Dials and gauges
10
Digital instrument panel
10–11
Dimensions
209
Dipstick
19, 175
Direction indicators
70, 192–194
Domestic charging
163
Domestic charging (Rechargeable
hybrid)
167–168
Door pockets
59
Doors
35
Drive Assist Plus
125
Driver’s attention warning
136
Driving
44, 100
Driving aids camera (warnings)
11 7
Driving aids (recommendations)
11 6
Driving economically
8
Driving modes
111
Driving positions (storing)
47
Dynamic stability control (DSC)
82–83