2021 PEUGEOT 5008 snow chains
[x] Cancel search: snow chainsPage 5 of 292

3
Contents
Lane positioning assist 140
Lane Departure Warning System 143
Active Lane Keeping Assistance 144
Active Safety Brake with Distance Alert and
Intelligent emergency braking assistance
147
Distraction detection 150
Blind Spot Monitoring 151
Active Blind Spot Monitoring System 152
Parking sensors 153
Visiopark 1 - Visiopark 2 154
Park Assist 158
7Practical informationCompatibility of fuels 163
Refuelling 163
Misfuel prevention (Diesel) 164
Rechargeable hybrid system 165
Charging the traction battery
(Rechargeable hybrid engine)
171
Towing device 173
Towing device with quickly detachable
towball
174
Tetőcsomagtartó rudak 176
Snow chains 177
Very cold climate screen 178
Energy economy mode 178
Motorháztető 179
Engine compartment 180
Checking levels 181
Checks 183
AdBlue® (BlueHDi) 184
Free-wheeling 186
Advice on care and maintenance 187
8In the event of a breakdownWarning triangle 189
Running out of fuel (Diesel) 189
Tool kit 190
Temporary puncture repair kit 192
Spare wheel 195
Changing a bulb 200
Changing a fuse 201
12
V battery 206
Accessory battery (Rechargeable hybrid) 209
Towing the vehicle 2 11
9Technical dataEngine technical data and towed loads 215
Petrol engines 216
Diesel engines 218
Rechargeable hybrid engines 220
Dimensions 221
Identification markings 222
10PEUGEOT Connect RadioFirst steps 223
Steering mounted controls 224
Menus 225
Applications 226
Radio 226
DAB (Digital Audio Broadcasting) radio 228
Media 228
Telephone 230
Settings 233
Frequently asked questions 234
11PEUGEOT Connect NavFirst steps 236
Steering mounted controls 237
Menus 237
Voice commands 239
Navigation 242
Connected navigation 245
Applications 247
Radio 250
DAB (Digital Audio Broadcasting) radio 251
Media 251
Telephone 253
Settings 255
Frequently asked questions 257
■
Alphabetical index
bit.ly/helpPSA
Access to additional videos
Page 127 of 292
125
Driving
6– The electric parking brake is being applied.In these cases, this indicator lamp flashes
for a few seconds, then goes off.
Malfunctions
In the event of a fault with the system, this
warning lamp flashes for a few moments
on the instrument panel, then remains on,
accompanied by the display of a message.
Have it checked by a PEUGEOT dealer or a
qualified workshop.
The vehicle stalls in STOP mode
All of the instrument panel warning lamps come
on if there is a fault.
►
Switch off the ignition then start the engine
again with the key or the " ST
ART/STOP" button.
12 V battery
The Stop & Start system requires a
12 V battery of specific technology and
specification.
All work must be carried out only by a
PEUGEOT
dealer or a qualified workshop.
Tyre under-inflation detection
This system alerts the driver when one or more
tyres have a drop in pressure.
The alert is raised when the vehicle is moving,
not when stationary.
It compares the information given by the wheel
speed sensors with reference values, which
must be reinitialised every time the tyre
pressures are adjusted or a wheel changed.
It takes the last values
stored during
the
reinitialisation request into account. It is
therefore essential that the tyre pressure is
correct during the operation. This operation is
the driver’s responsibility.
The tyre under-inflation detection cannot, in any circumstances, replace the need
for vigilance on the part of the driver.
This system does not avoid the need to
regularly check the tyre pressures (including
the spare wheel), especially before a long
journey.
Driving with under-inflated tyres, particularly
in adverse conditions (heavy load, high
speed, long journey):
–
worsens road-holding.
–
lengthens braking distances.
–
causes premature wear of the tyres.
–
increases energy consumption.
The inflation pressures defined for the vehicle can be found on the tyre pressure
label.
For more information on the Identification
markings, refer to the corresponding section.
Checking tyre pressures
This check should be done monthly
when the tyres are "cold" (vehicle stopped for
1 hour or after a journey of less than 6 miles
(10
km) at moderate speeds).
Otherwise, add 0.3 bar to the pressures
shown on the label.
Snow chains
The system does not have to be
reinitialised after fitting or removing snow
chains.
Under-inflation alert
This is signalled by the fixed illumination of this warning lamp, accompanied by an
audible signal and, depending on equipment, the
display of a message.
►
Reduce speed immediately
, avoid excessive
steering movements and avoid sudden braking.
►
Stop the vehicle as soon as it is safe to do
so.
The loss of pressure detected may not always cause visible deformation of the
tyre.
Do not rely on just a visual check.
►
Using a compressor
, such as the one in
the temporary puncture repair kit, check the
pressures of all four tyres when cold.
►
If it is not possible to carry out this check
immediately
, drive carefully at reduced speed.
Page 132 of 292
130
Driving
Information displayed on
the instrument panel
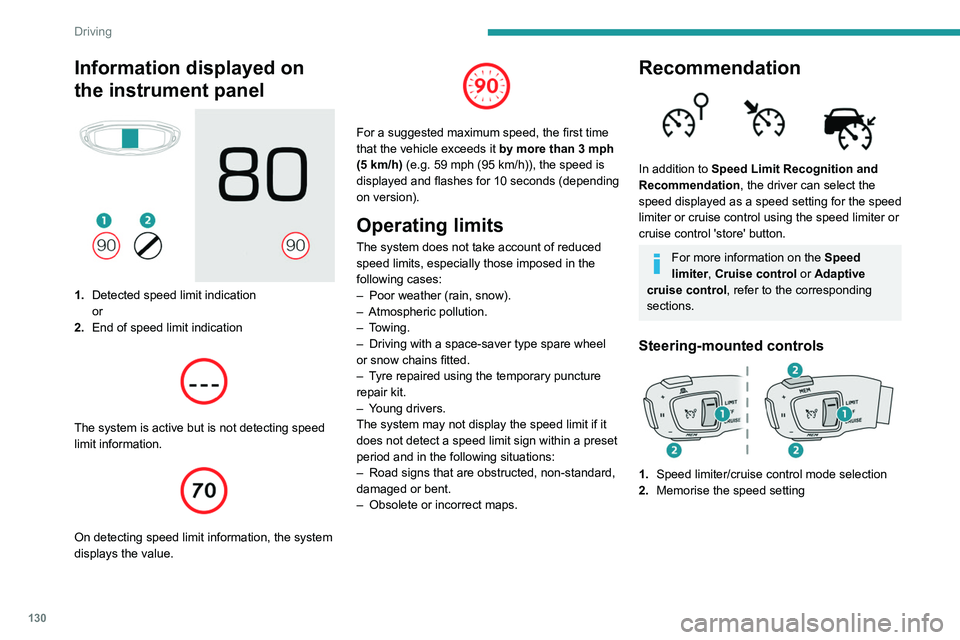
1.Detected speed limit indication
or
2. End of speed limit indication
The system is active but is not detecting speed
limit information.
On detecting speed limit information, the system
displays the value.
For a suggested maximum speed, the first time
that the vehicle exceeds it
by more than 3 mph
(5
km/h) (e.g. 59 mph (95 km/h)), the speed is
displayed and flashes for 10 seconds (depending
on version).
Operating limits
The system does not take account of reduced
speed limits, especially those imposed in the
following cases:
–
Poor weather (rain, snow).
–
Atmospheric pollution.
–
Towing.
–
Driving with a space-saver type spare wheel
or snow chains fitted.
–
T
yre repaired using the temporary puncture
repair kit.
–
Y
oung drivers.
The system may not display the speed limit if it
does not detect a speed limit sign within a preset
period and in the following situations:
–
Road signs that are obstructed, non-standard,
damaged or bent.
–
Obsolete or incorrect maps.
Recommendation
In addition to Speed Limit Recognition and
Recommendation, the driver can select the
speed displayed as a speed setting for the speed
limiter or cruise control using the speed limiter or
cruise control 'store' button.
For more information on the Speed
limiter, Cruise control or Adaptive
cruise control, refer to the corresponding
sections.
Steering-mounted controls
1. Speed limiter/cruise control mode selection
2. Memorise the speed setting
Information displayed on the
instrument panel
3.Speed limit indication
4. Speed memorisation prompt
5. Current speed setting
Storing the speed setting
► Switch on the speed limiter/cruise control.
The speed limiter/cruise control information is
displayed.
Upon detecting a sign suggesting a new speed
setting, the system displays the value and
"MEM" flashes for a few seconds, prompting you
to save it as a new speed setting.
If there is a difference of less than 6 mph
(9 km/h) between the speed setting and
the speed displayed by the Speed Limit
Recognition and Recommendation, the
"MEM" symbol is not displayed.
Depending on the road conditions, several
speeds may be displayed.
Page 136 of 292
134
Driving
To return to the speed setting, release the
accelerator pedal (when the set speed is
reached again, the displayed speed stops
flashing).
Operating limits
Never use the system in the following
situations:
–
In an urban area with the risk of
pedestrians crossing the road.
–
In heavy traffic (except versions with the
Stop & Go function).
–
On winding or steep roads.
–
On slippery or flooded roads.
–
In poor weather conditions.
–
In the event of restricted visibility for the
driver
.
–
Driving on a speed circuit.
–
Driving on a rolling road.
–
When using a ‘space-saver
’ type spare
wheel.
–
When using snow chains, non-slip covers
or studded tyres.
Cruise control
For more information, refer to the
General recommendations on the use
of driving and manoeuvring aids and the
Cruise control - particular
recommendations.
This system automatically maintains the vehicle’s speed at the value programmed
by the driver (speed setting), without the use of
the accelerator pedal.
Cruise control is switched on manually.
It requires a minimum vehicle speed of 25 mph
(40
km/h).
With a manual gearbox, third gear or higher must
be engaged.
With an automatic gearbox, mode
D
or second
gear or higher in mode
M
must be engaged.
Cruise control remains active after
changing gear on engines fitted with a
manual gearbox and Stop & Start.
Switching off the ignition cancels any
speed setting.
Steering-mounted control
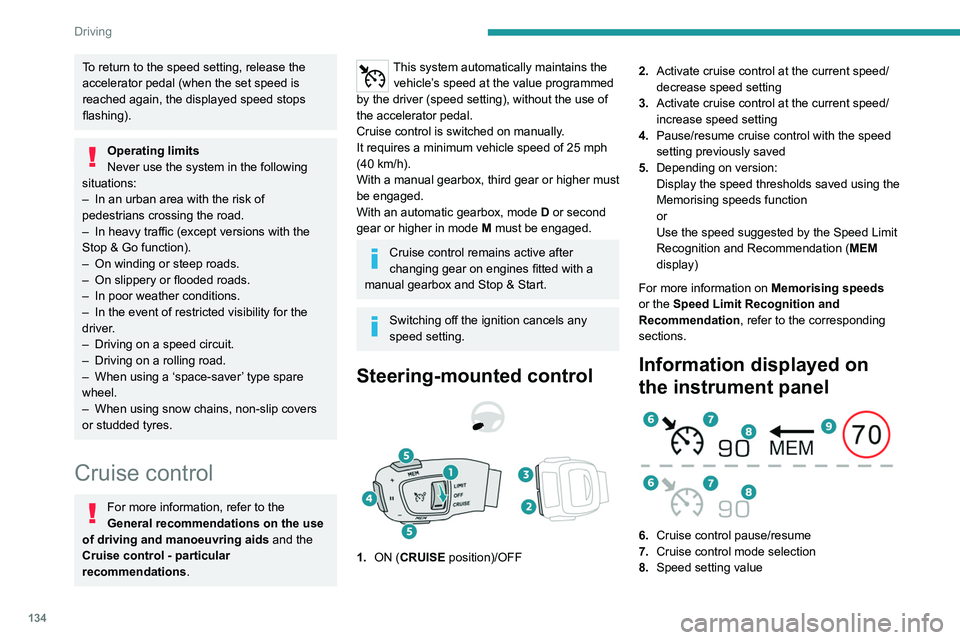
1. ON (CRUISE position)/OFF 2.
Activate cruise control at the current speed/
decrease speed setting
3. Activate cruise control at the current speed/
increase speed setting
4. Pause/resume cruise control with the speed
setting previously saved
5. Depending on version:
Display the speed thresholds saved using the
Memorising speeds function
or
Use the speed suggested by the Speed Limit
Recognition and Recommendation ( MEM
display)
For more information on Memorising speeds
or the Speed Limit Recognition and
Recommendation, refer to the corresponding
sections.
Information displayed on
the instrument panel
6. Cruise control pause/resume
7. Cruise control mode selection
8. Speed setting value
9.Speed suggested by the Speed Limit
recognition and recommendation system
(depending on version)
Switching on/pausing
► Turn thumbwheel 1 to the "CRUISE" position
to select cruise control mode; the function is
paused.
► Press button 2 or 3 to activate cruise control
and save a speed setting when the vehicle has
reached the desired speed; the vehicle’s current
speed is saved as the speed setting.
► Release the accelerator pedal.
► Pressing button 4 temporarily pauses the
function.
► Pressing button 4 again restores operation of
the cruise control (ON).
Page 150 of 292
148
Driving
It is the driver's responsibility to continuously
monitor traffic conditions in accordance with
applicable driving regulations.
As soon as the system detects a potential obstacle, it prepares the braking
circuit in case automatic braking is needed.
This may cause a slight noise and a slight
sensation of deceleration.
Deactivation/Activation
By default, the system is automatically activated
at every engine start.
The settings are changed via the Driving/Vehicle touch screen menu.
Deactivation of the system is signalled by
the illumination of this warning lamp,
accompanied by the display of a message.
Operating conditions and
limits
Vehicle moving forward.
ESC system operational.
DSC/ASR systems activated.
Seat belts fastened for all passengers.
Stabilised speed on roads with few bends.
In the following cases, deactivating the system
via the vehicle's configuration menu is advised:
–
T
owing a trailer.
–
Carrying long objects on roof bars.
–
V
ehicle with snow chains fitted.
– Before using an automatic car wash, with the
engine running.
–
Before placing the vehicle on a rolling road in
a workshop.
–
T
owed vehicle, engine running.
–
Damaged front bumper (version with radar).
–
Following
an impact to the windscreen close to
the detection camera.
The system is automatically deactivated once the use of a different diameter
"space-saver" type spare wheel is detected,
or if a fault with the two lateral brake lamps is
detected.
It can be dangerous to drive if the brake
lamps are not in perfect working order.
It is possible that warnings are not given,
are given too late or seem unjustified.
The driver must always stay in control of the
vehicle and be prepared to react at any time
to avoid an accident.
Following an impact, the system is
automatically deactivated.
Have it checked by a PEUGEOT dealer or a
qualified workshop.
Distance Alert
This function warns the driver that their vehicle
is at risk of a collision with the vehicle in front, or with a pedestrian or cyclist present in their traffic
lane.
Modifying the alert trigger threshold
This trigger threshold determines the sensitivity
with which the function warns of the risk of
collision.
The threshold is set via the
Driving/Vehicle touch screen menu.
►
Select one of the three pre-defined
thresholds: "Far", "Normal" or "Close".
The last threshold selected is memorised when
the ignition is switched off.
Operation
Depending on the degree of risk of collision
detected by the system and the alert trigger
threshold chosen by the driver, several different
levels of alert may be triggered and displayed on
the instrument panel.
The system takes account of the vehicle
dynamics, the speed of your vehicle and the one
in front, the environmental conditions and the
operation of the vehicle (actions on the pedals,
steering wheel, etc.) to trigger the alert at the
most relevant moment.
(orange)
Level 1: visual alert only, warning you that
the vehicle in front is very close.
The message
"Vehicle close" is displayed.
(red)
Level 2: visual and audible alert, warning
you that a collision is imminent.
The message "Brake! " is displayed.
Where the speed of your vehicle is too
high approaching another vehicle, the
first level of alert may not be displayed: the
level 2 alert may be displayed directly.
Important: the level 1 alert is not displayed
when there is a stationary obstacle or
when the "Near " trigger threshold has been
selected.
Intelligent emergency
braking assistance (iEBA)
This function supplements braking in the event
that the driver brakes, but not enough to avoid a
collision.
This assistance will only be provided if the driver
presses the brake pedal.
Page 179 of 292
177
Practical information
7These points are concealed by the vehicle doors
when the doors are closed.
The roof bar fixings have a stud which must be
inserted into the opening of each fixing point.
Maximum load distributed over the
transverse roof bars, for a loading height
not exceeding 40 cm (except bicycle carrier):
80
kg.
As this value may change, please verify the
maximum load quoted in the guide supplied
with the roof bars.
If the height exceeds 40 cm, adapt the speed
of the vehicle to the profile of the road to
avoid damaging the roof bars and the fixings
on the vehicle.
Be sure to refer to national legislation in order
to comply with the regulations for transporting
objects that are longer than the vehicle.
Recommendations
Distribute the load uniformly, taking care
to avoid overloading one of the sides.
Arrange the heaviest part of the load as close
as possible to the roof.
Secure the load firmly.
Drive gently: the vehicle will be more
susceptible to the effects of side winds and its
stability may be affected.
Regularly check the security and tight
fastening of the roof bars, at least before each
trip.
Remove the roof bars once they are no longer
needed.
Sunroof
Check that the load does not pass below
the roof bars so that it does not impede the
movements of the sunroof - risk of major
damage!
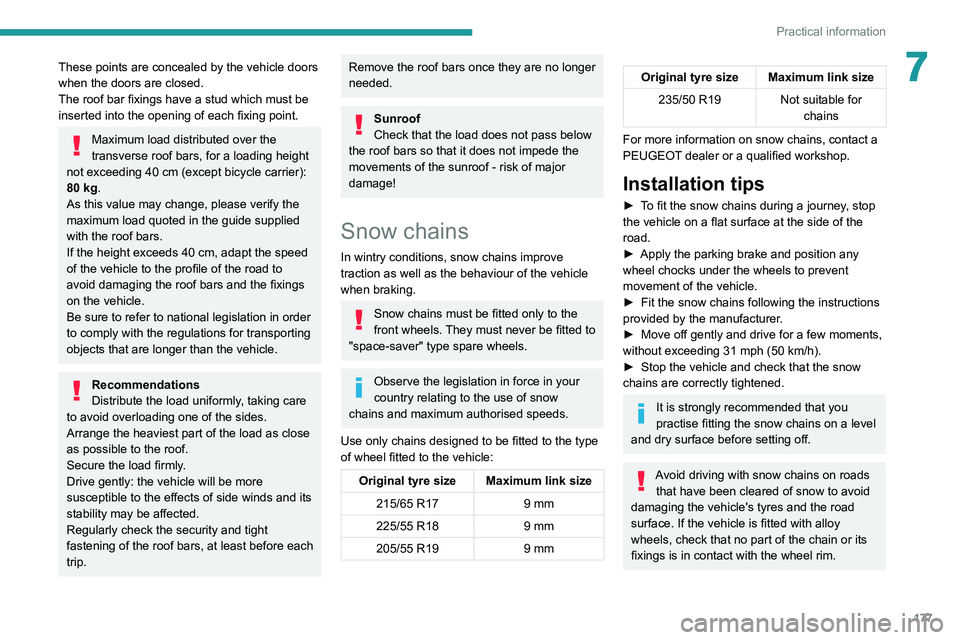
Snow chains
In wintry conditions, snow chains improve
traction as well as the behaviour of the vehicle
when braking.
Snow chains must be fitted only to the
front wheels. They must never be fitted to
"space-saver" type spare wheels.
Observe the legislation in force in your
country relating to the use of snow
chains and maximum authorised speeds.
Use only chains designed to be fitted to the type
of wheel fitted to the vehicle:
Original tyre size Maximum link size 215/65 R17 9 mm
225/55 R18 9 mm
205/55 R19 9 mm
Original tyre size Maximum link size
235/50 R19 Not suitable for
chains
For more information on snow chains, contact a
PEUGEOT dealer or a qualified workshop.
Installation tips
► To fit the snow chains during a journey, stop
the vehicle on a flat surface at the side of the
road.
►
Apply the parking brake and position any
wheel chocks under the wheels to prevent
movement of the vehicle.
►
Fit the snow chains following the instructions
provided by the manufacturer
.
►
Move off gently and drive for a few moments,
without exceeding 31
mph (50 km/h).
►
Stop the vehicle and check that the snow
chains are correctly tightened.
It is strongly recommended that you
practise fitting the snow chains on a level
and dry surface before setting off.
Avoid driving with snow chains on roads that have been cleared of snow to avoid
damaging the vehicle's tyres and the road
surface. If the vehicle is fitted with alloy
wheels, check that no part of the chain or its
fixings is in contact with the wheel rim.
Page 180 of 292
178
Practical information
Rechargeable hybrid vehicles
The use of snow chains is only
authorised on the front wheels.
The driving mode selector must be on the
4WD position (depending on version).
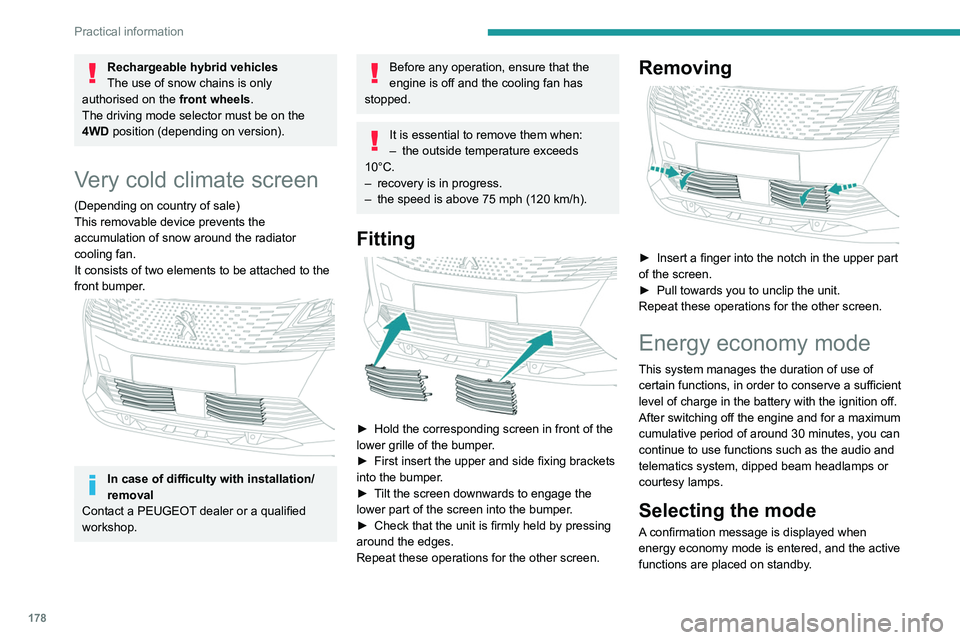
Very cold climate screen
(Depending on country of sale)
This removable device prevents the
accumulation of snow around the radiator
cooling fan.
It consists of two elements to be attached to the
front bumper.
In case of difficulty with installation/
removal
Contact a PEUGEOT dealer or a qualified
workshop.
Before any operation, ensure that the
engine is off and the cooling fan has
stopped.
It is essential to remove them when:
– the outside temperature exceeds
10°C.
–
recovery is in progress.
–
the speed is above 75 mph (120
km/h).
Fitting
► Hold the corresponding screen in front of the
lower grille of the bumper .
►
First insert the upper and side fixing brackets
into the bumper
.
►
T
ilt the screen downwards to engage the
lower part of the screen into the bumper.
►
Check that the unit is firmly held by pressing
around the edges.
Repeat these operations for the other screen.
Removing
► Insert a finger into the notch in the upper part
of the screen.
►
Pull towards you to unclip the unit.
Repeat these operations for the other screen.
Energy economy mode
This system manages the duration of use of
certain functions, in order to conserve a sufficient
level of charge in the battery with the ignition off.
After switching off the engine and for a maximum
cumulative period of around 30 minutes, you can
continue to use functions such as the audio and
telematics system, dipped beam headlamps or
courtesy lamps.
Selecting the mode
A confirmation message is displayed when
energy economy mode is entered, and the active
functions are placed on standby.
If a telephone call is in progress at the
time, it will be maintained for around 10
minutes via the audio system’s hands-free
system.
Exiting the mode
These functions are automatically reactivated the
next time the vehicle is used.
To restore the use of these functions
immediately, start the engine and let it run:
– For less than 10 minutes, to use the
equipment for approximately 5 minutes.
– For more than 10 minutes, to use the
equipment for approximately 30 minutes.
Let the engine run for the specified duration to
ensure that the battery charge is sufficient.
To recharge the battery, avoid repeatedly or
continuously restarting the engine.
A flat battery prevents the engine from starting.
For more information on the 12 V battery,
refer to the corresponding section.
Load reduction mode
This system manages the use of certain
functions according to the level of charge
remaining in the battery.
When the vehicle is being driven, the load
reduction function temporarily deactivates certain
Page 268 of 292
266
Alphabetical index
Regenerative braking (deceleration
by engine braking)
120
Reinitialisation of the under-inflation
detection system
126
Reinitialising the remote control
32
Reminder, lighting on
74
Remote control
26–30
Remote functions
25, 173
Remotely operable functions (Rechargeable
hybrid)
25, 61
Removing a wheel
198–199
Removing the mat
65
Replacing bulbs
200–201
Replacing fuses
201–202
Replacing the air filter
183
Replacing the oil filter
183
Replacing the passenger compartment
filter
183
Reservoir, screenwash
182
Resetting the trip recorder
21
Reset trip
22
Rev counter
9
Reversing camera
127, 154–156
Reversing lamps
201
Roof bars
176–177
Running out of fuel (Diesel)
189
S
Safety, children 95–99, 101–102,
105–106, 107
Saturation of the particle filter (Diesel)
183
Screen menu map 230
Screens, very cold conditions
178
Screenwash
81
Screenwash, front
81
Screenwash, rear
81
SCR (Selective Catalytic Reduction)
19, 184
Seat belts
91–92, 94, 100
Seat belts, rear
92–93
Seat, rear bench
48–49
Seats, additional
53–55
Seats, electric
45–46
Seats, front
43, 45–46
Seats, heated
46
Seats, rear
48–55, 98
Selector, gear
116–120
Sensors (warnings)
127
Serial number, vehicle
222
Service indicator
17, 21
Servicing
17, 183–184
Settings, equipment
23, 25
Settings, system
233, 256
Sidelamps
75, 200–201
Silent vehicle warning sound (Rechargeable
hybrid)
85
Ski flap
67
Smartphone
25, 64
Snow chains
125, 177–178
Snow screen
178
Socket, 12 V accessory
62, 66, 72
Socket, auxiliary
229, 251
Socket, Jack
251
Speakers
63
Speed limiter
128, 130–133Speed limit recognition 128, 130
Speedometer
9, 127
Sport mode
122–123
Spotlamps, side
77
Stability control (ESC)
87–88, 90
Starting a Diesel engine
163
Starting the engine
11 2
Starting the vehicle
111, 116–119
Starting using another battery
113, 206
State of charge, battery
24
Station, radio
226–227, 250
Stay, bonnet
179–180
Steering mounted controls, audio
224, 237
Steering wheel, adjustment
47
Stickers, customising ~ Stickers,
expressive
188
Stopping the vehicle
112, 116–119
Stop & Start
23, 57, 60, 123–124, 163, 179, 183, 209
Storage
62, 64–65, 67–68
Storage box
72
Storage boxes
68
Storage compartments
62
Storage wells
72
Storing driving positions
45–46
Sunroof, panoramic
39–41
Sunshine sensor
56
Sun visor
62
Suspension
184
Synchronising the remote control
32