2021 PEUGEOT 5008 key
[x] Cancel search: keyPage 256 of 292

254
PEUGEOT Connect Nav
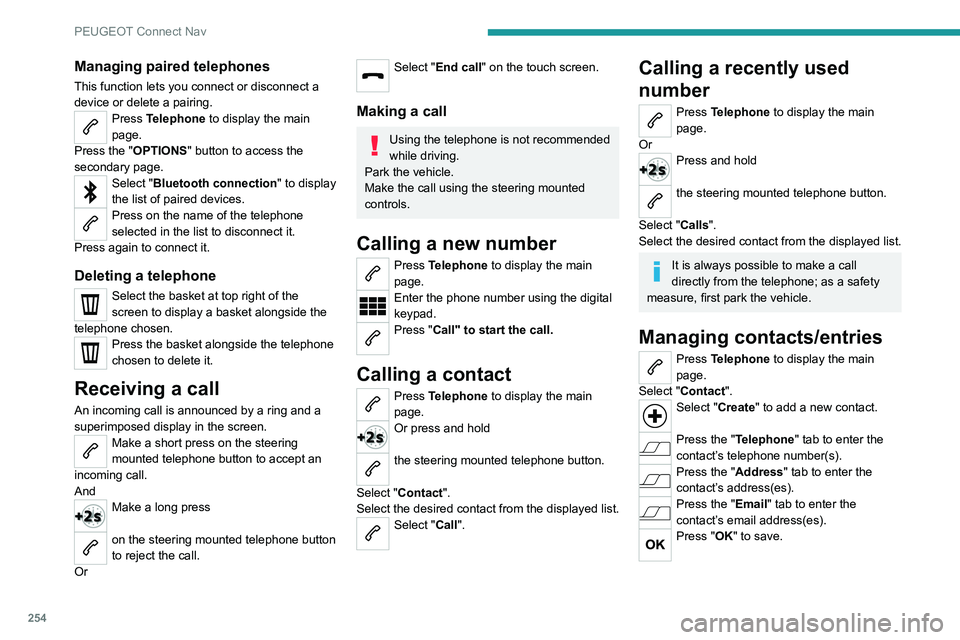
Managing paired telephones
This function lets you connect or disconnect a
device or delete a pairing.
Press Telephone to display the main
page.
Press the "OPTIONS " button to access the
secondary page.
Select "Bluetooth connection" to display
the list of paired devices.
Press on the name of the telephone
selected in the list to disconnect it.
Press again to connect it.
Deleting a telephone
Select the basket at top right of the
screen to display a basket alongside the
telephone chosen.
Press the basket alongside the telephone
chosen to delete it.
Receiving a call
An incoming call is announced by a ring and a
superimposed display in the screen.
Make a short press on the steering
mounted telephone button to accept an
incoming call.
And
Make a long press
on the steering mounted telephone button
to reject the call.
Or
Select "End call" on the touch screen.
Making a call
Using the telephone is not recommended
while driving.
Park the vehicle.
Make the call using the steering mounted
controls.
Calling a new number
Press Telephone to display the main
page.
Enter the phone number using the digital
keypad.
Press "Call" to start the call.
Calling a contact
Press Telephone to display the main
page.
Or press and hold
the steering mounted telephone button.
Select "Contact".
Select the desired contact from the displayed list.
Select "Call".
Calling a recently used
number
Press Telephone to display the main
page.
Or
Press and hold
the steering mounted telephone button.
Select "Calls".
Select the desired contact from the displayed list.
It is always possible to make a call
directly from the telephone; as a safety
measure, first park the vehicle.
Managing contacts/entries
Press Telephone to display the main
page.
Select "Contact".
Select "Create" to add a new contact.
Press the "Telephone " tab to enter the
contact’s telephone number(s).
Press the "Address" tab to enter the
contact’s address(es).
Press the "Email" tab to enter the
contact’s email address(es).
Press "OK" to save.
Press this button to sort contacts by
Surname+first name or by First
name+surname.
The "Email" function allows email addresses to be entered for a contact,
but the system is not able to send emails.
Managing messages
Press Telephone to display the main
page.
Press the "OPTIONS " button to access the
secondary page.
Select "Messages" to display the list of
messages.
Select the "All", "Incoming " or "Sent”
tab.
Select the details of the message chosen
in one of the lists.
Press "Answer" to send a quick message
stored in the system.
Press "Call" to start the call.
Press " Play" to listen to the message.
Access to "Messages " depends on the
compatibility between the smartphone
and the onboard system.
Some smartphones retrieve messages or
email messages more slowly than others.
Page 258 of 292

256
PEUGEOT Connect Nav
The "Position” settings (All passengers,
Driver and Front only) are common to all
sources.
Activate or deactivate "Touch tones ",
"Volume linked to speed " and "Auxiliary
input ".
Onboard audio: Arkamys Sound Staging©
optimises the sound distribution inside
the passenger compartment.
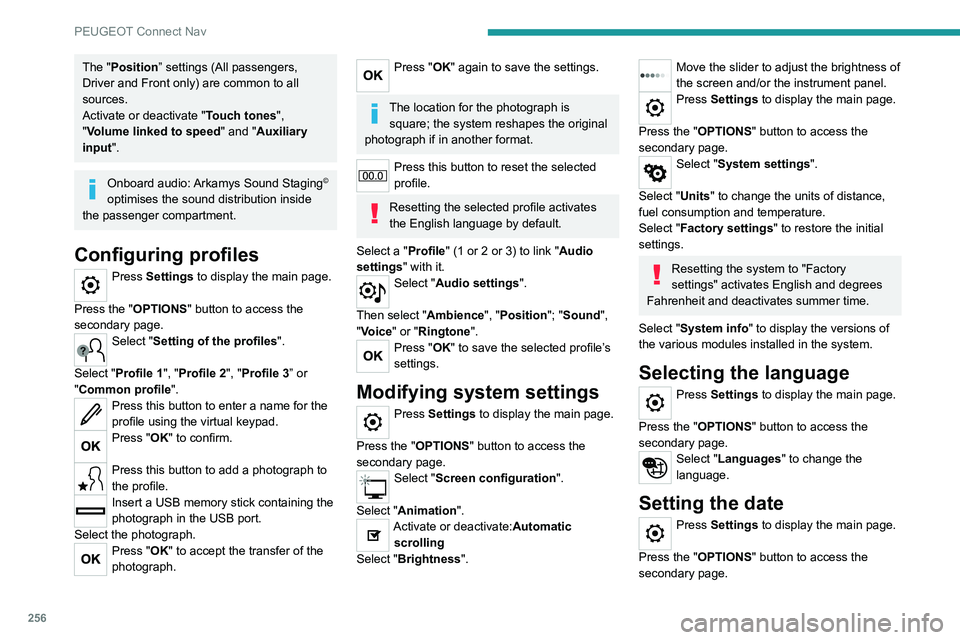
Configuring profiles
Press Settings to display the main page.
Press the "OPTIONS " button to access the
secondary page.
Select "Setting of the profiles".
Select "Profile 1", "Profile 2", "Profile 3” or
"Common profile ".
Press this button to enter a name for the
profile using the virtual keypad.
Press "OK" to confirm.
Press this button to add a photograph to
the profile.
Insert a USB memory stick containing the
photograph in the USB port.
Select the photograph.
Press "OK" to accept the transfer of the
photograph.
Press "OK" again to save the settings.
The location for the photograph is square; the system reshapes the original
photograph if in another format.
Press this button to reset the selected
profile.
Resetting the selected profile activates
the English language by default.
Select a "Profile" (1 or 2 or 3) to link "Audio
settings" with it.
Select "Audio settings".
Then select "Ambience", "Position"; "Sound ",
"Voice" or "Ringtone ".
Press "OK" to save the selected profile’s
settings.
Modifying system settings
Press Settings to display the main page.
Press the "OPTIONS " button to access the
secondary page.
Select "Screen configuration".
Select "Animation".
Activate or deactivate:Automatic scrolling
Select "Brightness".
Move the slider to adjust the brightness of
the screen and/or the instrument panel.
Press Settings to display the main page.
Press the "OPTIONS " button to access the
secondary page.
Select "System settings".
Select "Units" to change the units of distance,
fuel consumption and temperature.
Select "Factory settings" to restore the initial
settings.
Resetting the system to "Factory
settings" activates English and degrees
Fahrenheit and deactivates summer time.
Select "System info" to display the versions of
the various modules installed in the system.
Selecting the language
Press Settings to display the main page.
Press the "OPTIONS " button to access the
secondary page.
Select "Languages" to change the
language.
Setting the date
Press Settings to display the main page.
Press the "OPTIONS " button to access the
secondary page.
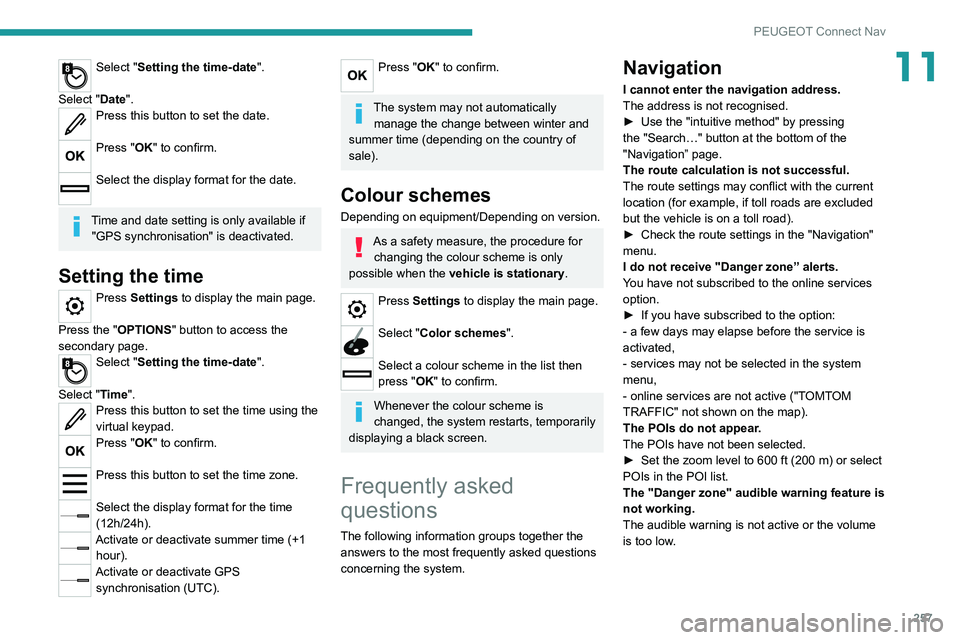
Select "Setting the time-date".
Select "Date".
Press this button to set the date.
Press "OK" to confirm.
Select the display format for the date.
Time and date setting is only available if "GPS synchronisation" is deactivated.
Setting the time
Press Settings to display the main page.
Press the "OPTIONS " button to access the
secondary page.
Select "Setting the time-date".
Select "Time".
Press this button to set the time using the
virtual keypad.
Press "OK" to confirm.
Press this button to set the time zone.
Select the display format for the time
(12h/24h).
Activate or deactivate summer time (+1 hour).
Activate or deactivate GPS synchronisation (UTC).
Page 259 of 292

257
PEUGEOT Connect Nav
11Select "Setting the time-date".
Select "Date".
Press this button to set the date.
Press "OK" to confirm.
Select the display format for the date.
Time and date setting is only available if "GPS synchronisation" is deactivated.
Setting the time
Press Settings to display the main page.
Press the "OPTIONS " button to access the
secondary page.
Select "Setting the time-date".
Select "Time".
Press this button to set the time using the
virtual keypad.
Press "OK" to confirm.
Press this button to set the time zone.
Select the display format for the time
(12h/24h).
Activate or deactivate summer time (+1 hour).
Activate or deactivate GPS synchronisation (UTC).
Press "OK" to confirm.
The system may not automatically manage the change between winter and
summer time (depending on the country of
sale).
Colour schemes
Depending on equipment/Depending on version.
As a safety measure, the procedure for changing the colour scheme is only
possible when the vehicle is stationary.
Press Settings to display the main page.
Select "Color schemes ".
Select a colour scheme in the list then
press "OK" to confirm.
Whenever the colour scheme is
changed, the system restarts, temporarily
displaying a black screen.
Frequently asked
questions
The following information groups together the answers to the most frequently asked questions
concerning the system.
Navigation
I cannot enter the navigation address.
The address is not recognised.
►
Use the "intuitive method" by pressing
the "Search…" button at the bottom of the
"Navigation” page.
The route calculation is not successful.
The route settings may conflict with the current
location (for example, if toll roads are excluded
but the vehicle is on a toll road).
►
Check the route settings in the "Navigation"
menu.
I do not receive "Danger zone” alerts.
Y
ou have not subscribed to the online services
option.
►
If you have subscribed to the option:
- a few days may elapse before the service is
activated,
- services may not be selected in the system
menu,
- online services are not active ("T
OMTOM
TRAFFIC" not shown on the map).
The POIs do not appear.
The POIs have not been selected.
►
Set the zoom level to 600 ft (200 m) or select
POIs in the POI list.
The "Danger zone" audible warning feature is
not working.
The audible warning is not active or the volume
is too low
.
Page 266 of 292

264
Alphabetical index
Histogramme, fuel consumption 24–25
Horn
85
Hybrid
220
I
i-Cockpit® amplify function 46
Ignition
113, 254
Ignition on
11 3
Immobiliser, electronic
111
Indicator, AdBlue® range
18
Indicator, coolant temperature
18
Indicator, engine oil level
17, 21
Indicators, direction
75
Inflating tyres
184, 222
Inflating tyres and accessories
(using the kit)
192, 195
Infrared camera
79, 127
Instrument panel
9–10, 21–22, 127
Instrument panel (Rechargeable hybrid)
9
Intelligent Traction Control
87
Internet browser
245, 248
ISOFIX mountings
102
J
Jack 192, 195–197, 251
Jump starting
206
K
Key 26–27, 30–31
Key, electronic
28–29
Keyless Entry and Starting
28–29, 111–112
Key not recognised
11 3
Key with remote control
26, 111
Kit, hands-free
231, 253
Kit, puncture repair
190–192
Kit, temporary puncture repair
190–193, 195
L
Labels, identification 222
Lamp, boot
73
Lamps, parking
75
Lamps, rear
201
Lams with Full LED technology
76, 78
Lane assist
135, 140–141
Lane departure warning active
144, 152
Lane Departure Warning System
(LDWS)
143–144
Leather (care)
188
LEDs - Light-emitting diodes
75, 200–201
Level, AdBlue®
182
Level, brake fluid
182
Level, Diesel additive
182–183
Level, engine coolant
18, 182
Level, engine oil
17, 181
Levels and checks
181–183
Level, screenwash fluid
81, 182
Light-emitting diodes - LEDs 75, 200–201
Lighting, cornering
78–79
Lighting dimmer
21
Lighting, exterior
74, 77
Lighting, guide-me home
27, 77
Lighting, interior
66–67
Lighting, mood
21, 66
Lighting, welcome
77
Loading
70–71, 176–177
Load reduction mode
179
Locating your vehicle
27
Locking
27, 29
Locking from the inside
30
Locking the doors
30
Long objects, transporting
67
Low fuel level
163
M
Mains socket (domestic network) 166
Maintenance (advice)
165, 187
Maintenance, routine
127, 183–184
Manoeuvring aids (recommendations)
126
Map reading lamps
66
Markings, identification
222
Massage function
46
Massage, multi-point
46
Mat
65, 127
Memorising a speed
128
Menu
230
Menu, main
23