2021 Peugeot 308 keyless entry
[x] Cancel search: keyless entryPage 28 of 244

26
Access
For all work on the alarm system, contact a
PEUGEOT dealer or a qualified workshop.
Locking the vehicle with full
alarm system
Activation
► Switch off the engine and exit the vehicle.► Lock the vehicle using the remote
control.
or
► Lock the vehicle with the " Keyless Entry and
Starting" system.
The monitoring system is active: the indicator
lamp in the button flashes once per second and
the direction indicators come on for about 2
seconds.
After an instruction to lock the vehicle using
the remote control or the " Keyless Entry
and Starting" system, the exterior perimeter
monitoring is activated after 5 seconds, the
interior volumetric monitoring after 45 seconds.
If a door, boot, bonnet, etc. is not properly
closed, the vehicle is not locked but monitoring
will be activated after 45 seconds.
Deactivation
► Press this unlocking button on the
remote control.
or
* Only cases valid for GTi vehicles fitted with just the anti-tilt alarm.
when moving (speed above 6 mph (10 km/h)), a
message appears for a few seconds.
In the event of a fault or difficulties felt in
manoeuvring the tailgate when opening
or closing it, have it quickly checked by a
PEUGEOT dealer or a qualified workshop to
stop this issue getting worse and so as to not
cause the tailgate to drop, and serious
injuries.
Back-up control
System allowing the mechanical unlocking of the
boot in the event of a battery or central locking
system malfunction.
Unlocking
► Fold the rear seats down to gain access to
the lock from inside the boot.
►
Insert a small screwdriver into hole A
in the
lock to unlock the boot.
► Move the latch to the right.
Locking again after closing
If the fault persists after closing again, the boot
will remain locked.
Bicycle/accessory carrier
Do not fit an accessory carrier to the
tailgate.
Alarm
System which protects and provides a deterrent
against theft and break-ins.
It provides the following types of monitoring:
Exterior perimeter
The system checks for opening of the vehicle.
The alarm is triggered if anyone tries to open a
door, the boot or the bonnet.
Interior volumetric
The system checks for any variation in volume in
the passenger compartment.
The alarm is triggered if anyone breaks a
window, enters the passenger compartment or
moves inside the vehicle.
For vehicles that are fitted with it, interior
volumetric monitoring is incompatible
with programmed thermal preconditioning.
Anti-tilt
(On GTi version.)
The system checks for any change in the attitude
of the vehicle.
The alarm is triggered if the vehicle is lifted,
moved or knocked.
Self-protection function
The system checks for any malfunction
in its components.
The alarm is triggered if the battery, button or
siren wiring is disconnected or damaged.
Page 29 of 244
27
Access
2For all work on the alarm system, contact a
PEUGEOT dealer or a qualified workshop.
Locking the vehicle with full
alarm system
Activation
► Switch off the engine and exit the vehicle.► Lock the vehicle using the remote
control.
or
►
Lock the vehicle with the "
Keyless Entry and
Starting" system.
The monitoring system is active: the indicator
lamp in the button flashes once per second and
the direction indicators come on for about 2
seconds.
After an instruction to lock the vehicle using
the remote control or the "
Keyless Entry
and Starting" system, the exterior perimeter
monitoring is activated after 5 seconds, the
interior volumetric monitoring after 45 seconds.
If a door
, boot, bonnet, etc. is not properly
closed, the vehicle is not locked but monitoring
will be activated after 45 seconds.
Deactivation
► Press this unlocking button on the
remote control.
or
* Only cases valid for GT i vehicles fitted with just the anti-tilt alarm.
► Unlock the vehicle with the " Keyless Entry
and Starting" system.
The monitoring system is deactivated: the
indicator lamp in the button goes off and the
direction indicators flash for about 2 seconds.
Where the vehicle locks itself again
automatically (occurs 30 seconds after
unlocking, if a door or the boot is not opened),
the monitoring system is not reactivated
automatically.
To reactivate it, the vehicle must be unlocked
and locked again, using the remote control
key or the "
Keyless Entry and Starting"
system.
Locking the vehicle
with exterior perimeter
monitoring only
Deactivate the interior volumetric monitoring
(and anti-tilt monitoring if fitted to your vehicle) to
avoid unwanted triggering of the alarm in cases
such as:
–
Passengers are inside the vehicle.
–
Leaving a window partially open.
–
W
ashing your vehicle.
–
Changing a wheel*.
–
Having your vehicle towed*.
–
T
ransport by ship or ferry*.
Deactivating the interior volumetric
and anti-tilt monitoring
► Switch off the ignition and within ten
seconds, press this button until the
indicator lamp comes on fixed.
►
Get out of the vehicle.
► Lock the vehicle immediately using the
remote control or the " Keyless Entry and
Starting" system.
The exterior perimeter monitoring alone is
activated: the indicator lamp in the button flashes
once per second.
T
o take effect, this deactivation must be carried
out each time the ignition is switched off.
Reactivating the interior volumetric
monitoring
The anti-tilt alarm is also reactivated, if your
vehicle has one.
► Deactivate exterior perimeter
monitoring by unlocking the vehicle using
the remote control or the "
Keyless Entry and
Starting" system.
The indicator lamp in the button goes off.
►
Reactivate the full alarm system by locking
the vehicle using the remote control or the "
Keyless Entry and Starting" system.
The indicator lamp in the button again flashes
once per second.
Page 30 of 244
28
Access
If the indicator lamp is on, the rear controls are
deactivated.
If the indicator lamp is off, the rear controls are
activated.
Reinitialising the electric
windows
Following reconnection of the battery, the safety
anti-pinch function must be reinitialised.
The anti-pinch function is disabled during the
following operations:
– bring the window down completely, then bring
it back up. It will go up by a few centimetres with
each press. Perform the operation again until the
window is fully closed,
– continue to pull the switch upwards for at least
one second after reaching the window closed
position.
Always remove the key when leaving the vehicle, even for a short time.
In the event of contact (pinching) during
operation of the windows, you must reverse
the movement of the window. To do this,
press the switch concerned.
When operating the passenger electric
window controls, the driver must ensure
that no one is preventing the closing of the
windows.
The driver must ensure that passengers use
the electric windows correctly.
Be aware of children when operating the
windows.
Triggering of the alarm
This is indicated by sounding of the siren and
flashing of the direction indicators for thirty
seconds.
The monitoring functions remain active until
the alarm has been triggered eleven times in
succession.
When the vehicle is unlocked using the
remote control or the " Keyless Entry and
Starting" system, rapid flashing of the indicator
lamp in the button informs you that the alarm
was triggered during your absence.
When the ignition is switched on, this flashing
stops immediately
.
Failure of the remote control
To deactivate the monitoring functions:
► Unlock the vehicle using the key (built into
the remote control) in the driver's door lock.
►
Open the door; this sets off the alarm.
►
Switch the ignition on; the alarm stops.
The
indicator lamp in the button
goes off.
Locking the vehicle without
activating the alarm
► Lock or deadlock the vehicle using the key
(built into the remote control) in the driver's door
lock.
Malfunction
When the ignition is switched on, fixed
illumination of the indicator lamp in the
button indicates a fault with the system.
Have the system checked by a PEUGEOT
dealer or a qualified workshop.
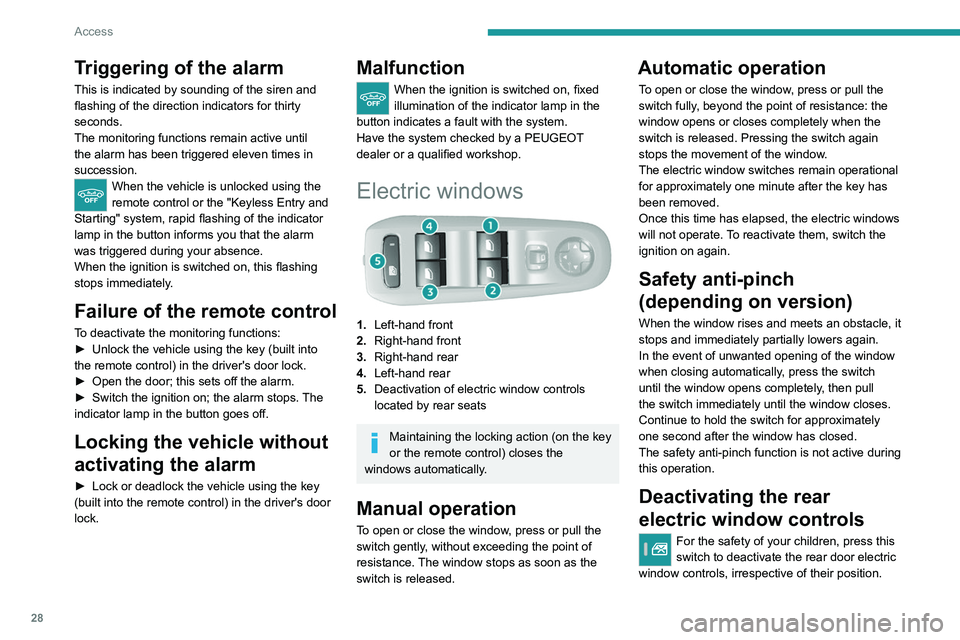
Electric windows
1. Left-hand front
2. Right-hand front
3. Right-hand rear
4. Left-hand rear
5. Deactivation of electric window controls
located by rear seats
Maintaining the locking action (on the key
or the remote control) closes the
windows automatically.
Manual operation
To open or close the window, press or pull the
switch gently, without exceeding the point of
resistance. The window stops as soon as the
switch is released.
Automatic operation
To open or close the window, press or pull the
switch fully, beyond the point of resistance: the
window opens or closes completely when the
switch is released. Pressing the switch again
stops the movement of the window.
The electric window switches remain operational
for approximately one minute after the key has
been removed.
Once this time has elapsed, the electric windows
will not operate. To reactivate them, switch the
ignition on again.
Safety anti-pinch
(depending on version)
When the window rises and meets an obstacle, it
stops and immediately partially lowers again.
In the event of unwanted opening of the window
when closing automatically, press the switch
until the window opens completely, then pull
the switch immediately until the window closes.
Continue to hold the switch for approximately
one second after the window has closed.
The safety anti-pinch function is not active during
this operation.
Deactivating the rear
electric window controls
For the safety of your children, press this
switch to deactivate the rear door electric
window controls, irrespective of their position.
Page 36 of 244

34
Ease of use and comfort
They can also be folded for parking in narrow
spaces.
Demisting - Defrosting
Demisting-defrosting of the door mirrors
operates with the engine running, by
switching on the heated rear screen.
For more information on Demisting and
defrosting the rear screen, refer to the
associated section.
Adjustment
► Move control A to the right or to the left to
select the corresponding mirror.
►
Move control
B in any of the four directions
to adjust.
►
Return control A
to the central position.
As a safety measure, the mirrors should be adjusted to reduce "blind spots".
Objects that you see in the mirrors are in fact
closer than they appear.
Take this into account in order to correctly
judge the distance of vehicles approaching
from behind.
Folding
► From outside: lock the vehicle using the
electronic key or the " Keyless Entry and Starting"
system.
►
From inside: with the ignition on, pull the
control
A in the central position rearwards.
If the mirrors are folded using control A,
they will not unfold when the vehicle is
unlocked. Pull again on control A.
Unfolding
► From outside: unlock the vehicle using the
electronic key or the " Keyless Entry and Starting"
system.
►
From inside: with the ignition on, pull the
control
A in the central position rearwards.
The folding and unfolding of the door mirrors using the remote control can be
deactivated by a PEUGEOT dealer or a
qualified workshop.
If necessary, the mirrors can be folded
manually.
Rear view mirror
Equipped with an anti-dazzle system, which
darkens the mirror glass and reduces the
nuisance to the driver caused by the sun,
headlights of other vehicles, etc.
Manual model
Adjustment
► Adjust the mirror so that the mirror is directed
correctly in the "day" position.
Day / night position
► Pull the lever to change to the "night" anti-
dazzle position.
►
Push the lever to change to the normal "day"
position.
Automatic "electrochrome" model
This system automatically and progressively
changes between day and night use by means
of a sensor measuring the light coming from the
rear of the vehicle.
In order to ensure optimum visibility
during your manoeuvres, the mirror
Page 86 of 244
84
Driving
► Press the "START/STOP" button; the
instrument panel comes on but the engine does
not start.
► Press the button again to switch off the
ignition and allow the vehicle to be locked.
With the ignition on, the system
automatically goes into energy economy
mode to maintain an adequate state of charge
in the battery.
Key not detected
Back-up starting
down on its blade in the ignition switch and
could cause a malfunction.
Key left in
If the key has been left in the ignition
switch at position 2 (Ignition on), the ignition
will be switched off automatically after one
hour.
To switch the ignition back on, turn the key
to position 1 (Stop), then back to position 2
(Ignition on) .
Starting/switching off the
engine,"
Keyless
Entry
and Starting"
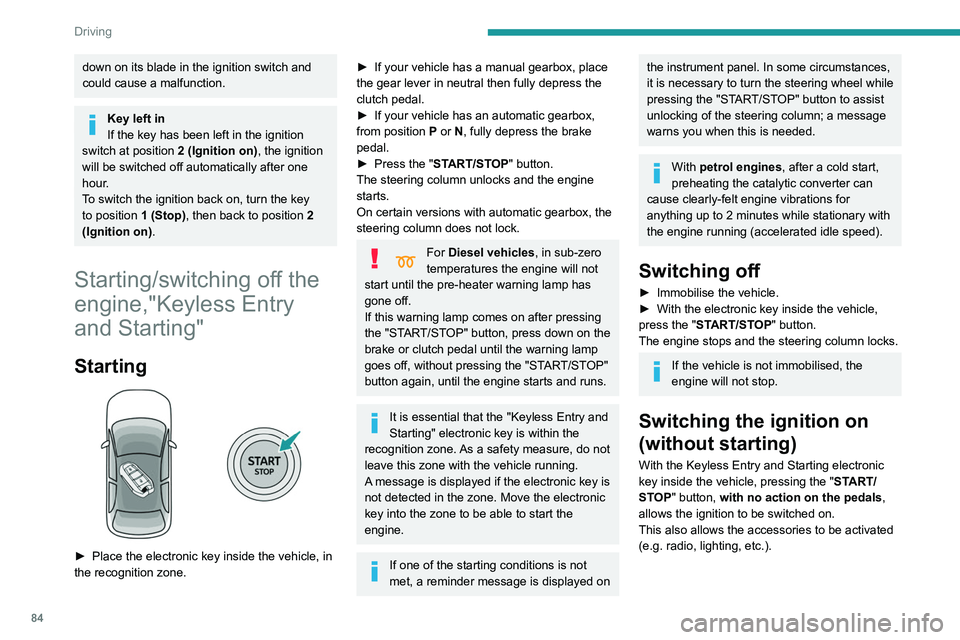
Starting
► Place the electronic key inside the vehicle, in
the recognition zone.
► If your vehicle has a manual gearbox, place
the gear lever in neutral then fully depress the
clutch pedal.
►
If your vehicle has an automatic gearbox,
from position
P or N, fully depress the brake
pedal.
►
Press the "
START/STOP" button.
The steering column unlocks and the engine
starts.
On certain versions with automatic gearbox, the
steering column does not lock.
For Diesel vehicles, in sub-zero
temperatures the engine will not
start until the pre-heater warning lamp has
gone off.
If this warning lamp comes on after pressing
the "START/STOP" button, press down on the
brake or clutch pedal until the warning lamp
goes off, without pressing the "START/STOP"
button again, until the engine starts and runs.
It is essential that the " Keyless Entry and
Starting" electronic key is within the
recognition zone.
As a safety measure, do not
leave this zone with the vehicle running.
A message is displayed if the electronic key is
not detected in the zone. Move the electronic
key into the zone to be able to start the
engine.
If one of the starting conditions is not
met, a reminder message is displayed on
the instrument panel. In some circumstances,
it is necessary to turn the steering wheel while
pressing the "START/STOP" button to assist
unlocking of the steering column; a message
warns you when this is needed.
With petrol engines , after a cold start,
preheating the catalytic converter can
cause clearly-felt engine vibrations for
anything up to 2 minutes while stationary with
the engine running (accelerated idle speed).
Switching off
► Immobilise the vehicle.
► With the electronic key inside the vehicle,
press the "
START/STOP" button.
The engine stops and the steering column locks.
If the vehicle is not immobilised, the
engine will not stop.
Switching the ignition on
(without starting)
With the Keyless Entry and Starting electronic
key inside the vehicle, pressing the " START/
STOP" button, with no action on the pedals ,
allows the ignition to be switched on.
This also allows the accessories to be activated
(e.g. radio, lighting, etc.).
Page 149 of 244
147
Practical information
7Never top up from an AdBlue® dispenser
reserved for heavy goods vehicles.
Storage recommendations
AdBlue® freezes at about -11°C and deteriorates
above +25°C. Containers should be stored in a
cool area and protected from direct sunlight.
Under these conditions, the fluid can be kept for
at least a year.
If the fluid has frozen, it can be used once it has
completely thawed out in the ambient air.
Never store AdBlue® containers in your
vehicle.
Precautions for use
AdBlue® is a urea-based solution. This fluid is
non-flammable, colourless and odourless (when
kept in a cool place).
In the event of contact with the skin, wash the
affected area with soap and running water. In the
event of contact with the eyes, immediately rinse
the eyes with large amounts of water or with an
eye wash solution for at least 15 minutes. Seek
medical attention if you feel a persistent burning
sensation or irritation.
If swallowed, immediately wash out the mouth
with clean water and then drink plenty of water.
In certain conditions (high temperature, for
example), the risk of release of ammonia cannot
be excluded: do not inhale the fluid. Ammonia
vapours have an irritant effect on mucous
membranes (eyes, nose and throat).
Store AdBlue® out of the reach of
children, in its original container.
Procedure
Before starting the top-up procedure, ensure that
the vehicle is parked on a flat and level surface.
In wintry conditions, ensure that the temperature
of the vehicle is above -11°C. Otherwise the
AdBlue
® may be frozen and so cannot be poured
into the tank. Park the vehicle in a warmer area
for a few hours to allow the top-up to be carried
out.
Never pour the AdBlue® into the Diesel
fuel tank.
For specific information about how to
access the AdBlue tank, refer to the
detailed descriptions below.
If any AdBlue® is splashed, or if there are
any spillages on the bodywork, rinse
immediately with cold water or wipe with a
damp cloth.
If the fluid has crystallised, clean it off using a
sponge and hot water.
Important: in the event of a top-up after
a breakdown because of a lack of
AdBlue, it is essential to wait around 5
minutes before switching on the ignition,
without opening the driver’s door,
unlocking the vehicle, introducing the key
into the ignition switch, or introducing the
key of the “
Keyless Entry and Starting
”
system into the passenger compartment
.
Switch on the ignition, then wait for 10
seconds before starting the engine.
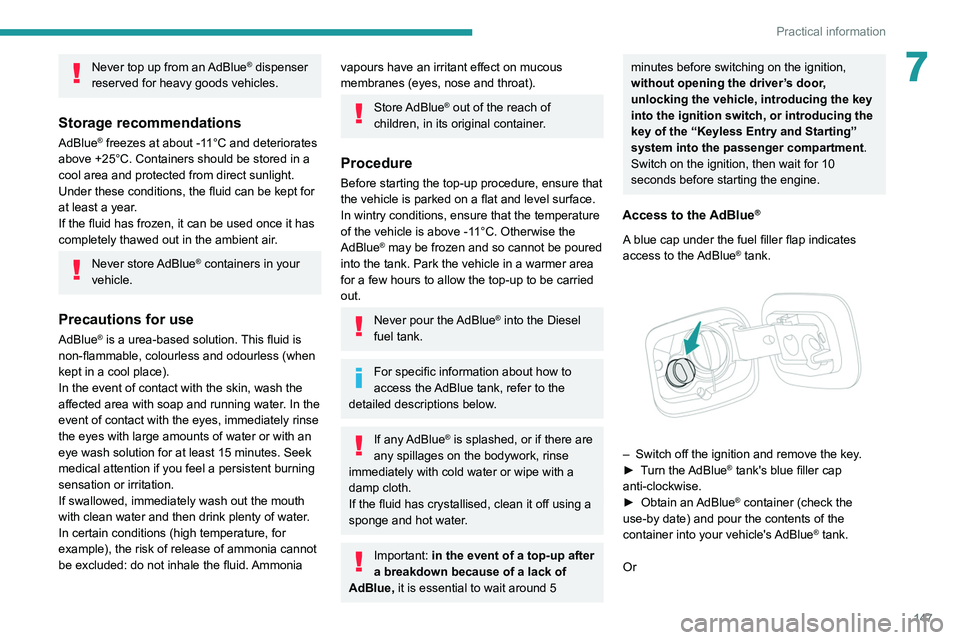
Access to the AdBlue®
A blue cap under the fuel filler flap indicates
access to the AdBlue® tank.
– Switch off the ignition and remove the key .
► T urn the AdBlue® tank's blue filler cap
anti-clockwise.
►
Obtain an
AdBlue
® container (check the
use-by date) and pour the contents of the
container into your vehicle's AdBlue
® tank.
Or
Page 150 of 244
148
Practical information
► Insert the AdBlue® pump nozzle and refill the
tank until the nozzle stops automatically.
Important:
To avoid overfilling the AdBlue® tank, it is
recommended:
►
T
o top up between 10 and 13 litres using
AdBlue
® containers.
Or
►
When filling at a service station, to stop
after the third automatic cut-off of the nozzle.
Free-wheeling
In certain situations, you must allow the vehicle
to free-wheel (while being towed, on a rolling
road, in an automatic car wash, or being
transported by rail or sea freight, etc.).
The procedure varies according to the type of
gearbox and parking brake.
With a manual gearbox and
electric parking brake
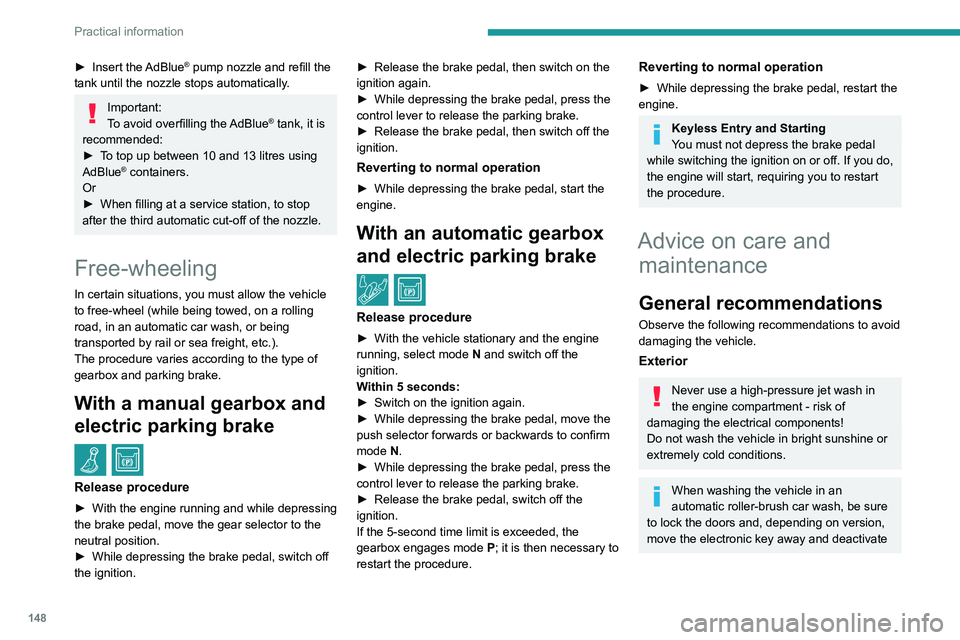
/
Release procedure
► With the engine running and while depressing
the brake pedal, move the gear selector to the
neutral position.
►
While depressing the brake pedal, switch off
the ignition. ►
Release the brake pedal, then switch on the
ignition again.
►
While depressing the brake pedal, press the
control lever to release the parking brake.
►
Release the brake pedal, then switch off the
ignition.
Reverting to normal operation
► While depressing the brake pedal, start the
engine.
With an automatic gearbox
and electric parking brake
/
Release procedure
► With the vehicle stationary and the engine
running, select mode N and switch off the
ignition.
Within 5
seconds:
►
Switch on the ignition again.
►
While depressing the brake pedal, move the
push selector forwards or backwards to confirm
mode
N.
►
While depressing the brake pedal, press the
control lever to release the parking brake.
►
Release the brake pedal, switch off the
ignition.
If the 5-second time limit is exceeded, the
gearbox engages mode P
; it is then necessary to
restart the procedure.
Reverting to normal operation
► While depressing the brake pedal, restart the
engine.
Keyless Entry and Starting
You must not depress the brake pedal
while switching the ignition on or off. If you do,
the engine will start, requiring you to restart
the procedure.
Advice on care and maintenance
General recommendations
Observe the following recommendations to avoid
damaging the vehicle.
Exterior
Never use a high-pressure jet wash in
the engine compartment - risk of
damaging the electrical components!
Do not wash the vehicle in bright sunshine or
extremely cold conditions.
When washing the vehicle in an
automatic roller-brush car wash, be sure
to lock the doors and, depending on version,
move the electronic key away and deactivate
Page 226 of 244

224
Alphabetical index
F
Fatigue detection 114–115
Filling the AdBlue® tank
147
Filling the fuel tank
131–132
Filter, air
144
Filter, oil
144
Filter, particle
144
Filter, passenger compartment
43, 144
Fitting a wheel
158–160
Fitting roof bars
140
Fittings, boot
40
Fittings, interior
37
Flap, fuel filler
131–132
Flashing indicators
53
Fluid, brake
143
Fluid, engine coolant
143
Foglamp, rear
50, 164–166
Foglamps, front
50, 163
Foglamps, rear
50
Folding the rear seats
35–36
Frequency (radio)
212
Fuel
6, 131
Fuel consumption
6
Fuel tank
131
Fusebox, dashboard
166
Fusebox, engine compartment
166, 168
Fuses
166–168
G
Gauge, fuel 131–132
Gearbox, automatic
89–91, 93–99, 145, 170
Gearbox, manual
89–90, 98–99, 145
Gear lever, automatic gearbox
91, 95
Gear lever, manual gearbox
89–90
Gear shift indicator ~ Gear efficiency
indicator
97
Glove box, refrigerated
37
G.P.S.
206
H
Hazard warning lamps 41, 58
headlamp adjustment
54
Headlamp adjustment
54
Headlamps, automatic dipping
52–53
Headlamps, automatic illumination
51
Headlamps, dipped beam
161–162
Headlamps, halogen
54, 161
Headlamps, main beam
161–162
Headlamp wash
55
Head restraints, front
30
Head restraints, rear
35–37
Heating
42–44
Hill start assist
89
Horn
61
I
Ignition 46, 84, 216
Ignition on
84
Immobiliser, electronic
23, 82
Indicator, AdBlue® range
15
Indicator, coolant temperature
15
Indicator, engine oil level
14
Indicators, direction
53
Inflating tyres
145, 183
Inflating tyres and accessories
(using the kit)
151, 153–156
Infrared camera
101
Instrument panel
7, 17–18, 102
Instrument panels
7
Internet browser
207, 210
ISOFIX
76
ISOFIX mountings
74–75
J
Jack 150–151, 157, 213
Jump starting
170
K
Key 19–21, 23, 25
Key, electronic
21–22
Keyless Entry and Starting
21–23, 84–85
Key not recognised
85