2021 PEUGEOT 3008 door lock
[x] Cancel search: door lockPage 68 of 292
66
Ease of use and comfort
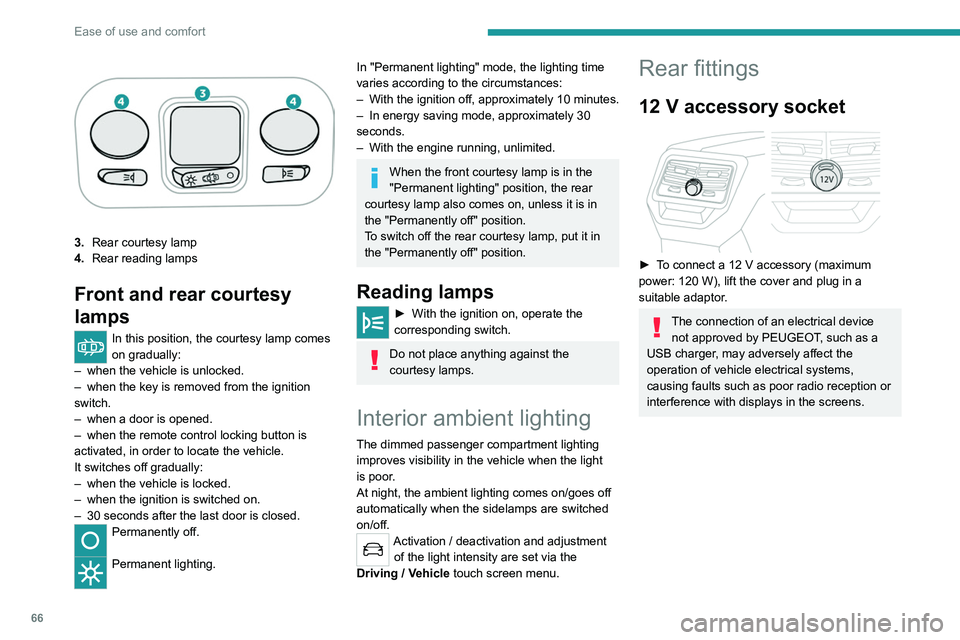
3.Rear courtesy lamp
4. Rear reading lamps
Front and rear courtesy
lamps
In this position, the courtesy lamp comes
on gradually:
–
when the vehicle is unlocked.
–
when the key is removed from the ignition
switch.
–
when a door is opened.
–
when the remote control locking button is
activated, in order to locate the vehicle.
It switches off gradually:
–
when the vehicle is locked.
–
when the ignition is switched on.
–
30 seconds after the last door is closed.
Permanently off.
Permanent lighting.
In "Permanent lighting" mode, the lighting time
varies according to the circumstances:
–
With
the ignition off, approximately 10 minutes.
–
In energy saving mode, approximately 30
seconds.
–
With the engine running, unlimited.
When the front courtesy lamp is in the
"Permanent lighting" position, the rear
courtesy lamp also comes on, unless it is in
the "Permanently off" position.
To switch off the rear courtesy lamp, put it in
the "Permanently off" position.
Reading lamps
► With the ignition on, operate the
corresponding switch.
Do not place anything against the
courtesy lamps.
Interior ambient lighting
The dimmed passenger compartment lighting
improves visibility in the vehicle when the light
is poor.
At night, the ambient lighting comes on/goes off
automatically when the sidelamps are switched
on/off.
Activation / deactivation and adjustment of the light intensity are set via the
Driving
/ Vehicle touch screen menu.
Rear fittings
12 V accessory socket
► To connect a 12 V accessory (maximum
power: 120 W), lift the cover and plug in a
suitable adaptor.
The connection of an electrical device not approved by PEUGEOT, such as a
USB charger, may adversely affect the
operation of vehicle electrical systems,
causing faults such as poor radio reception or
interference with displays in the screens.
USB sockets
Each USB socket is used only to power or
recharge a portable device.
Rear armrest
Page 79 of 292
77
Lighting and visibility
4reason, the lighting will not come on
automatically.
The inner surface of the windscreen may become misted up and affect the proper
operation of the rain/sunshine sensor.
In humid and cold weather, demist the
windscreen regularly.
Guide-me-home and
welcome lighting
Guide-me-home lighting
With the ring of the lighting control stalk in the
"AUTO" position and when the light is poor, the
dipped beam headlamps come on automatically
when the ignition is switched off.
You can activate/deactivate this function and adjust the guide-me-home lighting
duration in the Driving/Vehicle touch screen
menu.
Welcome lighting
When the vehicle is unlocked, if the ambient
light is low and the "Automatic illumination of
headlamps" function is activated, this system
automatically turns on certain exterior lamps
as well as certain lamps in the passenger
compartment.
You can activate/deactivate this function and adjust the welcome lighting duration
in the Driving
/ Vehicle touch screen menu.
Door mirror spotlamps
These spotlamps facilitate access to the vehicle
by lighting the ground near the front doors.
When the front courtesy lamp switch is in
this position, the spotlamps come on
automatically:
–
when the vehicle is unlocked.
–
when a door is opened.
–
when a request to locate the vehicle is
received from the remote control.
Whatever the position of the front courtesy lamp
switch, they also come on with the welcome
lighting and guide-me-home lighting functions.
They go off automatically after 30 seconds.
Automatic lighting systems - General
recommendations
The automatic lighting systems use a detection
camera, located at the top of the windscreen.
Operating limits
The system may be disrupted or not work
correctly:
–
When visibility conditions are poor
(e.g.
snowfall, heavy rain).
– If the windscreen is dirty , misted-up or
masked (e.g. sticker) in front of the camera.
–
If the vehicle is facing highly reflective signs
or safety barrier reflectors.
The system is not able to detect:
–
Road users that do not have their own
lighting, such as pedestrians.
–
V
ehicles with hidden lighting (e.g. travelling
behind a safety barrier on the motorway).
–
V
ehicles at the top or bottom of a steep
slope, on winding roads, on crossroads.
Maintenance
Clean the windscreen regularly,
particularly the area in front of the camera.
The internal surface of the windscreen can
also become misted around the camera.
In humid and cold weather, demist the
windscreen regularly.
Do not allow snow to accumulate on the
bonnet or roof of the vehicle as this could
obstruct the camera.
Automatic headlamp dipping
For more information, refer to the
General recommendations for
automatic lighting systems.
Page 100 of 292
98
Safety
Remember to fasten the seat belts or the
harness of child seats, keeping the slack
relative to the child's body to a minimum,
even for short journeys.
When installing a child seat using the seat
belt, ensure that the seat belt is tightened
correctly on the child seat and that it secures
the child seat firmly on the seat of the vehicle.
If the passenger seat is adjustable, move it
forwards if necessary.
Remove the head restraint before
installing a child seat with a backrest on a
passenger seat.
Ensure that the head restraint is stored or
attached securely to prevent it from being
thrown around the vehicle in the event of
sharp braking. Refit the head restraint once
the child seat has been removed.
Installing a booster seat
The chest part of the seat belt must be
positioned on the child's shoulder without
touching the neck.
Ensure that the lap part of the seat belt
passes correctly over the child's thighs.
Use a booster seat with backrest, equipped
with a belt guide at shoulder level.
Additional protections
To prevent accidental opening of the
doors and rear windows, use the "Child lock".
Take care not to open the rear windows by
more than one third.
To protect young children from the rays of the
sun, fit side blinds on the rear windows.
As a safety precaution, do not leave:
–
a child alone and unattended in a vehicle,
–
a child or an animal in a vehicle which is
exposed to the sun, with the windows closed,
–
the keys within reach of children inside the
vehicle.
Child seat at the rear
Forward-facing or rearward-facing
► Move the vehicle's front seat forward and
straighten the backrest so that the legs of the
child in the forward-facing or rearward-facing
child seat itself do not touch the vehicle's front
seat.
►
Check that the backrest of the forward-facing
child seat is as close as possible to the backrest
of the vehicle's rear seat, and ideally in contact
with it.
In the presence of a dog guard, it
is essential that booster seat type
child seats with backrest be installed in the
second row.
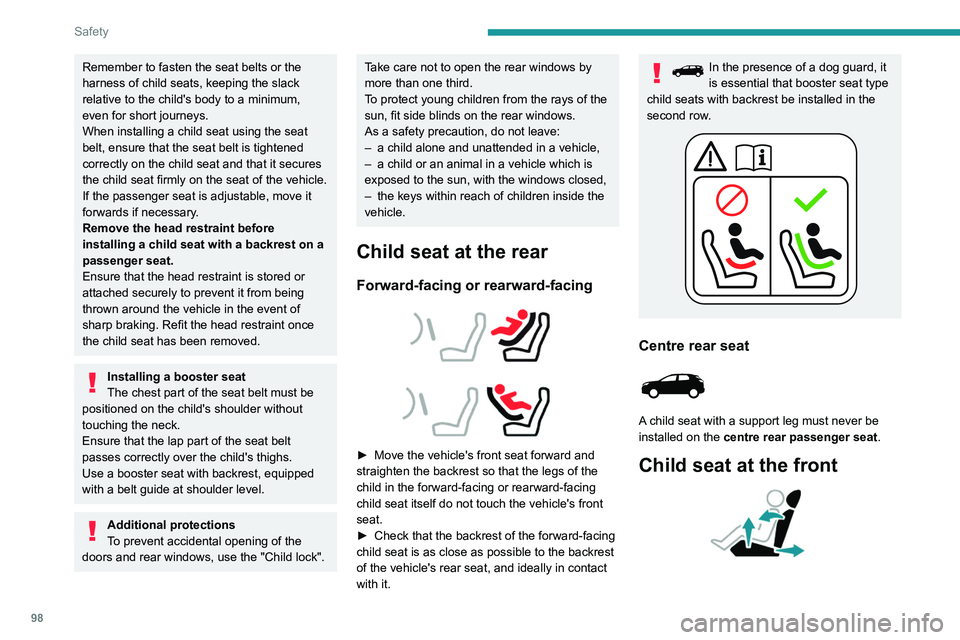
Centre rear seat
A child seat with a support leg must never be
installed on the centre rear passenger seat .
Child seat at the front
► Adjust the front passenger seat to the
highest and fully back longitudinal position ,
with the backrest straightened.
"Forward facing"
You must leave the front passenger airbag active.
"Rearward facing"
The front passenger airbag must be deactivated before installing a rearward
facing child seat. Otherwise, the child risks
being seriously injured or killed if the
airbag is deployed .
Page 110 of 292
108
Safety
Seat
Front passenger airbag i-Size restraint system i-Size restraint system
Row 2 Rear side seats
i-U i-U
Rear central seat
Not i-Size i-U
Row 3 Rear side seats -Not i-Size
i-U: Suitable for i-Size restraint systems in the
"Universal" category, "forward facing" and
"rearward facing".
i-UF: Only suitable for i-Size restraint systems
in the "Universal" category which are
"forward facing". X:
Seat position not suitable for i-Size restraint
systems in the "Universal" category.
(a) Refer to the current legislation in your
country before installing a child at this seat
position.
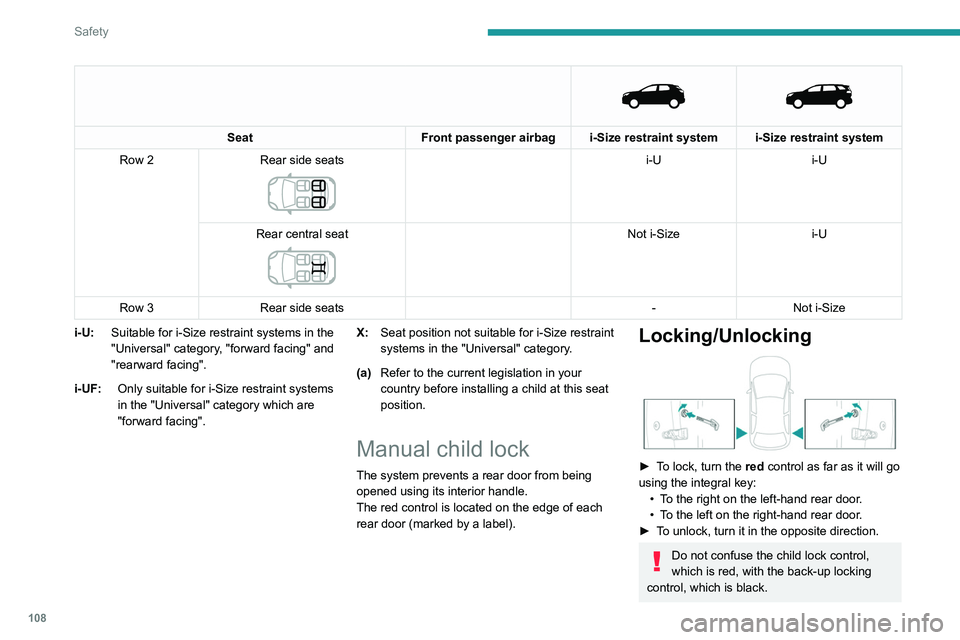
Manual child lock
The system prevents a rear door from being
opened using its interior handle.
The red control is located on the edge of each
rear door (marked by a label).
Locking/Unlocking
► To lock, turn the red control as far as it will go
using the integral key:
•
T
o the right on the left-hand rear door.
•
T
o the left on the right-hand rear door.
►
T
o unlock, turn it in the opposite direction.
Do not confuse the child lock control,
which is red, with the back-up locking
control, which is black.
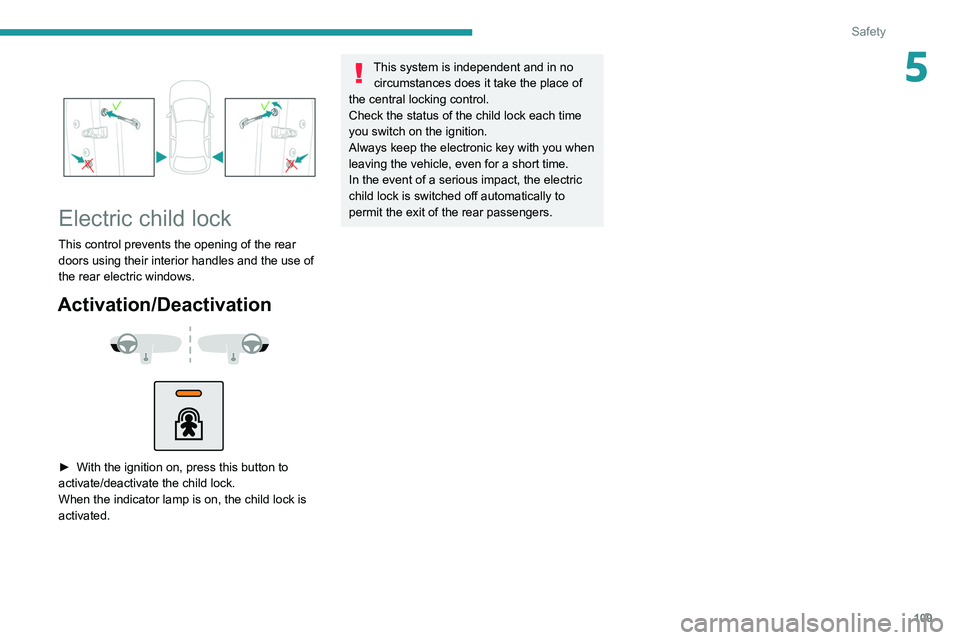
Electric child lock
This control prevents the opening of the rear
doors using their interior handles and the use of
the rear electric windows.
Activation/Deactivation
► With the ignition on, press this button to
activate/deactivate the child lock.
When the indicator lamp is on, the child lock is
activated.
Page 111 of 292
109
Safety
5
Electric child lock
This control prevents the opening of the rear
doors using their interior handles and the use of
the rear electric windows.
Activation/Deactivation
► With the ignition on, press this button to
activate/deactivate the child lock.
When the indicator lamp is on, the child lock is
activated.
This system is independent and in no circumstances does it take the place of
the central locking control.
Check the status of the child lock each time
you switch on the ignition.
Always keep the electronic key with you when
leaving the vehicle, even for a short time.
In the event of a serious impact, the electric
child lock is switched off automatically to
permit the exit of the rear passengers.
Page 115 of 292
11 3
Driving
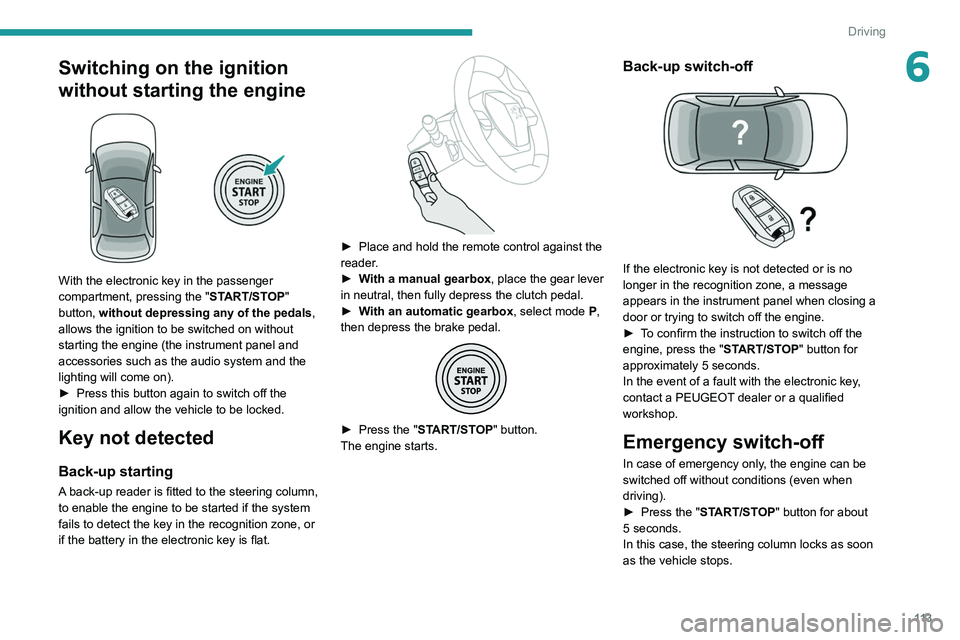
6Switching on the ignition
without starting the engine
With the electronic key in the passenger
compartment, pressing the "START/STOP"
button, without depressing any of the pedals ,
allows the ignition to be switched on without
starting the engine (the instrument panel and
accessories such as the audio system and the
lighting will come on).
►
Press this button again to switch off the
ignition and allow the vehicle to be locked.
Key not detected
Back-up starting
A back-up reader is fitted to the steering column,
to enable the engine to be started if the system
fails to detect the key in the recognition zone, or
if the battery in the electronic key is flat.
► Place and hold the remote control against the
reader .
►
W
ith a manual gearbox, place the gear lever
in neutral, then fully depress the clutch pedal.
►
W
ith an automatic gearbox, select mode P,
then depress the brake pedal.
► Press the " START/STOP" button.
The engine starts.
Back-up switch-off
If the electronic key is not detected or is no
longer in the recognition zone, a message
appears in the instrument panel when closing a
door or trying to switch off the engine.
►
T
o confirm the instruction to switch off the
engine, press the " START/STOP" button for
approximately 5
seconds.
In the event of a fault with the electronic key,
contact a PEUGEOT dealer or a qualified
workshop.
Emergency switch-off
In case of emergency only, the engine can be
switched off without conditions (even when
driving).
►
Press the "
START/STOP" button for about
5
seconds.
In this case, the steering column locks as soon
as the vehicle stops.
Page 116 of 292
11 4
Driving
On certain versions with automatic gearbox
(EAT6/EAT8), the steering column does not lock.
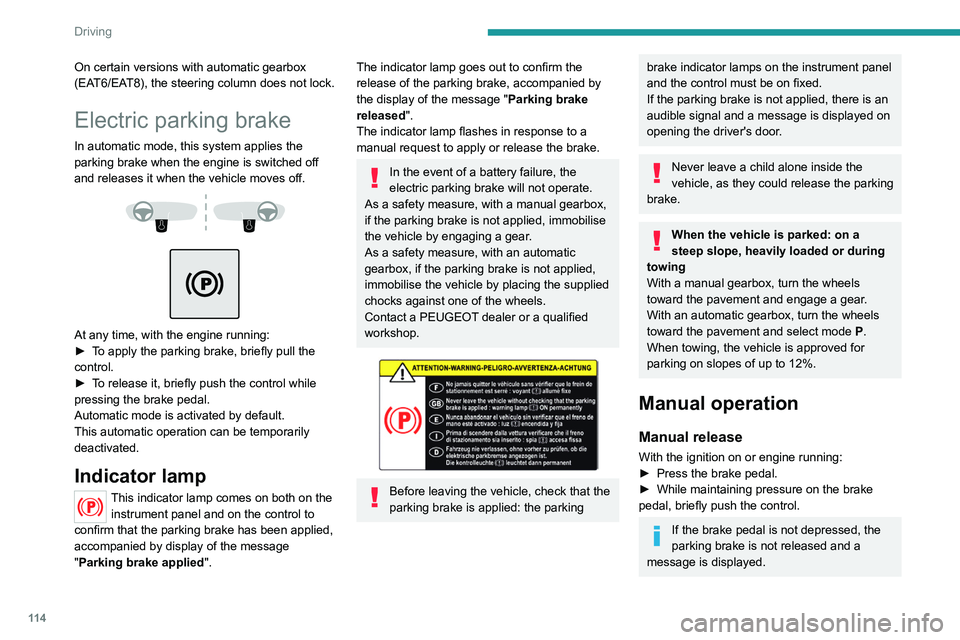
Electric parking brake
In automatic mode, this system applies the
parking brake when the engine is switched off
and releases it when the vehicle moves off.
At any time, with the engine running:
► T o apply the parking brake, briefly pull the
control.
►
T
o release it, briefly push the control while
pressing the brake pedal.
Automatic mode is activated by default.
This automatic operation can be temporarily
deactivated.
Indicator lamp
This indicator lamp comes on both on the instrument panel and on the control to
confirm that the parking brake has been applied,
accompanied by display of the message
"Parking brake applied".
The indicator lamp goes out to confirm the
release of the parking brake, accompanied by
the display of the message " Parking brake
released ".
The indicator lamp flashes in response to a
manual request to apply or release the brake.
In the event of a battery failure, the
electric parking brake will not operate.
As a safety measure, with a manual gearbox,
if the parking brake is not applied, immobilise
the vehicle by engaging a gear.
As a safety measure, with an automatic
gearbox, if the parking brake is not applied,
immobilise the vehicle by placing the supplied
chocks against one of the wheels.
Contact a PEUGEOT dealer or a qualified
workshop.
Before leaving the vehicle, check that the
parking brake is applied: the parking
brake indicator lamps on the instrument panel
and the control must be on fixed.
If the parking brake is not applied, there is an
audible signal and a message is displayed on
opening the driver's door.
Never leave a child alone inside the
vehicle, as they could release the parking
brake.
When the vehicle is parked: on a
steep slope, heavily loaded or during
towing
With a manual gearbox, turn the wheels
toward the pavement and engage a gear.
With an automatic gearbox, turn the wheels
toward the pavement and select mode
P
.
When towing, the vehicle is approved for
parking on slopes of up to 12%.
Manual operation
Manual release
With the ignition on or engine running:
► Press the brake pedal.
►
While maintaining pressure on the brake
pedal, briefly push the control.
If the brake pedal is not depressed, the
parking brake is not released and a
message is displayed.
Manual application
With the vehicle stationary:
► Briefly pull the control.
The control indicator lamp flashes to confirm the
application request.
Automatic operation
Automatic release
First ensure that the engine is running and that
the driver's door is closed.
The electric parking brake gradually releases
automatically as the vehicle moves off.
With a manual gearbox
► Fully depress the clutch pedal and engage
first gear or reverse.
► Depress the accelerator pedal and release
the clutch pedal.
With an automatic gearbox
► Depress the brake pedal.
► Select mode D, M or R.
► Release the brake pedal and depress the
accelerator pedal.
If the brake does not release
automatically, check that the front doors
are fully closed.
When stationary with the engine running,
do not depress the accelerator pedal
unnecessarily. Risk of parking brake release.
Page 117 of 292
11 5
Driving
6Manual application
With the vehicle stationary:
► Briefly pull the control.
The control indicator lamp flashes to confirm the
application request.
Automatic operation
Automatic release
First ensure that the engine is running and that
the driver's door is closed.
The electric parking brake gradually releases
automatically as the vehicle moves off.
With a manual gearbox
►
Fully depress the clutch pedal and engage
first gear or reverse.
►
Depress the accelerator pedal and release
the clutch pedal.
W
ith an automatic gearbox
►
Depress the brake pedal.
►
Select mode
D, M or R.
►
Release the brake pedal and depress the
accelerator pedal.
If the brake does not release
automatically, check that the front doors
are fully closed.
When stationary with the engine running,
do not depress the accelerator pedal
unnecessarily. Risk of parking brake release.
Automatic application
With the vehicle stationary, the parking brake
is applied automatically when the engine is
switched off.
It is not applied automatically if the
engine stalls or enters STOP mode with
Stop & Start.
In automatic mode, the parking brake
can be manually applied or released at
any time using the control.
Special cases
Immobilising the vehicle with the
engine running
To immobilise the vehicle with the engine
running, briefly pull the control.
Parking the vehicle with the brake
released
In very cold conditions (ice), applying the
parking brake is not recommended.
To immobilise the vehicle, engage a gear or
place the chocks against one of the wheels.
With an automatic gearbox, mode P is
automatically selected when the ignition
is switched off. The wheels are blocked.
For more information on Free-wheeling, refer
to the corresponding section.
With an automatic gearbox, while mode
N is selected, opening the driver’s door
triggers an audible signal. It stops when the
driver's door closes again.
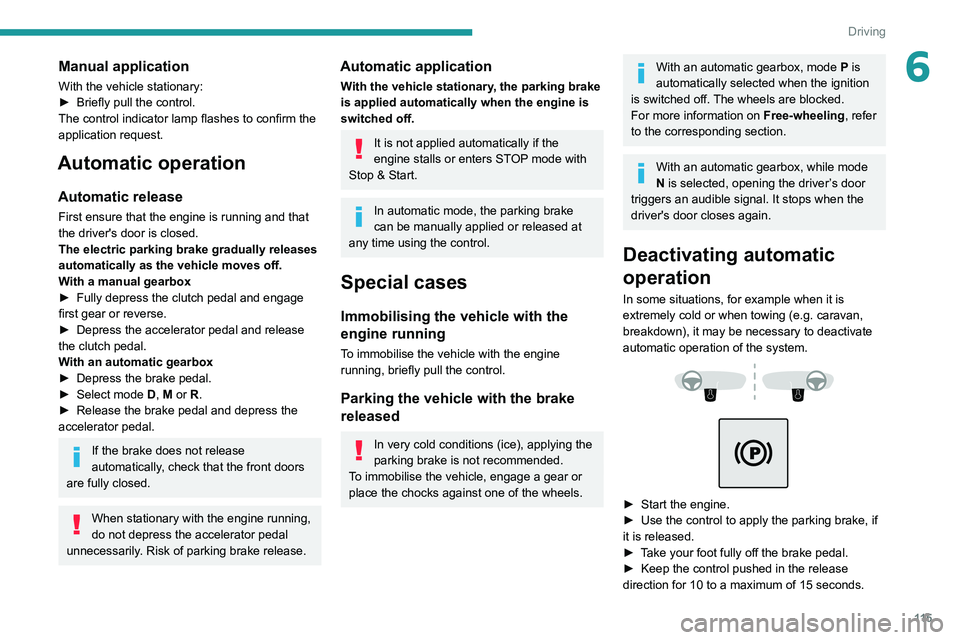
Deactivating automatic
operation
In some situations, for example when it is
extremely cold or when towing (e.g. caravan,
breakdown), it may be necessary to deactivate
automatic operation of the system.
► Start the engine.
► Use the control to apply the parking brake, if
it is released.
►
T
ake your foot fully off the brake pedal.
►
Keep the control pushed in the release
direction for 10 to a maximum of
15 seconds.