2021 NISSAN TITAN roof
[x] Cancel search: roofPage 95 of 638

WARNING
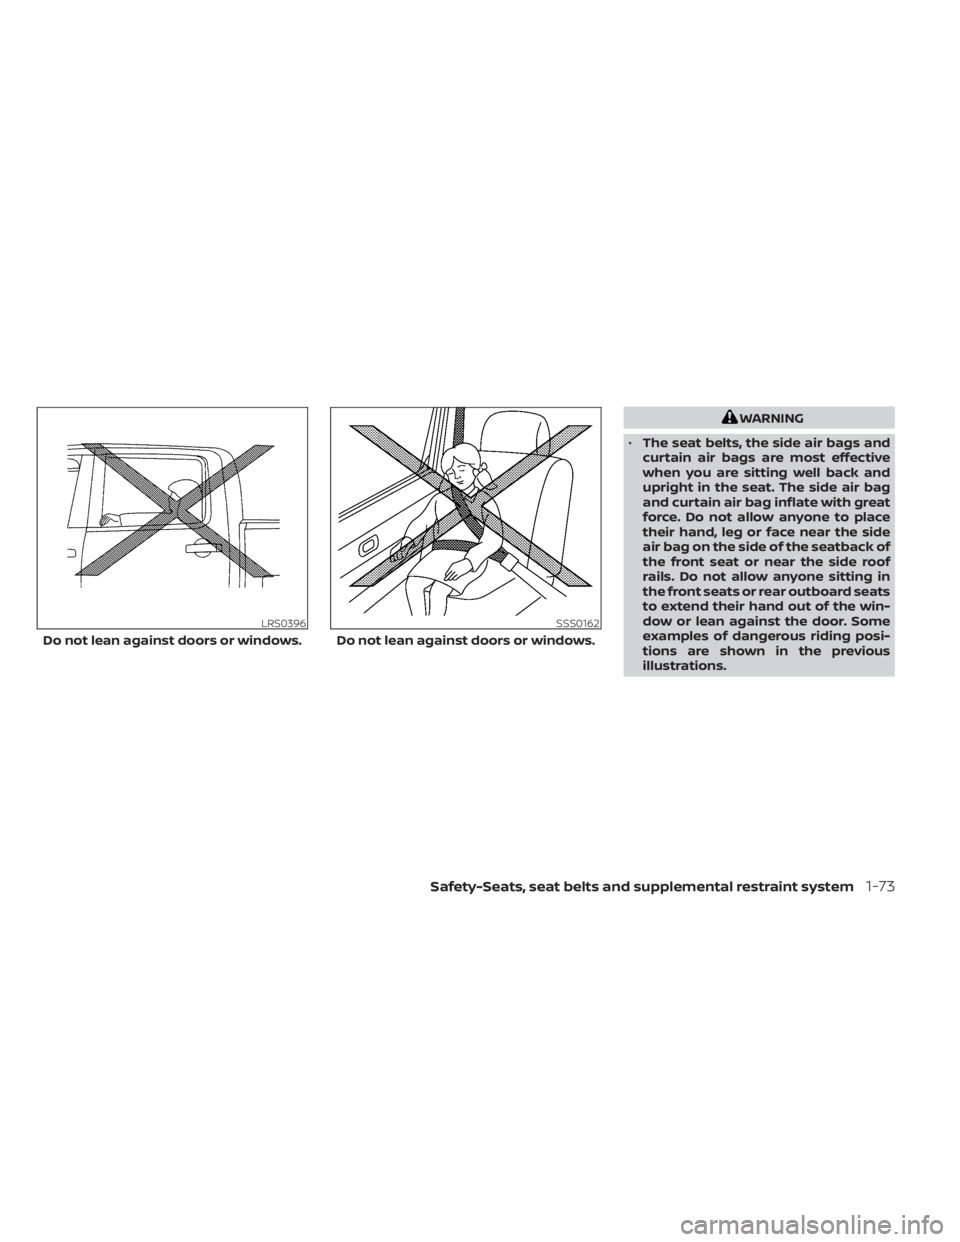
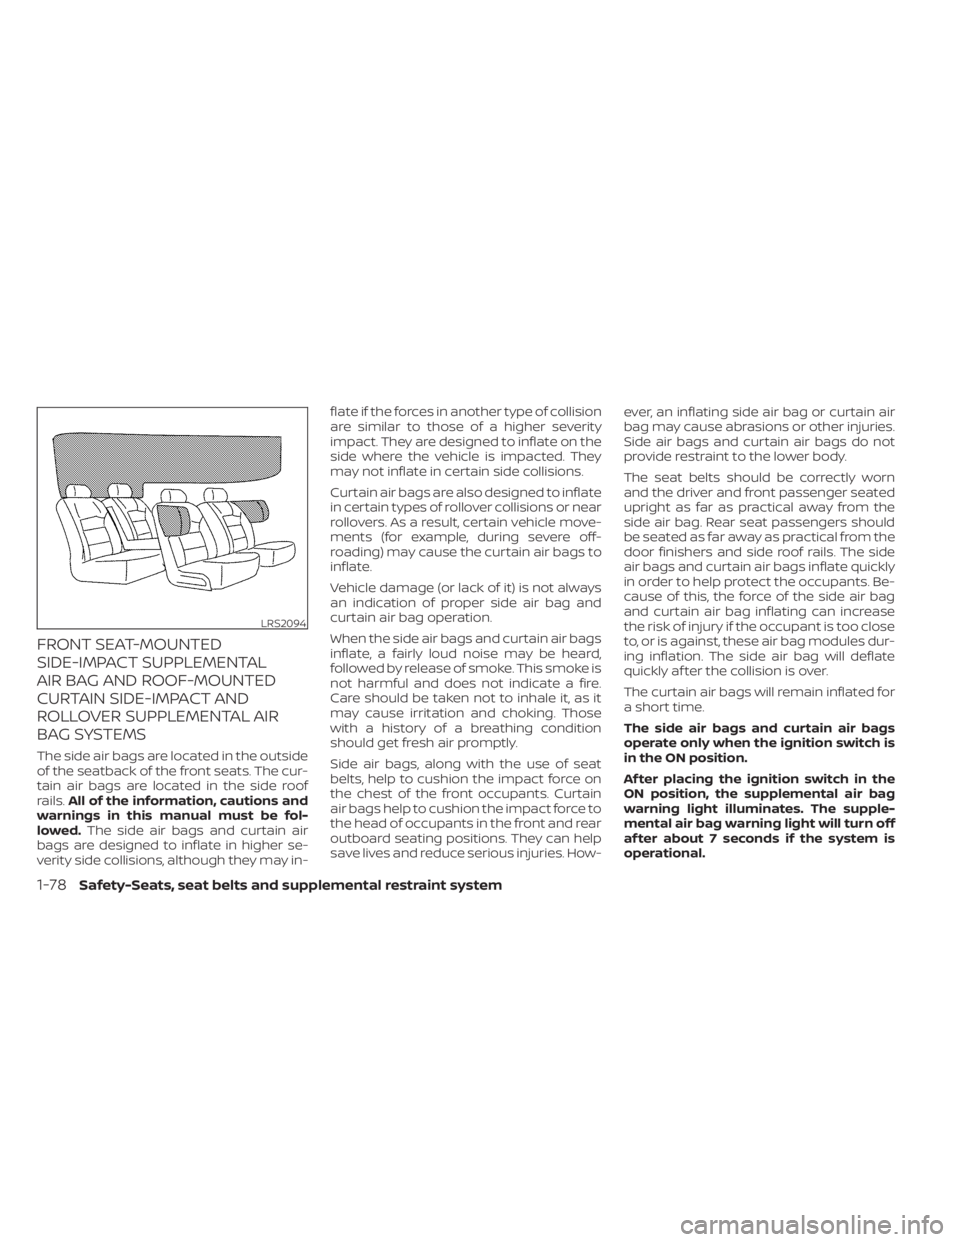
• The seat belts, the side air bags and
curtain air bags are most effective
when you are sitting well back and
upright in the seat. The side air bag
and curtain air bag inflate with great
force. Do not allow anyone to place
their hand, leg or face near the side
air bag on the side of the seatback of
the front seat or near the side roof
rails. Do not allow anyone sitting in
the front seats or rear outboard seats
to extend their hand out of the win-
dow or lean against the door. Some
examples of dangerous riding posi-
tions are shown in the previous
illustrations.
LRS0396
Do not lean against doors or windows.
SSS0162
Do not lean against doors or windows.
Safety-Seats, seat belts and supplemental restraint system1-73
Page 97 of 638

Supplemental air bag system
1. Roof-mounted curtain side-impact androllover supplemental air bags inflators 2. Roof-mounted curtain side-impact and
rollover supplemental air bags
3. Air bag Control Unit (ACU) 4. Supplemental front-impact air bag
modules
5. Crash zone sensor
6. Driver and passenger supplement knee air bags
7. Seat belt buckle switches
8. Seat belt with pretensioner(s) (front seats) (passenger’s side shown; driver’s
side similar)
9.
Front seat-mounted side-impact supple-
mental air bag modules (passenger’s side
shown; driver’s side similar)
10. Satellite sensors (passenger’s side shown; driver’s side similar)
11. Seat belt with pretensioner(s) (rear out- board seats) (passenger's side shown;
driver's side similar)
This vehicle is equipped with supplemental
front air bag system for the driver and right
front passenger seats. This system is de-
signed to meet certification requirements
under U.S. regulations. It is also permitted in
Canada. However, all of the information,
cautions and warnings in this manual
still apply and must be followed.
LRS3295
Safety-Seats, seat belts and supplemental restraint system1-75
Page 100 of 638

FRONT SEAT-MOUNTED
SIDE-IMPACT SUPPLEMENTAL
AIR BAG AND ROOF-MOUNTED
CURTAIN SIDE-IMPACT AND
ROLLOVER SUPPLEMENTAL AIR
BAG SYSTEMS
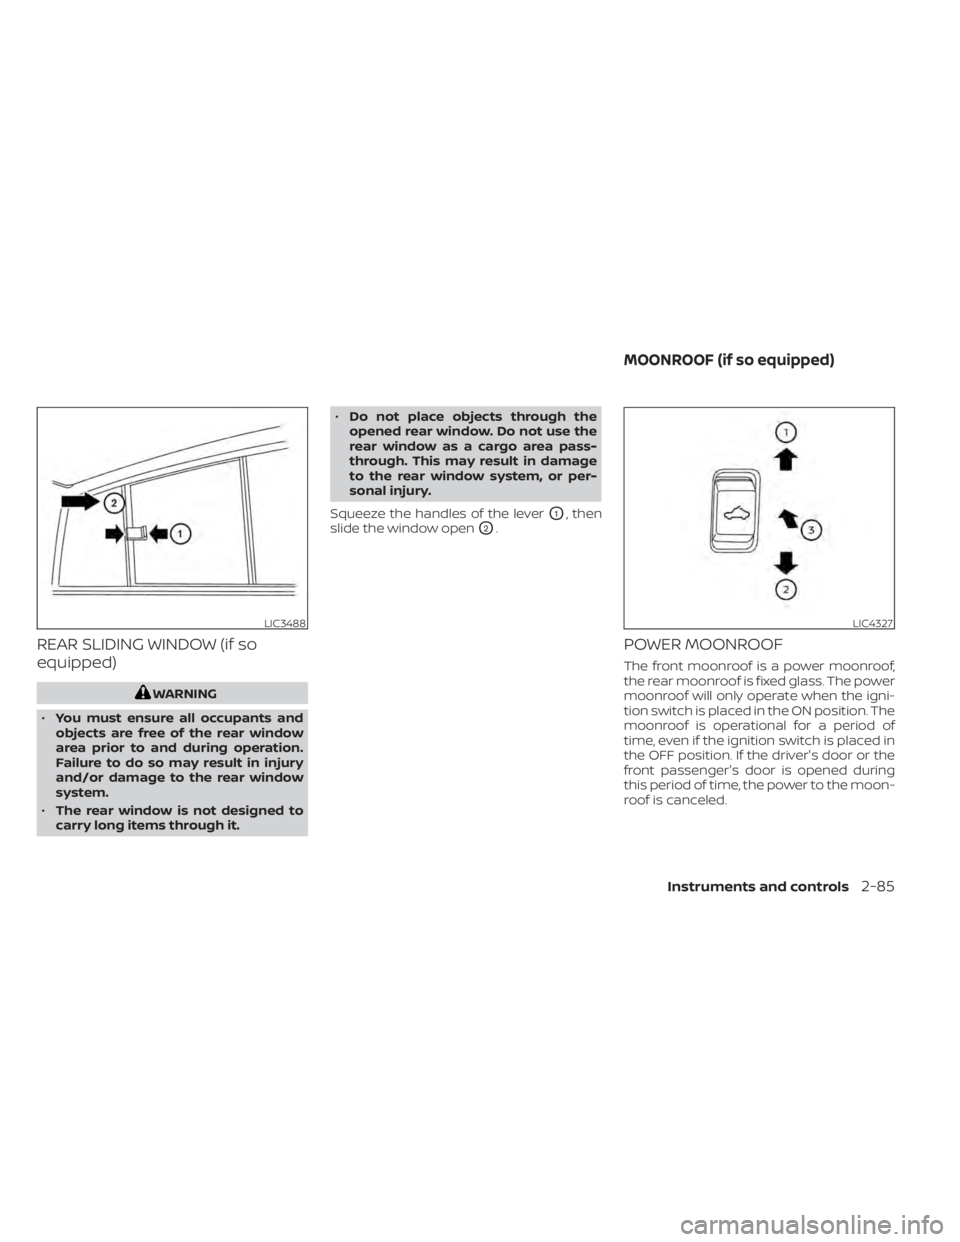
The side air bags are located in the outside
of the seatback of the front seats. The cur-
tain air bags are located in the side roof
rails.All of the information, cautions and
warnings in this manual must be fol-
lowed. The side air bags and curtain air
bags are designed to inflate in higher se-
verity side collisions, although they may in- flate if the forces in another type of collision
are similar to those of a higher severity
impact. They are designed to inflate on the
side where the vehicle is impacted. They
may not inflate in certain side collisions.
Curtain air bags are also designed to inflate
in certain types of rollover collisions or near
rollovers. As a result, certain vehicle move-
ments (for example, during severe off-
roading) may cause the curtain air bags to
inflate.
Vehicle damage (or lack of it) is not always
an indication of proper side air bag and
curtain air bag operation.
When the side air bags and curtain air bags
inflate, a fairly loud noise may be heard,
followed by release of smoke. This smoke is
not harmful and does not indicate a fire.
Care should be taken not to inhale it, as it
may cause irritation and choking. Those
with a history of a breathing condition
should get fresh air promptly.
Side air bags, along with the use of seat
belts, help to cushion the impact force on
the chest of the front occupants. Curtain
air bags help to cushion the impact force to
the head of occupants in the front and rear
outboard seating positions. They can help
save lives and reduce serious injuries. How-
ever, an inflating side air bag or curtain air
bag may cause abrasions or other injuries.
Side air bags and curtain air bags do not
provide restraint to the lower body.
The seat belts should be correctly worn
and the driver and front passenger seated
upright as far as practical away from the
side air bag. Rear seat passengers should
be seated as far away as practical from the
door finishers and side roof rails. The side
air bags and curtain air bags inflate quickly
in order to help protect the occupants. Be-
cause of this, the force of the side air bag
and curtain air bag inflating can increase
the risk of injury if the occupant is too close
to, or is against, these air bag modules dur-
ing inflation. The side air bag will deflate
quickly af ter the collision is over.
The curtain air bags will remain inflated for
a short time.
The side air bags and curtain air bags
operate only when the ignition switch is
in the ON position.
Af ter placing the ignition switch in the
ON position, the supplemental air bag
warning light illuminates. The supple-
mental air bag warning light will turn off
af ter about 7 seconds if the system is
operational.
LRS2094
1-78Safety-Seats, seat belts and supplemental restraint system
Page 108 of 638

Hill descent control switch (if so equipped).....2-58
Electronic locking rear differential (E-Lock)
system switch (if so equipped) .................2-59
Power inverter switch (if so equipped) ..........2-61
Parking Aids system switch ....................2-61
Tow mode switch .............................. 2-62
E-call (SOS) button (if so equipped) .............2-63
Trailer Brake Controller Unit (TBCU)
(if so equipped) ................................. 2-63
Rear Door Alert ................................. 2-63
Power outlets .................................. 2-64
12v Outlets .................................. 2-64
120v outlets (if so equipped) .................2-66
Extended storage switch .......................2-68
Storage ........................................ 2-69
Front-door pockets ......................... 2-69
Rear-door pockets .......................... 2-69
Console side pockets (if so equipped) .......2-69
Seatback pockets ........................... 2-70
Under-seat storage (if so equipped) .........2-70
Console box storage trays
(if so equipped) .............................. 2-72
Cell phone storage tray (if so equipped) .....2-72
Glovebox ................................... 2-72Console box (if so equipped)
................2-73
Center armrest storage (if so equipped) .....2-74
Under front seat storage bin
(if so equipped) .............................. 2-75
Overhead sunglasses storage
(if so equipped) .............................. 2-75
Cup holders ................................. 2-76
Grocery hooks (if so equipped) ..............2-79
Bed liner storage bins (if so equipped) .......2-79
Cargo hooks (if so equipped) ................2-80
C-Channel cargo hooks (if so equipped) .....2-80
Windows ....................................... 2-81
Power windows ............................. 2-81
Rear power window switch
(if so equipped) .............................. 2-84
Rear sliding window (if so equipped) .........2-85
Moonroof (if so equipped) ......................2-85
P
ower moonroof ............................ 2-85
Interior lights ................................... 2-88
Console light (if so equipped) ................2-88
Map lights (if so equipped) ...................2-89
Personal Lights (if so equipped) .............2-89
HomeLink® Universal Transceiver
(if so equipped) ................................. 2-89
Page 115 of 638

FUEL GAUGE
The gauge indicates theapproximatefuel
level in the tank.
The gauge may move slightly during brak-
ing, turning, acceleration, or going up or
down hills.
The gauge needle returns to 0 (Empty) af-
ter the ignition switch is placed in the OFF
position.
The low fuel warning light comes on when
the amount of fuel in the tank is getting low.
Refill the fuel tank before the gauge reg-
isters 0 (Empty). The
indicates that the fuel-filler door
is located on the driver's side of the vehicle.
CAUTION
• If the vehicle runs out of fuel, the
Malfunction Indicator Light (MIL) may
come on. Refuel as soon as possible.
Af ter a few driving trips. the
light
should turn off. If the light remains on
af ter a few driving trips, have the ve-
hicle inspected. It is recommended
that you visit a NISSAN dealer for this
service.
•
For additional information, see “Mal-
function Indicator Light (MIL)” (P. 2-15).
DISTANCE TO EMPTY (DTE)
Displays the estimated distance the ve-
hicle can be driven before refueling. The
value is calculated based on recent fuel
economy, the amount of fuel remaining in
the fuel tank, and the actual fuel consump-
tion.
Changes in driving patterns or conditions
can cause the DTE value to vary. As a result,
the value displayed may differ from the ac-
tual distance that can be driven. DTE display will change to “---” when the
fuel level in the tank is getting low, prior to
the fuel gauge reaching 0 (Empty).
NOTE:
• The DTE value af ter refill is estimated
based on recent fuel economy and
amount of fuel added.
• If a small amount of fuel is added, or the ignition is on during refueling, the
display may not be updated.
• Conditions that affect the fuel economy will also affect the estimated
DTE value (city/highway driving, idle
time, remote start time, terrain, sea-
sonal weather, added vehicle weight,
added deflectors, roof racks, etc.).
LIC2222
Instruments and controls2-9
Page 191 of 638

REAR SLIDING WINDOW (if so
equipped)
WARNING
• You must ensure all occupants and
objects are free of the rear window
area prior to and during operation.
Failure to do so may result in injury
and/or damage to the rear window
system.
• The rear window is not designed to
carry long items through it. •
Do not place objects through the
opened rear window. Do not use the
rear window as a cargo area pass-
through. This may result in damage
to the rear window system, or per-
sonal injury.
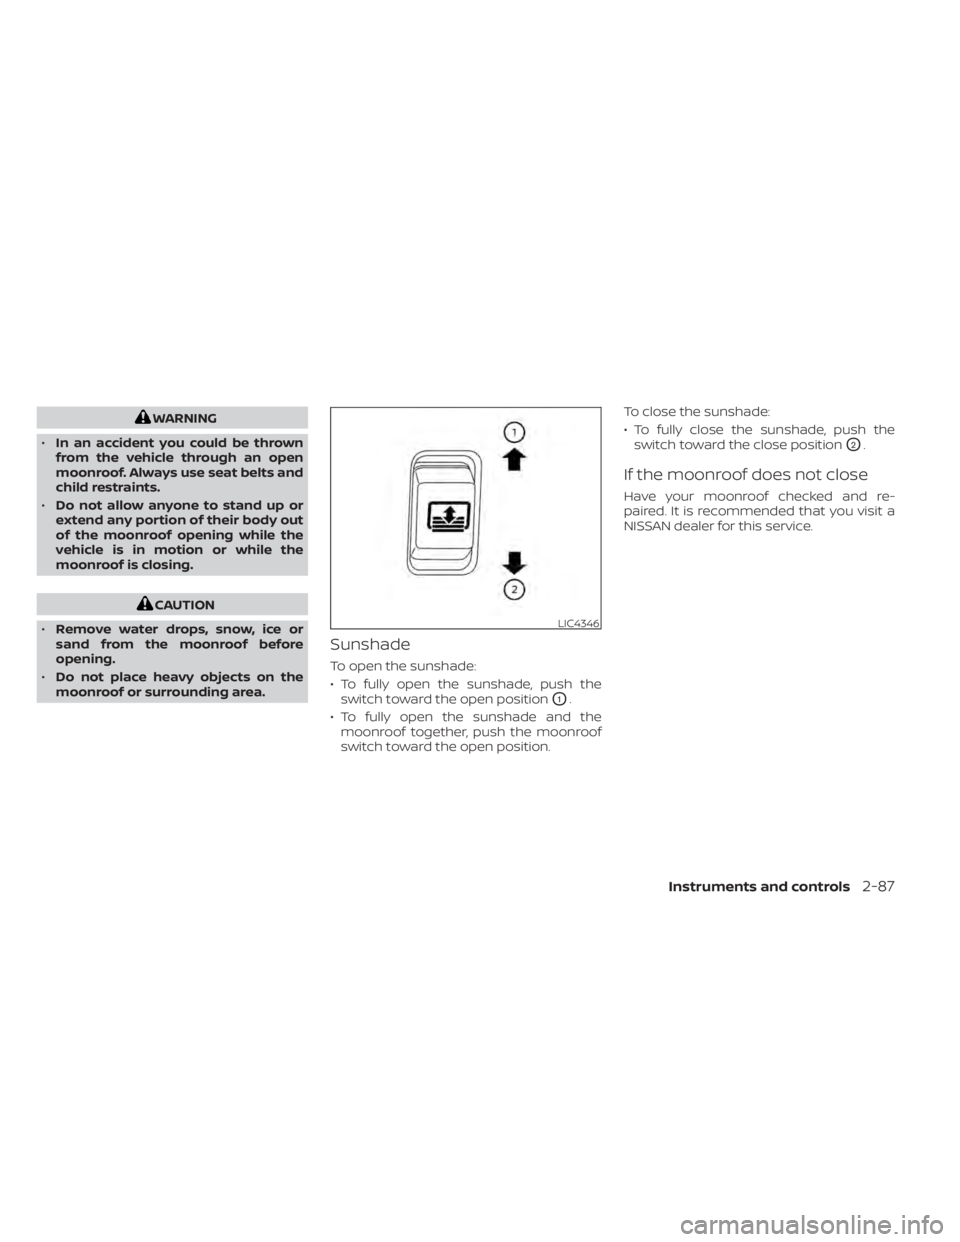
Squeeze the handles of the lever
O1, then
slide the window open
O2.
POWER MOONROOF
The front moonroof is a power moonroof,
the rear moonroof is fixed glass. The power
moonroof will only operate when the igni-
tion switch is placed in the ON position. The
moonroof is operational for a period of
time, even if the ignition switch is placed in
the OFF position. If the driver's door or the
front passenger's door is opened during
this period of time, the power to the moon-
roof is canceled.
LIC3488LIC4327
MOONROOF (if so equipped)
Instruments and controls2-85
Page 192 of 638

Sliding the moonroof
To fully open or close the moonroof, push
the switch toward the open
O1or closeO2
position and release it; it need not be held.
The roof will automatically open or close all
the way. To stop the roof, push the switch
once while it is opening or closing.
Tilting the moonroof
To tilt up, first close the moonroof, then
push the switch
O3and release it; it need
not be held. To tilt down the moonroof,
push the switch to the tilt down position
O2.
Resetting the moonroof switch
If the moonroof does not operate properly,
perform the following procedure to initial-
ize the moonroof operation system.
1. If the moonroof is open, close it fully by repeatedly pushing the moonroof
switch to the close position
O2.
2. Push and hold the moonroof switch to the close position
O2for approximately
15 seconds.
3. Release the switch af ter the moonroof moves up, down, then back to the full tilt
up position. 4. Push and hold the switch to the close
position
O2.
5. Release the switch af ter the moonroof completes one full cycle from the tilt up
position to the closed position, then to
the open position, and again to the fully
closed position.
6. Check if the moonroof switch operates normally.
If the moonroof does not operate properly
af ter performing the procedure above,
have your vehicle checked. It is recom-
mended that you visit a NISSAN dealer for
this service.
Auto-reverse function (when
closing or tilting down the
moonroof)
The auto-reverse function can be acti-
vated when the moonroof and sunshade
are closed or tilted down by automatic op-
eration when the ignition switch is placed
in the ON position or for a period of time
af ter the ignition switch is placed in the OFF
position. Depending on the environment or driv-
ing conditions, the auto-reverse func-
tion may be activated if an impact or
load similar to something being caught
in the moonroof occurs.
WARNING
There are some small distances imme-
diately before the closed position
which cannot be detected. Make sure
that all passengers have their hands,
etc., inside the vehicle before closing
the moonroof.
When closing
If the control unit detects something
caught in the moonroof and sunshade as it
moves to the front, the moonroof and sun-
shade will immediately open backward.
When tilting down
If the control unit detects something
caught in the moonroof as it tilts down, the
moonroof will immediately tilt up.
2-86Instruments and controls
Page 193 of 638

WARNING
• In an accident you could be thrown
from the vehicle through an open
moonroof. Always use seat belts and
child restraints.
• Do not allow anyone to stand up or
extend any portion of their body out
of the moonroof opening while the
vehicle is in motion or while the
moonroof is closing.
CAUTION
• Remove water drops, snow, ice or
sand from the moonroof before
opening.
• Do not place heavy objects on the
moonroof or surrounding area.
Sunshade
To open the sunshade:
• To fully open the sunshade, push the switch toward the open position
O1.
• To fully open the sunshade and the moonroof together, push the moonroof
switch toward the open position. To close the sunshade:
• To fully close the sunshade, push the
switch toward the close position
O2.
If the moonroof does not close
Have your moonroof checked and re-
paired. It is recommended that you visit a
NISSAN dealer for this service.
LIC4346
Instruments and controls2-87